
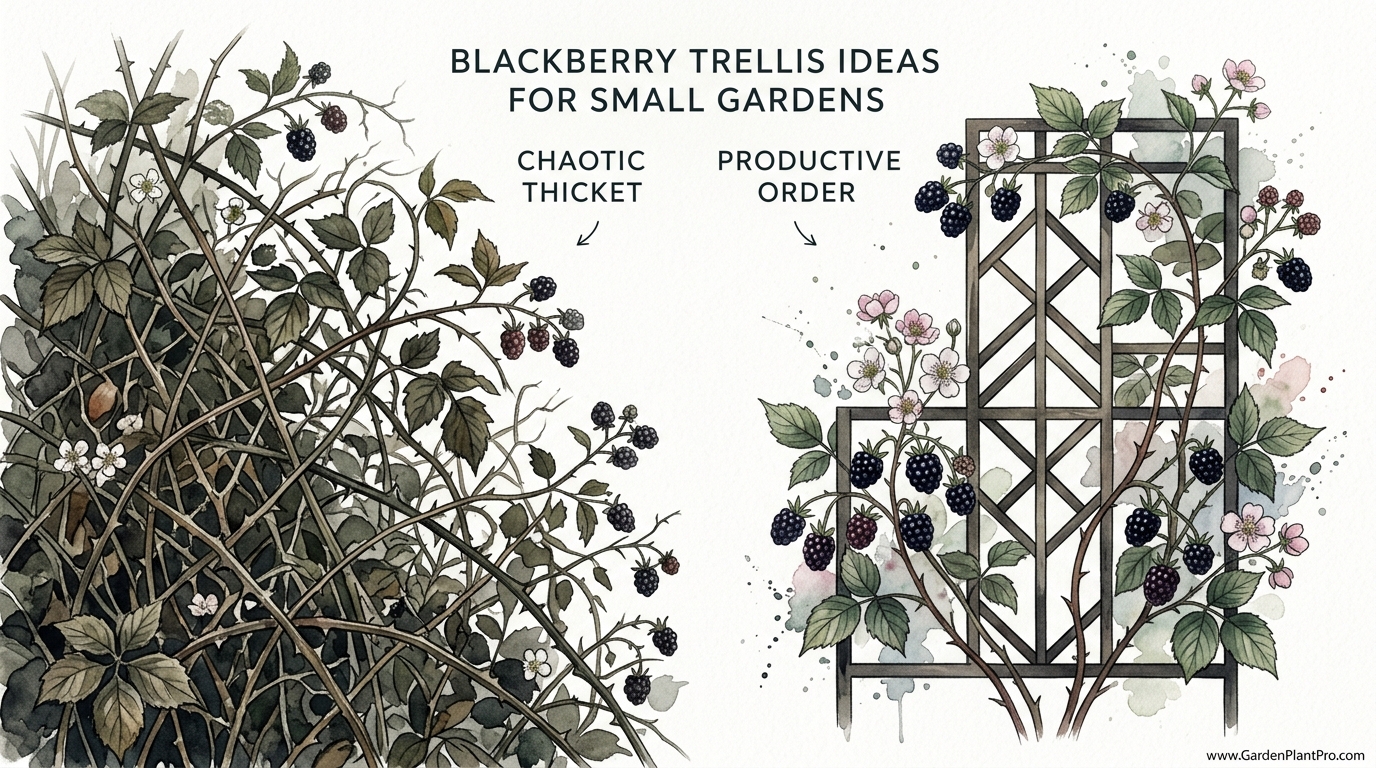
One of these is a gardener’s nightmare, while the other is a 50-pound harvest machine that fits in a tiny space. Most people think blackberries are an invasive weed because they let the canes run wild. Applying a simple trellis strategy turns a thorny mess into a vertical wall of gourmet fruit that is easier to pick and twice as productive.
Walking through an unmanaged blackberry patch is a rite of passage for many of us, usually resulting in scratched shins and stained fingers. I remember my first patch of ‘Triple Crown’ blackberries; I thought they’d just grow like a nice little shrub. Within two years, they had colonized half the compost pile and were reaching for the neighbor’s fence like something out of a horror movie. That is the Chaotic Thicket.
When you bring structure to the garden, you invite Productive Order. A well-designed trellis doesn’t just hold the plants up; it organizes the life cycle of the berry. It separates the new green growth from the old fruiting wood, allows the breeze to dry the leaves after a morning dew, and presents the berries right at eye level. If you have a small backyard or even just a few raised beds, trellising isn’t just an option—it’s the secret to getting a massive harvest without losing your sanity.
Blackberry Trellis Ideas For Small Gardens
A blackberry trellis is a specialized support structure designed to manage the biennial growth habit of caneberries. In the world of small-space gardening, these structures are essential for maximizing vertical real estate. Instead of letting a plant spread 10 feet (3 meters) across the ground, you train it to grow 6 feet (1.8 meters) up and only 2 feet (60 centimeters) wide.
These systems exist because blackberries are naturally “scramblers.” In the wild, they use their thorns to hook onto trees and climb toward the sunlight. In a garden, we provide the framework so the plant doesn’t have to work so hard. Different garden layouts require different approaches. For instance, a gardener with a narrow side-yard might use a flat “I-trellis,” while someone with a dedicated berry bed might prefer a “T-trellis” to spread the canopy out.
Small garden trellises are often built from a mix of sturdy posts—like cedar 4x4s or steel T-posts—and high-tensile wire. The goal is to create a “fruiting wall.” Imagine a hedge, but instead of just leaves, it’s dripping with heavy clusters of dark, sweet fruit. By keeping the canes off the soil, you also protect the harvest from slugs, rot, and the occasional curious dog.
Choosing the Right Trellis for Your Variety
Before you drive a single post into the ground, you need to know what kind of blackberry you’re growing. Not all canes behave the same way, and matching the structure to the plant’s natural habit will save you hours of frustration later.
* Erect Varieties: These types, like ‘Navaho’ or ‘Ouachita’, have stiff, tree-like canes. They can almost stand on their own, but they tend to flop over once they’re loaded with fruit. A simple two-wire vertical trellis is usually plenty for them.
* Semi-Erect Varieties: Popular choices like ‘Triple Crown’ or ‘Chester’ start growing upright but eventually arch over. They are incredibly productive but very heavy. A T-trellis or a V-trellis is best here to support that arching weight.
* Trailing Varieties: These are the true ramblers, like ‘Marionberry’ or ‘Boysenberry’. Their canes are thin and flexible, almost like vines. They absolutely require a multi-wire system where you can weave or tie the canes horizontally.
How to Build a Small Garden T-Trellis
The T-trellis is a favorite among backyard growers because it offers the best balance of space efficiency and light penetration. It essentially creates a “corridor” for the berries. The wide top allows the fruiting branches to hang outward, making them incredibly easy to pick.
Step 1: Setting the Posts
Start by marking your row. For a small garden, a 10-foot (3-meter) row is usually enough for two or three plants. Dig two holes at each end of the row, about 2 feet (60 centimeters) deep. Use pressure-treated lumber or naturally rot-resistant wood like cedar or black locust. If you are in a very windy area, setting these in concrete is a smart move, but for most home gardens, well-tamped soil and gravel will hold them firm.
Step 2: Attaching the Cross-arms
On each post, you’ll want to attach a horizontal “cross-arm” to create the “T” shape. A piece of 2×4 lumber about 30 inches (75 centimeters) long works perfectly. Bolt this to the post at about 5 feet (1.5 meters) above the ground. For semi-erect berries, I like to add a second, narrower cross-arm about 3 feet (90 centimeters) up to help guide the young canes as they climb.
Step 3: Running the Wire
Drill holes at the ends of your cross-arms and run galvanized 12.5-gauge or 14-gauge wire between the posts. Use eye-bolts and turnbuckles at one end so you can tighten the wires over time. Wire has a habit of sagging under the weight of a 50-pound (22-kilogram) harvest and the winter ice, so being able to crank that tension back up is a lifesaver.
Step 4: Planting and Initial Training
Space your plants evenly between the posts. As the new green shoots (the primocanes) emerge from the ground, guide them toward the center of the trellis. Once they reach the height of the wires, you can gently tip them or tie them to start their horizontal journey.
The Benefits of Vertical Berry Gardening
The most immediate benefit is Airflow. In a cramped garden, stagnant air is an invitation for fungal diseases like gray mold (Botrytis) or anthracnose. When canes are spread out on a trellis, the wind can whip through and dry the leaves after a rainstorm, keeping the plant healthy without the need for chemical sprays.
Another huge advantage is Sunlight Exposure. Berries need photosynthesized energy to build sugar. A flat, messy thicket shades its own fruit, leading to tart, unevenly ripened berries. A trellis acts like a solar panel array, ensuring every cluster gets its fair share of Vitamin D. You’ll notice the fruit on a trellised plant is often larger and significantly sweeter than fruit hidden in a bush.
Ergonomics cannot be overlooked. As we get older, bending over to find berries at the base of a thorny plant becomes a chore we’d rather avoid. With a trellis, the harvest comes to you. You can stand comfortably and pick gallon after gallon of fruit without ever having to go to a chiropractor the next day. It also makes pest management simpler, as you can easily spot aphids or beetles before they become a colony.
Challenges and Common Mistakes
The biggest mistake I see beginners make is Under-engineering. A young blackberry plant looks innocent enough in its 1-gallon pot. But three years later, that plant can weigh 40 pounds (18 kilograms) and catch the wind like a sail. If you use flimsy bamboo stakes or thin string, the first summer thunderstorm will flatten your hard work. Always build for the mature weight of the plant, not the size it is today.
Another pitfall is Failing to Separate Canes. Blackberries are biennial, meaning the canes grow one year (primocanes) and fruit the next (floricanes). If you let them all tangle together, it becomes a nightmare to prune out the dead wood after the harvest. Skilled gardeners use the trellis to keep them separate—training the fruiting canes to the left and the new green canes to the right, or using different wire levels for each.
Neglecting the “Tipping” Process is a common error as well. If you let an erect blackberry cane grow 10 feet (3 meters) straight up, it will eventually snap. Cutting the tip off when it reaches about 4 feet (1.2 meters) forces the plant to grow lateral branches. These side branches are where the actual fruit grows. No tipping means fewer branches, which means a much smaller harvest.
DIY PROJECT: Collect rainwater no matter where you live...

This DIY project is the best way to legally collect rainwater NO MATTER where you live. Get chlorine-free water, cut down on your water bills, and have enough for an emergency situation or to water your garden. Read More Here...
Limitations: When a Trellis Isn’t Enough
While trellises are fantastic, they don’t solve every problem. In extremely cold climates (Hardiness Zones 3-5), trailing blackberries often need to be taken off the trellis in the winter and tucked under a layer of mulch or straw to survive the deep freeze. If your trellis is too permanent or complex, this becomes a difficult task.
Space is another consideration. Even a vertical trellis requires a “footprint.” You still need enough room to walk on both sides of the trellis for picking and pruning. If you try to squeeze a blackberry trellis right against a wall or a solid fence, you lose 50% of your picking surface and invite powdery mildew because the air can’t circulate behind the plant.
Finally, remember that soil health and irrigation are just as important as the structure. A trellis helps the plant grow up, but it doesn’t feed the roots. If you have poor, compacted soil or inconsistent watering, the plant won’t have the vigor to fill out the trellis you’ve built. High-production berries are thirsty; consider laying a soaker hose at the base of your trellis to keep things consistent.
Comparing Trellis Styles for Small Spaces
| Trellis Type | Best For | Footprint | Ease of Build |
|---|---|---|---|
| I-Trellis (Single Line) | Erect varieties, narrow paths | Very Low | High (Easy) |
| T-Trellis | Semi-erect, maximum yield | Moderate | Medium |
| Cattle Panel Arch | Trailing types, decorative | Moderate | Medium |
| V-Trellis | Commercial-style separation | High | Low (Complex) |
Practical Tips for Trellis Maintenance
A trellis is a living part of your garden, and it needs a bit of love every season. During the winter dormancy, I always go out and check the tension on my wires. Cold weather can make metal contract, and if your end posts aren’t braced well, they might start to “lean in.” Tighten those turnbuckles just enough to remove the slack, but don’t over-tighten, or you might snap a bolt when the ground thaws and shifts.
When you are pruning out the old floricanes (the ones that just finished fruiting), be careful not to nick the wire with your loppers. Small nicks in galvanized wire can lead to rust spots that eventually weaken the strand. I find that using a pair of sharp bypass pruners is better for the fine work near the wires, saving the heavy loppers for the thick base of the canes.
Mulching at the base of the trellis is vital. A thick layer of wood chips or straw keeps the weeds down—which is important because you don’t want to be running a string trimmer near your expensive trellis wires. It also keeps the moisture in the ground. I usually aim for a 4-inch (10-centimeter) layer of organic mulch, replenished every spring.
Advanced Training: The “Weave” vs. The “Fan”
If you want to feel like a real pro, you can play with how you actually attach the canes to the wires. For Trailing Blackberries, the “Weave” is popular. You take the long, flexible canes and wrap them in a figure-eight pattern along the top and middle wires. This maximizes the number of fruiting nodes exposed to the sun.
For Semi-Erect Varieties, many gardeners prefer the “Fan” method. You bring the canes up to the center and then spread them out like the ribs of a fan, tying them individually to the wires. This creates beautiful geometry and ensures that no two clusters of berries are touching each other. It takes a bit more time with the garden twine, but the results are stunning.
Think about Primocane-fruiting varieties like ‘Prime-Ark Freedom’. These are unique because they can fruit on the first-year wood in late summer. For these, a trellis is even more important because you might have a summer harvest on the old wood and a fall harvest on the new wood at the same time. A T-trellis allows you to keep these two “crops” organized so you aren’t guessing which branch is which.
Example Scenario: The 4×8 Raised Bed
Let’s look at a common setup: a single 4×8 foot (1.2×2.4 meter) raised bed in a suburban backyard. If you just planted blackberries in there and let them go, they would take over the whole bed and spill out onto the lawn within one season. You wouldn’t be able to grow anything else.
Instead, you install a T-trellis right down the spine of the bed. You plant two ‘Triple Crown’ blackberries (thornless) about 4 feet (1.2 meters) apart. As they grow, you train them up to the wires. This leaves the outer 12–18 inches (30–45 centimeters) of the bed on both sides completely open.
What can you do with that extra space? You can plant “low-and-slow” companions. Strawberries make a great groundcover under blackberries, or you could put in some early-season greens like spinach and lettuce that appreciate the light shade the blackberry canopy provides in the heat of July. This is how you turn a single bed into a multi-layered food forest.
Final Thoughts
Building a trellis is the difference between fighting your garden and working with it. It’s an investment of an afternoon’s labor and a few dollars in materials that pays dividends in every single jar of jam and every bowl of fresh berries you eat for the next twenty years. Blackberries are incredibly resilient plants; they want to grow, and they want to produce. All they need is a little direction.
Don’t be intimidated by the construction. Even a simple fence-line can be turned into a trellis with a few eye-screws and some wire. The key is to get the canes off the ground and into the sun. Once you see that first wall of dark, glistening fruit hanging right where it’s easy to reach, you’ll never go back to the “chaotic thicket” again.
If you’re looking to expand your garden knowledge further, you might want to look into drip irrigation systems to keep your berries hydrated, or perhaps start a composting pile to provide the rich organic matter these heavy feeders crave. Gardening is a series of interconnected systems, and the trellis is the backbone of the berry patch. Happy building, and even happier harvesting!