
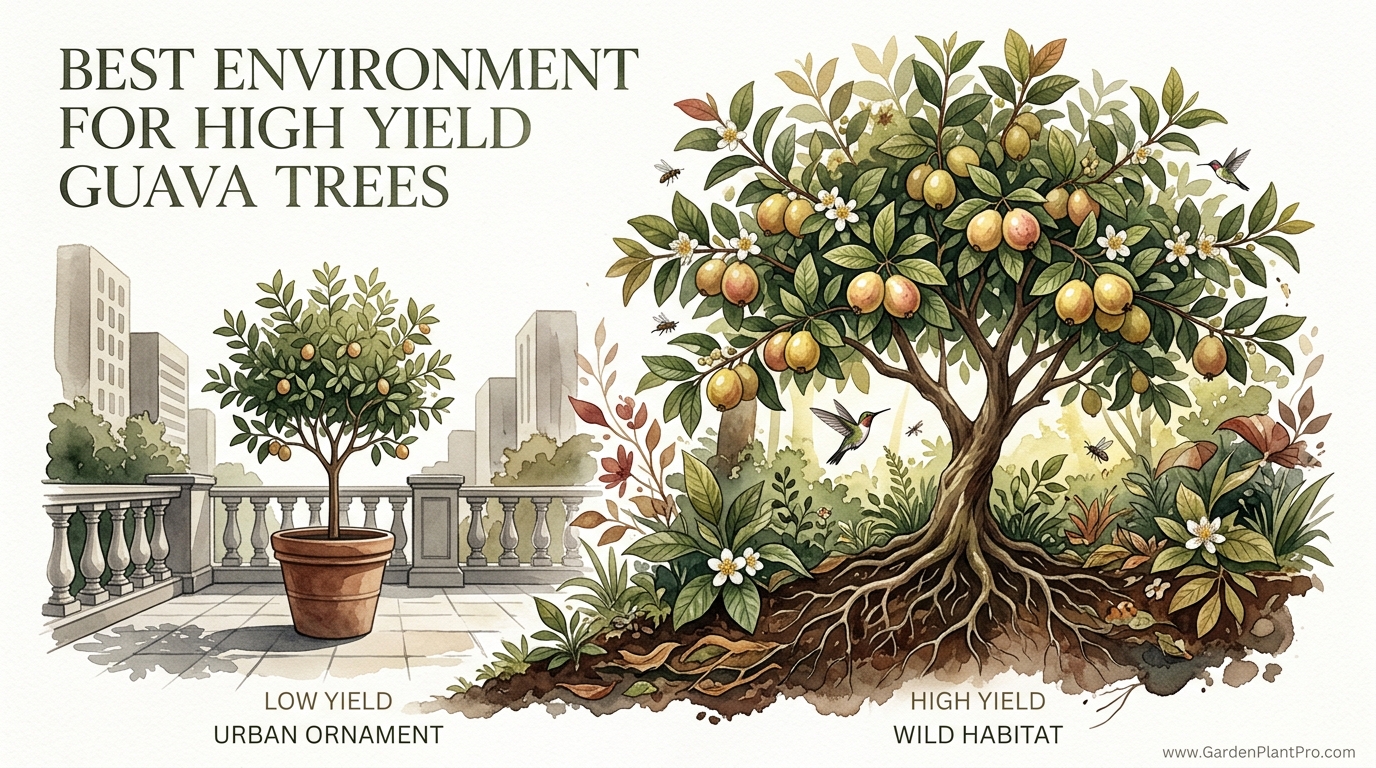
Why does a ‘messy’ wild tree produce sweeter fruit than a perfectly pruned city specimen? We’ve been taught that ‘clean’ gardening is better, but your guava tree disagrees. Modern urban pruning and concrete planters stress the tree, leading to small, sour fruit. When you mimic the ‘wild’ forest edge—letting the tree find its natural shape and keeping the soil ‘messy’ with leaf litter—you unlock the flavor potential the grocery store can’t match.
I’ve spent decades watching these trees. I’ve seen the difference between a pampered, manicured guava in a suburban front yard and the “forgotten” one growing against a back fence in a pile of its own leaves. The forgotten tree is almost always the one with the fruit that makes you stop in your tracks.
The secret isn’t in a bottle of expensive fertilizer. It’s in the way the tree interacts with the world around it. Nature doesn’t use a rake, and it certainly doesn’t use a hedge trimmer to turn a fruit tree into a box. If you want a high yield and fruit so sweet it drips, you have to stop fighting the tree’s natural instincts.
Best Environment For High Yield Guava Trees
The best environment for a guava tree is one that mimics its ancestral home in the tropical and subtropical regions of Central and South America. These trees are tough, but they have specific needs when it comes to the ground they stand in and the light they soak up. In the real world, this means finding a spot that feels like the edge of a forest—plenty of sun, but with a floor that stays cool and moist under a layer of organic debris.
Guavas need full sun to produce the sugars required for sweet fruit. You should aim for at least 6 to 8 hours of direct sunlight every day. Without enough light, the tree will grow leggy, and the fruit will stay pale and bland. If you’re in a particularly hot climate where the sun can be brutal, some afternoon shade is fine, but don’t tuck the tree into a dark corner and expect a harvest.
Drainage is the next big factor. While guavas are more tolerant of “wet feet” than many other fruit trees, they won’t thrive in a swamp. The ideal soil is a sandy loam with a pH between 5.0 and 7.0. If your soil is heavy clay, you’ll need to plant the tree on a slight mound or a raised bed about 30 to 45 cm (12 to 18 inches) high to keep the main root mass out of the standing water during heavy rains.
In an urban setting, the biggest environmental hurdle is often the lack of space for the roots to breathe. I often see people planting guavas in narrow strips between a driveway and a house foundation. This is a recipe for a stressed tree. The roots of a mature guava can spread 3 to 5 meters (10 to 16 feet) or more, and they prefer the top 30 to 45 cm (12 to 18 inches) of soil where the oxygen is plentiful. Concrete slabs trap heat and prevent the exchange of gases, which can lead to sour, underdeveloped fruit.
The “Messy” Soil Philosophy: Why Leaf Litter Matters
When I talk about “messy” soil, I’m talking about the organic layer that develops under a tree left to its own devices. In the wild, a guava tree drops its old leaves, spent flowers, and even a few fallen fruits. This isn’t trash; it’s a slow-release nutrient system and a biological shield.
Building the Mycorrhizal Network
Underneath that layer of “messy” leaf litter, a hidden world of arbuscular mycorrhizal fungi (AMF) thrives. These beneficial fungi hook into the guava’s roots, effectively extending the root system’s reach by ten times or more. This fungal network is much better at mining the soil for phosphorus, magnesium, and copper than the roots are on their own.
Research has shown that guavas with a strong fungal association have higher Brix levels—a measure of sugar content—and more Vitamin C. When you rake the soil bare or use heavy synthetic fertilizers, you kill off this delicate network. The tree then becomes “addicted” to your inputs, and its fruit quality suffers because it’s missing the trace minerals only the fungi can provide.
The Power of Organic Mulch
If you don’t have enough natural leaf litter yet, you have to build it. A thick layer of organic mulch, about 10 to 15 cm (4 to 6 inches) deep, is non-negotiable for high yields. I prefer a mix of wood chips, shredded leaves, and maybe some straw.
- Moisture Retention: Guavas need consistent moisture to fill their fruit. A mulch layer prevents the topsoil from baking and drying out between waterings.
- Temperature Control: Guava roots hate getting hot. In a city garden, the soil can reach 40°C (104°F) easily. Mulch keeps it a cool 25°C (77°F).
- Weed Suppression: Grass is the guava’s worst enemy. It’s a greedy consumer of nitrogen. A mulch ring keeps the grass at bay.
Pruning for Fruit vs. Pruning for Beauty
This is where most city gardeners go wrong. They want a tree that looks like a lollipop, so they shear off the outer branches every spring. The problem? Guavas produce fruit on new growth. When you prune for a specific shape, you’re often cutting off the very wood that would have held this year’s harvest.
The “Heading Back” Technique
Instead of shearing the tree, use a “heading back” technique. This involves cutting individual branches back by about 30 cm (12 inches) in the early spring. This stimulates the tree to push out 3 or 4 new shoots from just behind the cut. Each of those new shoots is a potential fruiting branch.
By doing this, you’re not just making the tree bushier; you’re multiplying the “fruiting sites.” A tree that has been tipped this way can produce double or triple the amount of fruit of a tree left to grow into a tall, spindly mess.
Thinning the Canopy
While we want the tree to be “messy” at the soil level, we want the canopy to have some room to breathe. High-yield trees need good airflow to prevent fungal diseases like anthracnose and rust.
Take out any branches that are growing straight toward the center of the tree. If you have two branches crossing and rubbing against each other, remove the weaker one. You want enough light to penetrate the center of the tree so that the fruit inside can ripen just as well as the fruit on the outside.
The Science of Sweetness: Brix and Nutrition
If your guavas are sour, the tree is likely missing two key ingredients: potassium and magnesium. Nitrogen makes the tree green and tall, but potassium and magnesium make the fruit sweet.
Once a guava tree is past its first year, I shift the feeding schedule. I move away from high-nitrogen “growth” fertilizers and toward something with more “K” (potassium) on the label. Many successful growers use a 6-6-6 or an 8-8-8 balanced fertilizer, but then they supplement with sulfate of potash or even a bit of Epsom salts (magnesium sulfate) right as the flowers start to appear.
Watering also plays a massive role in sweetness. The biggest mistake is overwatering as the fruit begins to ripen. If you keep the soil soggy during the final two weeks of ripening, the tree will pump too much water into the fruit, diluting the sugars. I’ve found that backing off the water just a little bit—not letting the tree wilt, but letting the soil get a bit drier—concentrates the flavors and results in a much sweeter harvest.
DIY PROJECT: Collect rainwater no matter where you live...

This DIY project is the best way to legally collect rainwater NO MATTER where you live. Get chlorine-free water, cut down on your water bills, and have enough for an emergency situation or to water your garden. Read More Here...
Benefits of the “Wild Edge” Approach
Choosing to go “wild” with your guava tree isn’t just about being lazy; it’s a strategic move for better fruit. The benefits are measurable and immediate.
- Superior Flavor: The complex sugars and aromatic compounds are far more intense than anything you’ll find in a store-bought guava.
- Higher Nutrient Density: Trees supported by a fungal network and organic matter produce fruit with higher levels of Vitamin C and antioxidants.
- Natural Resilience: A “wild” tree is less prone to pest attacks. The leaf litter provides a home for beneficial insects like predatory mites and beetles that eat the pests.
- Lower Maintenance: Once the mulch layer is established, you spend less time weeding and less money on synthetic fertilizers.
Common Mistakes and How to Avoid Them
Even the best-intentioned gardeners trip up. Here are the three most common ways I see people ruin their guava harvest.
The “Grass to the Trunk” Trap
Many people plant their guava right in the middle of a lawn and let the grass grow right up to the trunk. Grass is incredibly competitive. It will steal 70% of the nitrogen and water you give to the tree. I always recommend a “no-grow zone” at least 1 meter (3 feet) wide around the trunk, filled with thick mulch.
The “Wait and See” Pruning
If you don’t prune your guava at all, it will eventually become a 6-meter (20-foot) tall giant with fruit only at the very top where the birds get it. You have to be proactive. If you let the tree get too big, the inner branches will die off from lack of light, and your yield will plummet. Keep the tree at a manageable 2.5 to 3 meters (8 to 10 feet) through regular spring tipping.
Synthetic Overload
Dumping high-strength synthetic NPK fertilizer onto a guava might give you a quick flush of leaves, but it often leads to “watery” fruit and attracts pests like aphids and whiteflies. The fast, soft growth produced by synthetic nitrogen is like a buffet for bugs. Stick to compost, manure, and slow-release organic pellets to keep the growth sturdy and the fruit sweet.
Limitations: When the Wild Approach Needs a Tweak
The “wild” method is great, but it isn’t a magic wand for every situation. You have to be realistic about your local conditions.
| Factor | Limitation | Adjustment |
|---|---|---|
| Temperature | Guavas are damaged below -1°C (30°F). | Use frost blankets or plant in large pots that can be moved indoors. |
| Space | “Wild” shapes can take up significant room. | Focus on “pinching” new growth to keep the canopy dense and compact. |
| Pests | Fruit flies love “messy” environments too. | Clean up *rotting* fruit immediately; keep the mulch but remove the rot. |
If you’re in a region with heavy fruit fly pressure, the “messy” soil needs to be managed carefully. You want the leaves and wood chips, but you must remove any fallen fruit that is infested. Otherwise, you’re just breeding the next generation of pests right under your tree.
Practical Tips for the Seasoned Beginner
If you’re ready to flip your guava care from “city clean” to “wild productive,” start with these steps.
- Stop Raking: If the leaves under your tree are healthy, let them stay. If they look diseased (spots, fuzz), replace them with fresh wood chips.
- Test the Soil: Before adding anything, check your pH. If it’s above 7.0, your guava will struggle to take up iron. Use sulfur or peat moss to bring it down.
- Fruit Thinning: If your tree is loaded with hundreds of tiny guavas, pull some off. Aim for one fruit every 15 cm (6 inches) of branch. This tells the tree to put all its energy into making the remaining fruit huge and sweet.
- Water Deeply: Instead of a light sprinkle every day, give the tree a deep soak twice a week. You want to reach those roots that are 45 cm (18 inches) down.
Advanced Considerations: Going Beyond the Basics
For those who want to really push the limits of what a guava tree can do, consider the source of your tree. Most “wild” tasting fruit comes from trees grown from seed or air-layering, rather than grafted trees that might be chosen for shipping durability rather than flavor.
If you have a neighbor with a tree that produces incredible fruit, ask for a cutting or try “air-layering” a branch. This involves wounding a small section of a branch, wrapping it in moist sphagnum moss and plastic, and waiting for roots to form. Once it has roots, you snip it off and plant it. You’ll have a genetic clone of that “super sweet” tree without the lottery of growing from seed.
Another advanced tip is to track your “Brix” levels with a refractometer. This is a small handheld tool that tells you exactly how much sugar is in the juice. If your readings are low (below 10), you know you need to adjust your potassium or your watering schedule. High-quality home-grown guavas can reach 14 to 18 Brix.
Scenario: The Tale of Two Trees
Imagine two gardeners, Joe and Mary. Joe keeps his yard like a golf course. His guava is surrounded by green grass, and he prunes it into a perfect square every winter. He uses “all-purpose” blue crystal fertilizer once a month. His tree is 5 years old, but it only produces about 10 small, somewhat tart fruits a year.
Mary, on the other hand, has a “messy” garden. Her guava has a 2-meter (6-foot) wide ring of mulch and fallen leaves around it. She hasn’t touched a rake in years. She tips the branches in the spring but lets the tree find its natural, slightly weeping shape. Every spring, she tosses a few handfuls of organic poultry manure and some wood ash (for potassium) onto the mulch.
By year 5, Mary’s tree is a powerhouse. It produces over 100 large, aromatic guavas that are so sweet her neighbors line up at the fence for them. The difference isn’t the tree; it’s the ecosystem she built for it.
Final Thoughts
Turning a struggling urban guava into a high-yield producer doesn’t require a degree in botany. It requires a shift in how you see your garden. Instead of a series of objects to be cleaned and managed, see it as a living system. Your guava tree is a partner in that system, and it knows exactly what it needs to produce its best work.
By mimicking the “wild” forest floor with deep mulch and leaf litter, and by pruning with the tree’s natural growth cycle instead of against it, you can transform your harvest. You’ll move from those hard, flavorless fruits to the kind of guava that defines a tropical summer.
Experiment this season. Put down the rake, pick up the mulch bag, and give your tree the “messy” home it craves. The reward will be written in the sweetness of every fruit you pick.

Do you have some charcoal in your house right now? We call charcoal a “miracle leftover” for anyone who wants to be a little more self-sufficient and cut costs. That’s because it can help you with so many different things around the house and garden. You can even use it to make an energy-free fridge. Read More Here...