
One of these trees will yield 50 lbs of fruit, while the other is just an expensive lawn ornament. Plums are notorious for blooming early and losing everything to a single frost. The secret isn’t a better tree—it’s a better location. Learn how to use thermal mass to keep your orchard 5 degrees warmer when it matters most.
I remember one spring back in the late nineties when the plum trees looked like clouds of white popcorn. The air smelled like honey, and I was already thinking about the jars of jam I’d be lining up in the pantry. Then, a “radiational frost” hit—one of those clear, still nights where the heat just escapes straight into space. By morning, every single blossom was a soggy, brown mess. I didn’t get a single plum that year.
That heartbreak taught me that growing plums isn’t just about digging a hole and crossing your fingers. It is about understanding the invisible war between the warmth of the earth and the cold of the sky. If you want a consistent harvest, you have to stop thinking like a consumer and start thinking like a heat manager. We are going to look at how to use things like water barrels, stone walls, and even the very dirt under your feet to act as a thermal shield for those delicate flowers.
Protecting Plum Blossoms From Late Frost
Plum trees are the early risers of the orchard. While apples are still sleeping soundly, plums often wake up at the first hint of a February or March thaw. This trait makes them incredibly vulnerable. A late frost doesn’t usually kill the tree itself, but it destroys the reproductive parts of the flower—the pistil and the stamens—meaning no fruit will ever form. Protecting these blossoms is the difference between a bumper crop and a wasted season.
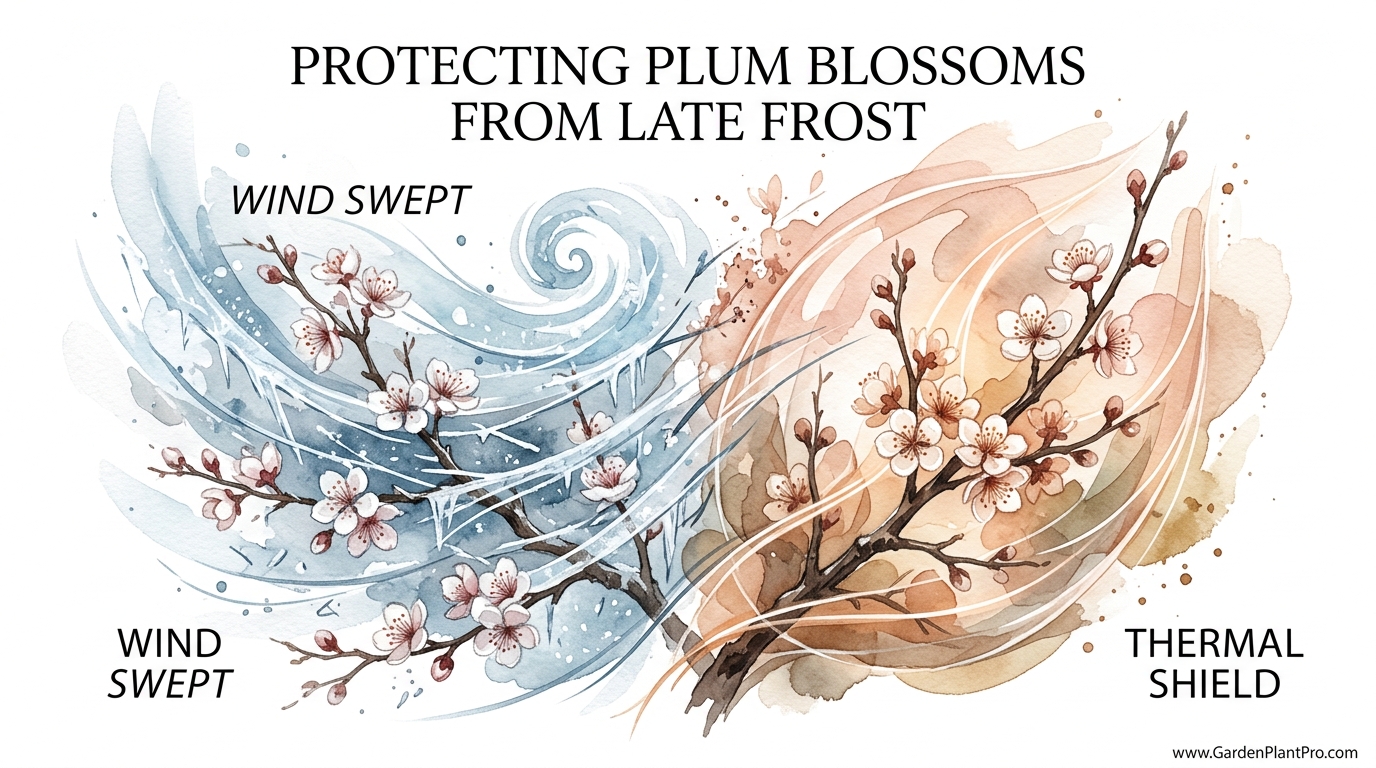
The concept of protection isn’t about heating the whole outdoors. Instead, it is about creating a microclimate. A microclimate is a small area where the temperature differs from the surrounding region. You can find these in your own backyard. That spot next to the brick chimney might stay 4°F (2.2°C) warmer than the middle of the lawn. In the gardening world, we often talk about a THERMAL SHIELD versus a WIND SWEPT location. A thermal shield uses physical mass to hold heat, while a wind-swept site uses air movement to prevent cold air from settling into “frost pockets.”
Understanding the “Critical Temperature” is your first step. For most plums, the danger zone begins around 27°F (-2.8°C). At this temperature, you can expect a 10% loss of blossoms. If the mercury dips to 24°F (-4.4°C), you are looking at a 90% loss. Your goal is to use thermal mass to keep the air around those branches just a few degrees above these killing thresholds.
How Thermal Mass Works in the Garden
Thermal mass refers to any material that can absorb, store, and later release heat. Think of it like a battery, but for temperature instead of electricity. In the daytime, the sun beats down on dense materials like stone, water, or heavy clay soil. These materials soak up that energy. When the sun goes down and the air temperature drops, these “heat batteries” begin to radiate that warmth back out, creating a bubble of protection around your plum tree.
The Power of Water
Water is the king of thermal mass because it has a very high “specific heat capacity.” This means it takes a lot of energy to change the temperature of water. A 55-gallon (208-liter) drum of water sitting in the sun all day will hold onto that warmth for hours after sunset. As the water cools, it releases “latent heat” into the surrounding air. If you place these barrels strategically around the base of your plum tree, they can raise the local temperature by 3°F to 5°F (1.7°C to 2.8°C), which is often exactly what you need to survive a snap frost.
Stone and Masonry
Brick walls, stone paths, and large boulders act in a similar way. A south-facing brick wall can reach temperatures well over 100°F (37.8°C) in the afternoon sun, even if the air is only 55°F (12.8°C). This wall becomes a massive radiator at night. Planting a plum tree 3 to 5 feet (0.9 to 1.5 meters) away from such a structure is one of the oldest tricks in the book for “pushing the zone” and protecting early blooms.
Practical Strategies for Heat Management
Knowing the theory is one thing, but getting out there in the mud and moving barrels is another. Here is how you actually implement these systems in a backyard setting.
- The Barrel Ring: Place three or four dark-colored water barrels around the trunk of the tree, about 2 feet (60 cm) away from the bark. Dark colors like black or deep blue absorb roughly 40% more solar energy than light colors.
- Moist Soil Advantage: Always water your orchard before a predicted frost. Wet soil conducts heat better than dry, loose soil. Moist earth acts as a better thermal mass, absorbing more heat during the day and releasing it more steadily at night.
- The Bare Ground Trick: While we usually love mulch for soil health, it actually acts as an insulator that *prevents* the ground from warming up during the day and *blocks* heat from rising at night. In the critical weeks of spring bloom, rake the mulch back to expose the bare soil. This allows the earth to function as a giant heater for the tree canopy.
Supplemental Heat Sources
Sometimes the thermal mass isn’t enough on its own, and you need to add a little “active” heat. The old-school way involves using incandescent Christmas lights—the big C7 or C9 bulbs. Do not use LEDs, as they produce almost no heat. String these through the branches and plug them in. When combined with a frost blanket, these lights can raise the temperature inside the canopy by 6°F to 8°F (3.3°C to 4.4°C). The blanket traps the heat from the lights and the rising heat from the soil, creating a cozy tent for your blossoms.
Critical Temperatures for Plum Blossoms
Different stages of bud development have different tolerances. A bud that is still tightly closed can handle a lot more cold than a wide-open flower. Use this table as a guide for when to start panicking and when to rest easy.
| Development Stage | 10% Kill Temp (°F) | 90% Kill Temp (°F) | 10% Kill Temp (°C) | 90% Kill Temp (°C) |
|---|---|---|---|---|
| Swollen Bud | 14°F | 0°F | -10°C | -17.8°C |
| Side White / Green Tip | 20°F | 7°F | -6.7°C | -13.9°C |
| Tight Cluster | 24°F | 16°F | -4.4°C | -8.9°C |
| First White (Popcorn) | 26°F | 22°F | -3.3°C | -5.6°C |
| Full Bloom | 27°F | 24°F | -2.8°C | -4.4°C |
| Post-Bloom (Petal Fall) | 28°F | 25°F | -2.2°C | -3.9°C |
Benefits of Choosing the Right Location
One of the biggest advantages of using microclimates is that they are passive. Once you’ve positioned your tree and your thermal mass, the sun does the work for you. You don’t have to worry about power outages killing your “electric” protection or fuel costs for orchard heaters.
Additionally, a well-placed tree near a thermal mass often yields higher quality fruit. The extra warmth during the day can help with early season growth and encourages pollinators like bees to visit your tree more often, as they prefer foraging in warmer spots during the chilly spring months. If you find your neighbor’s tree is still a skeleton while yours is buzzing with life, you’ve likely found a superior microclimate.
Common Mistakes and Challenges
The most frequent error I see is people covering their trees incorrectly. If you throw a plastic tarp over a tree and let it touch the leaves, the cold will conduct right through the plastic and freeze the foliage at the contact point. Even worse, if you don’t drape the cover all the way to the ground and weigh it down with bricks, the heat will simply escape out the bottom like a chimney.
Another mistake is relying on mulch during the spring. Gardeners are conditioned to mulch everything to keep it “safe,” but as we discussed, mulch is a barrier to heat transfer. I have seen orchards where the mulched trees lost 100% of their blossoms, while the “neglected” trees on bare, hard-packed dirt nearby kept most of theirs. The dirt was able to “breathe” heat into the air, while the mulch kept the warmth locked in the ground where it couldn’t help the flowers.
When This Method May Not Be Ideal
Thermal mass has its limits. If you are facing an “advective freeze”—which is a fancy way of saying a massive, windy cold front from the north—all the water barrels in the world might not help. The wind simply strips the heat away faster than the mass can release it. In those cases, you need windbreaks or high-output heaters.
Also, if you live in a valley or a “frost pocket,” your challenges are doubled. Cold air is heavier than warm air and behaves like water, flowing downhill and pooling in low spots. If your plum tree is at the bottom of a hill, it will always be several degrees colder than the ridge above it. In these situations, you might need to focus more on WIND SWEPT strategies—removing fences or hedges that block air drainage—so the cold air can continue flowing past your trees instead of settling on them.
Advanced Considerations: Variety Selection
Serious practitioners know that the ultimate form of frost protection is timing. If your plums bloom two weeks later, they might miss the danger entirely. There are two main categories of plums: Japanese and European.
DIY PROJECT: Collect rainwater no matter where you live...

This DIY project is the best way to legally collect rainwater NO MATTER where you live. Get chlorine-free water, cut down on your water bills, and have enough for an emergency situation or to water your garden. Read More Here...
Japanese varieties (like Santa Rosa or Methley) are famous for their juicy, large fruits, but they are notorious early bloomers. If you live in a frost-prone area, you are playing a high-stakes game with these. European plums (like Stanley, Bluebyrd, or Empress) generally bloom much later and are far more reliable in northern climates or “frosty” microclimates. There are also hybrids like Toka (the Bubblegum plum) that are bred for extreme cold hardiness and may offer better resistance to temperature swings.
Example: The “Water Wall” Scenario
Let’s look at a real-world application. Imagine you have a young Santa Rosa plum. A frost warning is issued for 25°F (-3.9°C). At full bloom, this would normally mean a 70% to 90% loss.
You place four 55-gallon drums around the tree. During the day, the sun provides roughly 1,000 watts of energy per square meter. The water absorbs this. At night, you drape a heavy frost blanket over the tree and the barrels, securing it to the ground. Inside that “tent,” the air remains at 29°F (-1.7°C) because of the radiant heat from the water and the earth. You wake up to a white frost on the grass, but your blossoms are perfectly green and healthy. You just saved your entire 50lb harvest with a few barrels and a blanket.
Final Thoughts
Growing fruit is a long game. It requires a mix of patience, observation, and a bit of “over the fence” wisdom. Protecting your plum blossoms from a late frost isn’t about fighting nature; it is about learning to lean on the tools nature provides. By mastering thermal mass and microclimates, you can turn a gamble into a guarantee.
I encourage you to spend a morning walking your yard with a simple thermometer. Find the warm spots, watch how the wind moves, and look for where the frost lingers longest in the grass. This knowledge is more valuable than any fertilizer or fancy pruning tool. Once you understand the heat of your land, those 50 lbs of plums will be waiting for you every summer.
If you find this fascinating, you might want to look deeper into other ways to stabilize your garden’s environment, such as irrigation methods for frost control or how soil health impacts a tree’s overall resilience. There is always more to learn when you are working with the soil.