
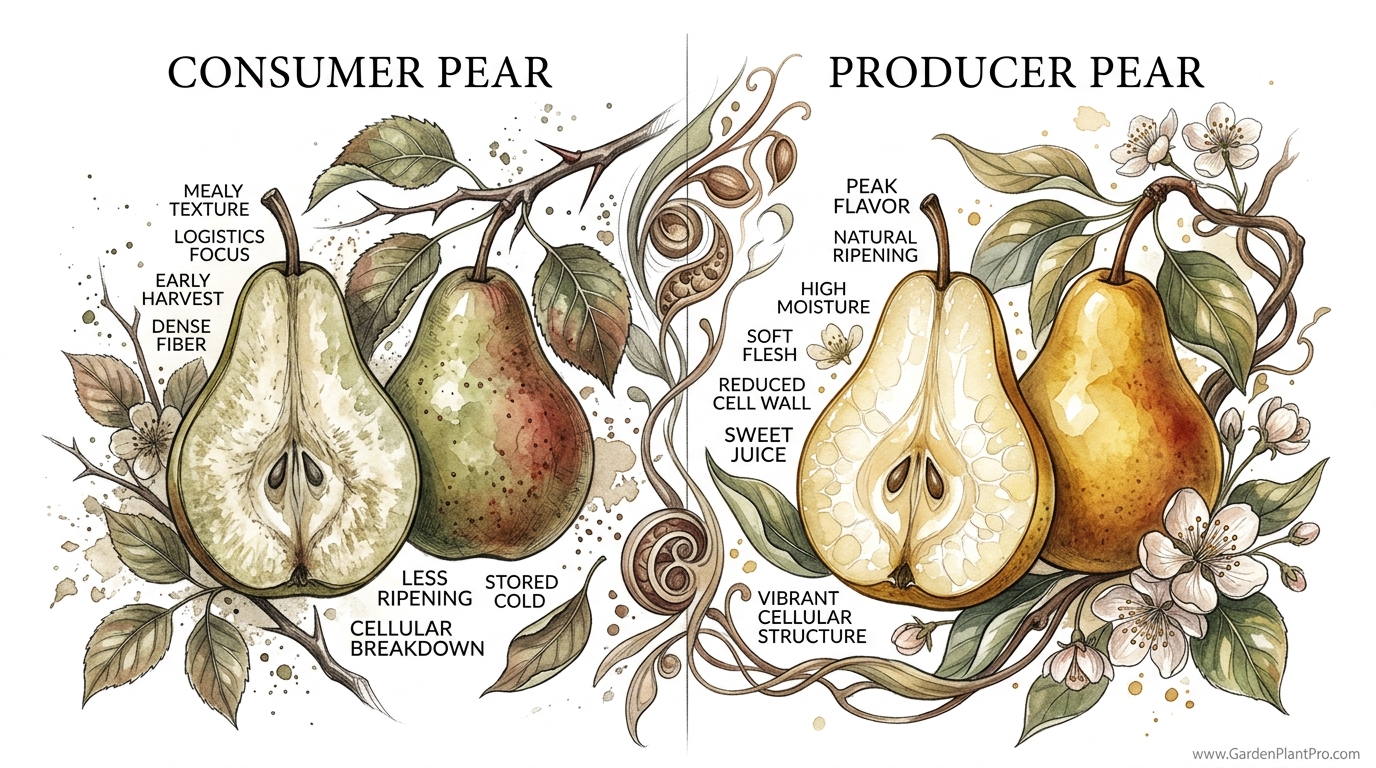
Did you know grocery store pears are often harvested months before they develop sugar, leaving them permanently mealy and bland? The ‘Consumer’ pear is a logistics experiment—bred for shipping, not for your taste buds. It’s hard, dry, and grainy because it never actually ripened on the tree. The ‘Producer’ pear is a backyard treasure: honey-sweet, buttery, and bursting with complex floral notes. It’s time to take your flavor back from the supermarket supply chain.
Why Grocery Store Pears Taste Mealy
Supermarket pears often fail to deliver because they are forced into a supply chain that prioritizes durability over delight. In the world of commercial agriculture, a pear that is soft and juicy is a pear that is bruised and unsellable. Consequently, most commercial growers harvest fruit at a stage of “immature maturity,” where the fruit is physically large enough to look right but has not yet begun the complex chemical shift from starch to sugar.
When these fruits are picked too early, they are immediately plunged into near-freezing temperatures for months. This cold storage is designed to halt the aging process, but it can also permanently damage the fruit’s ability to ripen properly. Instead of developing a buttery texture, the cells often break down into a dry, sand-like grit. This results in a pear that stays hard for weeks on your counter and then suddenly turns into a mealy, tasteless mush without ever passing through a “delicious” phase.
Growing your own pears allows you to bypass this industrial refrigeration. You get to control the exact moment of harvest and, more importantly, the specific ripening environment. In your backyard, you can choose varieties like the ‘Comice’ or ‘Seckel’ that would never survive a cross-country truck ride but will melt in your mouth like flavored butter. The difference isn’t just in the freshness; it is in the biology of how the fruit matures when it isn’t being treated like a piece of freight.
Understanding the Two Worlds of Pears
Before you stick a shovel in the ground, you need to understand that there are two very different types of pears you might grow. European pears (Pyrus communis) are the classic bell-shaped fruits we think of when we imagine a dessert pear. These are the varieties like ‘Bartlett’, ‘Bosc’, and ‘Anjou’. They are famous for their “melting” flesh and floral aroma, but they come with a catch: they almost never ripen properly on the tree.
Asian pears (Pyrus pyrifolia) are the opposite. They are often round like an apple, with a crisp, crunchy texture that remains firm even when fully ripe. Unlike their European cousins, Asian pears must ripen fully on the tree. If you pick them early, they stay sour and hard. If you leave them to reach their peak on the branch, they become incredibly juicy and sweet, often described as a cross between a pear and a high-quality jicama or apple.
Each type has its own place in the garden. European pears are for those who want the traditional, soft dessert experience, while Asian pears are for those who prefer a reliable, crunchy snack that can be eaten straight from the tree. Understanding this distinction is the first step toward avoiding the “mealy” disappointment of the grocery store.
European Pear Characteristics
- Classic “pyriform” (bell) shape.
- Must be picked green and ripened indoors.
- Buttery, smooth, and melting texture when handled correctly.
- Highly susceptible to Fire Blight in many regions.
Asian Pear Characteristics
- Round or apple-shaped fruit.
- Ripens fully on the branch for immediate eating.
- Crunchy, grainy, and extremely juicy texture.
- Often more resistant to common diseases and easier for beginners.
Selecting the Right Site for Your Orchard
Pears are surprisingly hardy trees, but they have specific needs if you want them to produce heavy crops of high-quality fruit. Sunlight is the most critical factor. Your tree needs at least 6 to 8 hours of direct, unfiltered sun every day. Sunlight drives the photosynthesis that creates the sugars in the fruit; without enough sun, even the best variety will taste watered down and bland.
Soil drainage is the next big consideration. While pears can handle slightly “wetter feet” than peaches or cherries, they will not survive in standing water. A site with sandy loam is ideal, but if you have heavy clay, you can still succeed by planting on a slight mound or in a raised bed. The roots need oxygen as much as they need water, and waterlogged soil effectively chokes the tree over time.
Air circulation is often overlooked by new gardeners. Planting your trees in a low-lying “frost pocket” can be disastrous. Pears bloom earlier than many other fruit trees, making their blossoms vulnerable to late spring frosts. A location on a gentle slope or a slightly elevated part of your yard allows cold air to drain away, protecting your future harvest from a sudden overnight freeze. High-altitude or northern gardeners should look for north-facing slopes to delay blooming until the risk of frost has passed.
Soil Preparation and Planting Steps
Preparing the ground is a one-time job that pays dividends for decades. Start by testing your soil pH. Pears prefer a slightly acidic to neutral range, ideally between 6.0 and 7.0. If your soil is too alkaline, you might see yellowing leaves (chlorosis) and poor fruit set. Adding elemental sulfur can lower the pH over time, but it is best to do this several months before planting.
When you are ready to plant, dig a hole that is twice as wide as the root system but no deeper. It is a common mistake to bury the tree too deep. Look for the “graft union”—that bumpy scar near the base of the trunk where the specific pear variety was joined to the rootstock. This union must remain at least 2 to 3 inches (5 to 7 centimeters) above the soil line. If it is buried, the top part of the tree may grow its own roots, and you will lose the size-controlling benefits of the rootstock.
Spread the roots out naturally in the hole. Instead of adding heavy fertilizers or “hot” manure directly into the hole, fill it with the native soil you removed. Tamping the soil down firmly with your hands as you go will remove air pockets. After planting, give the tree a deep soak—about 5 gallons (19 liters) of water—to settle the earth around the roots. Applying a 3-inch (8-centimeter) layer of wood chips or straw mulch around the base will help retain moisture, but keep the mulch away from the trunk to prevent rot.
The Crucial Role of Chilling Hours
Pear trees, like most deciduous fruits, require a certain amount of cold weather to “reset” their internal clocks for the spring. This is measured in “chilling hours,” which are the cumulative hours spent between 32°F and 45°F (0°C to 7°C) during the winter. If your variety requires 800 hours and your winter only provides 400, the tree may leaf out late, bloom unevenly, or fail to fruit entirely.
Before buying a tree, check your local climate data to find your average chilling hours. Varieties like ‘Bartlett’ typically need about 800 hours, making them great for northern or temperate climates. If you live in a warmer region like the southern United States or parts of Australia, you should look for “low-chill” varieties like ‘Hood’, ‘Floridahome’, or ‘Baldwin’, which can fruit with as little as 200 to 300 hours of cold.
Selecting a tree that matches your local chilling hours is the difference between a thriving orchard and a decorative tree that never produces a single pear. It is one of the few environmental factors you cannot easily “cheat” with fertilizers or pruning, so choose wisely at the nursery.
The Art of the Harvest: The Tilt Test
Knowing when to pick a European pear is the most difficult skill for a backyard grower to master. If you wait until the fruit is soft on the tree, it is already ruined. Pears ripen from the inside out; by the time the skin feels soft, the core is usually brown and mealy. To get that perfect buttery texture, you must pick the fruit while it is still “rock hard” but physiologically mature.
The “Tilt Test” is the gold standard for determining maturity. Reach out and cradle a pear in your hand. Gently lift it from its vertical hanging position to a horizontal angle. If the pear is mature, the stem will “snap” or detach cleanly from the spur with a crisp click. If you have to tug, pull, or twist the fruit, it isn’t ready yet. Leave it for another few days and try again. This method works because as a pear matures, a layer of corky cells forms at the base of the stem, designed to let go when the time is right.
Color changes are another subtle clue. Most green pears will shift slightly toward a lighter, yellowish-green “ground color” when they are ready. The small dots on the skin, called lenticels, may also turn from white to brown. For Asian pears, the rules are simpler: wait until they change to their final color (usually golden-brown or bright yellow) and taste one. If it’s sweet and crunchy, harvest the whole tree.
DIY PROJECT: Collect rainwater no matter where you live...

This DIY project is the best way to legally collect rainwater NO MATTER where you live. Get chlorine-free water, cut down on your water bills, and have enough for an emergency situation or to water your garden. Read More Here...
The Secret Step: Cold Conditioning European Pears
This is where most beginners fail. After you harvest your “rock hard” European pears, they often need a period of cold storage to trigger the ripening hormone, ethylene. Without this “chill” period, the fruit might just sit on your counter for weeks until it shrivels and rots without ever softening.
Place your harvested pears in a refrigerator set to about 33°F to 40°F (1°C to 4°C). Different varieties require different amounts of time in the “cold box.” A ‘Bartlett’ might only need 2 or 3 days of chilling, while winter pears like ‘Anjou’ or ‘Bosc’ might need 2 to 6 weeks. This mimics the natural transition from autumn to winter and tells the fruit it is time to start the final stage of sugar development.
When you are ready to eat them, take a few pears out of the fridge and put them on your kitchen counter. Over the next 3 to 7 days, they will slowly soften. To check for ripeness, use the “Check the Neck” rule: press gently near the stem with your thumb. If the flesh gives slightly under pressure, the pear is at its absolute peak. If the main body of the pear is soft, you’ve waited too long.
Pruning for Health and Productivity
Pears have a natural tendency to grow straight up, like a poplar tree. This “apical dominance” leads to tall, spindly trees where the fruit is out of reach and the center is shaded out. Pruning is the only way to keep the tree manageable and ensure sunlight reaches the interior branches where the fruit spurs live.
The “Central Leader” system is the most common for pears. This involves maintaining one main trunk (the leader) and encouraging several tiers of horizontal branches (scaffolds) to grow outward. Imagine the shape of a Christmas tree. The bottom branches should be the longest, with each higher tier getting progressively shorter. This ensures that the bottom of the tree isn’t shaded out by the top.
Winter is the time for “structural” pruning. Remove any branches that are crossing, rubbing, or growing back toward the center of the tree. You should also prune out any “water sprouts”—those thin, whip-like branches that shoot straight up from the main limbs. These sprouts suck energy away from the tree and rarely produce fruit. If you want to keep the tree shorter, you can perform “summer pruning” in July or August to remove new, vigorous growth, which helps slow the tree’s overall height.
Pruning Comparison Table
| Feature | Central Leader | Open Center (Vase) |
|---|---|---|
| Best For | European Pears, Cold Climates | Asian Pears, Stone Fruit |
| Structure | One main trunk with tiers | 3-5 main limbs, hollow center |
| Light Penetration | Moderate (requires thinning) | Excellent (center is open) |
| Harvest Ease | Can become very tall | Easier to keep low |
Managing Fire Blight and Common Pests
If you grow pears, you will eventually encounter Fire Blight. This is a bacterial disease (Erwinia amylovora) that can kill a tree in a single season if left unchecked. It usually enters through the blossoms during warm, wet spring weather. Infected branches look like they have been scorched by a blowtorch—the leaves turn black and shrivel, and the tips of the branches often curl into a “shepherd’s crook” shape.
The only effective treatment for Fire Blight is surgical. You must prune out the infected wood, cutting at least 12 inches (30 centimeters) below the last visible sign of the disease. It is vital to dip your pruning shears in a 10% bleach solution or 70% isopropyl alcohol between every single cut. If you don’t sanitize your tools, you will simply spread the bacteria to the next branch you touch. Avoid heavy nitrogen fertilization, as the succulent, fast-growing shoots it produces are the most vulnerable to infection.
Codling moths and pear psylla are the two most common insect pests. Codling moth larvae are the “worms” found in the fruit. You can manage them by thinning your fruit so no two pears touch each other (which is where the moths like to lay eggs) and by picking up and destroying any “drops” that fall early. Pear psylla are tiny sap-suckers that produce a sticky “honeydew” on the leaves, which can lead to black sooty mold. A well-timed spray of dormant oil in late winter can smother the eggs of many of these pests before they hatch.
Recommended Varieties for Home Producers
Choosing the right variety is more important than almost any other decision. If you want that “backyard treasure” experience, look for varieties that the grocery store ignores. ‘Seckel’ pears, also known as “Sugar Pears,” are tiny, bite-sized fruits that are incredibly sweet and naturally resistant to Fire Blight. They are one of the few European pears that can actually ripen reasonably well on the tree.
‘Comice’ is widely considered the best-tasting pear in the world. It has a texture so smooth it’s almost like custard, but it is very delicate and difficult to grow in humid regions where disease is high. For those in the Eastern US or South, ‘Moonglow’ and ‘Magness’ are excellent choices. They were specifically bred to be highly resistant to Fire Blight while still offering the buttery texture of a classic French pear.
For Asian pears, ‘Hosui’ and ‘Shinseiki’ are the gold standard. ‘Hosui’ has a beautiful golden-bronze skin and a rich, brandy-like flavor, while ‘Shinseiki’ is bright yellow, incredibly productive, and stays crisp for months in the refrigerator. If you only have room for one tree, look for a “multi-grafted” tree that has three or four different varieties on the same trunk. This solves your pollination problems and spreads your harvest out over several months.
Practical Tips for Success
- Thin the fruit: When the pears are about the size of a marble, remove enough so there is only one or two pears per cluster. This prevents branches from breaking and ensures the remaining fruit grows large and sweet.
- Mulch deeply: Maintain a 3 to 4 foot (1 meter) circle of mulch around the tree to suppress grass competition. Grass is a “nutrient thief” that can stunt young fruit trees.
- Water consistently: Young trees need about 1 inch (2.5 centimeters) of water per week. Drought stress during the summer can cause the tree to drop its fruit early or result in small, woody pears.
- Keep a garden journal: Note when your tree blooms and when the fruit passes the tilt test. This data is specific to your backyard and will be your best guide in future years.
Advanced Considerations: Rootstocks and Spacing
The size of your tree is determined almost entirely by its rootstock. If you plant a “Standard” pear tree, it can grow 30 to 40 feet (9 to 12 meters) tall, which is a nightmare to harvest and prune. Most backyard gardeners should look for trees on “Quince” or “OHxF” (Old Home x Farmingdale) rootstocks. These semi-dwarfing stocks keep the tree in the 12 to 15 foot (4 to 5 meter) range, making it much more manageable.
Spacing depends on the rootstock choice. Semi-dwarf trees should be spaced about 12 to 15 feet (4 to 5 meters) apart. If you are very limited on space, consider “Espalier”—the practice of training a tree to grow flat against a wall or fence. Pears are the best fruit for this technique because their wood is flexible and they produce fruit on permanent “spurs” that can be maintained for decades along horizontal wires.
Pollination is the final piece of the puzzle. Most pears are not self-fertile, meaning they need a second, different variety nearby to produce fruit. Check a pollination chart to ensure your two varieties bloom at the same time. If your neighbor has a pear tree, that often counts! Bees can easily travel a few hundred yards to do the work for you.
A Year in the Life of a Pear Tree
To visualize the process, let’s look at a typical year for a ‘Bartlett’ pear tree in a temperate climate. In late winter, while the tree is still dormant, you perform your structural pruning and apply a dormant oil spray to kill overwintering pests. As spring arrives, the tree erupts in white blossoms. This is the danger zone for Fire Blight, so you keep a close eye on the weather; if it’s warm and rainy during bloom, you might apply a protective organic spray.
By early summer, the fruit has set. You spend an afternoon thinning the clusters so the branches don’t sag. Throughout the heat of July and August, you ensure the tree gets a deep soak once a week. In late August, you start the daily tilt test. One day, the pears snap off cleanly. You harvest the crop—all of it at once—and put them in the refrigerator.

Do you have some charcoal in your house right now? We call charcoal a “miracle leftover” for anyone who wants to be a little more self-sufficient and cut costs. That’s because it can help you with so many different things around the house and garden. You can even use it to make an energy-free fridge. Read More Here...
In September, you pull a few pears out of the fridge every Friday. By Tuesday, they are soft at the neck. You sit on your porch and eat a pear that is so juicy you need a napkin for your chin. This is the moment the ‘Producer’ pear pays you back for all those months of care. It’s a flavor that no grocery store on earth can provide.
Final Thoughts
Growing pears is a lesson in patience and timing, but the reward is one of the greatest treasures a garden can offer. By moving away from the “Consumer” pear and embracing the varieties and techniques of a “Producer,” you transform a hard, mealy fruit into a gourmet experience. It starts with choosing the right variety for your climate and ends with the discipline of harvesting early and ripening in the cold.
Don’t be intimidated by the technical aspects of pruning or the threat of Fire Blight. These are manageable challenges that become second nature as you spend time with your trees. Start small—perhaps with a single multi-grafted tree or a couple of resistant varieties like ‘Seckel’ and ‘Shinseiki’—and build your orchard from there.
As you watch your trees grow from thin whips into productive scaffolds of fruit, you’ll find that the garden provides more than just food. It provides a connection to the seasons and a deep satisfaction in knowing exactly how that perfect, honey-sweet pear came to be. Take your flavor back; your backyard is waiting for its first pear tree.