
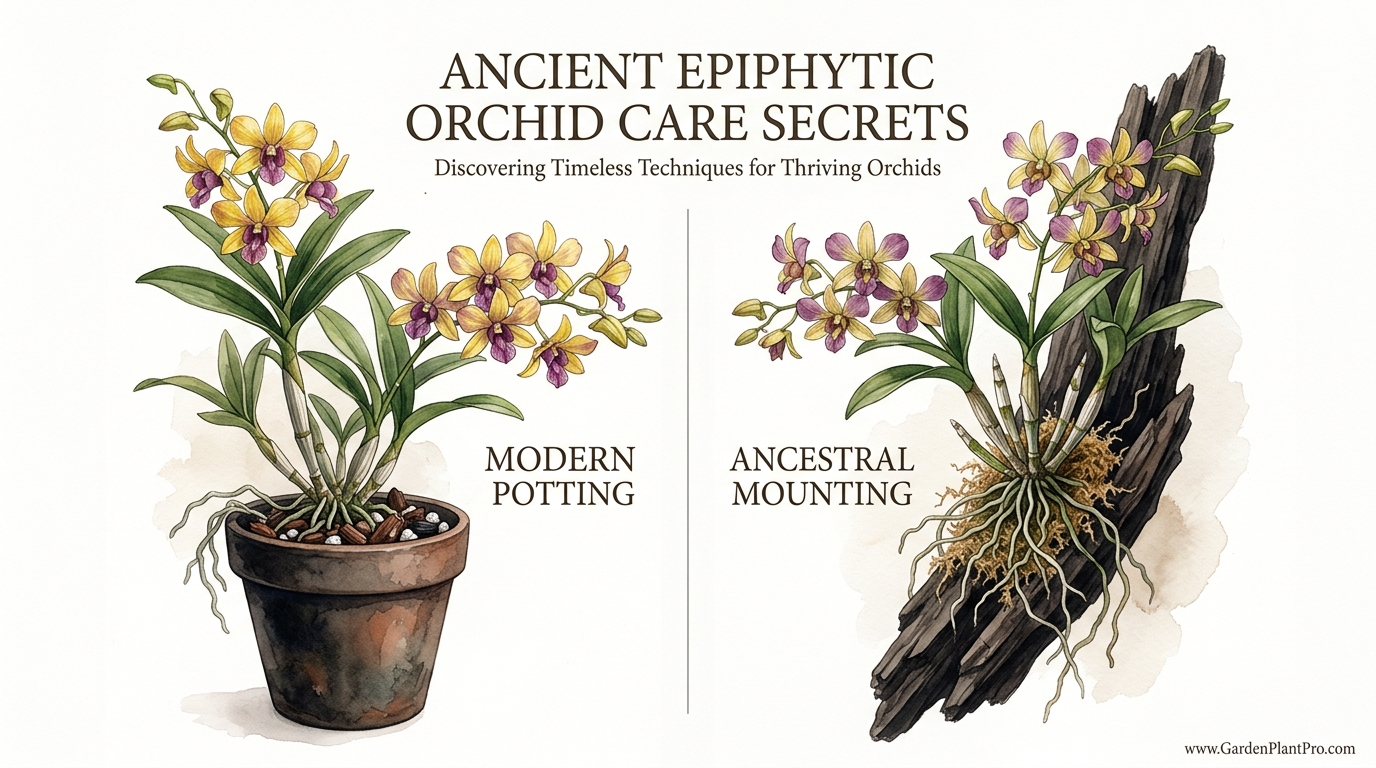
Did you know that in the wild, orchids never touch the ground, yet we keep trying to bury them in dirt? We treat orchids like roses, but they are actually aerial acrobats. Modern potting ‘soil’ is a slow death sentence for these ancient air-dwellers. By switching back to the ancestral method of mounting them on wood, you mimic their rainforest home and unlock decades of continuous blooming.
Most of us start our orchid journey with a plant from the grocery store, tucked into a plastic pot with a bit of moss or bark. It looks beautiful for a few weeks, but eventually, the roots start to shrivel or turn into a soggy mess. This happens because we are fighting millions of years of evolution.
I have spent nearly forty years watching these plants in my own backyard and windowsills. I have learned that the secret to a happy orchid isn’t a fancy fertilizer or a specific schedule. It is all about the atmosphere and the physical foundation you provide for those curious, wandering roots.
When you take an orchid out of its pot and tie it to a piece of rough bark, you are giving it a new lease on life. You are letting it breathe, climb, and drink the way nature intended. This article will guide you through the transition from modern potting to the ancestral mounting method that keeps orchids thriving for a lifetime.
Ancient Epiphytic Orchid Care Secrets
To understand why mounting works so well, we have to look back at the history of these plants. Orchids are part of one of the largest and oldest flowering families on Earth, with some ancestors dating back nearly 200 million years. Most of the species we love today, like the Phalaenopsis or Cattleya, are epiphytes.
An epiphyte is a plant that grows on another plant—usually a tree—but is not a parasite. It does not steal nutrients from the tree. Instead, it uses the tree as a high-vantage perch to reach the sunlight and the humid breezes of the canopy. In the wild, their roots are exposed to the open air, getting drenched by tropical rains and drying out completely within an hour or two.
The “secret” to their survival is a specialized tissue called the velamen. If you look at a healthy orchid root, you will see a silvery-white or greyish coating. This is the velamen, a thick layer of dead cells that acts like a high-tech sponge. It sucks up moisture and nitrogen from the air instantly. When it is wet, it turns green as the chlorophyll underneath becomes visible. When it is dry, it turns back to silver, protecting the delicate living core of the root from the sun.
In a traditional pot, this velamen rarely gets to do its job. It stays wet for too long, which invites “bad” fungi and bacteria that cause root rot. When you mount an orchid, you allow the velamen to follow its natural wet-dry cycle. This rapid transition from soaked to dry is exactly what triggers vigorous growth and frequent blooming cycles.
Historically, even the Victorians understood this during the height of “Orchidmania” in the 19th century. Wealthy collectors realized that their exotic imports died in “stove houses” if they were kept in heavy soil. They began using “Wardian cases”—miniature glass greenhouses—and mounting plants on wooden blocks to mimic the tropical environment of the Americas and Asia.
The Monopodial vs. Sympodial Secret
Not all orchids grow the same way, and knowing the difference is vital for a successful mount. Monopodial orchids, like the common Moth Orchid (Phalaenopsis) or the Vanda, grow upward from a single point. They produce leaves from the top and roots from the sides of the stem.
Sympodial orchids, such as Cattleyas, Dendrobiums, and Oncidiums, grow horizontally. They produce a creeping stem called a rhizome and send up “bulbs” (pseudobulbs) that store water. These plants are the “crawlers” of the orchid world. They love to march across a piece of wood, attaching themselves as they go. Understanding which type you have tells you how to position them on your mount.
Choosing the Right Foundation: Materials and Preparation
Choosing the right piece of wood is the most important decision you will make in this process. You want a material that is rot-resistant, has a rough texture for roots to grip, and is free of toxic chemicals. Not all wood is created equal when it comes to supporting an air-dwelling orchid.
Cork bark is widely considered the gold standard for mounting. It is the outer bark of the cork oak tree (Quercus suber) and can last ten years (10 years) or more without breaking down. It is incredibly lightweight, has deep crevices that roots adore, and does not hold onto excess salts from fertilizers.
If you prefer to find your own materials, hardwoods like oak, hickory, pecan, or fruitwoods like apple and pear are excellent choices. Avoid “softwoods” like pine or fir for the mount itself; they contain resins that can be toxic to delicate root tips, and they tend to rot much faster in high humidity.
Before you attach your plant, you must prepare the wood. If you found the wood in nature, I recommend a quick cleaning. Scrub it with a stiff brush and plain water to remove dirt or loose pests. Some gardeners like to bake their wood in the oven at 200°F (93°C) for an hour to ensure it is sterile, though this is optional if the wood is clean and dry.
A Quick Guide to Wood Types
| Material | Estimated Lifespan | Best For… | Key Pros/Cons |
|---|---|---|---|
| Cork Bark | 10+ Years | Almost all epiphytes | Pro: Light and textured. Con: Can be expensive. |
| Oak/Hardwood | 5–8 Years | Cattleyas, Dendrobiums | Pro: Easy to find. Con: Heavier than cork. |
| Tree Fern Slabs | 4–6 Years | Moisture lovers | Pro: Holds more water. Con: Not sustainable. |
| Grapevine | 3–5 Years | Smaller orchids | Pro: Very beautiful shapes. Con: Rots quickly. |
| Driftwood | Varies | Artistic displays | Pro: Unique look. Con: Needs soaking to remove salt. |
Tools You Will Need
- Mounting Material: Cork, oak, or cedar.
- Securing Line: 10-lb to 15-lb (4.5–6.8 kg) monofilament fishing line or green florist wire.
- Moisture Pad: Long-fiber sphagnum moss or coconut husk fiber.
- Sterile Pruners: Cleaned with rubbing alcohol to prevent spreading disease.
- Hanging Hardware: A drill and some heavy-gauge wire to create a hook.
How to Mount Your Orchid: Step-by-Step
The best time to move an orchid to a mount is when you see new green root tips just starting to emerge. This usually happens in the spring or after the plant has finished blooming. These fresh roots are “active” and will quickly adapt to the new surface, anchoring the plant within a few months.
The first step is to soak your orchid in a bucket of room-temperature water for about 20 to 30 minutes. This makes the roots flexible and prevents them from snapping during the transition. While the plant is soaking, do the same for your sphagnum moss. It should be damp, not dripping wet.
Next, carefully remove the orchid from its pot. Gently pick away all the old bark, moss, or perlite. You want the roots to be as bare as possible. Use your sterile pruners to snip away any brown, mushy, or hollow-feeling roots. Healthy roots will be firm and either green or white. Don’t worry if the roots look “messy”—they are about to be rearranged.
Place a small pad of the damp sphagnum moss onto the wood. This acts as a moisture reservoir for the first year. Position the orchid on top of the moss. If it is a sympodial orchid (like a Cattleya), place the oldest part of the plant toward the edge and the new growth toward the center of the wood, so it has room to crawl. If it is a monopodial orchid (like a Phalaenopsis), tilt it slightly downward. In the wild, they grow at an angle so water doesn’t sit in the “crown” (the center where leaves meet), which prevents rot.
DIY PROJECT: Collect rainwater no matter where you live...

This DIY project is the best way to legally collect rainwater NO MATTER where you live. Get chlorine-free water, cut down on your water bills, and have enough for an emergency situation or to water your garden. Read More Here...
Now, take your fishing line and tie a secure knot around the wood. Gently spread the roots over the moss and the wood. Wrap the line over the roots and around the mount. You want the plant to be very snug. If the orchid can “wobble,” the new root tips will be damaged every time the mount is moved, and the plant will never attach. Aim for “firm but fair”—secure enough that the plant doesn’t move when you shake the mount, but not so tight that you cut into the living tissue.
The Benefits of Ancestral Mounting
Switching to this method offers several practical advantages that you simply cannot get with pot culture. The most significant benefit is the total elimination of root rot. In a pot, even a single day of “soggy feet” can kill the roots of a sensitive species. On a mount, gravity is your best friend. Excess water drains away instantly, leaving the roots damp but surrounded by the fresh air they crave.
Another benefit is the long-term health of the root system. When an orchid is grown on wood, its roots can grow several feet (up to a meter) long, just as they do in the rainforest. This increased surface area allows the plant to absorb more nutrients and moisture from the air. You will often notice that the new roots grown on a mount are thicker and have longer green tips than those grown in a pot.
From an aesthetic standpoint, mounted orchids are a conversation piece. They transform a plant into a living piece of art. You can hang them on a wall, from a curtain rod, or even on the branches of a large indoor tree. It saves precious windowsill space and allows the flowers to hang pendulously, which is their natural blooming habit.
Finally, mounting reduces the need for frequent repotting. In a pot, orchid bark eventually breaks down and becomes acidic, requiring you to disturb the plant every two years to refresh the media. A cork mount can stay in place for a decade or more. The only maintenance required is occasionally trimming back the plant if it gets too large for the wood.
Challenges and Common Mistakes
The transition from a pot to a mount is not without its hurdles. The biggest mistake gardeners make is underestimating the water needs of a mounted orchid. Because there is no pot to hold moisture, the plant will dry out much faster—sometimes within hours if you live in a dry climate or use indoor heating.
I often see people try to “compensate” by wrapping the entire root system in a massive, thick ball of moss. This defeats the purpose of mounting. If the moss ball is too thick, the center stays wet and the outer layer stays dry, leading to the same rot problems you had in the pot. The moss should only be a thin “security blanket” to help the plant transition while it grows new, air-adapted roots.
Another common pitfall is the environment. If you move a mounted orchid into a room with 20% humidity and don’t water it daily, it will desiccate and die. Orchids on wood require high ambient humidity—ideally between 50% and 70%. If your home is dry, you will need to be diligent with misting or use a humidifier to keep the air “heavy” enough for the plant to thrive.
Lastly, pay attention to the light. Many people mount their orchids and then hang them in a dark corner as “decor.” Remember, these are plants first. They still need bright, indirect light to photosynthesize and produce the energy required for those stunning blooms. A lack of light is the number one reason why mounted orchids fail to flower, even if they look healthy.
When This May Not Be Ideal
While I am a huge advocate for mounting, I have to be honest: it is not for everyone. If you are the type of gardener who likes to go on three-week vacations without a plant sitter, a mounted orchid will likely perish. They are high-maintenance in terms of the *frequency* of care, even if the *effort* of care is low.
Indoor environments with constant air conditioning or forced-air heating are also a challenge. These systems strip the moisture out of the air. Unless you have a dedicated growing room, a greenhouse, or a very humid bathroom with a window, you might find yourself struggling to keep up with the plant’s thirst. In these cases, a slotted orchid pot or a wooden basket might be a better “middle ground” that offers good airflow with a bit more moisture retention.
Furthermore, some specific types of orchids are terrestrials—meaning they *do* grow in the ground. Paphiopedilums (Lady Slippers) and Cymbidiums generally prefer their roots to stay moist in a specialized soil mix. Trying to mount a terrestrial orchid is like trying to teach a fish to climb a tree; it simply isn’t built for it. Always double-check your species before you pull it out of its pot.
Practical Tips for Ongoing Care
Once your orchid is mounted, your daily routine will change. Instead of watering once a week, you should aim to mist the roots every morning. Use a spray bottle and thoroughly saturate the velamen until it turns a vibrant green. Doing this in the morning allows the plant to dry out by evening, which is crucial for preventing fungal spotting on the leaves.
For a deeper drink, take the entire mount to the sink or a bucket once or twice a week and soak the whole thing for ten minutes (10 minutes). This ensures the wood itself and the thin layer of moss are fully hydrated. If you live in a particularly hot or dry area, you may need to do this more often.
When it comes to fertilizer, I use the “weekly, weakly” method. Use a balanced orchid fertilizer diluted to one-quarter (1/4) of the recommended strength. Put it in a spray bottle and mist the roots and the undersides of the leaves after you have already dampened the plant with plain water. This prevents “fertilizer burn” on the dry root tips. Every fourth watering, use only plain water to flush away any mineral buildup.
In the winter, your orchid’s metabolism will slow down. You can reduce the frequency of fertilizing, but keep the humidity high. If you notice the leaves are starting to look wrinkled or leathery, it is a sign that the plant is losing more water than it can take in. This is your cue to increase the humidity around the plant immediately.
Improving Indoor Humidity Without a Greenhouse
- The Grouping Effect: Place your mounted orchid near other leafy houseplants. Plants release moisture through their leaves (transpiration), creating a pocket of humid air.
- The Bathroom Sanctuary: If you have a bathroom with a window, the steam from your daily shower provides a perfect “mini-rainforest” boost.
- Misting the Surroundings: Instead of just misting the plant, mist the area *around* it. Wetting a nearby wall (if it’s waterproof) or a tray of pebbles can help raise local humidity levels.
Advanced Considerations: The Science of Velamen
For those who want to go deeper, let’s talk about why the velamen is so incredible. This tissue isn’t just a sponge; it’s a filter. Research has shown that the velamen can selectively absorb essential minerals like phosphate and potassium from the first few drops of a rainstorm—which are often the most nutrient-rich as they wash “dust” and organic debris off the tree canopy.

Do you have some charcoal in your house right now? We call charcoal a “miracle leftover” for anyone who wants to be a little more self-sufficient and cut costs. That’s because it can help you with so many different things around the house and garden. You can even use it to make an energy-free fridge. Read More Here...
Additionally, the velamen houses beneficial mycorrhizal fungi. These fungi have a symbiotic relationship with the orchid, helping the roots process nutrients that the plant couldn’t handle on its own. When you keep an orchid in a pot with old, decaying bark, the “good” fungi are often crowded out by “bad” ones. On a mount, the healthy airflow encourages the right kind of microbial life to flourish in the root zone.
You may also notice that mounted roots develop a “sticky” quality. This is due to specialized cells that secrete a natural adhesive, allowing the root to weld itself to the microscopic bumps and ridges in the wood bark. Once an orchid has “gripped” the wood, it is almost impossible to remove without damaging the plant. This is why it is so important to choose a long-lasting mount; you want the wood to last as long as the orchid’s attachment.
A Realistic Scenario: The Weekend Mount
Imagine it is a Saturday morning in April. You have a Phalaenopsis that just finished its last bloom, and you found a beautiful piece of weathered oak during a hike last fall. You spend twenty minutes (20 mins) soaking the plant while you drink your coffee. You clean the roots, noticing how cramped they looked in the plastic pot.
You lay the plant on the oak, wrap the fishing line around it six or seven times, and hang it near an east-facing window. For the first two weeks, you keep it out of direct sun to let it recover. Every morning, you give it a quick spray. By July, you see a tiny, bright green “nub” pushing out from the stem. That is a new root. By September, that root has traveled three inches (7.6 cm) across the wood and is beginning to disappear into a crack in the bark. You’ve done it—you’ve successfully returned that orchid to its ancestral home.
Final Thoughts
Moving away from the “soil and pot” mindset can be intimidating for any gardener. We are trained to believe that plants need dirt to survive. But orchids are different. They are the rebels of the plant world, having long ago abandoned the dark, crowded forest floor for the light and freedom of the treetops.
When you mount an orchid on wood, you aren’t just trying a new gardening technique; you are participating in a tradition that honors the plant’s true nature. You will see colors more vibrant, roots more vigorous, and a plant that feels “at home” in your space. It requires a bit more attention to watering and humidity, but the reward is a plant that can live as long as you do.
I encourage you to start with one. Pick up a piece of cork bark, find a healthy Cattleya or Phalaenopsis, and give it a try. Once you see that first root firmly grip the wood, you will understand why many of us never go back to pots. Happy gardening, neighbor!