
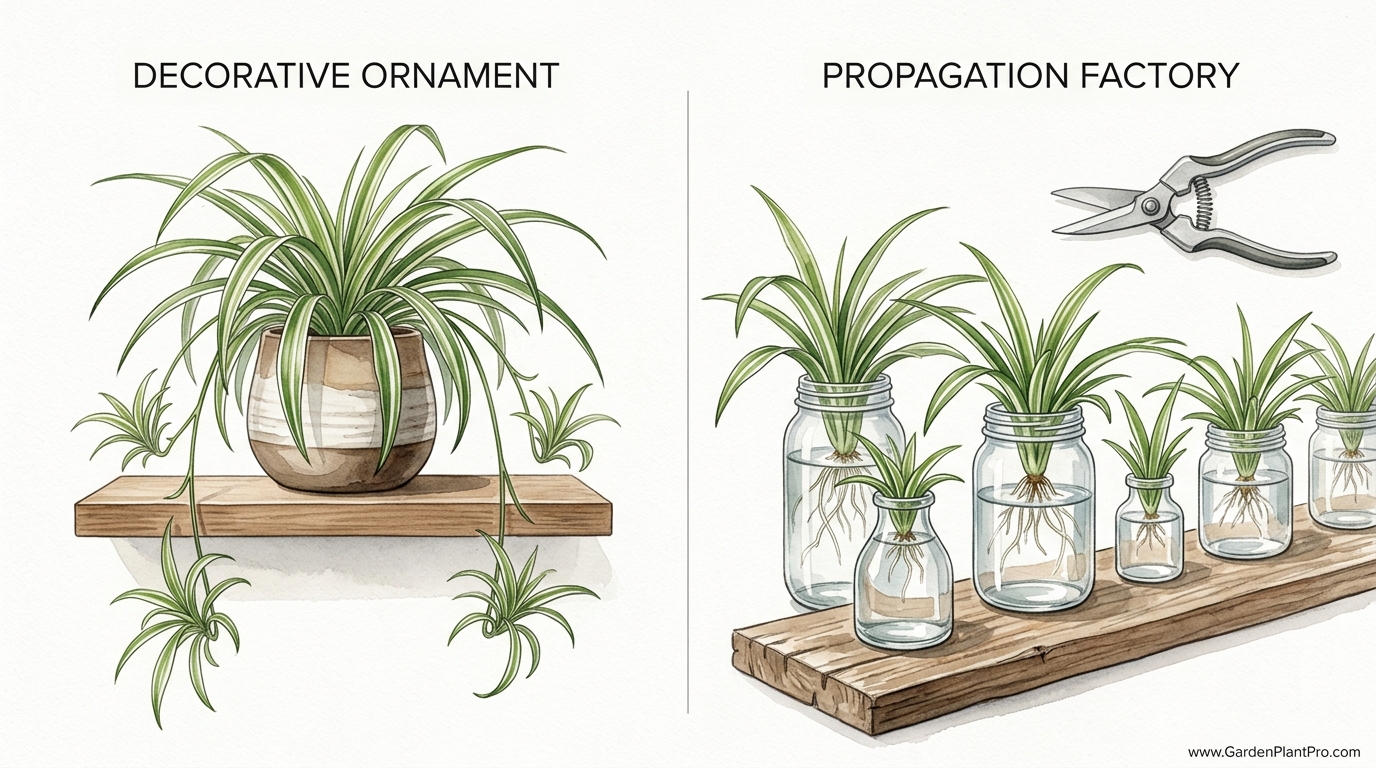
Is your spider plant just a dusty decoration, or is it a self-replicating air-cleaning machine? Most people see those dangling ‘spiderettes’ as a sign that their plant is getting messy. Smart gardeners see them as a free, infinite supply of high-performance air filters. One mother plant can populate your entire home and provide a year’s worth of gifts if you know the ‘Multi-Use’ secret.
I’ve been growing these hardy characters since back when macramé hangers were the height of fashion the first time around. Over the decades, I’ve learned that a spider plant (Chlorophytum comosum) isn’t just a houseplant; it’s an inheritance. If you treat it right, it will give you more offspring than you know what to do with.
The beauty of these plants lies in their resilience. Whether you live in a drafty old farmhouse or a modern apartment, they just want to grow. But there is a big difference between a plant that’s merely “staying alive” and one that is a thriving propagation factory.
I’m going to walk you through the lessons I’ve gathered from years of trial and error. We’ll talk about the science behind those little “babies,” how to pick the strongest ones, and the simple tricks to make sure they take root every single time.
Spider Plant Propagation Guide For Beginners
Spider plant propagation is the process of creating new, independent plants from a single “mother” plant. In the gardening world, we call this vegetative propagation. It’s essentially cloning, where the new plant is genetically identical to the parent.
These plants are famous for their “spiderettes”—the tiny plantlets that dangle from long, arching stems called stolons. In their native South African habitat, these stolons would trail along the ground. When a baby plant touches the soil, it sends out roots and starts a new life right there.
Inside our homes, we have to play the role of nature. We provide the soil or the water to catch those babies before they just hang there indefinitely. It’s a simple process, but understanding why it happens helps you do it better.
Think of the stolon as an umbilical cord. The mother plant sends energy and moisture down that line to keep the baby alive until it can feed itself. Once the baby develops its own root system, it no longer needs the mother. That is the moment of independence.
Propagation matters because it’s the most cost-effective way to fill your home with greenery. It also rejuvenates the mother plant. If she’s supporting fifty babies, she’s putting all her energy into them instead of her own leaves. Strategic propagation keeps the whole family healthy.
How the “Pinning” and Soil Methods Work
If you want the absolute highest success rate, you should look at the soil-pinning method. This is how nature intended it to happen. You don’t even have to cut the baby off the mother plant until it’s already established its own roots.
To do this, grab a small nursery pot—about 3 to 4 inches (7.5 to 10 cm) in diameter—and fill it with a light, well-draining potting mix. Place this little pot right next to the mother plant. Take one of the dangling spiderettes and rest the base of it directly on the soil of the new pot.
I usually use a bent paperclip or a U-shaped floral pin to gently hold the base of the baby against the dirt. You want the “nodes”—those little bumps at the bottom of the baby—to have firm contact with the moist soil. This contact triggers the plant’s hormones, specifically auxin, to start growing roots.
Keep that soil slightly damp but never soggy. Because the baby is still attached to the mother, it has a “backup” power supply. If the soil dries out a bit too much, the mother keeps it alive. If the soil is perfect, it grows roots in record time.
After about 3 to 4 weeks, give the baby a very gentle tug. If you feel resistance, it means roots have taken hold. At that point, you can snip the stolon (the connecting “umbilical cord”) with a pair of clean scissors. Now you have a completely separate plant.
The Direct Soil Cut Method
If you don’t have the shelf space to keep two pots side-by-side, you can use the direct cut method. This involves snipping the baby off first and then planting it. It’s a bit more stressful for the plant, but it works just fine for a healthy spiderette.
Select a baby that already has small, visible root nubs at the base. These nubs look like little brown or white pimples. Snip the runner about an inch (2.5 cm) away from the baby, then tuck the base of the plantlet into a pot of moist soil.
When using this method, I like to put the whole pot inside a clear plastic bag for the first week. This creates a mini-greenhouse effect, keeping the humidity high so the leaves don’t wilt while the roots are trying to find their footing.
The Water Propagation Technique
Water propagation is probably the most popular way to do this, mostly because it’s fun to watch the roots grow. It’s also very easy to see if something is going wrong. If the water gets cloudy or the base looks mushy, you know you need to act.
Find a small jar or a glass. I often use old spice jars or even shot glasses for the smaller babies. Fill it with filtered water or rainwater. Avoid using straight tap water if your city adds a lot of fluoride, as spider plants are famously sensitive to it.
DIY PROJECT: Collect rainwater no matter where you live...

This DIY project is the best way to legally collect rainwater NO MATTER where you live. Get chlorine-free water, cut down on your water bills, and have enough for an emergency situation or to water your garden. Read More Here...
Suspend the baby so only the very bottom (the root nodes) touches the water. You do not want the leaves submerged. If the leaves stay wet for too long, they will rot before the roots ever have a chance. You can use a piece of cardboard with a hole in it to keep the plantlet sitting high.
Place the jar in a spot with bright, indirect light. Avoid direct sunlight, which can heat the water too much and cook the delicate new roots. Change the water every 2 to 3 days to keep it oxygenated and to prevent algae from growing.
Once the roots are about 1 to 2 inches (2.5 to 5 cm) long, it’s time to move the plant to soil. Don’t wait too long. Roots grown in water are “softer” than soil roots. If they get too long in the jar, the plant will have a harder time adjusting to the density of dirt later on.
Benefits of Propagating Your Spider Plants
The most obvious benefit is the “infinite plant” factor. I haven’t bought a spider plant in twenty years, yet I have them in every room of my house. But there are deeper reasons to keep this cycle going.
Spider plants were the stars of the famous NASA Clean Air Study. Researchers found that these plants are exceptional at removing formaldehyde, xylene, and toluene from the air. By propagating more of them, you are literally building a better filtration system for your home.
Newer, younger plants often have more vigor than a ten-year-old mother plant that has become root-bound. By regularly starting new babies, you ensure that you always have “high-performance” plants that are growing at their maximum rate.
There is also a wonderful social benefit. A rooted spiderette in a pretty little pot makes the perfect “thinking of you” gift. It’s a piece of your home that you can share with a neighbor. It’s a low-pressure way to introduce someone to the joy of gardening.
Finally, propagation is a great way to “backup” your plants. If a pest infestation or a watering accident takes out your main plant, having a few babies growing in other rooms means you haven’t lost your favorite variety for good.
Common Mistakes to Avoid
Even though these plants are tough, I see people make the same few mistakes over and over. The biggest one is choosing a baby that isn’t ready. If you pick a tiny plantlet that hasn’t developed those little brown root nodes yet, its chances of survival are much lower.
Another frequent error is “leaf drowning.” Whether in soil or water, if the crown of the plant—where the leaves all meet at the base—is buried too deep or submerged, it will rot. The plant needs air just as much as it needs water.
Using the wrong kind of water is a subtle mistake. If you notice the tips of your new babies’ leaves are turning brown and crispy, it’s likely fluoride or chlorine from your tap. These chemicals build up in the leaf tips and eventually kill the tissue. Use distilled water or let your tap water sit out overnight before using it.
Don’t forget about light. A common misunderstanding is that because spider plants are “low light” plants, the babies can grow in a dark corner. That’s not true. Babies need energy to build roots. Give them bright, filtered light until they are established.
Over-fertilizing is another trap. You might think a boost of “plant food” will help the baby grow faster. In reality, the delicate new roots can be burned by the salts in synthetic fertilizers. Wait until the plant has been in its own pot for at least 4 to 6 months before you even think about feeding it.
Limitations of Spider Plant Propagation
While propagation is generally easy, it isn’t a magic wand. There are times when it simply won’t work well. For instance, trying to propagate in the dead of winter in a cold climate can be a struggle. The plants are naturally in a slower growth phase, and the lack of light makes rooting take twice as long.
The health of the mother plant is also a major limitation. If the mother is struggling with spider mites or scale, those pests will be on the babies too. You’ll just be propagating a problem. Always make sure your source plant is clean and healthy before you start.
Space is a practical boundary. Because these plants grow so fast, you can quickly find yourself “plant rich and space poor.” A single mother plant can produce 20 to 30 babies a year. Unless you have a lot of friends or a very large house, you’ll eventually run out of sunny windowsills.
Some varieties of spider plants are “shy” about producing babies. The variegated versions (with white stripes) tend to produce more spiderettes than the solid green ones. If you have a solid green variety, you might have to wait years for a runner, or you may need to use the “division” method instead.

Do you have some charcoal in your house right now? We call charcoal a “miracle leftover” for anyone who wants to be a little more self-sufficient and cut costs. That’s because it can help you with so many different things around the house and garden. You can even use it to make an energy-free fridge. Read More Here...
Spider Plant Variety Comparison
Not all spider plants are created equal. Depending on which one you have, your propagation experience might be slightly different. Here is a quick look at the common types I’ve grown over the years.
| Variety Name | Appearance | Propagation Speed | Best Feature |
|---|---|---|---|
| Vittatum | Green edges, white center stripe | Fast | Prophylific baby producer |
| Variegatum | White edges, green center | Moderate | Very elegant, arching look |
| Bonnie | Curled, “corky” leaves | Moderate | Compact, fits in small spaces |
| Solid Green | No variegation | Slow | Tolerates very low light |
Practical Tips for Best Results
If you want to see your babies grow into lush, full plants quickly, there are a few “old gardener” tricks I can share. First, don’t be afraid to put three or four rooted babies into the same pot. A single baby can look a bit thin for the first year. Planting them together gives you that “instant jungle” look.
Temperature matters more than you might think. These plants love a range between 65°F and 75°F (18°C to 24°C) during the day. If your propagation station is on a cold granite countertop or near a drafty window in winter, the roots will grow much slower. I sometimes use a seedling heat mat set to a very low temperature to speed things up.
When you move a water-rooted baby into soil, the first week is critical. The soil should be kept “swampier” than usual for those first 7 days. You are transitioning the roots from 100% water to 50% water. If you let the soil dry out immediately, the water-roots will shrivel and the plant will die.
I also recommend using a “soilless” potting mix for propagation. A blend of peat moss or coco coir with plenty of perlite provides the perfect balance. It holds enough moisture to keep the plant happy but allows enough air to reach the new roots so they don’t rot.
Advanced Considerations: Triggering More Babies
Once you get the hang of propagation, you might find yourself wanting even more spiderettes. The secret to getting a spider plant to “throw” runners is a combination of light and root conditions.
Spider plants are most likely to produce babies when they are slightly root-bound. If you put a small plant in a massive pot, it will spend all its energy growing roots to fill that space. If the roots are snug in the pot, the plant realizes it has no more room to grow “down” and decides to grow “out” by sending out runners.
Light cycles also play a role. In their natural environment, spider plants often bloom and produce plantlets in response to shorter days. Some gardeners find that giving their plants a “rest” with less light in the autumn triggers a massive explosion of babies in the spring.
If your plant is healthy but refusing to produce runners, check your fertilizer. High-nitrogen fertilizers promote leaf growth but can actually discourage reproduction. Switch to a “bloom booster” style fertilizer with a higher phosphorus count for a month or two to see if that coaxes out some stolons.
Example: A Propagation Timeline
Let’s look at how this works in a real-world scenario. Say it’s early spring, and your mother plant has a few babies with 1/4-inch (0.5 cm) root nubs.
Day 1: You snip the baby and place it in a glass of rainwater. You set it on a kitchen windowsill that gets bright, indirect morning light.
Day 7: You notice the white roots have grown to about 1/2 inch (1.2 cm). You change the water because it’s looking a little dusty.
Day 14: The roots are now 1.5 inches (4 cm) long and have started to grow tiny “hair” roots off the main ones. This is the perfect time to plant.
Day 15: You pot the baby in a 4-inch (10 cm) pot with a mix of potting soil and perlite. You water it thoroughly and keep the soil damp.
Day 30: You notice a new leaf emerging from the center of the baby plant. This is the sign of success! You can now start letting the top inch (2.5 cm) of soil dry out between waterings.
Final Thoughts
Propagating spider plants is one of the most rewarding tasks you can take on in your indoor garden. It’s a low-risk way to practice your skills and a high-reward way to improve your living environment. There is something deeply satisfying about watching a tiny offshoot turn into a massive, arching beauty.
Remember that gardening is as much about patience as it is about technique. Some babies will take off like rockets, and others might take their time. Don’t get discouraged if one doesn’t make it; that’s why the mother plant gives you so many chances.
CASE STUDY: We've been living off the grid for the last 40 years...

In all that time an electric wire has never been connected to our house. We haven’t gotten or paid an electricity bill in over 40 years, but we have all the electricity we want. We grow everything we need, here, in our small backyard. We also have a small medicinal garden for tough times. Read More Here...
I encourage you to try at least two different methods—maybe water propagation for one and soil pinning for another. See which one fits your routine better. Once you master this, you’ll never look at a “messy” spider plant the same way again. You’ll see it for what it truly is: an abundant, living gift that keeps on giving.