
Why does your Peace Lily faint every week when it could be building its own water reserve? We’ve all seen it: one missed day of watering and your Peace Lily looks like it’s auditioning for a tragedy. But constant wilting isn’t just dramatic—it’s damaging to the plant’s long-term health. Stop the fainting cycle by switching from a fragile manual schedule to a resilient self-wicking system that mimics the consistent moisture of the tropical forest floor.
Walking through a greenhouse or a lush garden, you might notice that the most vibrant plants aren’t the ones being coddled with a watering can every hour. Instead, they are often the ones connected to a steady, silent source of hydration that works beneath the surface. For a plant like the Peace Lily (Spathiphyllum), which hails from the humid understory of Central and South American rainforests, the “feast or famine” cycle of traditional watering is a constant stressor.
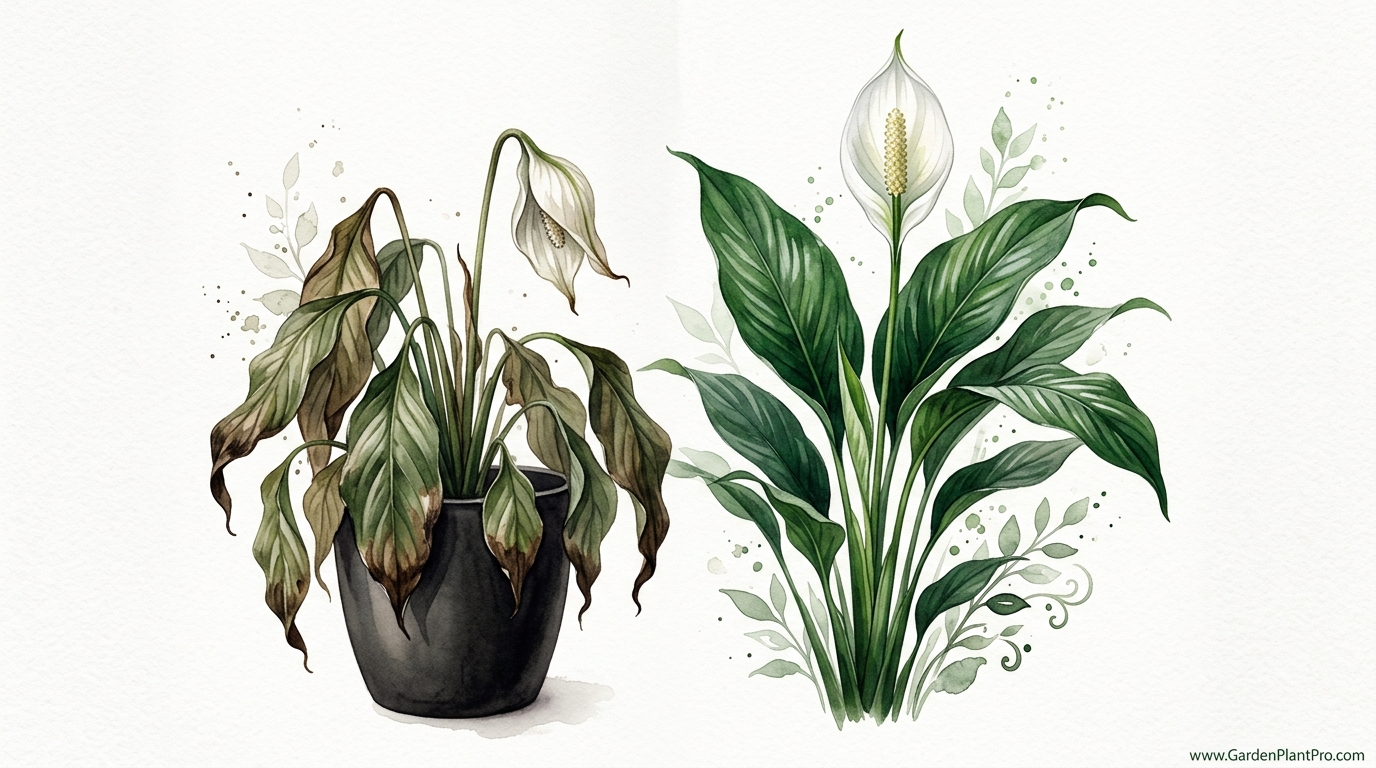
When we talk about a plant “fainting,” we are really talking about a loss of turgor pressure. Think of the plant’s stems like fire hoses; when they are full of water, they are stiff and upright. When the water level drops, they go limp. A self-wicking system ensures those “hoses” stay pressurized around the clock without you having to lift a finger more than once every couple of weeks. This guide will walk you through how to transform your dramatic houseplant into a steadfast bloom by using simple physics and a bit of DIY grit.
How To Stop Peace Lily Wilting
Stopping the wilting cycle requires moving away from reactive care and toward a proactive environment. In the gardening world, a self-wicking system is a method of irrigation that uses capillary action to pull water from a reservoir up into the plant’s root zone. This isn’t just a fancy pot; it is a way to replicate the way soil naturally draws moisture from the earth’s water table. Instead of waiting for the soil to dry out and then drenching it, the wicking system provides a “sipping” mechanism that allows the plant to take exactly what it needs, when it needs it.
Peace Lilies are famous for being “drama queens” because they have high transpiration rates. Transpiration is the process where water evaporates from the leaves, acting like a straw that pulls more water up from the roots. In a standard pot, once the soil moisture drops below a certain point, that “straw” starts sucking air, and the plant collapses. By installing a wick, you ensure the “straw” is always dipped in a fresh glass of water. This creates a state of steadfast bloom where the plant can focus its energy on growing lush green leaves and those iconic white spathes rather than constantly recovering from near-death experiences.
In real-world terms, this system is a lifesaver for office workers, frequent travelers, or anyone who simply finds it hard to keep up with the demands of a thirsty plant. It changes the conversation from “Did I water the plant today?” to “Is there water in the reservoir?” This shift in perspective is the first step to becoming a more successful indoor gardener.
The Science of the Sip
Understanding why this works helps you troubleshoot later. Capillary action is the same force that causes a paper towel to soak up a spill even if only the corner is touching the liquid. In a wicking pot, a porous material—usually a rope or a specialized soil mix—acts as the bridge. Because the water molecules like to stick to each other and to the surface of the wick, they travel upward against gravity. This provides a slow, steady delivery of moisture that keeps the soil consistently damp but rarely “swampy” if designed correctly.
How It Works: Building Your Self-Wicking System
Setting up a self-wicking system doesn’t require a degree in engineering, but it does require attention to detail. You can buy pre-made self-watering pots, but building your own allows you to customize the reservoir size and the soil blend to fit your specific home environment. Here is a step-by-step breakdown of how to build a high-performance wicking setup for a standard Peace Lily.
Step 1: Gather Your Materials
To build a robust system, you will need an inner pot (the one with drainage holes where the plant lives) and an outer pot or reservoir that is slightly larger. You will also need a wicking material. Braided nylon or polyester rope works best because it won’t rot as quickly as cotton. Aim for a rope diameter of about 0.5 cm to 1 cm (1/4 to 3/8 inches). Finally, you will need a fill tube—a simple piece of PVC pipe or even a sturdy plastic straw—that reaches from the top of the pot down into the reservoir.
Step 2: Prepare the Wick
Cut a length of rope that is long enough to reach from the bottom of your reservoir, up through the drainage hole of the inner pot, and about halfway up into the soil. For a 15 cm (6 inch) pot, a 30 cm (12 inch) wick is usually plenty. Before you install it, soak the wick in water. This “primes” the capillary action, making it easier for the water to start its journey upward once the system is assembled.
Step 3: Installation
Thread the wick through one of the drainage holes in the inner pot. If your pot only has one central hole, you can use that. If it has several, choose one toward the center. Pull the wick through so that a good portion—about 10 cm (4 inches)—will sit submerged in the reservoir. Inside the inner pot, coil the remainder of the wick in a circle. This ensures the moisture is distributed evenly throughout the root zone rather than just in one small spot.
Step 4: The Fill Tube and Potting
Place your fill tube in the corner of the inner pot. This allows you to pour water directly into the bottom reservoir without wetting the top of the soil, which helps prevent issues like fungus gnats. Hold the tube and the wick in place as you add your specialized wicking soil. Once the pot is about one-third full, place your Peace Lily inside, spreading the roots gently. Fill the rest of the pot with soil, firming it down lightly to ensure good contact between the roots, the soil, and the wick.
The Secret Sauce: Soil Mix for Wicking
One of the most common mistakes gardeners make with wicking systems is using standard, heavy “potting soil” from a big-box store. Those mixes often contain too much peat or real soil, which can compact and become anaerobic (oxygen-deprived) when kept constantly moist. For a Peace Lily in a wicking system, you need a mix that is “chunky” and aerated.
A reliable “Jungle Mix” for wicking systems consists of:
- 60% Coco Coir: This is the base. It holds moisture brilliantly but doesn’t compact as easily as peat moss.
- 30% Coarse Perlite: These white volcanic “stones” provide the air pockets that roots need to breathe.
- 10% Worm Castings or Compost: This provides a slow-release, gentle nutrient source.
By using this airy mix, you ensure that even though the wick is constantly bringing up water, there is still enough oxygen in the soil to prevent the roots from suffocating. If the mix feels too dense, don’t be afraid to add more perlite or even some orchid bark (about 1–2 cm / 0.5–1 inch in size) to break things up.
Benefits of the Self-Wicking Approach
Switching to a self-wicking system offers more than just convenience; it fundamentally changes the plant’s physiology. When a Peace Lily wilts and revives repeatedly, it develops micro-tears in its vascular system. Over time, this leads to brown leaf tips and smaller, stunted growth. By providing a constant moisture level, you eliminate this “vascular stress.”
- Consistent Hydration: The soil moisture level stays at a near-perfect 70–80% saturation, which is the “sweet spot” for tropical aroids.
- Deep Root Growth: In traditional top-watering, roots often stay near the surface where the water is. In a wicking system, the moisture comes from below, encouraging the roots to grow deep and strong to “chase” the water source.
- Water Efficiency: Because the reservoir is enclosed, there is very little evaporation. You end up using about 30% less water than you would with traditional watering.
- Vacation Friendly: Depending on the size of your reservoir, a Peace Lily in a wicking pot can often go 14 to 21 days without a refill.
Challenges and Common Mistakes
Even though this system is powerful, it isn’t “set it and forget it” forever. The most frequent issue gardeners face is root rot. This usually happens because the reservoir was kept too full, submerging the bottom of the inner pot. In a true wicking system, there should be an air gap between the bottom of the inner pot and the surface of the water in the reservoir. Only the wick should be touching the water.
Another pitfall is algae growth. If your reservoir is made of clear plastic or glass, sunlight will hit the water and cause green algae to bloom. While not always harmful to the plant, algae can clog the wick and make the water smell swampy. Always use an opaque (non-see-through) container for your reservoir, or wrap a clear one in dark paper or fabric to block the light.
Finally, watch out for mineral buildup. Because water is constantly evaporating from the leaves, but the “source” water is in the reservoir, salts and minerals from your tap water can build up in the soil over time. You might notice a white, crusty film on the surface of the soil. To fix this, simply “flush” the pot once every three months by pouring plenty of fresh, distilled or rainwater through the top of the soil until it runs out the bottom, then empty the reservoir and start fresh.
DIY PROJECT: Collect rainwater no matter where you live...

This DIY project is the best way to legally collect rainwater NO MATTER where you live. Get chlorine-free water, cut down on your water bills, and have enough for an emergency situation or to water your garden. Read More Here...
Limitations: When Wicking Isn’t the Answer
While Peace Lilies thrive in these systems, not every environment is a good fit. If you live in an extremely cold climate and keep your plants on a drafty windowsill, a wicking system can be dangerous. Cold water and constant moisture are a recipe for fungal infections. If the ambient temperature regularly drops below 15°C (60°F), the plant’s metabolism slows down, and it may not be able to process the water fast enough, leading to “wet feet.”
Additionally, if your Peace Lily is already suffering from an active case of root rot, do not put it in a wicking system immediately. You must first treat the rot by trimming away mushy, black roots and repotting in a dry, sterile medium. Only once the plant has established new, white, healthy roots should you transition it to a self-watering setup.
Practical Tips for Success
To get the best results, treat your wicking system like a precision tool. Here are a few “neighborly” tips I’ve picked up over the years:
- Use Rainwater: Peace Lilies are sensitive to fluoride and chlorine found in city tap water. If you can, collect rainwater or use distilled water. It prevents those annoying brown “crispy” tips.
- Monitor the “Suck”: Every time you refill the reservoir, take a peek at the wick. If it feels slimy or looks black, it’s time to replace it. A healthy wick should look just like it did when you put it in, just wet.
- The Finger Test: Even with a wick, check the top inch (2.5 cm) of soil occasionally. It should feel slightly cool and damp. If it’s bone dry, your wick might have a gap or “bridge” where it isn’t touching the soil properly.
- Fertilize Lightly: Because the system is closed, fertilizer doesn’t wash away. Use a liquid fertilizer at 1/4 the recommended strength once a month during the growing season. Too much will burn the roots.
Advanced Considerations: Scaling Up
For those with large, floor-standing Peace Lilies, a single rope wick might not be enough. As a plant grows, its water demand increases exponentially. For a large specimen in a 30 cm (12 inch) pot, I recommend using three or four separate wicks distributed around the pot. This ensures that the entire root ball stays hydrated, not just one side.
You can also experiment with different wicking materials. While nylon is standard, some gardeners swear by microfiber strips cut from old towels or specialized “capillary matting” used in commercial greenhouses. The principle remains the same: whatever material you choose must be able to hold water and transport it effectively through its fibers.
Example Scenario: The 14-Day Test
Imagine you have a medium-sized Peace Lily in a 20 cm (8 inch) pot. Usually, you water it every 4 days. By day 5, it’s wilting. You decide to build a wicking system using a 1-liter (approx. 1 quart) reservoir.
After the first week, you check the reservoir. It’s half empty. The plant looks perfectly upright—no fainting. By day 14, the reservoir is nearly empty, and the plant is still turgid and green. You have successfully tripled the “autonomy” of your plant while providing a more stable environment. This is the power of the wicking system in action. Instead of a series of “emergencies,” you have a predictable maintenance cycle.
Final Thoughts
Transitioning your Peace Lily to a self-wicking system is one of the kindest things you can do for a plant that thrives on stability. It moves you away from the stress of the DRAMATIC FAINT and into a world of STEADFAST BLOOM. It’s a project that takes less than an hour but pays dividends in the form of glossier leaves and more frequent flowers for years to come.
Don’t be afraid to experiment with your soil mixes or reservoir sizes. Gardening is as much about observing and adjusting as it is about following rules. If you notice your plant looks a bit too wet, add more perlite next time. If it’s still drooping, try a thicker wick. The goal is to create a small, self-sustaining piece of the rainforest right in your living room.
As you master this technique, you might find yourself looking at your other houseplants with a wicking eye. Pothos, ferns, and African Violets all love this system. Once you understand the balance of water, air, and capillary action, you’re well on your way to a garden that looks after itself, leaving you more time to simply sit back and enjoy the greenery.