
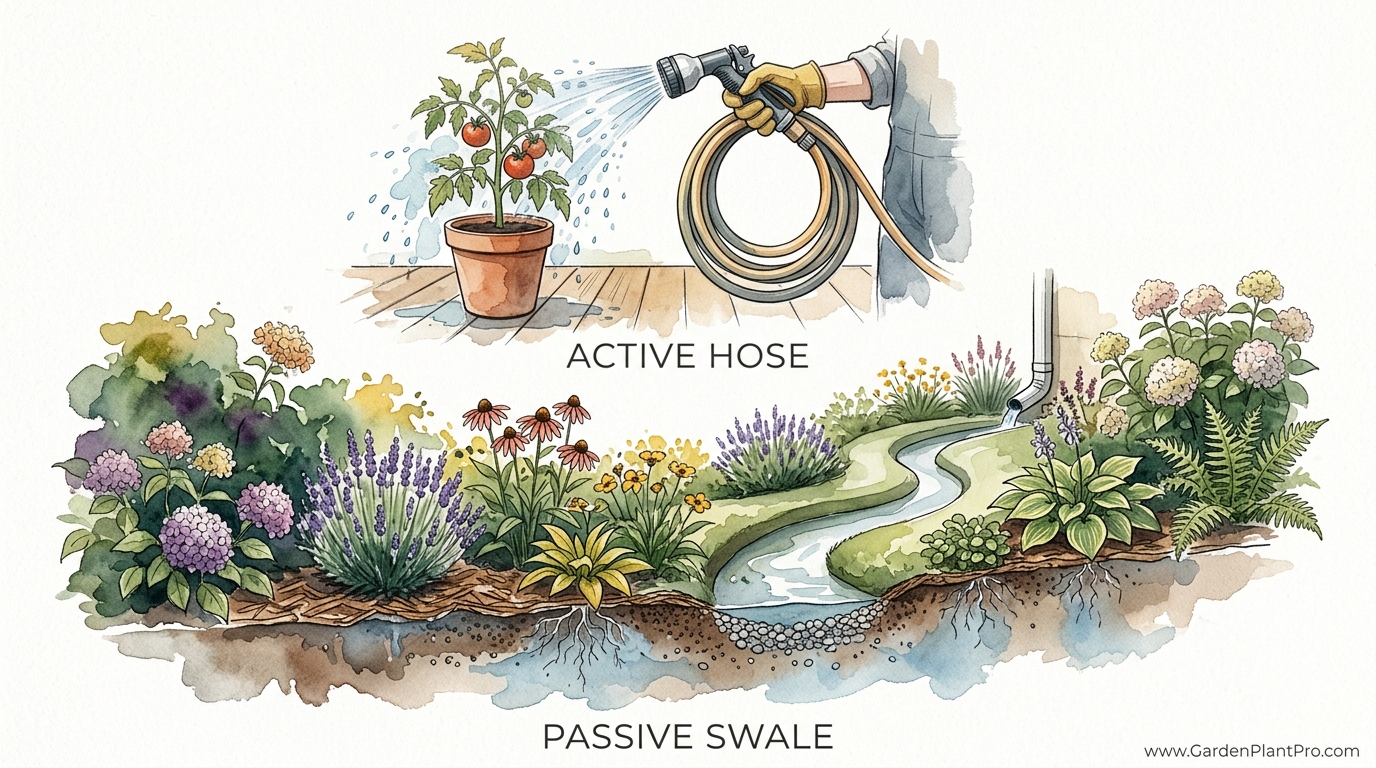
Are you paying for a water bill just to see it evaporate before it reaches the roots? Most gardeners are stuck in an ‘Active’ cycle: paying for municipal water and spending hours dragging hoses only to lose half that water to runoff. ‘Passive’ irrigation turns your landscape into a living sponge. Through the use of swales and earthworks, you capture every drop of rain and store it in the ground, creating a self-watering system that survives even the harshest droughts while your neighbors’ plants wither.
In my forty years of working this patch of earth, I have seen too many folks treat rain as a problem to be drained away rather than a gift to be banked. This transition from “hosing the garden” to “preparing the landscape” is the most profound change a steward can make. It shifts your role from a constant life-support technician to a designer of a self-sustaining ecosystem.
Passive Rainwater Harvesting For Gardens
Passive rainwater harvesting is the practice of shaping the land to slow, spread, and soak water into the soil rather than collecting it in tanks. It turns the very ground beneath your feet into a reservoir. While active systems rely on gutters, pipes, and barrels, passive systems use simple earthworks like basins, berms, and swales to intercept rain where it falls.
This approach exists because it mirrors how nature manages water. In an old-growth forest, the floor is uneven and covered in organic matter. This creates thousands of tiny “check dams” that hold water long enough for it to sink in. Modern yards, however, are often graded to be flat and smooth, which causes water to gain speed and race toward the street. Passive harvesting corrects this by reintroducing “texture” to the garden.
You will find these systems used everywhere from the arid deserts of the American Southwest to the high-rainfall hills of the Pacific Northwest. In dry climates, the goal is to store every rare drop in the soil to sustain plants through the summer. In wet climates, these same features manage heavy downpours, preventing erosion and keeping local watersheds healthy. Think of it as a biological battery; the soil is the storage medium, and the water is the energy that keeps the garden running during the lean times.
How It Works: The Principles of Earthworks
Understanding the way water moves across your property is the first step toward successful harvesting. Water always follows the path of least resistance and moves perpendicular to the contour of the land. Our goal is to interrupt that path.
A swale is perhaps the most famous passive feature. It is a ditch dug exactly on the “contour” of a slope. A contour is a level line where every point is at the exact same elevation. When water flowing downhill hits this level ditch, it can no longer go down. It stops, fills the ditch, and begins to seep vertically and horizontally into the soil.
The excavated soil from that ditch is placed on the downhill side to create a mound, or a “berm.” This berm acts as a secondary barrier and a prime planting location. While the swale bottom might get quite wet during a storm, the berm remains well-drained but stays hydrated from the “plume” of water soaking into the earth below it.
Soil behaves differently depending on its composition. Sandy soil acts like a sieve, absorbing water quickly but holding very little. Clay soil is the opposite; it holds a tremendous amount of moisture but takes a long time to let it in. Testing your soil’s infiltration rate—often called a “perc test”—is essential. Dig a hole 12 inches (30 cm) deep, fill it with water, and see how long it takes to drain. If it takes more than 24 hours, you have heavy clay and need to design shallower, wider basins to prevent drowning your plants.
Constructing the Living Sponge
Building these systems starts with a simple tool called an A-frame level. You can build one yourself using three pieces of scrap wood and a string with a weight at the end. This tool allows you to walk your property and mark out lines that are perfectly level.
Finding the contour is the most critical step. If your swale is not level, the water will simply run to the lowest point, pile up, and eventually “blow out” the berm, causing a muddy mess. Once you have marked your level lines with stakes or flags, you can begin the physical work.
Digging should always begin at the highest point of your property. This allows you to catch the water before it gains speed. For a standard backyard, a swale that is 1 foot (30 cm) deep and 2 feet (60 cm) wide is often sufficient. Use the soil you remove to build the berm on the downhill side. Always remember to “de-compact” the bottom of your swale with a garden fork. Tightly packed soil won’t let water through, so loosening the floor of your trench is vital for infiltration.
Mulching the swale is just as important as digging it. Filling the trench with wood chips or straw prevents the sun from baking the soil and provides a home for the fungi that help transport water to your plants’ roots. Over time, this organic matter breaks down, creating a rich, spongy soil that can hold even more moisture.
Benefits of Passive Harvesting
Choosing this approach offers measurable advantages over traditional irrigation. The most immediate benefit is the reduction in your water bill. By banking winter and spring rains in the ground, you can often delay turning on the taps for weeks or even months.
Plants grown in passive systems tend to be more resilient. Because the water is stored deep in the soil, the plants develop deeper root systems to reach it. This makes them much less vulnerable to the “surface drying” that happens in a standard garden bed. I have found that my fruit trees planted on swale berms grow faster and produce more consistent yields during heatwaves than those on flat ground.
There is also the benefit of flood and erosion control. Heavy rain on a flat, bare lawn creates “sheeting,” where water picks up topsoil and carries it away. Earthworks break this cycle. They capture the sediment that water carries, effectively “mining” the uphill areas for nutrients and depositing them right where your plants can use them. Your garden becomes a filter, cleaning the water before it eventually replenishes the local groundwater table.
Challenges and Common Mistakes
Experience has taught me that the biggest mistake is “undersizing” the system. A 1,000 square foot (93 square meter) roof can shed over 600 gallons (2,270 liters) of water from just one inch (2.5 cm) of rain. If you direct a downspout into a tiny swale, it will overflow in minutes. Always calculate your potential runoff before you start digging.
Another frequent error is building too close to foundations. Water is a powerful force. Soaking hundreds of gallons of water into the ground right next to your house can lead to cracked foundations or flooded basements. Always keep your earthworks at least 10 feet (3 meters) away from any permanent structure.
Failure to plan for “overflow” is the final major hurdle. Every passive system will eventually fill to capacity during a major storm. You must design a dedicated, stabilized “spillway”—a low point lined with rocks—where excess water can safely exit the system. Without a spillway, the water will find its own way out, usually by carving a hole through your carefully constructed berm.
DIY PROJECT: Collect rainwater no matter where you live...

This DIY project is the best way to legally collect rainwater NO MATTER where you live. Get chlorine-free water, cut down on your water bills, and have enough for an emergency situation or to water your garden. Read More Here...
Limitations and Constraints
Passive irrigation is not a universal solution. If your land is extremely steep—slopes greater than 15 to 20 percent—passive earthworks can actually increase the risk of landslides. Sapping a steep hillside with thousands of gallons of water can lubricate the layers of soil and cause the whole slope to move. In these cases, smaller, more frequent “micro-basins” are safer than long swales.
Soil type also dictates feasibility. In areas with very high water tables, digging a swale might just result in a permanent, mosquito-breeding ditch. If your soil is already saturated, there is no “room” for the rain to go. Similarly, in areas with “caliche” or hardpan layers, you might need to break through that impermeable crust before the system will function.
Legal constraints are a reality in some regions as well. While most places encourage passive harvesting, some municipalities have strict rules about how much you can alter the natural flow of water. Always check your local codes, especially if you plan on diverting water that would normally flow into a neighbor’s yard or a public roadway.
Comparison: Active vs. Passive Systems
It helps to see how these two philosophies stack up side-by-side. While most gardeners use a mix of both, understanding the trade-offs is essential for long-term planning.
| Feature | Active Harvesting (Tanks/Hoses) | Passive Harvesting (Earthworks) |
|---|---|---|
| Initial Cost | High (Tanks, pumps, plumbing) | Low (Shovel, mulch, labor) |
| Storage Capacity | Limited by tank size | Large (Soil can hold 20-50% its volume) |
| Maintenance | High (Cleaning filters, winterizing) | Low (Clearing debris, mulching) |
| Complexity | Medium to High | Low to Medium |
| Longevity | Plastic/Metal degrades over time | Improves with age as soil life grows |
Practical Tips for Success
Start small. I always tell my neighbors to start with one single basin or a short “boomerang” berm around one tree. Watch how it behaves during a rainstorm. Does the water soak in within 24 hours? Does the overflow go where you expected? Learning from one small feature is much easier than fixing a whole hillside of mistakes.
Use “bio-indicators” to help you plan. Look at where the grass stays greenest in the summer—that is a natural low point where water is already collecting. Enhance what nature is already doing rather than fighting against the land’s natural tendencies.
Keep your organic matter levels high. Passive harvesting is only half the battle; the other half is soil health. Soil with 5% organic matter can hold eight times more water than soil with 1% organic matter. Integrating composting and heavy mulching into your earthworks will double their efficiency. Mentioning the importance of soil health to your gardening friends will often lead to better results for the whole neighborhood.
Advanced Considerations
Serious practitioners often move beyond simple swales to “Keyline” design. This involves a more complex understanding of topography to move water from wet valleys to dry ridges. While it is usually applied on a farm scale, the principles of shifting water horizontally across a landscape can be adapted to large residential lots.
Integrating “Hugelkultur” into your berms is another advanced strategy. By burying large logs and woody debris inside your berm, you create a long-term moisture reservoir. As the wood slowly decays, it acts like a sponge within a sponge, holding water for years and releasing nutrients slowly.
Consider the “Net-and-Pan” system for orchards. This involves a series of interconnected basins that catch water from a wide area and direct it into deep “pans” where individual trees are planted. This is particularly effective in arid regions where every square inch of the landscape must act as a catchment for the precious few trees you are growing.
Example Scenario: The suburban “Sponge”
Imagine a typical suburban yard of about 5,000 square feet (465 square meters). The house has a 1,500 square foot (140 square meter) roof. In a region that gets 20 inches (500 mm) of rain a year, that roof alone sheds nearly 19,000 gallons (72,000 liters) of water.
The gardener decides to disconnect two downspouts. Instead of letting that water run down the driveway, they dig a series of three shallow basins, each 6 inches (15 cm) deep and 4 feet (1.2 meters) wide, connected by a rock-lined swale.
In the first basin, which gets the most water, they plant moisture-lovers like Elderberry or Willow. The overflow travels to the second basin, where they plant fruit trees on the berms and Comfrey in the bottom. By the time the water reaches the third basin, most of it has soaked in. The gardener hasn’t bought a single tank; they have simply moved the water from the roof into the “underground tank” of their soil. Within two years, the trees are flourishing without any supplemental water, even during the dry August heat.
Final Thoughts
Transforming your garden into a living sponge is a journey of observation. It requires you to put on your raincoat, go out into the storm, and see where the water is trying to go. There is a deep satisfaction in seeing a muddy torrent turn into a gentle, soaking pool that you know will sustain your garden for the months to come.
This practice is more than just a way to save money; it is a way to rebuild the broken water cycles of our neighborhoods. When we hold rain on our land, we reduce the pressure on city storm drains and help prevent the pollution of our local creeks and rivers.
I encourage you to grab a shovel and find a level line. Start with a single basin. Watch the water. Once you see the soil drink its fill and your plants respond with vigorous, deep-green growth, you will never look at a rain cloud the same way again. It isn’t just weather; it is your garden’s future, falling right from the sky.