
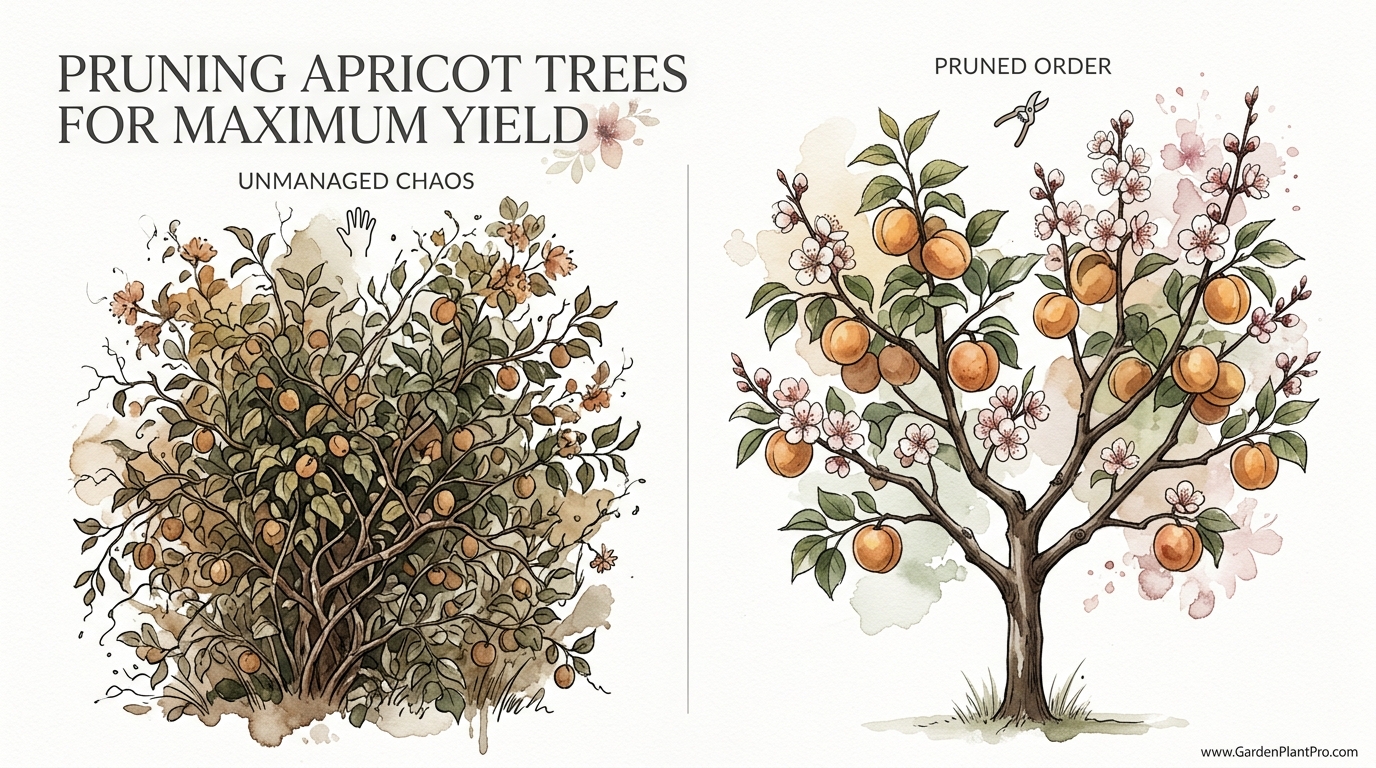
Is your apricot tree wasting its energy on leaves instead of fruit? Most gardeners are afraid to cut their apricot trees, but leaving them to grow ‘wild’ is the fastest way to get a harvest of sour, tiny fruit. Moving from chaos to order allows the sun to do the heavy lifting for you.
I have spent many years standing in my orchard with a pair of shears in one hand and a thermos of tea in the other. If there is one thing I have learned from watching dozens of apricot seasons come and go, it is that a tree left to its own devices will eventually become its own worst enemy. It grows thick, tangled, and dark, becoming a playground for fungus rather than a factory for fruit.
Pruning is not just about making the tree look neat for the neighbors. It is about a fundamental shift in how the tree uses its resources. You are essentially acting as a traffic controller, directing the flow of sap away from useless ‘water sprouts’ and toward the branches that actually put food on your table. It is a rewarding process once you understand the rhythm of the tree.
Pruning Apricot Trees For Maximum Yield
Pruning apricot trees for maximum yield is the intentional practice of removing specific branches to improve the tree’s health and increase the quality and quantity of its fruit. In the gardening world, we often talk about ‘thinning’ and ‘heading’ cuts. For an apricot, these techniques are the difference between a tree that struggles to keep its limbs off the ground and one that stands proud with a heavy, sweet harvest.
Apricot trees are unique among stone fruits because they are particularly vigorous. Left unmanaged, they can easily reach heights of 20 to 30 feet (6 to 9 meters), making harvesting a dangerous game of ladder-climbing. Proper pruning keeps the fruit within reach—usually at a manageable height of 8 to 12 feet (2.4 to 3.6 meters). This ensures that every piece of fruit gets the 10 to 12 hours of sunlight it needs to develop those deep sugars we all crave.
Think of your tree as a living solar panel. The leaves are the collectors, but if the outer leaves shade the inner ones, the interior of the tree becomes a ‘dead zone’ where no fruit can ripen. Pruning removes that internal clutter. This practice is used everywhere from small backyard raised beds to massive commercial orchards in regions like California, Turkey, and Australia. While the scale changes, the biological needs of the tree remain the same.
The Essential Timing: When to Make Your Move
Timing is perhaps the most debated topic among apricot enthusiasts. Most fruit trees, like apples and pears, are traditionally pruned in the dead of winter when they are dormant. Apricots, however, play by a different set of rules. I have seen many well-meaning gardeners lose a prize tree because they pruned it during a wet winter, opening the door for diseases that love cold, damp wood.
The Case for Late Summer Pruning
Late summer, specifically July or August in the Northern Hemisphere (January or February in the Southern Hemisphere), is often the best window for established trees. Pruning immediately after the harvest allows the tree to heal its wounds while the sap is still flowing and the weather is dry. This rapid healing acts as a natural seal against fungal spores. It also helps control the tree’s size, as summer pruning removes the foliage that would have fueled even more growth later in the season.
Late Winter and Early Spring Considerations
Late winter pruning—just as the buds begin to swell but before they open—is the standard for young trees or for gardeners in very dry climates. This timing encourages vigorous growth, which is exactly what you want when you are trying to build the framework of a new tree. You must ensure there is a clear forecast of dry weather for at least 4 to 6 weeks. Moisture on a fresh cut is an invitation for bacterial canker and Eutypa dieback, two silent killers in the apricot world.
How It Works: Step-by-Step Pruning Techniques
Taking a saw to a tree can feel like surgery, and in many ways, it is. You want to be precise, clean, and purposeful. Following a logical order helps prevent ‘analysis paralysis’ when you are standing under a dense canopy of branches.
Step 1: The Three D’s
Start every pruning session by identifying the ‘Three D’s’: Dead, Damaged, and Diseased wood. These branches are a drain on the tree’s immune system and provide entry points for pests like the peach twig borer. Cut these back to healthy wood, making sure to look for the green ‘cambium’ layer under the bark to ensure you have reached the living part of the tree. If you see dark or honey-colored staining in the wood, keep cutting back until the center of the branch is clean and creamy-white.
Step 2: Thinning for Airflow
Move to the interior of the tree and look for branches that are growing straight up or straight into the center. These ‘water sprouts’ are vegetative thieves that will never grow fruit. Removing them opens up the center of the tree, creating what we call an ‘Open Vase’ shape. You should be able to look through the tree and see the sky. This airflow is vital; it dries out the leaves after a rain or heavy dew, which drastically reduces the risk of brown rot and shothole disease.
Step 3: Managing the Scaffolds
Identify your main ‘scaffold’ branches. These are the 3 to 5 heavy limbs that form the primary structure of the tree. These branches should ideally grow outward at a 45-degree angle. Angles that are too narrow (V-shapes) are weak and prone to splitting under the weight of a heavy crop. If you have two branches competing for the same space, choose the one with the better angle and remove the other entirely. This is called a thinning cut, and it is much better for the tree’s long-term health than simply shortening both branches.
Step 4: Heading Back for Strength
Shorten the remaining outward-growing branches by about one-third of their length. This is a ‘heading cut,’ and it stimulates the growth of new wood and fruiting spurs. Always make your cut about 1/4 inch (6 mm) above an outward-facing bud. This encourages the new branch to grow away from the center of the tree rather than back into the chaos you just cleared out.
Understanding Fruiting Wood and Spurs
Understanding where the fruit actually grows is the key to a massive yield. Apricots are interesting because they produce fruit on two types of wood: one-year-old wood (the growth from the previous season) and short, stubby ‘spurs’ that grow on older branches. These spurs are incredibly productive and can provide fruit for 3 to 5 years before they need to be replaced.
One-year-old wood is easy to spot—it is usually smoother and more brightly colored than the older, greyish bark. Depending on the variety of your tree, the flower buds might be clustered at the tip, the middle, or the base of this growth. I recommend watching your tree closely during the spring. Note where the blossoms appear. If your tree only fruits at the very tips of the branches, you should be very careful with heading cuts, or you might accidentally prune away your entire harvest for the year.
Spur management is an advanced skill that pays off. As spurs get older than five years, they become less productive and the fruit gets smaller. A good gardener will selectively prune back some of the older wood to encourage the tree to grow fresh, young spurs. This ensures a ‘rolling’ harvest where you always have wood at the peak of its productive life.
Benefits of Proper Pruning
The advantages of a disciplined pruning routine go far beyond aesthetics. When you take the time to manage your apricot tree, you are fundamentally changing its biology for the better.
- Increased Fruit Size: By reducing the number of potential fruiting sites, the tree can focus its limited energy on fewer, larger apricots. You get a bowl of “supermarket-sized” fruit rather than a bucket of “marbles.”
- Better Sugar Content (Brix): Sunlight is the primary driver of sugar production. Open canopies allow UV rays to hit the skin of the fruit, triggering the development of fructose and complex aromatics.
- Disease Resistance: Most stone fruit diseases thrive in stagnant, humid air. An open tree dries quickly and is much harder for fungal spores to colonize.
- Structural Integrity: Apricot wood is notoriously brittle. Heading back long branches prevents them from snapping under the weight of 50 lbs (22 kg) of fruit during a summer storm.
- Easier Harvesting: Keeping the tree at a “pedestrian height” means you can pick most of the crop with your feet firmly on the ground, reducing the risk of falls and making the job much faster.
Challenges and Common Mistakes
Even seasoned gardeners make mistakes. The most common error I see is ‘lions-tailing.’ This happens when a gardener removes all the small inner growth and leaves a tuft of leaves and fruit at the very end of a long, thin branch. This shifts the weight to the weakest part of the limb, almost guaranteeing a break when the fruit ripens.
DIY PROJECT: Collect rainwater no matter where you live...

This DIY project is the best way to legally collect rainwater NO MATTER where you live. Get chlorine-free water, cut down on your water bills, and have enough for an emergency situation or to water your garden. Read More Here...
Another frequent pitfall is leaving ‘stubs.’ When you cut a branch, you must cut it just outside the ‘branch collar’—that slightly swollen ring of bark where the limb meets the trunk. If you leave a 2-inch (5 cm) stub, the tree cannot grow over it. The stub eventually dies and rots, creating a direct pipeline for fungus to enter the heartwood of the tree. Always make clean, flush (but not recessed) cuts.
Over-pruning is a trap for the over-zealous. Removing more than 25% of the canopy in a single year can shock the tree into a defensive mode. It will respond by sending out dozens of vertical ‘water sprouts’ in an attempt to recover its lost leaf area. This creates more work for you next year and stresses the root system. Patience is a virtue in the orchard; if a tree is severely overgrown, it is better to fix it over a three-year period rather than all at once.
Limitations and Environmental Constraints
Pruning is a powerful tool, but it cannot solve every problem. Environmental factors play a huge role in how a tree responds to your cuts. In extremely hot, desert-like climates, over-pruning can lead to sunscald. This is essentially a “sunburn” on the bark of the main trunk, which can cause the bark to crack and peel, exposing the tree to borers.
Water availability is another constraint. A heavily pruned tree requires consistent moisture to fuel the new growth you have stimulated. If you are in the middle of a multi-year drought, it is often better to do very light thinning rather than major structural heading. You don’t want to encourage the tree to put out a flush of new growth that it cannot support with its current water supply.
Age also dictates what is possible. A 40-year-old apricot tree that has never been pruned has a very different “budget” for healing than a 5-year-old sapling. With older trees, the focus should be on stability and safety rather than trying to force it back into a perfect vase shape. Sometimes, the best you can do is keep the deadwood out and enjoy whatever fruit the old girl is still willing to give.
Tools of the Trade: A Practical Checklist
Good tools make for clean cuts, and clean cuts make for healthy trees. I always tell my neighbors that if you wouldn’t want a surgeon using a rusty knife on you, don’t use a rusty blade on your tree.
| Tool Type | Best For… | Maintenance Tip |
|---|---|---|
| Bypass Pruners | Branches up to 3/4 inch (19 mm) | Sharpen the blade every 100 cuts. |
| Loppers | Branches 1 to 2 inches (25-50 mm) | Use geared loppers for extra leverage. |
| Pruning Saw | Anything over 2 inches (50 mm) | Clean with alcohol between trees. |
| Pole Pruner | High branches without a ladder | Check the rope for fraying annually. |
Sanitation is non-negotiable. I keep a spray bottle of 70% isopropyl alcohol or a 10% bleach solution in my pocket. Every time I move from one tree to the next—or even after cutting a diseased branch on the same tree—I drench the blades. This simple step prevents the spread of bacterial canker, which can wipe out an entire orchard if you are careless.
Advanced Considerations: Fruit Thinning
Serious practitioners know that pruning doesn’t stop once the leaves come out. Fruit thinning is the “second pruning” that happens in late spring. Apricots often set far more fruit than they can possibly ripen. If you see clusters of five or six apricots touching each other, you must act. This is hard for beginners because it feels like you are “throwing away” food.
Aim for a distance of about 2 to 4 inches (5 to 10 cm) between each individual fruit. This prevents the branches from bowing and ensures that each apricot has enough leaf area to provide it with sugar. It also prevents “biennial bearing,” a cycle where a tree overproduces one year and is so exhausted that it produces nothing the next. By thinning the fruit, you keep the tree’s energy levels balanced year after year.
Example Scenario: Reviving the “Wild” Tree
Imagine a neighbor has a 10-year-old apricot tree that hasn’t been touched in five years. It is a thicket of crossing branches, and the fruit is only growing at the very top, 15 feet (4.5 meters) in the air. Here is how I would approach it over three seasons.
In Year One, we focus on the sky. I would remove the tallest central leaders, cutting them back to a strong outward-facing side branch at about 8 feet (2.4 meters). We would also remove any dead wood. We stop there, even if it still looks messy. This prevents the tree from going into shock.
In Year Two, we focus on the “floor.” We remove the low-hanging “skirt” branches that are touching the ground and any suckers growing from the rootstock. We then thin out about 20% of the crossing branches in the middle to let light into the center.
In Year Three, we fine-tune the spurs. We identify the old, grey, unproductive wood and remove it to make room for the new, vigorous growth that resulted from our Year One cuts. By the end of this third season, the tree is back to a manageable height, the light is reaching the trunk, and the fruit quality has skyrocketed.
Final Thoughts
Taking care of an apricot tree is a partnership. You provide the structure and the protection, and the tree provides the harvest. It takes a little courage to make those first few big cuts, but the tree will thank you with a flush of healthy new growth and fruit that actually tastes like it’s supposed to.
Don’t worry about making it look like a museum piece. Trees are resilient, and as long as you are keeping things clean, open, and manageable, you are doing a great job. Gardening is a lifelong learning process, and every cut you make this year will teach you something valuable for the next season.
Start small, keep your blades sharp, and watch how your tree responds. Before you know it, you’ll be the one sharing “over the fence” advice with your neighbors while you hand them a basket of the best apricots they’ve ever tasted. If you find yourself wanting to learn more, I suggest looking into soil health and irrigation methods, as a well-fed and well-watered tree is much more forgiving of a heavy-handed pruner.