
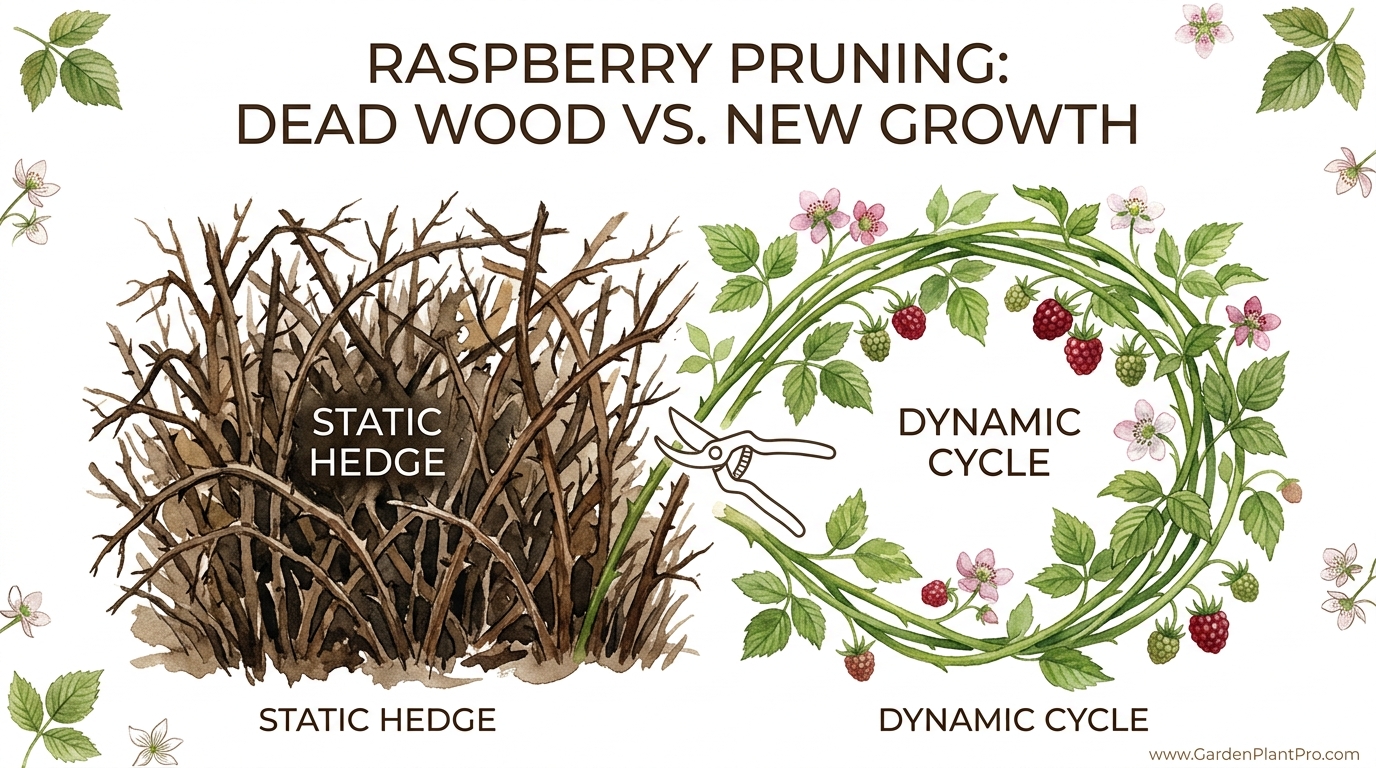
Is your berry patch a graveyard of old wood or a high-speed engine for fruit production? If you treat your raspberries like a static hedge, you’re growing wood, not food. Raspberries operate on a dynamic biennial cycle—the old wood becomes an ‘energy vampire’ that steals nutrients from next year’s harvest. Learn the difference between Floricanes and Primocanes to unlock a massive harvest.
I’ve spent many a spring morning out in my patch with a pair of shears and a steaming cup of coffee, looking at what most folks see as a chaotic tangle of thorns. To the untrained eye, a raspberry bush looks like a permanent fixture, much like a boxwood or a privet. But that’s the first mistake. If you view your berries as a static hedge, you’re fighting against their very nature. These plants aren’t meant to stand still; they are in a constant state of rebirth.
Every single cane you see has a predetermined expiration date. Understanding this “dynamic cycle” is the secret to moving from a handful of sour berries to bowls overflowing with sweet, sun-warmed fruit. It’s about more than just “cleaning up” the garden. It’s about directing the life force of the plant where it belongs. When we leave dead wood standing, we aren’t just looking at an eyesore—we are looking at a thief that blocks light, invites disease, and robs the roots of the energy they need to push out next year’s giants.
Raspberry Pruning: Dead Wood Vs. New Growth
At its heart, raspberry pruning is the art of telling the past from the future. Because raspberries have perennial roots but biennial canes, the wood you see today won’t be the wood you see three years from now. A single cane lives for only two seasons. In the first year, it’s a leafy green shoot called a primocane. In its second year, it turns woody, produces fruit, and is then known as a floricane. Once that floricane finishes its harvest, its job is done. It will never fruit again.
This biological reality means your patch is always half-dying and half-growing. If you don’t step in to manage that transition, the dead canes from last year will choke out the new shoots of this year. We call these old canes “energy vampires.” While they aren’t actively sucking sap in the way a parasite might, they act as a physical barrier to sunlight and a breeding ground for fungal spores like anthracnose or spur blight. By removing the dead wood, you clear the way for the new growth to thrive in a high-airflow, high-light environment.
Gardeners use this distinction to dictate exactly when and how to cut. In the real world, this means your pruning schedule isn’t just a “to-do” item for a Saturday in March; it’s a strategic intervention. Whether you’re growing in a tight suburban backyard or a sprawling rural garden, the goal is the same: maintain a narrow, productive row where every cane has the space to breathe and the light to photosynthesize at peak efficiency.
The Biology of the Biennial Cycle
To really understand why we prune, you have to look underground. The crown of the raspberry plant—the thick, woody part just at the soil line—is a storage depot for carbohydrates. During the late autumn and early winter, the plant pulls sugars down from the leaves and stems into this crown and the surrounding root system. This is why I always tell my neighbors not to prune too early in the fall. If you cut those canes while they’re still bronze or yellow, you’re throwing away the fuel the plant needs to survive a hard frost.
Once the plant is fully dormant, usually after a few good hard freezes, the connection between the cane and the crown becomes a one-way street. The cane has given all it can. By late winter or very early spring, before the buds begin to swell, you can see the clear difference between the canes that are ready to work and those that are ready to retire. This is the moment when the “dynamic cycle” requires your shears.
How to Identify and Prune Your Raspberries
Before you make your first cut, you need to know which “camp” your raspberries fall into. Generally, we deal with two main types: summer-bearing and ever-bearing (also called fall-bearing). Their pruning needs are different because their fruiting schedules are different. If you treat a summer-bearer like an ever-bearer, you might find yourself with a beautiful green bush and zero berries.
Identifying Your Variety
- Summer-bearing (June-bearing): These produce one heavy crop in early to mid-summer. They fruit ONLY on two-year-old wood (floricanes). If you cut everything to the ground in the spring, you will get no fruit that year.
- Ever-bearing (Autumn-bearing): These are the “overachievers.” They fruit on the tips of the first-year canes (primocanes) in late summer or fall, and then fruit again lower down on those same canes the following summer.
The Scratch Test and Visual Cues
If you’ve inherited a patch and have no idea what you’re looking at, use your senses. Dead wood is often grayish, brittle, and the bark might be peeling away in long, papery strips. If you snap a small side branch and it’s dry and brown all the way through, that cane is a goner. Live wood, even when dormant, has a certain “glow.” Red raspberries often have a purplish or deep brown hue to their live canes. If you’re still unsure, use your thumbnail to gently scratch a tiny bit of the bark away. If you see bright, moist green underneath, that cane is alive and well. If it’s tan or brown and bone-dry, it’s time to cut it out.
Step-by-Step Pruning for Summer-Bearing Types
For these varieties, the goal is to remove the “spent” wood and thin out the new growth to prevent overcrowding. I like to keep my rows about 12 to 18 inches (30 to 45 cm) wide. Anything wandering outside that line gets the boot.
- Remove Spent Floricanes: Look for the canes that have old, dried-up berry clusters at the tips. These are the ones that fruited last year. Cut them right at the soil line. Don’t leave a stub! Stubs are like open doors for pests and rot.
- Thin the Primocanes: Now you’re left with the fresh, green-to-brown canes that grew last year. They’ll be the ones fruiting this coming summer. Thin them so you have about 4 to 5 of the strongest canes per linear foot (30 cm) of row. Space them about 6 inches (15 cm) apart.
- Head Back the Tips: If the canes are towering 7 or 8 feet (2 meters) into the air, they’ll flop over under the weight of the fruit. I usually snip the tips off at about 5 feet (1.5 meters) or just above your highest trellis wire. This encourages the plant to put energy into side-branching, which means more berries at eye level.
Step-by-Step Pruning for Ever-Bearing Types
You have two choices here: the “Easy Way” or the “Double Crop Way.” Most home gardeners prefer the Easy Way because it’s nearly foolproof and results in a massive, high-quality fall harvest.
- The Easy Way (Single Fall Crop): In late winter or early spring, simply mow or cut every single cane down to the soil level. The plant will send up a fresh forest of primocanes that will fruit from late August until the first frost. This is the best method if you want a clean, manageable patch with minimal disease issues.
- The Double Crop Way: If you want a small summer harvest followed by a fall harvest, you only cut off the top 1/3 of the canes (the part that fruited last fall). The bottom 2/3 will fruit in the summer. Once that summer harvest is over, you must then cut those old canes to the ground to make room for the new fall-fruiting primocanes. It’s more work, but it keeps the berries coming for months.
Benefits of Proper Pruning
Why go through all this trouble? Well, if you’ve ever reached into a thick, unpruned raspberry patch only to come out with scratched arms and a handful of moldy berries, you already know the answer. Pruning is the single most effective way to increase the quality of your harvest.
Increased Fruit Size and Sugar Content: When a plant isn’t trying to maintain a massive amount of unproductive wood, it can focus all its carbohydrates on the fruit. This results in larger berries that are significantly sweeter. You’re essentially telling the plant, “Don’t build a skyscraper; build a candy factory.”
Pest and Disease Suppression: Fungi love stagnant, humid air. By thinning your canes to a 6-inch (15 cm) spacing, you allow the wind to whip through the patch. This dries out the leaves quickly after a rain, preventing the damp conditions that diseases like botrytis (gray mold) crave. It also makes it much harder for pests like the raspberry cane borer to hide.
Ease of Harvest: This is a big one for me as I get older. A well-pruned row is a joy to pick. The berries are visible, the thorns are manageable, and you aren’t fighting through a wall of dead sticks to find that one perfect cluster in the middle. You save time and your skin stays intact.
Challenges and Common Mistakes
Even the most well-intentioned gardener can trip up when faced with a wild bramble patch. The most common mistake I see is “The Haircut.” People take hedge trimmers and just shear off the top of the patch like they’re trimming a boxwood. This is a disaster for summer-bearers because you’re cutting off the very tips where the fruit buds are most concentrated.
Another pitfall is ignoring the suckers. Raspberries are ambitious. They will send “runners” or suckers 3 or 4 feet (about 1 meter) away from the main row. If you let these go, they will eventually turn your garden into a berry forest. You have to be ruthless. If a cane is growing in your path or in the middle of your carrots, dig it out or cut it down. Keep your rows narrow—no more than 18 inches (45 cm) wide—so you can always reach the center from either side.
Leaving “Horns” or Stubs: When you cut a cane, get as close to the dirt as you can. If you leave a 4-inch (10 cm) “horn” sticking out of the ground, that dead tissue will slowly rot. That rot can travel down into the healthy crown, weakening the entire plant. Plus, those little stubs are sharp! They’ll catch your ankles every time you walk by.
DIY PROJECT: Collect rainwater no matter where you live...

This DIY project is the best way to legally collect rainwater NO MATTER where you live. Get chlorine-free water, cut down on your water bills, and have enough for an emergency situation or to water your garden. Read More Here...
Limitations and Environmental Factors
The “perfect” pruning time can vary depending on where you live. If you’re in a region with extremely harsh, drying winter winds, you might actually want to leave the dead wood standing until the very end of winter. Why? Because those old canes can act as a natural snow fence, catching snow that provides moisture and insulation to the roots. In these climates, pruning in November could expose the crown to “freeze-thaw” cycles that can heave the plants out of the ground.
On the flip side, if you live in a very humid, rainy climate, you want to get that dead wood out as soon as the harvest is over. In the Pacific Northwest or parts of the UK, leaving spent floricanes standing through a wet autumn is an invitation for fungal diseases to settle in for the winter. You have to balance the need for winter protection with the need for hygiene based on your local weather patterns.
Also, consider your soil. Raspberries have shallow roots—90% of them are in the top 2 feet (60 cm) of soil. If your soil is heavy clay, you might notice more “die-back” from the tips during a wet winter. This isn’t necessarily a pruning error; it’s a drainage issue. Always look at the health of the wood before you decide how much to take off. If the top foot of a cane is shriveled and dark, cut back to where you see a healthy, fat bud.
Practical Tips for a Productive Patch
Pruning is only one part of the equation. Over the years, I’ve found a few “pro tips” that make the job easier and the results better. First, invest in a good pair of bypass pruners. Don’t use the anvil type that crushes the stem; you want a clean, surgical snip. I also highly recommend a pair of gauntlet-style leather gloves. Raspberry thorns are designed to catch and tear, and a good pair of gloves is the difference between a pleasant morning and a trip for a tetanus shot.
- Sanitation is Key: After you prune, don’t just leave the dead canes in a pile next to the patch. Burn them or haul them to the municipal compost. Many raspberry diseases survive the winter on dead wood. Moving them out of the garden breaks the cycle of infection.
- Mulch Like You Mean It: After your spring pruning, lay down a thick layer of organic mulch. I like to use a mix of compost and shredded bark. This keeps the shallow roots cool and moist, and it smothers the weeds that would otherwise compete for nutrients. Aim for a 3-inch (7.5 cm) layer, but keep it a few inches away from the actual canes to prevent rot.
- The Finger-Thickness Rule: When thinning your summer-bearing canes, prioritize the ones that are at least as thick as your pinky finger. Those skinny, whip-like canes will produce small, crumbly berries. The “fat” canes are the ones with the stored energy to give you those “supermarket-sized” fruits.
Advanced Considerations: Tipping and Training
For the serious practitioner, there is the concept of “Summer Tipping.” This is primarily used for black and purple raspberries, which have a much more aggressive, arching growth habit than red ones. When the new primocanes reach about 30 inches (75 cm) in height, you snip off the top 2 or 3 inches (5-7 cm). This “shocks” the cane into sending out lateral branches. In the winter, you then prune those lateral branches back to about 12 inches (30 cm).
Why do this? Because black raspberries fruit on these lateral branches. If you don’t tip them, you’ll end up with one long, 10-foot (3-meter) cane that fruits only at the very end, usually while lying on the ground. By tipping, you turn one cane into a “fruiting tree” with multiple branches, effectively tripling your yield per square foot. This requires a bit more attention in the heat of July, but the payoff in June is undeniable.
Trellising Systems: Don’t just let them flop. A simple “T-bar” trellis with two wires running at 3 feet (0.9 meters) and 5 feet (1.5 meters) is all you need. Tie your floricanes to the wires in the spring using soft twine or plastic clips. This keeps the fruit off the dirt and makes pruning so much easier because you can clearly see the structure of the plant.
Example Scenario: Restoring a Neglected Patch
I once helped a neighbor who had “inherited” a raspberry patch that hadn’t been touched in five years. It was a 10-by-10 foot (3-by-3 meter) square of solid thorns. If you find yourself in this situation, don’t panic. You can’t really “kill” a raspberry patch by pruning it too hard; they are incredibly resilient.
We started by defining the rows. We took a mower and cut two paths through the middle, leaving three rows that were each 18 inches (45 cm) wide. Then, we went in with loppers and removed every single gray, brittle cane we could find. We were left with about 20% of the original mass. We thinned the remaining green canes, gave the whole area a heavy dose of compost and 4 inches (10 cm) of wood chips, and watered it deeply. That first summer, the yield was modest, but by the second year, that “ruined” patch was producing more fruit than the neighbor knew what to do with. The lesson? When in doubt, cut it out. The roots are where the real power is.
Final Thoughts
Raspberry pruning often feels like a daunting task, but once you wrap your head around the biennial lifecycle, it becomes one of the most rewarding chores in the garden. It’s a chance to reset the clock and start fresh every single year. Remember, you aren’t just cutting away dead wood; you are clearing a path for the future. You are transforming a static, unproductive hedge into a dynamic, high-output engine for food.
Be patient with yourself as you learn to spot the difference between a primocane and a floricane. Your plants will forgive a few mistakes, and every season you’ll find your “eye” getting sharper. Before you know it, you’ll be the one leaning over the fence, explaining the “scratch test” to a curious neighbor. So, grab your shears, clear out those “energy vampires,” and get ready for a harvest that finally does justice to the work you put into the soil. Happy growing!