
Are you looking to add some interesting flavors to your vegetable garden? Rutabaga (or “swede”) is a great addition to any garden. Not only does it have a unique, sweet flavor, but it’s also packed with nutrition and easy to grow. In this guide, we’ll cover all the basics of growing rutabaga in your own vegetable garden.
A Brief History
Rutabagas, commonly referred to as Swedes, have been cultivated for many centuries. The crop is believed to have originated from a cross between the turnip and the cabbage, and was first documented in Europe in the early 1700s.
Since then, the crop has spread widely across the globe and is now grown in many countries. In North America, Swedes were introduced by early settlers from Europe. They quickly became an important food crop for settlers, providing a valuable source of nutrition during the winter months.
Today, Swedes are still grown in many parts of the world, including North America and Europe. They are also increasingly popular as a health food and can be found in grocery stores and farmer’s markets across the continent.
Nutritional Benefits
Rutabaga, or swede, is a nutritious vegetable that is part of the brassica family. A serving size of rutabagas (100 grams) has 36 calories and provides us with an excellent source of calcium, magnesium, potassium, vitamins C and E, folate and dietary fiber. Rutabaga also contains many beneficial phytochemicals that can help to support weight management, immunity, and healthy bowels.
Overall, rutabagas are a wonderful addition to any diet.
They provide us with essential vitamins and minerals that our bodies need to function at their best. Furthermore, growing them in your own garden means you have access to fresh produce all year round.
Common Varieties & Their Uses
When it comes to growing rutabaga, there are several common varieties to choose from.
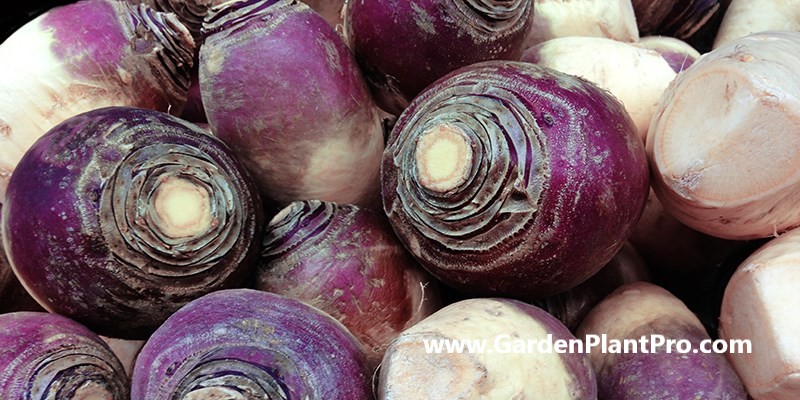
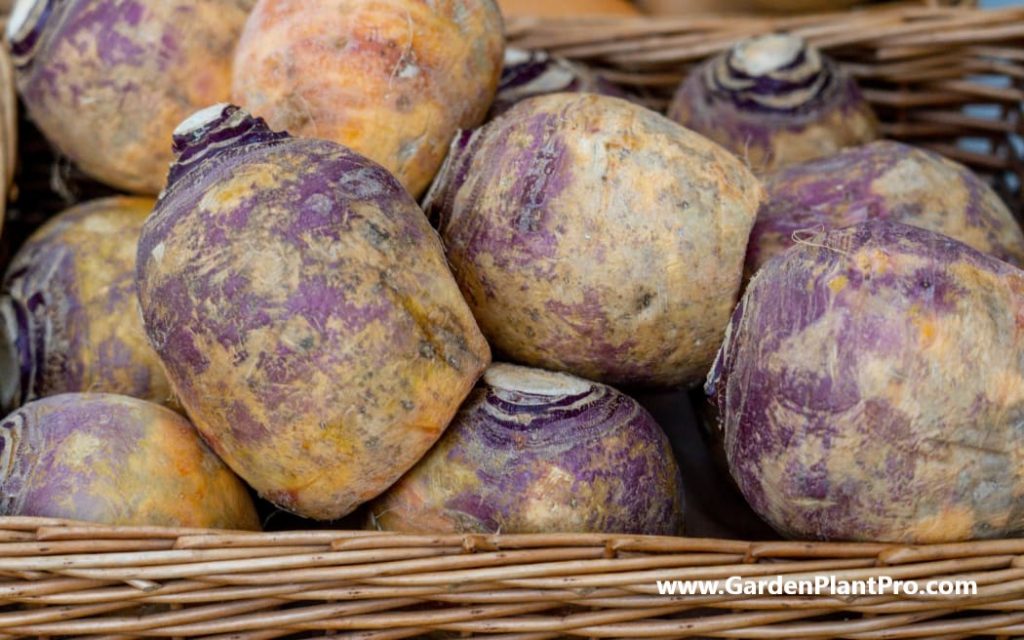
The most popular variety is the ‘Purple Top’ which is a standard root vegetable. It has a yellow flesh and a purple top and is easy to grow. It is a great choice for short season climates, as it matures in about 90 days.
Another popular variety is the ‘White Globe’, which has a white flesh and white top. It’s slightly larger than the Purple Top and takes slightly longer to mature, at around 95 days. It’s an excellent choice for cold winter climates, as its thick skin helps protect it from frost.
The ‘American Purple Top’ is another variety that has yellow flesh and purple tops and will mature in about 90 days. It’s well-suited for growing in most climates, as it’s hardy enough to withstand a few frosts.
The ‘Long Island Improved’ is also known as the ‘Long Island Rutabaga’. This variety has yellow flesh with a purple top and will take around 105 days to mature. It’s best suited for cold regions, as its thick skin helps it withstand frost damage better than other varieties.
Finally, the ‘Crimson Globe’ is also known as the ‘Red Globe’ or ‘Crimson Red’. This variety has red flesh and red tops and will take about 100 days to mature. It’s well-suited for cool climates, as its thick skin helps protect it from frost damage.
No matter which variety you decide to grow, they all need full sun and well-draining soil with plenty of compost incorporated into it before planting. They need plenty of water during the growing season, but should be kept moist but not soggy or waterlogged. Once established, they should be fertilized every couple of weeks with an all-purpose fertilizer or organic compost tea.
When To Sow
When it comes to sowing rutabaga, timing is everything. The best time to plant rutabagas is early to mid-summer, approximately three months before the first expected frost date. This allows for 10-12 weeks of growing time before the first fall frost. Rutabagas can also be planted in successive crops every 3-4 weeks to extend your harvest window.
It is important to choose a suitable location in the garden for your rutabaga planting. The soil should be well-draining, with a pH of 5.5 – 6.8 and rich organic matter added prior to sowing. Plant the seeds or seedlings 12-20cm (4-8 inches) apart and ensure the soil is kept consistently moist during germination and growth.
During germination and growth, be sure to water and fertilize your rutabaga plants regularly, as they require a good amount of nutrients and moisture to reach their full potential. It is also important to watch out for common pests and diseases and use beneficial companion plants to help keep them away.
Once the mature rutabagas have reached the desired size, they can be harvested by digging them up with a spade or fork. Be careful not to damage the roots as you do so and store them in an airtight container for up two months if necessary. With proper care, your home grown rutabagas will give you a bountiful harvest that can be used in all kinds of recipes.
Choosing A Suitable Location In The Garden
When choosing a suitable location in the garden for growing rutabaga, look for an area in full sun with well-drained soil. It should be open and sunny, with moist, free-draining soil that is very fertile.
DIY PROJECT: Collect rainwater no matter where you live...

This DIY project is the best way to legally collect rainwater NO MATTER where you live. Get chlorine-free water, cut down on your water bills, and have enough for an emergency situation or to water your garden. Read More Here...
The addition of garden compost or well-rotted manure can also help to improve the soil quality. If possible, avoid planting in areas where other root vegetables have been grown recently, as this can introduce pests and diseases that may affect your crop.
Preparing The Soil
Before sowing rutabaga (swede) seeds, it is important to prepare the soil. This can be done by adding organic fertilizer or composted material to the soil to ensure that it has adequate nutrients for the plants. Additionally, it is important to weed thoroughly and rake the soil level, firming it gently.
Swedes prefer a firm seedbed, so this step is essential in order to get the best results. It is also important to note that swedes are easier to grow than turnips, so this is a great vegetable for beginner gardeners.
Planting The Seeds Or Seedlings
Planting the seeds or seedlings of rutabaga (swede) is the next step in growing this hearty vegetable in your garden. Depending on your climate, you can either sow the seeds directly into rows or opt for seedlings.
If you are sowing the seeds directly, it is best to do so in midsummer for 10 to 12 weeks of growing time before the first fall frost. Rake and aerate the soil, plant seeds every few inches in rows, and then thin to six inches apart when seedlings are a few inches tall.
If you choose to buy seedlings, space them 12-20cm (4-8 inches) apart when planting. Be sure to account for the eventual size of each plant and leave enough room between them for growth.
Gently water after planting and ensure that your rutabagas are receiving adequate sunlight and water throughout their growing season.
Caring For The Seedlings
Once your rutabaga seedlings have germinated, it’s important to take good care of them. Water them regularly, as they need a consistent level of moisture to prevent the roots from drying out.
As the plants grow, you may need to thin out the weakest seedlings, leaving around 15-20cm spacing between each plant. This will allow the remaining plants enough room to grow. Keep weeds down with regular hoeing or mulching with compost or shredded bark.
You can also add a light fertilizer to the soil every few weeks to encourage strong growth. Fertilizers with a higher nitrogen content are best for promoting leafy growth, whereas those higher in potassium and phosphorus will help with root and tuber development.
Keep an eye on your crop for signs of pests and diseases. Common pests that attack rutabagas include aphids, cabbage loopers, flea beetles, and slugs. Common diseases include downy mildew and blackleg. If you spot any signs of pest or disease activity, take steps to control them quickly before they spread further.
Watering & Fertilizing
Once the rutabagas are planted, they will need to be watered regularly. The soil should be kept moist, but not wet. Overwatering can cause root rot and other diseases. It is recommended to give rutabagas about an inch of water per week.
Fertilizing should be done one month after planting the rutabagas. A good recommendation is to use 10-10-10 fertilizer at a rate of two to five pounds per 100 square feet. Half this amount should be used when fertilizing again a few months later.
It is important to note that too much fertilizer can cause the roots to become too large and tough, making them unappetizing when harvested. It is also important to keep weeds away from the rutabagas, as they can compete for nutrients in the soil.
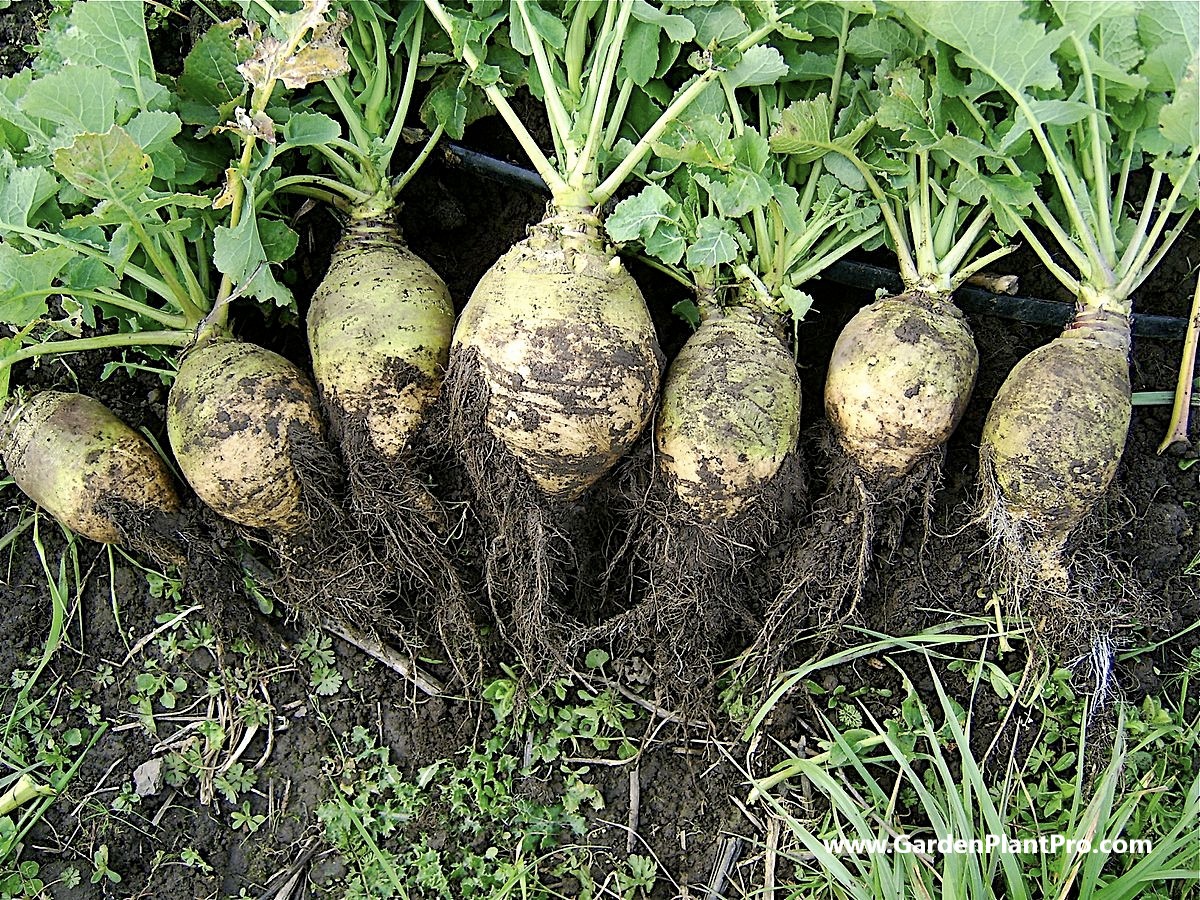
When & How To Harvest
Harvesting your rutabagas or swedes is an important part of the process.
The best time to harvest is 90 days after planting, or around the first or second frost as the flavor is improved with cold weather.
When harvesting, use a garden fork to loosen and lift the roots gently from the soil. Carefully cut off the leaves, leaving about an inch at the top of the root, and then rinse off any dirt before storing.

Do you have some charcoal in your house right now? We call charcoal a “miracle leftover” for anyone who wants to be a little more self-sufficient and cut costs. That’s because it can help you with so many different things around the house and garden. You can even use it to make an energy-free fridge. Read More Here...
Storing & Preserving
Storing and preserving your home-grown rutabagas is easy. The best way to store them is in a dry root cellar above 32°F (0°C).
If you don’t have a cellar, consider keeping them in the refrigerator in vegetable storage bags tucked into the crisper. For large harvests, store rutabagas in moist peat moss, sand, or sawdust.
To maximize their shelf life, keep your rutabagas and turnips out of direct sunlight and away from sources of heat. They will last up to six months if stored correctly.
Before using rutabagas or turnips that have been stored for an extended period of time, check for signs of spoilage such as softening or discoloration. It is best to discard any damaged vegetables before cooking.
Common Diseases & How To Control Them
Common diseases to rutabaga can include clubroot, blackleg, and black rot.
Clubroot
Clubroot is caused by a soil-borne fungus, Plasmodiophora brassicae, which affects the root system of the plant. Symptoms include stunted growth, yellowing of leaves, and twisted or distorted roots. To control clubroot, rotate crops with other vegetables that are not in the same family such as potatoes or carrots. You can also apply lime or sulfur to the soil to raise or lower the pH levels to make it less hospitable for the fungus.
Blackleg
Blackleg is caused by a bacteria called Erwinia carotovora, which causes wilting and rotting of stems near the base of the plant. To control blackleg, practice crop rotation and rid your garden bed of any debris from previous plants. It is also important to water your plants at their base and not on their foliage in order to reduce infection.
Black Rot
Black rot is caused by the fungus Xanthomonas campestris which causes dark spots on leaves and wilted stems. To control black rot, rotate your crops with other vegetables that are not in the same family such as potatoes or carrots. Additionally, it is important to rid your garden bed of any debris from previous plants and make sure there is adequate air circulation in order to reduce infection.
By following these steps and incorporating companion plants into your garden bed you can help protect your rutabagas from common diseases while ensuring a bountiful harvest come harvest time.
Common Pests & How To Control Them
Common pests can be a nuisance in any vegetable garden, but rutabaga is generally not overly affected by many insect pests. The most common pest is the cabbage root maggot, which can be prevented by putting a barrier of diatomaceous earth or wood ash around the seedlings.
Slugs and snails can also be a problem, and can be controlled with copper tape or beer traps. Aphids, mites, and caterpillars may also appear, and can be controlled with insecticidal soap or other organic methods. It is important to monitor your plants regularly for signs of pest infestation so that you can take action quickly if needed.
In addition to preventing and controlling pests, it is also important to practice crop rotation in order to avoid pest build-up in the soil. Planting different crops in the same area each season will reduce the chances of pests becoming established and help keep your garden healthy.
Beneficial Companion Plants
When it comes to companion planting, rutabaga (swedes) can benefit from the presence of certain vegetables and herbs. Peas and onions are two vegetables that are known to be beneficial companions for rutabaga. Planting these vegetables together in the same area will help to encourage healthy growth and increase yields.
In addition to companion plants, rutabaga can also benefit from the presence of beneficial insects, such as bees, ladybugs, and lacewings. These insects can help to pollinate flowers and control pests. Planting a variety of flowers around the perimeter of your vegetable garden will attract these beneficial insects and help to keep your rutabaga plants healthy.
When planting companion plants with your rutabaga, be sure to space them out properly. Rutabaga should be planted 12-20cms (4-8 inches) apart, while peas and onions should be spaced 2 feet apart. This will ensure that each plant has enough room to grow and thrive without competing for resources with its companions.
By planting beneficial companion plants alongside your rutabaga, you can ensure that your swedes have all the support they need to reach maturity in 90 days or less.
Using Your Home Grown Swedes
Once your Swedes are ready for harvest, you will be amazed at the versatility of this vegetable.
CASE STUDY: We've been living off the grid for the last 40 years...

In all that time an electric wire has never been connected to our house. We haven’t gotten or paid an electricity bill in over 40 years, but we have all the electricity we want. We grow everything we need, here, in our small backyard. We also have a small medicinal garden for tough times. Read More Here...
Depending on the variety, the root can be boiled, mashed, roasted, steamed, fried or even pickled. You can also use the leaves in salads or as a green vegetable.
Swedes have a slightly sweet and earthy flavor, and their firm texture makes them a good substitute for potatoes in many dishes. They can also be grated and added to salads for a crunchy texture and extra flavor.
Your home grown Swedes are also incredibly nutritious. They are packed with vitamin C, potassium and dietary fiber, and contain some calcium and iron too. Furthermore they are low in calories and fat so they make a great addition to any healthy diet.
Whether you want to use your Swedes as a side dish or main course or even pickle them for a delicious snack, you are sure to reap the rewards of growing your own Swede in your vegetable garden.