

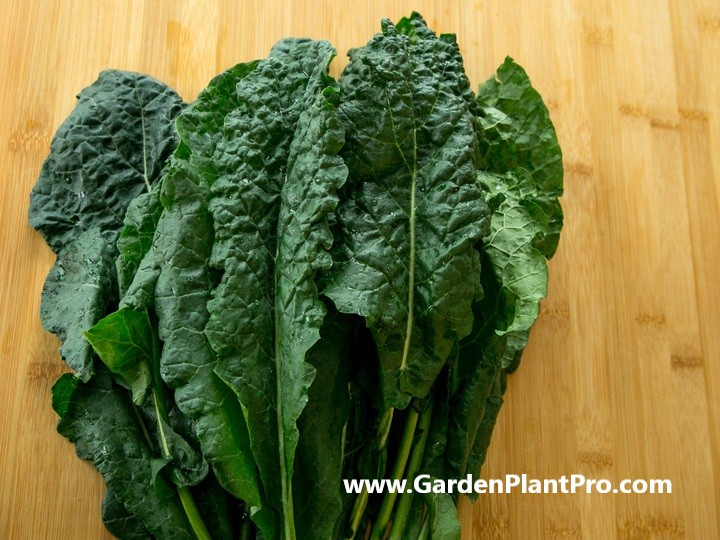
Collard greens are a type of leafy green vegetable that belong to the Brassica family, known for their hearty, slightly bitter taste and are often cooked down to add flavor.
They are a good source of nutrients like Vitamin C, Vitamin K, and calcium, making them a healthy addition to any diet. Collard greens are also easy to grow in different soils and climates and are low maintenance, making them a great option for home gardening.
A Brief History
The history of collard greens is a long and fascinating one.
Though accounts vary as to when and where the first collard plants arrived in the American colonies, it is clear that the southern method of cooking collard greens has been around for many generations.
It is thought that the African-American tradition of cooking collard greens dates back to slavery times, when slaves were only allowed to grow a few select vegetables for themselves and their families.
Today, collard greens are enjoyed all over the world. They are a popular ingredient in many dishes from the southern United States, and are also used in various cuisines around the world. They are full of nutrition and flavor, making them a great addition to any meal.
Whether you want to learn more about the history of collard greens or you are simply looking for ways to incorporate them into your diet, you will find plenty of useful information in this guide. Read on to find out all you need to know about growing, harvesting, and cooking with collard greens.
Nutritional Benefits
Collard greens are a nutrient-dense vegetable that has a wide range of health benefits. They are an excellent source of vitamin A, vitamin C, calcium, and vitamin K. They also provide a good source of iron, vitamin B-6, and magnesium. Eating collard greens regularly can help to improve overall health, as they are low in calories yet packed with essential vitamins and minerals.
The nutritional content of collard greens is impressive. It contains plenty of Vitamins A and C, which are both essential for eye health and the prevention of certain diseases such as cancer. Vitamin A is also important for maintaining healthy skin and strong bones. Collards are also an excellent source of calcium, providing 5% of the recommended daily intake per serving. Calcium is essential for bone health and helps to protect against osteoporosis.
Collard greens are also a good source of iron and vitamin B-6 – two nutrients that help to regulate the body’s metabolism and energy production. Iron helps to transport oxygen throughout the body, while Vitamin B-6 helps to convert food into energy. Additionally, collard greens contain magnesium which is important for muscle relaxation and healthy nerve function.
Eating collard greens provides numerous health benefits as they contain high levels of vitamins and minerals that provide protection against disease and support overall health. Furthermore, collard greens provide a low-calorie alternative to other sources of protein such as meat, making them an excellent choice for those looking to reduce their caloric intake without sacrificing nutrition.
Common Varieties & Their Uses
Collard greens come in many varieties and can be used in multiple ways.
The main varieties are Georgia Southern, Morris Heading, and Vates. Georgia Southern is a popular variety that is known for its large, dark green leaves and is often used in salads. Morris Heading is a smaller variety that is ideal for growing in containers and has a milder flavor than Georgia Southern. Vates is a tall variety with more frilly, lighter-colored leaves that are ideal for cooking.
Collard greens can be eaten raw, steamed, sautéed, boiled, or stir-fried. Raw collards are perfect for salads or slaws, while steamed or sautéed greens make an excellent side dish. Boiled collards can also be used as a base for soups or stews. Stir-fried collards are great as a vegan main dish or as an accompaniment to meat-based meals.
When choosing which variety of collard greens to plant, consider the soil type and climate of your garden. The larger varieties may require more space and need more water to grow well. If you’re growing in containers, the smaller varieties may be better suited to your needs.
When To Sow
When determining when to sow collard greens, it is important to consider the climate of your area and the variety of collard greens you are planting. Generally, collard greens should be planted in early spring. In areas with mild winters and long growing seasons, you can sow collard greens up to three months before the expected fall frost.
For bunching, sow 3–4 seeds every 30-45 cm (12-18″), 1 cm (½”) deep, in rows 45-90 cm (18–36″) apart. For a continuous harvest of collard greens, sow seeds every two weeks until four weeks before expected frost. Plant seeds in moist soil and in a full sun location for best results.
It is also important to consider the weather during the planting process. Excessive heat or cold can cause seedlings to suffer if not planted correctly. If planting during very hot or cold weather, it is best to wait until conditions improve or use cold frames or other protective methods to ensure successful germination and growth.
Choosing A Suitable Location In The Garden
Choosing an appropriate location for your collard greens is essential for successful growth. A well-drained, sunny spot in the garden is ideal. Collards can tolerate partial shade, but will grow best in full sun. Avoid areas that are prone to flooding or waterlogged soil.
DIY PROJECT: Collect rainwater no matter where you live...

This DIY project is the best way to legally collect rainwater NO MATTER where you live. Get chlorine-free water, cut down on your water bills, and have enough for an emergency situation or to water your garden. Read More Here...
If planting in containers, make sure to select a large enough pot that will allow the plants to spread out and receive plenty of sunlight. When planting in raised beds, make sure the soil is well-draining and amended with organic matter.
Preparing The Soil
Before planting collard greens, it is important to prepare the soil. Loosen the soil and amend it with plenty of organic material. A 10-10-10 fertilizer should then be scattered over the planting area. The soil should be rich and well-draining, with a pH level of 6.5 to 6.8. Collard greens need lots of water, so make sure the area has good drainage to prevent root rot.
Creating an ideal growing environment for collards is essential for a healthy crop. Adding compost or aged manure can help improve soil fertility and give the plants the nutrients they need to grow. If you are using compost, it should be well-rotted and applied before planting.
The best time to amend your soil is in the fall before planting in the spring. This will give the organic material enough time to break down and become part of the soil structure before planting begins.
Planting The Seeds Or Seedlings
For direct sowing, seeds should be heavily sown in rows that are spaced 70 cm (30 inches) apart. Seedlings should then be thinned to 30-45 cm (12-18 inches) apart. Collards can be direct-seeded as soon as nights cool down in late summer, or container-grown seedlings can be set out.
For best results, the soil should have been properly prepared with organic matter and fertilizers for optimal growth. If starting indoors, this should be done 8-7 weeks before the last frost in spring to give the seedlings enough time to mature before transplanting outdoors.
Once planted, the seedlings will need to be well cared for with adequate watering and fertilization if grown from seed or soil preparation if grown from seedlings. The plants will also need to be regularly monitored for common diseases and pests that may affect their growth. Additionally, beneficial companion plants can be planted alongside collards for added protection and nutrition.
Harvesting can begin when the leaves are large enough to use – usually around 10-12 weeks after planting – and storing can begin once the harvest is complete.
Caring For The Seedlings
Once the seeds have been planted and germinated, caring for the seedlings is important. The soil should be kept consistently moist but not wet – water as needed to keep the soil evenly moist. It is also important to keep the soil temperature above 23°C (75°F) until germination. A heat mat or grow light may be necessary if the temperature drops below this mark.
As the seedlings grow, thin them to 45 cm (18 inches) apart so they have enough space to develop fully. Fertilizing with a balanced fertilizer every couple of weeks will help ensure the plants receive proper nutrition throughout their growth cycle.
Additionally, if pests or disease become an issue, take steps to control them as soon as possible so they don’t spread and affect the entire crop. By following these steps, gardeners can ensure their collard greens have a healthy start and will produce high-quality results when harvested.
Watering & Fertilizing
Watering and fertilizing are two important steps for successful collard green growth. To ensure proper growth, it is recommended to water regularly, applying 1 to 2 inches of water weekly. To avoid burning the roots, place side-dress fertilizer 4 to 6 inches away from the plants.
Slow release, foliar application, and soil soaks are great for collards. Apply a high nitrogen fertilizer to the base of your plants when they reach 6 inches tall or when they start flowering. Weekly 1 tablespoon with liquid manure and side-dress 10-10-10 fertilizer per plant or a few shovels compost midseason is recommended. Always remember to water well after fertilizing your collards.
When & How To Harvest
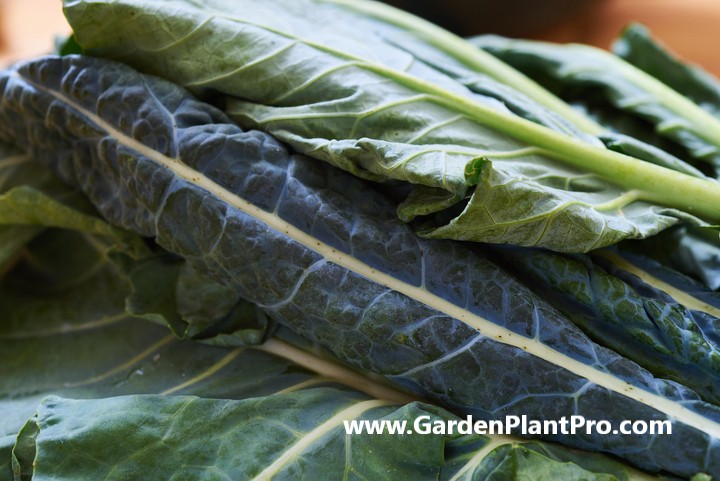
When it comes to harvesting collard greens, timing is key. After sowing seeds or setting out seedlings in spring, you can start harvesting outer leaves about 6 to 8 weeks later. To pick the big leaves, you can either clip individual leaves or pick a couple of the outer leaves at a time, leaving the rest of the plant intact. Collard leaves are ready for harvest as soon as they reach usable size, typically less than 10 inches long and dark green. For the best flavor, pick them young.
If you planted in early spring for early summer harvest, you can start harvesting around 2 months after planting. If you planted in late summer or early fall for a late fall harvest, you can expect to be able to start harvesting around 3 months after planting. For both types of planting, make sure to check your plants regularly and clip off individual leaves as needed.
When storing collard greens, make sure to keep them cool and dry in order to preserve their flavor and texture. You can wrap them loosely in plastic wrap or store them in an airtight container if desired. With proper storage, collard greens will keep fresh for up to a week.
Storing
Storing collard greens can be done in two ways: refrigeration or freezing. It is important to cool the greens quickly after harvest or blanching to prevent spoilage.

Do you have some charcoal in your house right now? We call charcoal a “miracle leftover” for anyone who wants to be a little more self-sufficient and cut costs. That’s because it can help you with so many different things around the house and garden. You can even use it to make an energy-free fridge. Read More Here...
Refrigeration
After cooling, drain the water well and pat the leaves dry with a paper towel. Package the greens in a sealed plastic bag or container and store in the refrigerator at around 2°C (34°F) and 90 to 95 percent humidity (moist) with some air circulation. Collard greens will store for two to three weeks under these conditions.
Freezing
Blanching is recommended for freezing collard greens. Begin by submerging the greens in boiling water for 2-3 minutes, then transfer them to a bowl of cold water for an additional 2-3 minutes. Drain and pat dry, then package in a sealed plastic bag or container and store in the freezer for up to 6 months.
For both refrigeration and freezing, it is important to check the condition of your collard greens regularly. Discard any that have become wilted or slimy.
Common Diseases & How To Control Them
Collard greens are a nutritious and delicious vegetable, but they can be prone to diseases.
One of the most common diseases is downy mildew, which can be identified by the presence of light grayish-white patches on the leaves. To control this disease, spray the leaves with a mixture of water and vinegar.
Rotating cruciferous vegetables in the garden also helps to prevent many diseases. This means that collard greens should not be planted in the same spot for more than one season. Additionally, if you have a disease or pest problem, it is important to remove any affected plants from the garden immediately.
It is also important to ensure that your collard plants receive enough nutrients and moisture throughout their growing season. Be sure to water them regularly and fertilize accordingly. If you see any signs of nutrient deficiencies, such as yellowing or stunted growth, treat them with a balanced fertilizer or soil amendment as soon as possible.
Finally, it is important to scout your garden regularly for diseases and pests. If you see any symptoms of disease or an infestation of pests, it is important to take action right away in order to protect your collard plants. Use appropriate fungicides and insecticides as needed and always follow label instructions carefully when applying these products.
Common Pests & How To Control Them
Collard greens are prone to a variety of pests that can cause damage to the plants.
These include harlequin bugs and cabbage worms, which can both do great damage if not treated quickly. To get rid of harlequin bugs, use insecticidal soap or spray neem oil onto the leaves of your plants. For cabbage worms, you can spray horticultural oil on them that you make at home with soybean oil and liquid dish-washing soap. Aphids also respond to a dusting with horticultural or pyrethrin dust.
For all types of pests, it’s important to be vigilant and take action as soon as you see any signs of infestation or damage. Regularly inspect your plants for signs of pests, such as holes in the leaves, and take appropriate action to prevent further damage.
You may also want to use companion planting techniques, such as planting certain herbs near your collards that will help repel pests naturally. Planting marigolds near your collard greens is one way to naturally deter pests without the use of chemicals.
Beneficial Companion Plants
After planting the seeds or seedlings, it is important to consider what other plants will be beneficial companions for the collard greens. Companion planting is an ancient practice that involves intentionally planting certain plants together so that they can help each other thrive in the garden.
Good companion plants for collard greens include mugwort, thyme, rosemary, oregano, marjoram, mint, catnip, southernwood, chamomile, garlic, potatoes, and onions. Strawberries may also be a good companion plant since they won’t compete with collard greens for the same nutrients. Catnip should also be considered since it repels aphids and other common garden pests.
When considering companion plants for collard greens, it is important to take into account the existing flora in the garden. For example, planting garlic close to collard greens may help deter harmful insects such as cabbage worms. Additionally, if there are any existing weeds nearby that are known to harbor disease or attract pests, they should be removed before planting.
In addition to their insect-repelling properties, companion plants can also help keep soil conditions optimal for growth. For example, planting marjoram near collard greens will help add organic matter to the soil and improve moisture retention. Likewise, some companion plants such as chamomile can attract helpful beneficial insects such as pollinators and ladybugs which can help keep pest populations under control.
By carefully choosing which companion plants to include in your garden plot with your collard greens, you can create a thriving environment that allows all of your plants to reach their full potential.
CASE STUDY: We've been living off the grid for the last 40 years...

In all that time an electric wire has never been connected to our house. We haven’t gotten or paid an electricity bill in over 40 years, but we have all the electricity we want. We grow everything we need, here, in our small backyard. We also have a small medicinal garden for tough times. Read More Here...
Using In Cooking
Collard greens are a versatile vegetable that can be used in a wide variety of recipes. Their mild flavor and hearty texture make them an ideal choice for many dishes. The traditional preparation is to slow-cook chopped collard greens with bacon or ham, but in truth collard greens are a dream veggie for almost any recipe.
To prepare collard greens for cooking, first bring 6 cups of water to a boil in a large pot. Once boiling, add the chopped collard greens and reduce heat to low. Cover the pot and allow the collards to simmer for 20 minutes, or until they are tender. Once cooked, drain and season as desired.
Collard greens can be added to soups and stews for extra flavor and texture, sautéed with other vegetables and served as a side dish, or even used as a wrap or wrap substitute in place of tortillas or breads. They are also great in curries, stir-fries, salads, and grain bowls. Try adding cooked collards to mac & cheese or pizza for an added nutritional boost.
When storing cooked collard greens, make sure to cool them completely before transferring them to an airtight container and refrigerating for up to 5 days. To freeze cooked collards, spread the leaves out on a baking sheet lined with parchment paper and freeze until solid. Transfer frozen leaves to an airtight container or zip-top bag and store in the freezer for up to 3 months.