
Kale is one of the most nutritious and delicious veggies around, and it’s surprisingly easy to grow at home! Whether you’re a beginner gardener or just looking for a way to get your kids involved in gardening, we’ve got all the tips and tricks you need to start growing kale in your own backyard.
A Brief History
Kale has a long and storied history as a popular vegetable. It is believed to have originated in the Mediterranean region and was cultivated by the Romans, who brought it to Britain in the first century AD. In the Middle Ages, it was a staple crop grown in monasteries and later became popular with farmers across Europe. Kale has been eaten in the United States since colonial times and is now widely enjoyed around the world.
Kale is highly nutritious and contains vitamins A, C, K and B6, as well as minerals such as calcium, potassium, magnesium, iron and zinc. It also contains powerful antioxidants such as lutein, zeaxanthin and beta-carotene. Its high fiber content makes it an excellent choice for digestive health and weight management.
There are many different varieties of kale available today, each with its own unique flavor and texture. Common varieties include curly kale, lacinato or dinosaur kale, red Russian kale, and purple flowering kale. Kale can be enjoyed cooked or raw in salads or added to soups and stews. It can also be steamed, sautéed or stir-fried for a nutritious side dish.
Whether you’re looking for a nutritious vegetable to add to your garden or a flavorful addition to your cooking repertoire, there’s a variety of kale that’s perfect for your needs.
Nutritional Benefits
Kale is one of the most nutrient-dense vegetables, containing high amounts of dietary fiber, calcium, vitamins A and C, and other nutrients. Kale is also an excellent source of carotenoids, which are powerful antioxidants that can help protect the body from oxidative damage. Eating kale regularly can help reduce the risk of cancer, cardiovascular disease, and other chronic illnesses.
In addition to its high nutrient content, kale is also low in calories. A single cup of cooked kale provides 33.5 calories and just 0.4 grams of fat. This makes kale an ideal food for weight loss or maintenance, as it can provide a substantial amount of nutrients without adding too many calories to the diet.
Kale is also rich in fiber, which is important for digestion and promoting regular bowel movements. A single cup of cooked kale provides 2.6 grams of dietary fiber, making it a great source of this essential nutrient. By adding kale to your diet, you can enjoy a wide range of health benefits.

Common Varieties & Their Uses
When it comes to common varieties of kale, there are several that are suitable for home gardeners.
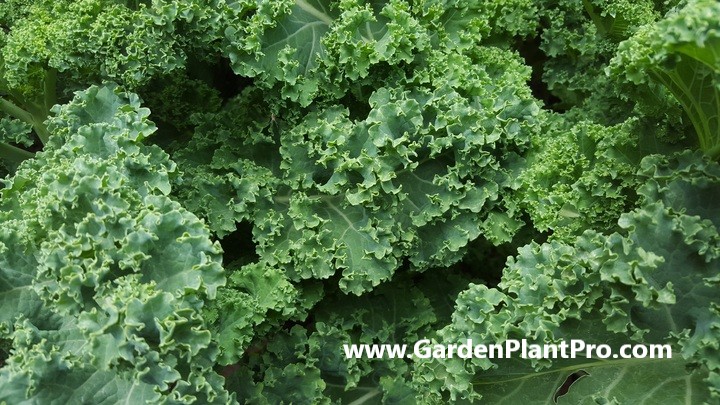
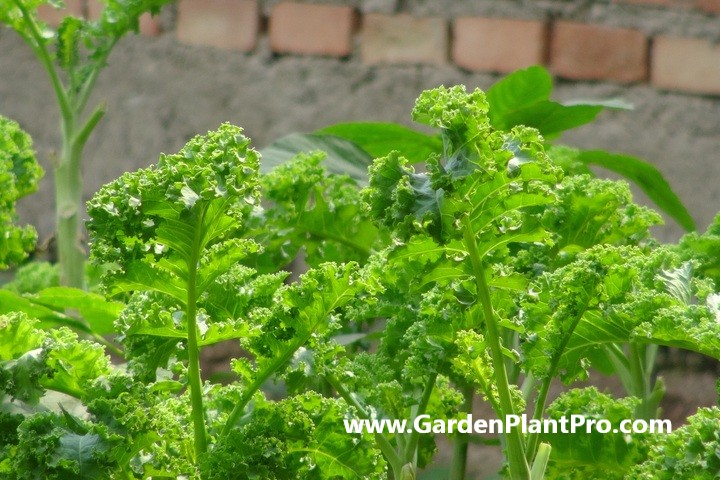
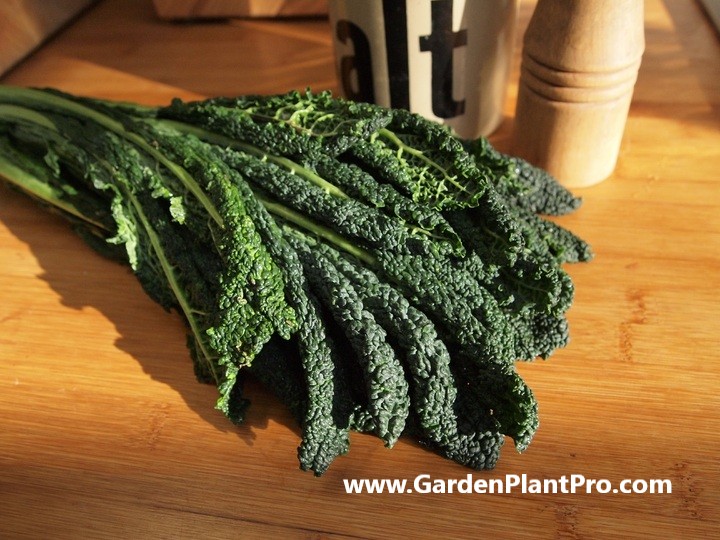
Curly kale is one of the most popular and widely grown varieties, and is often used in salads and cooking. It has frilly leaves that range in color from light green to deep purple, depending on the variety. Another popular variety is Red Russian kale—this type has smooth leaves with a dark red-purple color. Dinosaur kale, also known as Tuscan or lacinato kale, has thick, dark green leaves with a bumpy texture. Kale can also be grown as an ornamental in gardens and containers, with varieties like Redbor and Red Ursa offering bright colors and interesting textures to the landscape.
When To Sow
Kale is a cool-season crop, so the best time to sow seeds is during the cool season, typically between late winter and spring. It can tolerate some heat (but not extreme), so if you live in a climate with relatively mild summers its possible to grow year round.
For those who live in areas with cold winters, it’s best to start seeds indoors before transferring them outdoors. Once you have chosen a suitable location in the garden and prepared the soil, you can begin sowing your kale seeds.
Choosing A Suitable Location In The Garden
Choosing the right location in the garden for planting kale is essential for successful growth. The plant requires full sun to partial shade, and it thrives in cool weather. Kale is a hardy green and can be grown in most climates.
When selecting a spot to plant kale, consider the following:
• The soil: Kale plants need rich, acidic soil in order to thrive. If your soil is not quite right, consider adding compost or other forms of organic matter to help nourish the plant.
• Shade: Kale can tolerate both full sun and partial shade, but if you are growing it during the warm season or in warmer regions, you may want to select a location that has some shade.
• Temperature: Kale prefers cooler temperatures and will not tolerate extreme heat. If you live in an area with warm temperatures, choose a spot that will provide some protection from the heat. Mulch can also be used to help keep the soil temperature down.
By taking into consideration these factors when selecting a location for your kale, you should be able to create an ideal environment for growing this hardy green and enjoying its many nutritional benefits.
Preparing The Soil
Preparing the soil is an essential part of growing kale.
DIY PROJECT: Collect rainwater no matter where you live...

This DIY project is the best way to legally collect rainwater NO MATTER where you live. Get chlorine-free water, cut down on your water bills, and have enough for an emergency situation or to water your garden. Read More Here...
Before planting the seeds or seedlings, the soil should be amended with organic matter such as compost or aged manure to improve drainage and provide nutrients for the plants. The soil should also be high in nitrogen content and well-drained, as kale prefers a slightly acidic pH of 6.0–6.5. If the soil is too alkaline, it can be amended with sulfur or iron sulfate to lower the pH.
Mulch is also essential when growing kale. It helps keep the soil moist and prevents weeds from taking over. Mulch also insulates the roots of the plant, which is especially important in cold climates or during periods of extreme heat. The mulch should be applied after planting, and can be made from organic materials such as straw, hay, leaves, grass clippings, or even shredded newspaper.
Once the soil has been amended and mulched, it’s time to plant your kale seeds or seedlings.
Planting The Seeds Or Seedlings
Planting the seeds or seedlings of kale is the next step in growing this nutritious vegetable. To begin, dig a hole that is twice the depth and width of the root ball of your plant. Place the seedling in the hole and fill it with soil, pressing down firmly to ensure that it is securely planted.
Kale seeds should be sown about 1/2 inch deep, leaving at least 1 1/2 to 2 feet between each plant. It is important to ensure that the soil has a high nitrogen content to support the growth of your kale plants. Mulching with organic matter is essential when growing kale, as the roots grow at a shallow depth only inches below the ground surface and need to remain cool.
If you’re sowing in rows directly into the earth, sow 3 or 4 seeds together every 12 inches (30cm), half an inch (13mm) deep. Once your seedlings have reached about 3 inches high, thin them out so that there’s at least 12 inches between each one.
Regularly water your seedlings and fertilize them every few weeks with a high-nitrogen fertilizer according to package instructions. Carefully monitor your plants for signs of disease or pests and take steps as needed to protect them from harm. Additionally, consider adding companion plants such as garlic and onions which can help repel pests and provide beneficial nutrients to your kale plants.
With proper care and maintenance, you’ll soon be harvesting delicious kale from your own garden!
Caring For The Seedlings
Once the seeds or seedlings have been planted, they will need to be well cared for in order to ensure a successful harvest.
It is important to keep the soil moist but not soggy as this will help the seedlings to establish quickly. Kale should be watered once or twice a week, depending on the weather and soil conditions.
Fertilizing is also important for healthy kale plants. A balanced fertilizer such as 10-10-10 should be applied every two to three weeks during the growing season. A light application of compost or well-rotted manure can also be beneficial.
Weeds should be carefully removed from around the kale plants, as they will compete for water and nutrients. Mulching around the plants is an effective way to control weeds and conserve moisture in the soil. In addition, kale plants should be staked if they are tall varieties, or if they are being grown in windy conditions. This should be done when the plants are still young and flexible, so as not to damage them.
Finally, pest control may also be necessary if pests such as aphids or caterpillars become a problem. If so, natural predators such as ladybugs can be released into the garden, or insecticidal soap can be used to treat affected plants.
Watering & Fertilizing
Watering and fertilizing your kale plants is essential for their growth and productivity. When watering, the key is to keep the soil evenly moist. Kale will do well with a single application of balanced fertilizer after the first harvest. When planting, mix fertilizer into the top 3 to 4 inches of soil. Then, feed your kale throughout the growing season, following the instructions on the fertilizer label.
Kale requires full sun and fertile, well-drained soil for optimal growth and tender leaves. If you don’t have a grow light setup, you can still plant kale seeds indoors. Find your sunniest window and choose a spot on the windowsill or in a tray to place your plants in. Place a dome over the tray for humidity and warmth if needed.
When it comes to fertilizing, you can use natural sources like compost or aged manure to help nourish your plants throughout the growing season. For best results, add plenty of organic matter to the soil prior to planting. This will provide essential nutrients and help retain moisture in the soil. Additionally, make sure to mulch around your plants to reduce weed growth and conserve moisture in the soil.
When & How To Harvest
When it comes to harvesting kale, timing is key. Kale tastes best when plants grow rapidly and mature before the heat of summer (before temperatures exceed 75°F/24°C) or after fall frosts occur. For most varieties, this means harvesting the leaves when they are between 6–12 inches long.

Do you have some charcoal in your house right now? We call charcoal a “miracle leftover” for anyone who wants to be a little more self-sufficient and cut costs. That’s because it can help you with so many different things around the house and garden. You can even use it to make an energy-free fridge. Read More Here...
To harvest, remove the outer leaves first – these will be the largest and oldest. As you work your way inward, you’ll find that the inner leaves are smaller and more tender. You can harvest these as well, as long as they are not damaged or diseased. Once you’re done harvesting, you can either use them right away or store them in an airtight container in the refrigerator for up to a week.
Storing
Properly storing kale will ensure the leaves last for at least 5-6 days, if not longer. To store, give the leaves a good rinse, remove any stems and pat dry. You can store kale with stems as a whole or remove them for easy snacking and salads. Place the leaves in an airtight container to retain moisture and store in the fridge.
When selecting fresh kale, look for crisp, dark green leaves with no wilting or yellowing. Avoid any with brown spots or discoloration as these are signs of spoilage. If you harvest your own kale from the garden, do so on an overcast day or in the evening when temperatures are cooler. This will ensure a sweeter flavor and maximum shelf life.
For longer storage, blanching is an option. Blanching is a process of boiling or steaming vegetables then rapidly cooling them to stop the cooking process and retain their nutrients and color. To blanch your kale, bring a pot of water to a boil then add your washed and cleaned kale leaves for 3 minutes. Remove them from heat and place in an ice bath to stop cooking. Once cooled, place in an airtight bag or container and freeze for up to 6 months. The frozen kale can be used in smoothies or added to soups directly from frozen.
Common Diseases & How To Control Them
Kale is a hardy plant, but it can still be affected by common diseases. To keep your kale healthy and thriving, it is important to recognize the signs of disease and take appropriate action.
Downy Mildew
Downy Mildew is a fungal disease that attacks the leaves of a kale plant, causing them to become yellow and eventually die. To prevent Downy Mildew, it is important to keep the leaves dry and the soil well drained. Crop rotation and using disease-free seeds that have been heated with 122°F water for 15 minutes can also help to reduce the risk of infection.
Fusarium Wilt
Fusarium Wilt is another fungal infection that targets the root system of a kale plant. Symptoms include wilting leaves and yellowing foliage. To control this disease, avoid planting in areas with poor drainage and make sure to rotate crops.
Cercospora Leaf Spot
Cercospora Leaf Spot is a fungal pathogen that causes small, circular spots on kale leaves. This can cause the leaves to become malformed and discolored. To control Cercospora Leaf Spot, make sure to keep your plants well-watered, rotate crops, and use mulch or compost around the base of the plants to reduce humidity levels around them.
Clubroot
Clubroot is a soil-borne disease caused by a fungus-like organism called Plasmodiophora brassicae. It results in stunted plants with small, distorted leaves and root systems that have a club-like appearance. To prevent Clubroot from becoming an issue, it is important to rotate crops and avoid planting in low lying areas with poor drainage.
Common Pests & How To Control Them
Kale is an easy-to-grow vegetable that can be grown in the home garden with a little effort. However, just like any other garden crop, kale is susceptible to pests and diseases.
The most common pests affecting kale include cabbage aphids, caterpillars, thrips, codling moth, and tomato potato psyllid. Fortunately, there are ways to control these pests and keep your kale healthy and productive.
Cabbage Aphids
Cabbage aphids are small, soft-bodied insects that suck liquid out of the leaves of kale plants. To treat small colonies of cabbage aphids, use insecticidal soap or Yates Success Ultra Insect Control – Concentrate. This product helps control common caterpillars, thrips, codling moth and tomato potato psyllid.
Caterpillars
Caterpillars are also common pests of kale plants. These pesky insects feed on the leaves of kale plants and can cause significant damage if left unchecked. To get rid of them you can blast them off with a strong stream of water from the hose or use an insecticide such as Yates Success Ultra Insect Control – Concentrate which will help control all types of caterpillars as well as other common pests.
Thrips
Thrips are tiny insects that feed on the leaves of kale plants and can cause significant damage if left unchecked. To control thrips on your kale plants you can use Yates Success Ultra Insect Control – Concentrate which helps control these pesky pests as well as other common pests.
Codling Moth & Tomato Potato Psyllid
Codling moths and tomato potato psyllids are two more common pests that affect kale plants. To control these pests you can use Yates Success Ultra Insect Control – Concentrate which helps control the codling moth and tomato potato psyllid as well as other common pests.
Beneficial Companion Plants
Kale is a nutritious and versatile vegetable that can be grown in the garden with relative ease. While it requires minimal care, it can benefit from companion planting. Companion planting is the practice of growing different plants together to benefit one another. Kale can be paired with a variety of beneficial companions to help protect it from pests and disease while providing additional nutrition in the form of nitrogen-fixing bacteria and other beneficial compounds.
Here are some of the best companion plants for kale.
CASE STUDY: We've been living off the grid for the last 40 years...

In all that time an electric wire has never been connected to our house. We haven’t gotten or paid an electricity bill in over 40 years, but we have all the electricity we want. We grow everything we need, here, in our small backyard. We also have a small medicinal garden for tough times. Read More Here...
Sweet Alyssum
Sweet alyssum (Lobularia maritima) is an annual flowering plant that produces masses of sweet-smelling white or purple flowers. It is an excellent companion for kale because it attracts hoverflies, ladybugs, and other beneficial predatory insects that feed on common kale pests such as aphids, mites, and whiteflies. Sweet alyssum also helps improve soil fertility by providing nitrogen-fixing bacteria in the roots.
Cilantro
Cilantro (Coriandrum sativum) is another excellent companion plant for kale. It attracts beneficial insects like hoverflies that prey on common pests like aphids, mites, and whiteflies. It also provides additional nutrition in the form of nitrogen-fixing bacteria and other beneficial compounds to the soil around kale plants.
Alliums
Alliums are members of the onion family and include onions, leeks, chives, garlic, and shallots. All of these make excellent companion plants for kale as they repel many common pests. They also add additional nutrients to the soil when their foliage breaks down.
Legumes
Legumes are plants that form nitrogen-fixing nodules on their roots which add important nutrients to the soil around them. Good companion legumes for kale include peas, beans, clover, alfalfa, and vetch. These legumes are easy to grow and will provide your kale plants with extra nutrition while keeping away pests.
Using Kale In Cooking
Kale is a versatile ingredient that can be used in a variety of dishes. It is packed with nutrients and adds a distinctive flavor to any dish. Here are some tips on how to use kale in cooking.
Cooking Kale
Kale can be added to many dishes like soups, stir-fry and salads. It can also be cooked on its own or combined with other ingredients for a delicious meal. When cooking kale, it’s important to remember that it should always be cooked on low heat and for a shorter period of time than other greens like spinach. This will prevent the kale from becoming tough and chewy.
Adding Flavor
Kale has a mild flavor that can be enhanced by adding some simple ingredients like garlic, ginger, lemon juice, or chili flakes. For a more flavorful dish, try sautéing the kale with some olive oil and balsamic vinegar before adding other ingredients. This will give the kale a deeper flavor and texture.
Using Kale in Soups & Stews
Kale is an excellent addition to soups and stews as it adds texture and flavor. For best results, add the kale towards the end of cooking as it only needs to be cooked for a few minutes to retain its flavor and texture. To add more flavor, consider adding some fresh herbs or spices like cumin or curry powder for an extra kick.
Using Kale in Salads & Stir-Fries
Kale makes an excellent addition to salads as it has a mild flavor that won’t overpower other ingredients. For stir-fries, kale should be added at the beginning of cooking so that it has time to soften and absorb the flavors of the other ingredients. To make sure that the kale doesn’t become tough or chewy, make sure not to overcook it.