
If you enjoy pumpkin pies, soups, or roasted pumpkin dishes, why not try growing your own at home? Pumpkins are quite easy to grow and can produce a large harvest if properly prepared and cared for.
Whether you have a vast garden or a little balcony, you can grow pumpkins in containers, raised beds, or straight in the ground. In this guide we’ll lead you through the essential steps for growing pumpkins at home, from selecting the proper kind to preparing the soil, sowing the seeds, and caring for the plants. So, roll up your sleeves and let’s get your pumpkin-growing started.
A Brief History
Pumpkins have been cultivated in North America for centuries. Indigenous people have grown them for food and ceremonial purposes since the earliest times. Colonists of the American continent brought their own varieties of pumpkins, which they grew alongside those of the native people. The pumpkin was then quickly adopted into other cultures, becoming a popular crop in Europe and Asia.
Pumpkins are an incredibly versatile crop, with many uses. They can be eaten raw, boiled, steamed or baked and used as a roasted vegetable. Pumpkins can also be used to make soups, pies or jams and are even used as a decorative item in many parts of the world. Pumpkins are also high in vitamin A and potassium, making them a nutritious part of any diet.
Today, pumpkins are enjoyed all over the world for their unique flavor and versatility. Whether you’re growing your own or buying from a store, pumpkins are an easy way to add an extra bit of flavor and nutrition to any dish. With the right preparation and knowledge, you can grow your own pumpkins at home and enjoy them fresh from the vine.
Nutritional Benefits
Pumpkins are a nutrient-rich food that can help support your immune system.
They are full of vitamin A, beta-carotene and other carotenoids which play an important role in improving immunity. A one cup serving of cooked pumpkin contains just 49 calories but supplies 245% of the daily recommended value for vitamin A. It also provides 12 grams of carbohydrates, 2 grams of protein, and 3 grams of fiber.
In addition to vitamins and minerals, pumpkins are also a good source of antioxidants which can help protect cells from damage caused by free radicals. Eating pumpkins can help support the body’s natural defense system against infection and disease. Pumpkins also contain lutein and zeaxanthin which are thought to be beneficial for eye health.
Pumpkins can be eaten in a variety of ways – roasted, boiled, steamed, or mashed. They can be added to soups and stews as well as being blended into smoothies or pureed into sauces. Pumpkins can also be used to make pies and other desserts as well as being a great addition to salads or stir fries. Including pumpkins in your diet is an easy way to get a variety of essential vitamins and minerals as well as boost your immune system.
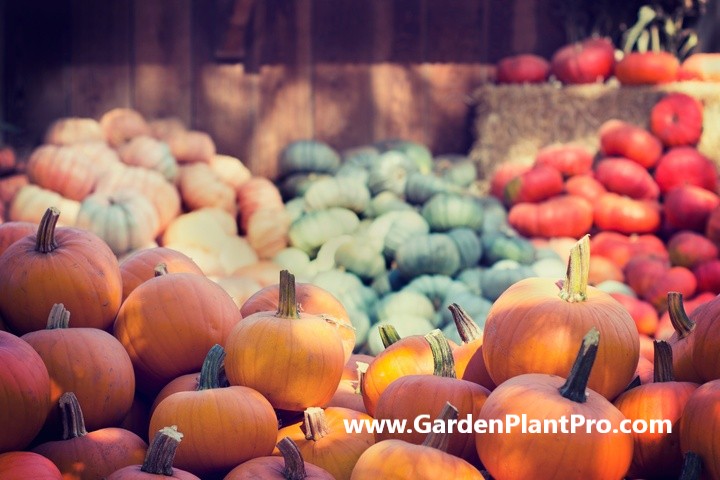
Common Varieties & Their Uses
When it comes to growing pumpkins, there are many varieties to choose from. From classic Jack-o-lanterns to the new and trendy heirloom varieties, there is something for everyone. Knowing which varieties to grow can help you make the most of your pumpkin patch.
The most common types of pumpkins are Jack-o-Lanterns, which are usually large and round with orange skin and a smooth texture. These pumpkins are great for carving.
Other popular varieties include Small Sugar Pie, a small and sweet pumpkin with a deep orange color; Howden Biggie, a large, bright orange pumpkin; and Blue Jarrahdale, an Australian heirloom variety with grayish-blue skin and deep orange flesh.
Whatever variety you choose to grow, be sure to prepare the soil with plenty of organic matter. To get the best results, mix in some compost or aged manure when planting. Make sure to water your pumpkins regularly and feed them with a balanced fertilizer every two weeks throughout the growing season.
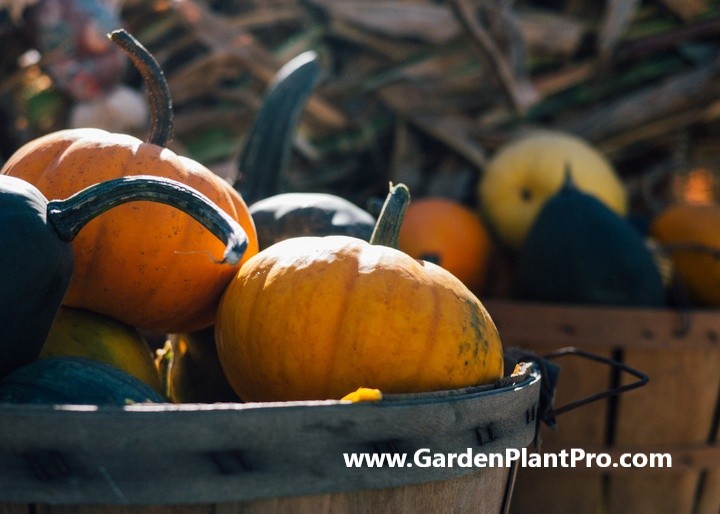
Once your pumpkins have ripened, you can use them in a variety of ways. The classic Jack-o-Lantern is always a favorite for Halloween decorations. Smaller varieties like the Small Sugar Pie are great for roasting or adding to soups and stews. Heirloom varieties like Blue Jarrahdale can be used as decorations or pureed into baked goods such as pies or muffins.
No matter what you choose to do with your pumpkins, growing pumpkins at home is an enjoyable activity that provides delicious results. With just a little bit of knowledge and preparation, you can create your own pumpkin patch full of flavor and fun.
When To Sow
When it comes to planting pumpkin seeds, the best time to start is during spring after the last frosts have past so that you can enjoy the fruits of your labour in the autumn. You can also start seeds indoors several weeks beforehand to get a head start and plant seedlings come spring.
You can buy store-bought seeds that are ready for planting, but be sure to check the packet for specific instructions on when they need to be sown. Pumpkins are sensitive to cold temperatures so do not sow the seeds directly into the ground until all danger of frost has passed and the soil temperature is between 65° and 95°F (18° to 35°C).
Once you have chosen a suitable location in your garden that gets plenty of sunlight, you will need to prepare the soil by loosening it up and then forming small mounds spaced 1m apart. Sow 3-4 seeds into each mound and water thoroughly. As the seedlings grow, thin out the weakest plants until you are left with two strong seedlings per mound.
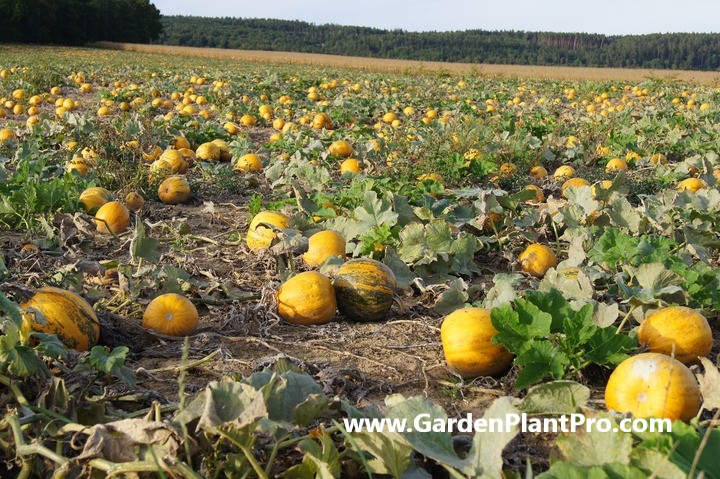
Choosing A Suitable Location In The Garden
When choosing a suitable location in the garden for growing pumpkins, it is important to consider a few factors. Pumpkins need full sun and plenty of space to sprawl.
DIY PROJECT: Collect rainwater no matter where you live...

This DIY project is the best way to legally collect rainwater NO MATTER where you live. Get chlorine-free water, cut down on your water bills, and have enough for an emergency situation or to water your garden. Read More Here...
Therefore, the ideal spot should have at least 50 to 100 square feet per plant.
If space is limited, then planting the pumpkin at the edge of the garden will help to contain its growth. It is also important to form small mounds of soil and space them 1m apart for each plant. If room is really limited you can also train your pumpkins to grow up a trellis system if needed.
Pumpkins also prefer full sun locations, so chose a spot that receives 6 – 9 hours of sunlight per day.
Preparing The Soil
Preparing the soil is an important step in growing pumpkins at home. It is best to begin this process before sowing the seeds or transplanting seedlings.
To get started, mix in some organic compost and aged manure when digging out a four or five foot pit that is two to three feet deep. This will help create a rich and well-drained soil for the pumpkins to grow in. Additionally, adding a light potting mix with vermiculite, perlite, or peat moss can also help to ensure that the pumpkin plants have all of the nutrients they need.
Make sure to apply 3-4 pounds of 10-10-10 fertilizer per 100 square feet before planting the seeds or seedlings, as this will give them a boost of nutrients and help them grow strong and healthy. When transplanting seedlings, it’s important to harden them off before putting them in the soil. Finally, make sure to keep your pumpkin patch well-watered and weeded throughout its growing season.
Planting The Seeds Or Seedlings
Once you have chosen a suitable location for your pumpkins and prepared the soil, it is time to plant the seeds or seedlings. If you are starting from seed, germinate them in late winter or early spring in sheltered areas, or after the frosts have finished in cold areas.
Place the seeds in a colander and rinse them with cold water. Once you’ve rinsed all the seeds, separate and set seeds 1 inch deep with four or five seeds per hill. Keep them moist until germination. When seedlings are 2 to 3 inches tall, thin to two plants per hill.
It is important to keep your pumpkins well-watered throughout their growing season – water deeply once a week during dry spells, making sure not to over-water. Fertilize with a balanced fertilizer according to directions on the package after the first fruits have formed.
Caring For The Seedlings
Once the pumpkin seeds have been planted and the seedlings have sprouted, it is important to provide them with the best possible care. In order to do this, it is important to ensure that they get the right amount of water and nutrients.
Watering should be done at least twice a week, or more often in hot weather. The soil should be kept moist but not soggy, as this can lead to root rot. If possible, use a soaker hose or drip irrigation system for more efficient watering. Pumpkins need at least 1 inch of water per week, and should be watered deeply at the base of the plant. To avoid eroding away the soil, water slowly and evenly.
Fertilize every few weeks to give the plants the additional nutrients they need to grow strong and healthy. Begin fertilizing a few weeks after sowing or planting seedlings and continue throughout the growing season until a week before harvest.
Pumpkins enjoy a balanced 10-10-10 fertilizer, applied at a rate of 3 pounds per 100 square feet, or 1 tablespoon per plant. If you have already applied compost or other organic matter to your soil prior to planting, you may not need to fertilize your pumpkins as frequently. Always follow the label instructions for the specific type of fertilizer you use.
Weeding is also essential for keeping pumpkins healthy. Regularly removing weeds around the plants helps prevent competition for nutrients and water and reduces the risk of disease.
Finally, provide supports such as trellises or cages if you’re growing vining pumpkins as they will need something to climb on. This will help keep them off the ground and make harvesting easier later on.
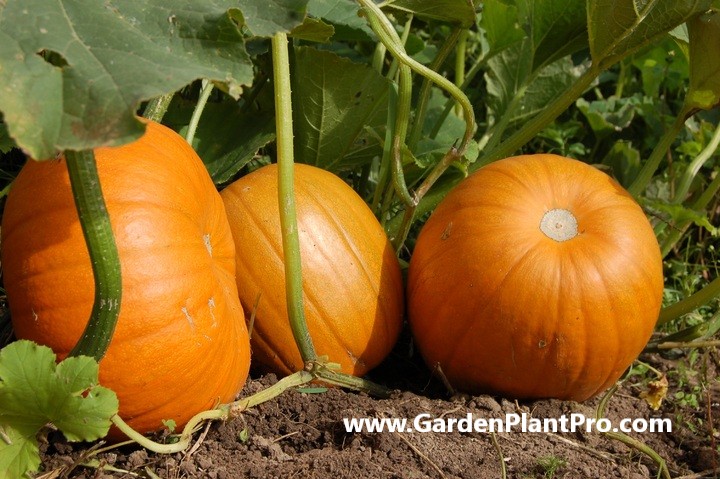
When & How To Harvest
Harvesting pumpkins is an exciting and rewarding part of growing this versatile squash.
The first step to harvesting pumpkins is to determine when they are ready.

Do you have some charcoal in your house right now? We call charcoal a “miracle leftover” for anyone who wants to be a little more self-sufficient and cut costs. That’s because it can help you with so many different things around the house and garden. You can even use it to make an energy-free fridge. Read More Here...
Generally, when the rind is hard and dull and the stem is dry and woody, the pumpkin is ripe for picking. To test for ripeness, try pressing your thumb into the skin of the fruit; it should be difficult to pierce. Additionally, when knocking on the outside of the pumpkin it should make a “hollow” tapping sound. When ready, use a sharp knife or pruning shears to cut the stem from the vine, leaving about two inches attached.
When harvesting pumpkins for storage, be sure to select mature fruit with no signs of decay. Place them on a flat surface and keep them out of direct sunlight. To keep them dry and prevent rot, cover them with a light cloth or newspaper. Store in a cool, dry place at temperatures between 50-55 degrees Fahrenheit (10-13°C). For longer storage times, you may want to wrap each pumpkin in newspaper before storing them in a root cellar or other cool area.
For those planning on using their pumpkins right away, you can pick them right away as long as there are no signs of rot or disease on the fruit. Be sure to wash your hands after handling any pumpkins you plan on eating as many contain bacteria that can cause foodborne illnesses. After washing your hands, you may want to scrub the pumpkin with a vegetable brush and warm water before carving or cooking with it.
Storing & Preserving
Storing and preserving your pumpkins is an important part of the process of growing them at home. After harvesting, you need to make sure your pumpkins are kept in the right conditions to make them last. The most important factor is temperature; pumpkins should be stored in a cool place between 50 – 55°F (10-13°C). They can also be stored in a refrigerator or freezer, but this isn’t recommended unless you’re going to use them up within a couple of weeks.
It’s important that your pumpkins are free from any nicks, bruises or cuts as these can lead to rotting and mould. If you find any imperfections on your pumpkins, it’s best to use them up quickly or discard them. Also remove any leaves or stems from the pumpkin before storing it.
If you want to store your pumpkins for longer than a few weeks, it’s best to cure them first. To do this, place your pumpkins in a warm, dry place for around ten days. The curing process helps toughen the skin and helps prevent mould and rot.
When storing pumpkins, make sure that they are not stacked on top of each other as this can cause damage. If you have multiple pumpkins, store them on a flat surface with some space between each one. Finally, if you want to store pumpkin seeds for planting next year, the best place to do this is in a cool and dry environment such as a refrigerator or freezer. You can also keep them in an airtight container for even longer storage times.
Common Diseases & How To Control Them
Many gardeners are familiar with the common diseases that can affect pumpkins, such as powdery mildew and downy mildew. With proper cultural practices and preventive measures, however, these diseases can be avoided or minimized.
To prevent powdery mildew, provide lots of air circulation around the plants. Avoid wetting the foliage when watering, and remove any infected leaves as soon as they are noticed. In greenhouses, reduce humidity by increasing air circulation and providing adequate ventilation.
Downy mildew is another common fungal disease that affects pumpkins. It is most prevalent in humid climates or when wet conditions persist for long periods of time. To avoid downy mildew, avoid overhead irrigation and instead use a soaker hose or drip irrigation to keep the foliage dry. Plant resistant varieties if possible and practice crop rotation to reduce the chances of infection. Remove any infected foliage immediately.
Bacterial diseases such as bacterial wilt can also affect pumpkins. This disease is caused by a soil-borne bacterium that enters through wounds in the stem or leaves of the plant. To prevent this disease, avoid wounding plants and practice crop rotation to reduce the chances of infection. If you notice wilting or yellowing leaves on your pumpkin plants, check for signs of bacterial wilt and remove any infected plants immediately.
Properly caring for your pumpkin plants can help prevent or minimize many common diseases. Be sure to provide adequate water, fertilize according to soil tests, rotate crops regularly and remove any diseased plants as soon as you notice them to keep your pumpkins healthy and productive!
Common Pests & How To Control Them
In order to protect your pumpkins from pests, it is important to be aware of the common pests that may affect them. Beetles are the most common pest on pumpkins, and can be easily treated with a mild pesticide spray. Slugs, mould, mildew and a lack of pollination are some other potential issues you may encounter while growing pumpkins.
To prevent slugs, try to use natural methods such as encouraging beneficial wildlife like hedgehogs and frogs, which will naturally eat them. You can also use barriers such as copper tape around the outside of your pumpkin patch or container, or create physical barriers such as mulch or gravel around the plants.
Mould and mildew can be prevented by ensuring good airflow around your plants and keeping the patch free from weeds that may harbour moisture.
Pollination is essential for successful fruit set. To encourage bees to your garden, plant some flowers nearby that will attract them and provide them with pollen and nectar. If this isn’t possible, you can hand pollinate with a paintbrush or cotton bud by transferring pollen from the male flowers to the female flowers.
If you notice any pests on your pumpkins, it’s important to act quickly in order to prevent infestation from spreading further. Remove any infected leaves or fruit from your patch as soon as possible and apply an appropriate insecticide if necessary.
CASE STUDY: We've been living off the grid for the last 40 years...

In all that time an electric wire has never been connected to our house. We haven’t gotten or paid an electricity bill in over 40 years, but we have all the electricity we want. We grow everything we need, here, in our small backyard. We also have a small medicinal garden for tough times. Read More Here...
Beneficial Companion Plants
Beneficial companion plants can be a great way to support the health and growth of your pumpkins. Corn, pole beans, various flowering herbs, radishes, tomatoes, marigolds, nasturtium, sunflowers and petunias are all great companion plants for pumpkins.
Corn helps to repel pests such as squash bugs and cucumber beetles, while pole beans provide nitrogen to the soil and protect against weeds. Various flowering herbs like sage, mint, marjoram, chives and oregano also work well with pumpkins as they attract beneficial insects like bees and ladybugs while deterring harmful ones. Radishes can be planted near pumpkins to help repel the striped cucumber beetle.
Tomatoes, marigolds and nasturtium are good companion plants for pumpkins as they provide shading to protect the plant from the sun’s harsh rays. Sunflowers provide a physical barrier against pests as well as a source of food for beneficial insects like bees. Lastly, petunias can help keep away aphids by releasing a compound that repels them from nearby plants.
When planting companion plants with your pumpkins it is important to keep in mind that each plant has a different purpose and should be placed accordingly. For example, the taller corn should be planted on the north side of your garden bed so that it does not cast too much shade on your pumpkins. Additionally, it is important to ensure that your companion plants are placed in an area with adequate sunlight and ample space for them to grow.
By carefully selecting companion plants for your pumpkin patch you can help ensure that your gourds get all the nutrients they need while being protected from pests and disease. With the right combination of companion plants you can create a thriving garden that will produce delicious pumpkins for years to come.

Using Your Pumpkins & Pumpkin Pie Recipe
After you’ve successfully grown your own pumpkins, it’s time to consider how to use them! Pumpkins are a versatile and delicious vegetable that can be utilised in a number of recipes, from sweet to savoury. Here are some creative ways to use your pumpkins:
Roasted pumpkin: Cut your pumpkin into pieces, drizzle with olive oil and seasonings, then bake until soft and golden in the oven. Roasted pumpkin is great as an appetiser or as a side dish.
Pureed pumpkin for baking: Roast your pumpkins before scooping out the flesh and pureeing it in a food processor or blender. Pumpkin puree can be used in pies, muffins, bread, pancakes, and a variety of other baked items.
Pumpkin soup: Combine pureed pumpkin, stock, cream, and spices to make a creamy and soothing soup ideal for chilly days.
Roast pumpkin seeds: Don’t throw away the pumpkin seeds! Rinse them, toss with oil and salt, and bake them for a crunchy and tasty snack.
Pumpkin curry: Combine cubed pumpkin, additional vegetables, coconut milk, and curry paste in a spicy and fragrant curry.
Pumpkin risotto: For a warm and cosy supper, stir pureed pumpkin into a creamy risotto.
Pumpkin smoothie: For a healthful and delightful smoothie, combine pumpkin puree, yoghurt, milk, spices, and a sweetener.
Perhaps the most popular use of pumpkins is in pumpkin pies.
Here’s a classic pumpkin pie recipe that you can make using your freshly-grown pumpkins.
Ingredients:
1 (15 ounce) can of pumpkin puree
3 eggs
1/2 cup white sugar
1/2 cup packed light brown sugar
1 teaspoon ground cinnamon
1/2 teaspoon ground ginger
1/4 teaspoon ground nutmeg
1/4 teaspoon ground cloves
1/2 teaspoon salt
1 (12 fluid ounce) can evaporated milk
1 (9 inch) unbaked pie crust
Directions:
Preheat oven to 425 degrees F (220 degrees C).
In a large bowl, combine the pumpkin, eggs, white sugar, light brown sugar, cinnamon, ginger, nutmeg, cloves and salt. Mix until thoroughly blended.
Gradually stir in the evaporated milk until smooth.
Pour into the prepared pie crust.
Bake for 15 minutes in the preheated oven.
Reduce the temperature to 350 degrees F (175 degrees C). Continue baking for an additional 35 to 40 minutes, or until a knife inserted into the center of the pie comes out clean. The center should be slightly firm and jiggle only slightly when shaken.
Allow to cool completely before serving. Enjoy.
These are just a few suggestions for how to use your pumpkins. Experiment with different recipes and enjoy your homegrown pumpkins’ tasty and nutritious abundance!