
Mustard greens are a healthy and tasty leafy green that may be readily cultivated at home, both inside and outdoors. They’re high in vitamins and minerals and may give salads, sandwiches, and stir-fries a spicy bite. Growing mustard greens at home is an easy and rewarding way to enjoy fresh, organic vegetables throughout the year.
In this guide, we’ll go over the essentials of producing mustard greens, such as the ideal growing conditions, soil and water needs, and harvesting and usage advice. You may learn how to cultivate mustard greens whether you’re a novice or an expert gardener and get the advantages of this versatile and tasty vegetable.
A Brief History
Mustard greens have a long history of use as a culinary and medicinal herb. It is believed to have originated in the Mediterranean region and has been used for centuries as an ingredient in many dishes. Mustard greens are also known as Brassica juncea, which is part of the Brassicaceae family.
The use of mustard greens dates back to at least 5,000 BC when they were used in Ancient Egypt. During the Roman Empire, mustard was used as a condiment and a medicinal herb. In the Middle Ages, it was believed that mustard had healing powers and was often used to treat various ailments.
Throughout history, mustard greens have been used in various dishes throughout the world, including India, China, Japan, Europe, North Africa and the Americas. In many countries, it is still served today as an accompaniment to meats or as a salad green.
Mustard greens also have a long history of being used for medicinal purposes. It has been found to be effective for treating respiratory ailments such as bronchitis and asthma.
Mustard greens are now grown commercially throughout the world and are available in most grocery stores. They are a great source of vitamins A, C and K, dietary fiber and beneficial antioxidants. They are also low in calories and fat but high in nutrients such as potassium, calcium and magnesium.
Nutritional Benefits
Mustard greens are an incredibly nutritious vegetable, offering a host of health benefits.
They contain vitamins A, C, K, and folate, as well as minerals such as calcium, iron, magnesium, and potassium. In addition to these essential nutrients, mustard greens also provide dietary fiber and phytonutrients like carotenoids and flavonoids.
One cup of cooked mustard greens (140g) contains 690% of the daily value (DV) of vitamin K. Vitamin K is essential for blood clotting and helps to maintain strong bones. It also aids in the absorption of calcium into the body. Mustard greens are also a great source of vitamin A, providing 25% of the DV per one cup (56g). Vitamin A is essential for healthy eyesight and skin.
Mustard greens are also a good source of vitamin C with one cooked cup providing 23% of the DV. Vitamin C is an antioxidant that helps to boost the immune system and protect against diseases like cancer and heart disease. Mustard greens also contain folate which helps to support cell growth and prevent anemia.
In addition to these essential vitamins and minerals, mustard greens also contain dietary fiber which helps to promote gut health. They are also rich in phytonutrients like carotenoids and flavonoids which help to protect against inflammation and cell damage.
Overall, mustard greens are an excellent choice for those looking to increase their daily intake of essential vitamins and minerals. They are very versatile in the kitchen and can be enjoyed raw or cooked in a variety of dishes such as salads, soups, stir-fries, or sautés.
Common Varieties & Their Uses
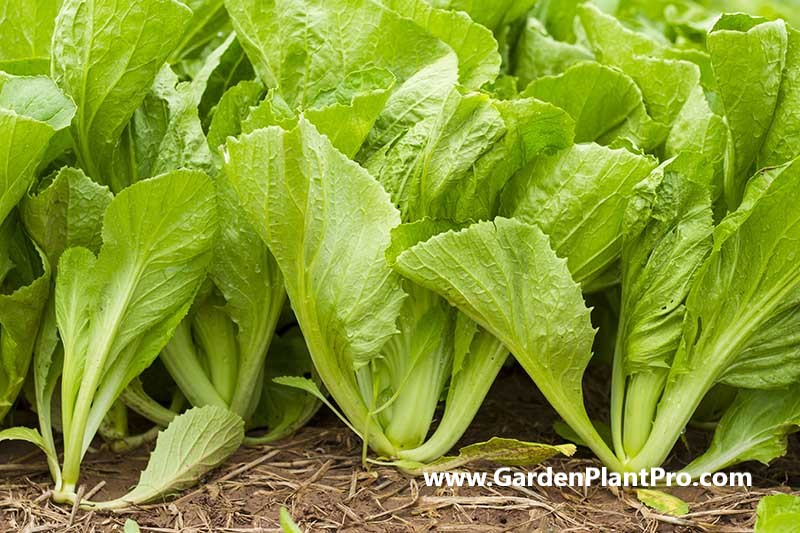
Mustard greens come in a variety of varieties that can be used in a variety of ways. Some of the most popular and widely available varieties are mizuna, tatsoi, and mustard greens. Each type has its own unique flavor, texture, and use.
Mizuna is a popular Japanese green that has a mild, peppery flavor and tender leaves. It is often used in salads or as a garnish, but it can also be cooked or stir-fried.
Tatsoi is another popular Asian green with tender leaves and a mild mustard flavor. It can be eaten raw or cooked in a variety of dishes such as soups, stir-fries, and salads. It is also great for adding color to dishes.
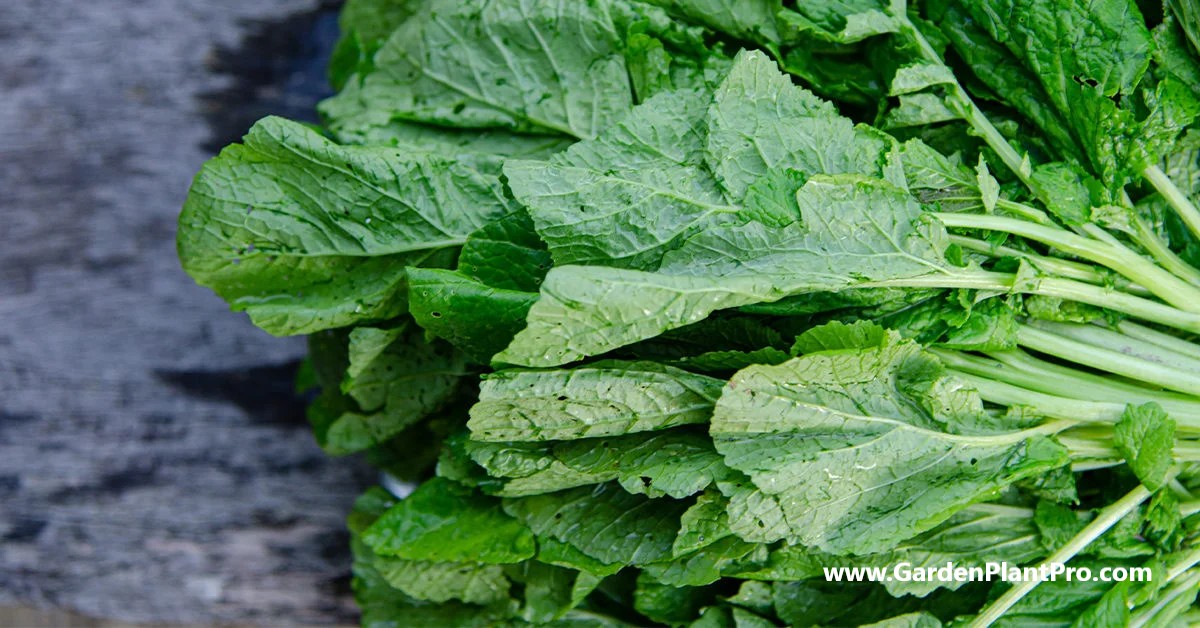
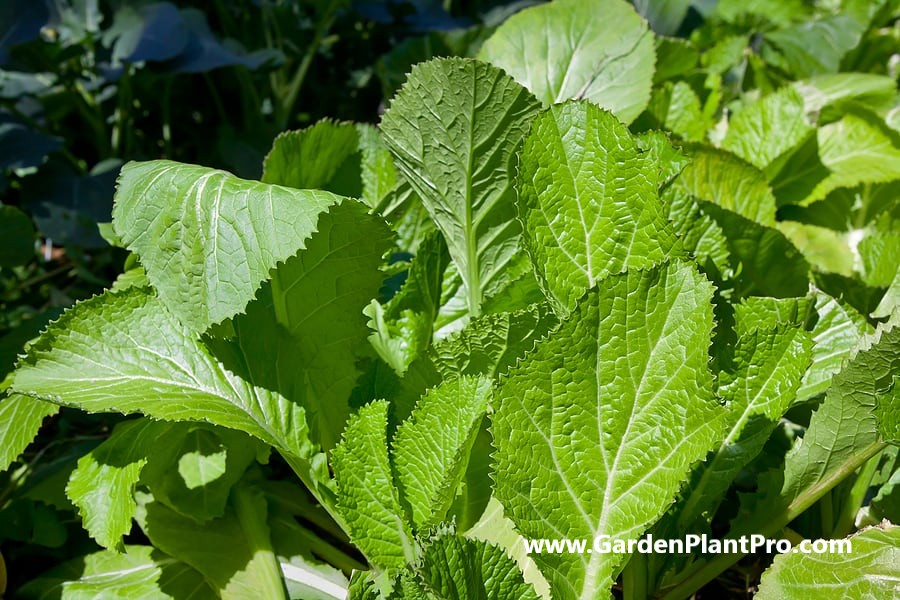
Mustard greens are the most pungent of the mustard greens varieties and have large, dark green leaves with a sharp taste. They are typically cooked in soups or stir-fries, but they can also be eaten raw in salads or as a garnish.
Mustard greens all require similar growing conditions – warm temperatures and moist soil – but they vary in their growing season. Mizuna and tatsoi should be planted six weeks before the average last frost date for your area and can be planted every 30 days until the end of summer for successive crops. Mustard greens should be planted when the weather is cooler than 24 degrees C (75 degrees F) and should be harvested before the heat of summer arrives.
When selecting mustard green varieties for your garden, be sure to consider their flavor profiles and uses to ensure you choose varieties that will work best for your desired recipes or dishes. With proper care, these varieties will provide you with tasty greens all season long.
DIY PROJECT: Collect rainwater no matter where you live...

This DIY project is the best way to legally collect rainwater NO MATTER where you live. Get chlorine-free water, cut down on your water bills, and have enough for an emergency situation or to water your garden. Read More Here...
When To Sow
Mustard greens are a cool-weather crop, and the best time to sow seeds is usually in the late winter or early spring. The ideal soil temperature for germination is between 55°F (13°C) and 75°F (24°C). In areas with milder winters, you may be able to get away with sowing in late winter or early spring. In cooler climates, wait until spring has well and truly arrived before planting.
Spring sowings are best used for baby leaves as plants quickly run to seed in hotter temperatures.
In addition to spring sowings, you can also opt for autumn sowings if you want to use mustard as a short-term autumn green manure. Broadcast seed into cultivated soil so that the seeds are about 5 inches (12 cm) apart and cover lightly with soil. Keep in mind that mustard greens need at least six weeks of growth before they can be harvested, so plan accordingly when determining when to sow.
Choosing A Suitable Location In The Garden
When choosing a suitable location in the garden for your mustard greens, it’s important to consider the amount of sunlight and moisture needed by the plants.
Mustard greens prefer full sun, but will tolerate some shade. They also need well-drained soil, so make sure that your planting area is not overly wet. If your soil is sandy or clay-based, you may want to enrich it with Yates Thrive Natural Blood & Bone with Seaweed.
Once your mustard greens are growing in the garden, they generally need little care besides plenty of sun or partial shade and regular watering. Make sure to keep an eye out for any signs of disease or pests, and be sure to harvest your mustard greens at the right time for maximum flavor and nutrition.
Preparing The Soil
Preparing the soil for mustard greens is an important step in growing this nutritious plant. Before sowing seeds or planting seedlings, it is important to make sure the soil is rich in nutrients and has adequate moisture.
When choosing a location for your mustard greens, select a spot that gets at least six hours of direct sunlight per day. The soil should be rich in organic matter and well-draining, so it’s best to avoid areas prone to standing water.
To prepare the soil, work in 2-3 inches (5-7 cm) of compost or aged manure and till the soil 8-10 inches (20-25 cm) deep. If necessary, add lime to raise the pH of acidic soils or sulfur to lower the pH of alkaline soils.
It is also important to check the soil temperature before planting. Mustard greens germinate best at 55-65°F (12-18°C). If the soil temperature is too cold or too hot, wait until it cools down before sowing seeds or planting seedlings.
Finally, make sure to water your newly planted mustard greens regularly and fertilize them every few weeks to ensure they have all the nutrients they need to thrive.
Planting The Seeds Or Seedlings
Planting the seeds or seedlings is the next important step in growing mustard greens at home.
When starting from seeds, it’s best to begin them indoors in a couple of inches of pre-moistened soil or a soilless mix in a peat pot or other small container about 20 days before your last frost date. Plant each seed just under the soil about a half inch (1 cm) deep. Once the seedlings are large enough to handle, they can be transplanted into the garden.
When direct sowing, broadcast seed into cultivated soil so that the seeds are about 5 cm apart and ⅓-½ inches deep in rows one to two feet apart. Planting too close together will require thinning and transplanting which can damage the roots of older plants. For larger varieties, space plants 3-5 inches apart for optimal growth.
Mustard greens are considered a cool-season crop, so it’s best to sow in autumn to use mustard as a short-term autumn green manure. To ensure success, carefully follow instructions on the packet for sowing depth and spacing as different varieties have different requirements. Once seeded, lightly water in and keep moist until germination occurs.
Caring For The Seedlings
Once your mustard greens seedlings are established, they will require regular care to keep them healthy and productive. Water the plants deeply once or twice a week, making sure that the soil is thoroughly moistened.
Mustard greens prefer a soil pH of 6.5 to 7.5 and moderate amounts of nitrogen, phosphorus and potassium fertilizer. If soil tests show that your soil is deficient in any of these nutrients, apply a balanced fertilizer such as 10-10-10 according to the manufacturer’s instructions.

Do you have some charcoal in your house right now? We call charcoal a “miracle leftover” for anyone who wants to be a little more self-sufficient and cut costs. That’s because it can help you with so many different things around the house and garden. You can even use it to make an energy-free fridge. Read More Here...
Weed your mustard greens regularly to reduce competition for moisture and nutrients. When the plants are mature, you may want to mulch around them to help retain moisture in the soil and reduce weed growth.
Pay attention to pests and diseases. Mustard greens can be affected by aphids, cabbage worms, flea beetles, and spider mites. Common diseases include black rot, clubroot, downy mildew and white rust. If you find any of these pests or diseases in your garden, take appropriate action such as hand-picking pests off of plants or applying a fungicide or insecticide according to the instructions on the label.
Harvest your mustard greens when they are young and tender for the best flavor. Enjoy your harvest fresh in salads or cooked in stir-fries or soups.
Watering & Fertilizing
Once you have your mustard green seedlings planted, it is important to keep them well watered and fertilized. Mustard greens need 2 inches (5 cm.) of water a week. If you are not getting this much rainfall a week while the seedlings are growing, water at the first sign of wilt.
If watering, apply an inch of water in one watering. For regular feedings, apply a dilute liquid fertilizer every 7 to 14 days (or as per the instructions) after your mustard greens start growing. Any all-purpose fertilizer will do. A side-dressing of nitrogen-rich fertilizer, applied when the plants have several true leaves, will help mustard grow quickly and reach maturity before bolting.
It is also important to make sure that your mustard greens remain moist but not soggy. To avoid over-watering and under-watering, check the soil regularly with your finger and water when it feels slightly dry. Make sure to keep the soil evenly moist throughout the entire growing season for optimal growth and yield.
When & How To Harvest
Harvesting mustard greens is a simple and straightforward process.
Depending on the variety, they are ready to harvest approximately 40-50 days after planting. To check their readiness, cut off a leaf and taste it. If it has a slightly spicy flavor it is ready to harvest.
For baby greens, snip off the leaves with scissors or simply pull them off the stem with your fingers. This will stimulate the plant to produce more leaves for another harvest in about a week or two. For full-sized leaves, wait until the plant is about 6 inches tall before harvesting by cutting off the entire stem at soil level.
When harvesting mustard greens, it is important to ensure that you are only taking what you need as leaving some leaves on the plant will ensure that it continues to produce for many weeks. For full-sized mustard greens, harvest from the outside of the plant inwards to allow for further growth on the inside of the plant.
When harvesting baby greens, try to avoid harvesting from any one area for more than two weeks in a row as this will result in fewer yields over time. If you want to maximize your yield, consider succession planting every three weeks so that you have a steady supply of baby mustard greens throughout the season.
Once harvested, store your mustard greens in an airtight container in the refrigerator for up to five days. Mustard greens can also be frozen or preserved in jars of oil or vinegar for longer storage periods. Enjoy your freshly harvested mustard greens!
Storing & Preserving
Storing and preserving mustard greens is an important part of the growing process.
Mustard greens must be harvested when the leaves are young and tender for the best flavor. The University of Illinois Extension recommends storing them in a plastic bag in your refrigerator’s crisper. To extend the life of fresh leaves, wrap them loosely in a damp paper towel and place them in a plastic bag before putting them in the crisper.
Mustard greens can also be dried for later use. Cut the stalk from the plant below the seed pods and gather them in a paper bag. Set the bag aside for a couple of weeks in a warm place to allow the moisture to evaporate. Once dry, store mustard greens in an airtight container or plastic resealable bag and keep them away from direct sunlight and humidity.
For long-term storage, mustard greens can be frozen. Blanching is recommended for optimal flavor retention, but it isn’t necessary if you plan to use them within a few months. To blanch, submerge your mustard greens in boiling water for 1-2 minutes before draining and immediately plunging them into an ice bath to stop the cooking process. Once cooled, pat dry and freeze in airtight containers or resealable bags. Frozen mustard greens will last up to 6 months when stored properly.
Common Diseases & How To Control Them
Mustard greens are generally quite resistant to disease, but following some simple practices can help to keep them healthy and productive. Rotating crop locations and alternating with non-Brassica crops will help to reduce the risk of soil-borne pathogens. It is also important to ensure that the soil is kept well-drained and fertilised, as this will help to keep the plants healthy and better able to resist disease.
CASE STUDY: We've been living off the grid for the last 40 years...

In all that time an electric wire has never been connected to our house. We haven’t gotten or paid an electricity bill in over 40 years, but we have all the electricity we want. We grow everything we need, here, in our small backyard. We also have a small medicinal garden for tough times. Read More Here...
If disease does occur, it is important to act quickly. Common diseases affecting mustard greens include downy mildew, black rot, and Rhizoctonia blight. Downy mildew appears as a white or grey powdery coating on the leaves which may lead to yellowing and wilting. Black rot can cause rapid wilting, yellowing and dieback of the foliage. Rhizoctonia blight often appears as dark lesions on the leaves or stems which may cause the foliage to wilt and die.
To control these diseases, it is important to remove any affected plants or plant parts immediately. The use of fungicides can also be effective if applied early in the season when symptoms first appear. It is also important to avoid overcrowding which can increase humidity levels and create ideal conditions for fungal growth. Finally, providing adequate air circulation around the plants will help to reduce humidity levels and discourage fungal growth.
Common Pests & How To Control Them
Common pests can be a problem for mustard growers. Aphids are the most common, rapidly multiplying until they cover the underside of the leaves. To keep them away from your mustard plants, try spraying neem oil onto the leaves or using insecticidal soap. Inspect your plants frequently and take action if you notice an infestation.
Companion planting can also help prevent unwanted insects from invading your mustard greens. Planting members of the mint family—such as marjoram, oregano, basil, and thyme—around your mustard greens can help deter certain pests. These herbs also have other benefits, such as improving soil structure and preventing soil-borne diseases.
In addition to aphids and other insects, slugs can also be problematic for mustard growers. To prevent slugs from eating your mustard greens, sprinkle wood ash or diatomaceous earth around the plants. You can also use beer traps to lure these pests away from your plants.
By following the tips above, you can protect your mustard plants from unwanted pests and ensure a safe and plentiful harvest.
Beneficial Companion Plants
When growing mustard greens, it is important to consider the other plants that will be growing alongside them. Mustard greens can benefit from companion planting with certain vegetables and herbs. Some of the best companion plants for mustard greens include onions, cucumbers, celery, thyme, rosemary, fennel, corn, buckwheat, mint, tansy, yarrow, beets and peas.
Onions are a great companion for mustard greens because they help to repel pests such as aphids. Cauliflower is another good companion plant for mustard because it repels flea beetles. Other beneficial companion plants include vining flowers and vegetables such as English peas, snap peas, jasmine and thyme. These plants provide support to the mustard green vines and can also help to protect them from pests.
If you are a seed saver, it is important to note that mustard greens can cross with broccoli raab, turnips and Chinese cabbage. To prevent this from happening it is best to leave at least 800 feet between these crops when planting in your garden.
To get the most out of your companion planting efforts when growing mustard greens, make sure that you select hardy varieties of plants that grow well together.
Using Your Mustard Greens
There are several great ways to utilise fresh mustard greens in your cooking once you’ve collected them. These spicy, leafy greens may be used to lend a zesty spice to salads, sandwiches, and stir-fries, as well as a tasty substitution for spinach or other leafy greens in many dishes.
A fresh, tangy salad is a favourite way to employ mustard greens. Simply slice the greens into bite-sized pieces and combine them with other fresh veggies such as cherry tomatoes, cucumbers, and avocado in your favourite salad dressing. For a more full lunch, add some protein, such as grilled chicken or tofu.
Stir-fry is another fantastic method to use mustard greens. In a wok or pan, heat some oil, then add the sliced garlic and ginger and sauté until fragrant. Stir-fry the mustard greens until they’re wilted and soft, then season with soy sauce or additional seasonings to suit. For a quick and easy supper, serve over rice or noodles.
Mustard greens can also be used to flavour sandwiches, wraps, and burgers. Simply stack the leaves on top of your favourite toppings, such as cheese, tomato, and avocado, and enjoy the spicy, tangy flavour.
To summarise, mustard greens are a versatile and tasty item that may offer a healthy boost of vitamins and minerals to a variety of meals. These leafy greens are a wonderful and healthful way to enjoy the results of your gardening effort, whether you want them in a salad, stir-fry, or sandwich.