
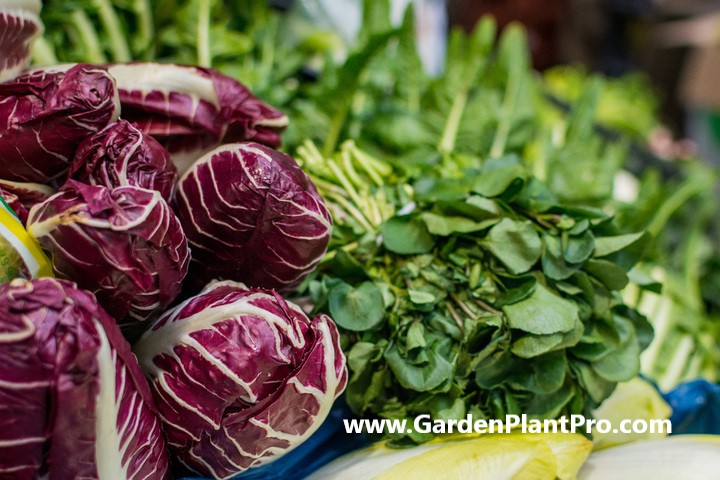
Radicchio is a brightly colored, leafy vegetable that provides bitterness and sharpness to salads and other foods. If you want to add this Italian classic to your garden, you’re in luck! Radicchio can be grown in your vegetable garden with the proper conditions and care.
In this guide we’ll walk you through the steps of growing and caring for radicchio, from seed to harvest, so you may enjoy the tasty and nutritious advantages of this savoury vegetable in the comfort of your own home.
A Brief History
Radicchio is a popular leafy vegetable that originates from the Italian region of Veneto.
It is a member of the chicory family and has been grown since the 16th century. It is believed to have been introduced to Europe by traders from the Middle East. Radicchio was originally grown for its medicinal properties, as it was thought to improve digestion. In more recent years, it has become widely used in salads and cooked dishes throughout Europe and the United States.
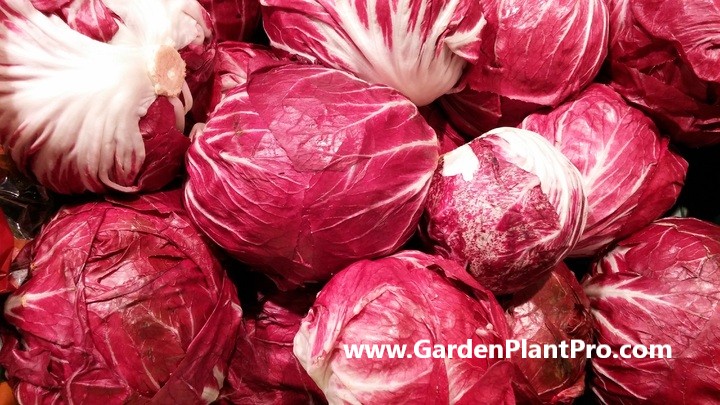
The most widely cultivated varieties of radicchio are known as Radicchio di Treviso and Radicchio di Verona. These varieties have a deep red color and a slightly bitter taste. Other varieties include Castelfranco, Precoce di Chioggia, Rossa di Verona, and Rosso di Treviso.
All these varieties are easy to grow from seed.
Nutritional Benefits
Radicchio is not only a delicious complement to your meals, but it also has several health benefits.
Radicchio is high in antioxidants, which can help protect your body from damage produced by dangerous molecules known as free radicals. It is also a low-calorie vegetable, making it a good choice for individuals attempting to reduce weight or maintain a healthy diet.
Radicchio is high in fibre, which can help keep your digestive tract healthy and lower your risk of certain chronic diseases. It’s also high in vitamins and minerals, including vitamin K, vitamin C, folate, and potassium, all of which are necessary for good health.
Radicchio includes inulin, a substance that can help manage blood sugar levels and increase insulin sensitivity helping to promotes healthy blood sugar levels.
Adding radicchio into your diet can be an excellent strategy to improve your general health while also adding flavor to your dishes. Growing your own radicchio at home can also help you save money, as store-bought varieties can be quite expensive.
Common Varieties & Their Uses
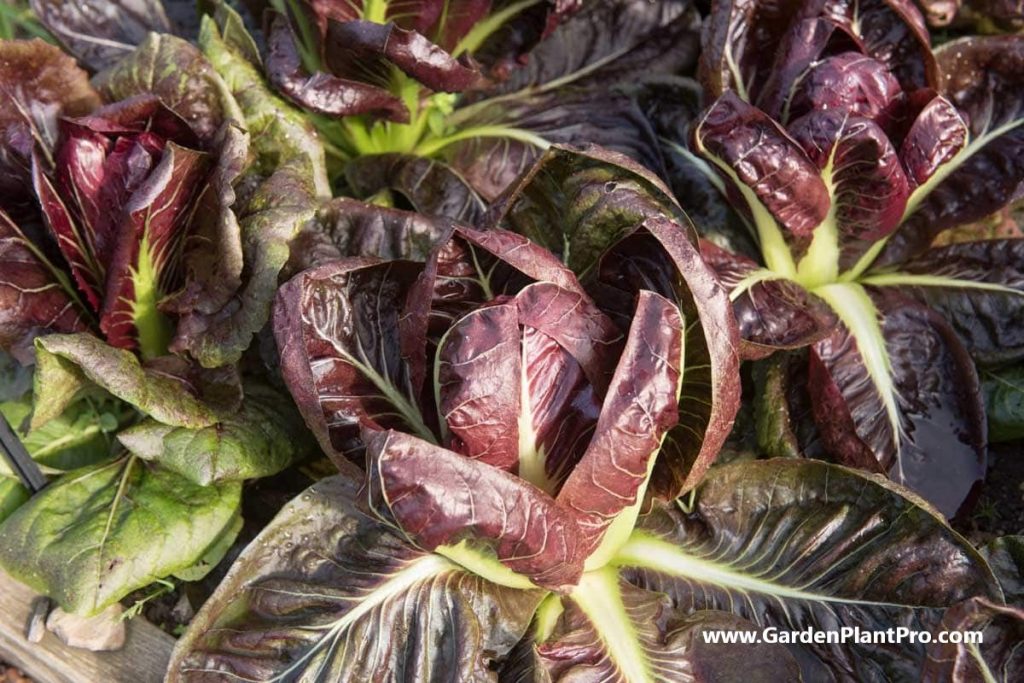
Radicchio is a chicory that comes in a wide variety of shapes, sizes, and colors. Depending on the variety, radicchio can be used for salads, braising, stir-fries, and pesto.
The most popular varieties include the round “Palla Rossa” and the elongated “Treviso”.
The round “Palla Rossa” variety is deep red in color and has a slightly bitter taste. It is best eaten raw in salads or lightly cooked to bring out its sweetness.
The elongated “Treviso” variety is light red in color and has a strong bitter flavor. It is often used in braised or stir-fried dishes to add flavor and texture. It can also be used to make pesto or roasted for added flavor.
The “Verona” variety is a cross between the Palla Rossa and Treviso varieties. It has an elongated shape and a deep, reddish-purple color. This variety is less bitter than Treviso but more flavorful than Palla Rossa. It can be eaten raw or cooked, making it an excellent all-purpose radicchio.
The “Tardivo di Treviso” variety is an autumnal radicchio with a red-green color and mild flavor. This variety is best eaten raw as it has a delicate texture that does not hold up well to cooking.
No matter which variety you choose, radicchio can be used to add flavor and texture to your favorite dishes. Whether you are looking for something sweet and crunchy or something bitter and flavorful, there’s sure to be a radicchio that fits your needs.
When To Sow
Radicchio is a cold hardy chicory, so it can be planted as soon as the soil can be worked in early spring. For a fall crop, tuck plants into the garden in late summer. To ensure a continuous harvest, sow seeds every 3 weeks. Radicchio grows best during the cooler seasons – spring and fall – when temperatures are cool.
DIY PROJECT: Collect rainwater no matter where you live...

This DIY project is the best way to legally collect rainwater NO MATTER where you live. Get chlorine-free water, cut down on your water bills, and have enough for an emergency situation or to water your garden. Read More Here...
When sowing seeds indoors, fill starter pots or trays with seed raising mix and sow the seeds. Cover them lightly, firm down and water well. Keep the soil moist so the seeds don’t dry out. Plant any seedlings outdoors when they reach 3-4 inches tall and have several sets of leaves.
Choosing A Suitable Location In The Garden
When choosing a suitable location in the garden to grow Radicchio, it is important to consider factors such as sunlight and soil quality.
Radicchio grows best in full sun and in well-drained soils with plenty of compost or organic matter. The ideal pH for the soil should be between 5.5 and 6.5. If you have a container garden, choose a large pot with drainage holes and good quality potting soil.
It is also important to consider the temperature when deciding on a location for your Radicchio plants. Radicchio does best when temperatures are cool, so it is best to choose a spot that gets a lot of sunlight but is not overly exposed to the hot summer sun.
Once you have chosen an appropriate location, it’s time to prepare the soil.
Preparing The Soil
Radicchio needs fertile, well-drained soil in a sunny site.
To encourage fast growth, it’s a good idea to dig in a cushiony blanket of rich compost when preparing the soil. This will help to ensure maximum nutrient availability for the plants and give them the best chance of success.
If planting in spring, it is important to make sure that the soil has had enough time to warm up before sowing seeds or planting seedlings. Generally speaking, it is best to wait until three to four weeks before the average last frost date in your area before sowing seeds or setting out seedlings.
For a fall crop, it is important to keep in mind that radicchio grows best during the cooler seasons -spring and fall – so it is best to start preparing your soil at least four weeks before your first frost date. Doing this will give the plants time to grow and mature before cold weather sets in.
If you live in a colder climate and you want to enjoy radicchio year-round, you can also grow salad greens in pots when the soil is too cold and wet in winter. That way, you can bring them indoors or keep them on your patio if temperatures drop below freezing.
No matter what season you’re planting for, making sure that your soil is well-prepared for radicchio will give you the best chance of success with your crop. Start by removing any weeds and roots from the planting area, then dig down about 10 inches (25 cm) deep and mix in a generous layer of compost or other organic matter to enrich the soil.
If needed, add some fertilizer or slow release fertilizer according to package instructions. Be sure to rake the soil flat before sowing seeds or planting seedlings so they have a good base to take root in.
Planting The Seeds Or Seedlings
Planting the seeds or seedlings of radicchio is a relatively straightforward process.
For those who choose to sow seeds directly in the garden bed, they should be sown in full sun and about 1” apart in rows 12-18” apart.
Cover the seed lightly with 1/8” inch soil and firm it down gently so that it doesn’t get washed away by rain or watering.
For indoor sowing, the seeds should be started 3-4 weeks before the average last frost date in your area before transplanting outside.
If you opt to transplant a punnet of seedlings, then this can be done even in late autumn when temperatures are cool.

Do you have some charcoal in your house right now? We call charcoal a “miracle leftover” for anyone who wants to be a little more self-sufficient and cut costs. That’s because it can help you with so many different things around the house and garden. You can even use it to make an energy-free fridge. Read More Here...
When it comes to thinning the seedlings, this should be done when they are 8” apart. The seedlings removed through the thinning process may be transplanted elsewhere if desired. It is important to note that dry soil must be kept consistently moist in order for the plants to thrive, and so regular watering is essential.
Fertilizing the plants is also recommended for optimal growth and health.
Caring For The Seedlings
Once the seedlings have been planted, it is important to provide them with the right care. Caring for the seedlings should include regular watering and fertilizing.
Watering is necessary for maintaining healthy growth, especially during the hot summer months. Radicchio plants should be watered approximately every two days, but this can vary depending on the weather and soil conditions. When watering, make sure that the soil is evenly moist without being soggy.
Fertilizing is also important to ensure healthy growth. Radicchio plants require nitrogen-rich fertilizer to stay healthy and produce high-quality heads of radicchio. Apply fertilizer when planting and then once every two weeks during the growing season.
When caring for the seedlings, it is also important to keep an eye out for any signs of disease or pest infestations. Check regularly for signs of wilting leaves or discoloration, which could indicate diseases such as downy mildew or root rot.
Also keep an eye out for common pests such as aphids, whiteflies, and thrips, which can cause damage to your plants if left unchecked. If you notice any signs of disease or pests, take action immediately to prevent further damage.
When & How To Harvest
When it comes to harvesting radicchio, timing is key.
Heads are ready for cutting when they’re firm to the touch (usually after about 60 to 65 days), similar to iceberg lettuce. Depending on the variety, radicchio can also be harvested as individual leaves any time during its growth. To ensure the best flavour, aim to harvest in the morning on a sunny day, when the leaves are firm and crisp.
When harvesting heads, use a sharp knife or scissors to cut the head just above the base of the stem. For individual leaves, you can gently pull them off one by one. Once harvested, store your radicchio in a cool, dark place or in your refrigerator for up to two weeks. To preserve radicchio for longer periods of time, it can be blanched and frozen for up to six months.
Storing & Preserving
Once your radicchio is harvested, it is important to store and preserve it properly. Radicchio does not have a long shelf life and should be used within a few days of harvest. If you cannot eat the radicchio immediately, there are various methods for storing and preserving it.
One option is to blanch the radicchio in boiling water. This will help to preserve the color and texture of the leaves. After boiling, plunge the radicchio into cold water, drain, and then wrap it in plastic wrap or vacuum seal it before refrigerating. It should keep for up to two weeks in the refrigerator.
Another option is to pickle your radicchio leaves. To do this, bring a pot of vinegar, sugar and salt to a boil and add your radicchio leaves. Boil for a few minutes until the leaves are wilted and then transfer them into sterilized jars before pouring over the boiling liquid. Allow them to cool before refrigerating them for up to two months.
You can also freeze your radicchio if you want to store it for longer periods of time. Start by blanching your radicchio in boiling water for about 3 minutes before rinsing with cold water. Drain well and then pat dry with a paper towel before wrapping in freezer bags or containers. Radicchio can be stored in the freezer for up to six months.
Whatever method you choose, make sure you keep your radicchio away from direct light and humidity as much as possible so that it stays fresh as long as possible. With proper storage techniques, your home-grown radicchio can last several weeks or even months so that you can enjoy its unique texture and flavor all year round.
Common Diseases & How To Control Them
Radicchio is a robust and popular vegetable that is a part of the chicory family. It has a long history of cultivation, with evidence of its use as early as Roman times. Radicchio is full of nutrients and can be used in many different recipes, from salads to grilled entrees. When grown correctly, radicchio can yield delicious results for the home gardener.
However, radicchio can sometimes be susceptible to certain diseases.
CASE STUDY: We've been living off the grid for the last 40 years...

In all that time an electric wire has never been connected to our house. We haven’t gotten or paid an electricity bill in over 40 years, but we have all the electricity we want. We grow everything we need, here, in our small backyard. We also have a small medicinal garden for tough times. Read More Here...
Knowing how to identify and manage these diseases is key to successful harvests of this popular vegetable. Here are some common diseases that may affect your radicchio crop and how to control them.
Downy Mildew:
Downy mildew is a fungal disease that will cause yellow spots on the leaves of the radicchio plant.
To prevent downy mildew, make sure to provide adequate spacing between plants and avoid overcrowding them. Make sure to water your plants at the base rather than spraying them with water from above, as this will help to prevent moisture from settling on the leaves and spreading the fungus. If downy mildew does occur, treat with a fungicide spray according to the instructions on the label.
Fusarium Wilt:
Fusarium wilt is a soil-borne fungal disease that causes wilting and yellowing of the leaves.
To prevent this disease from taking hold, ensure that your soil is well-drained and not prone to flooding or sitting in puddles. Rotate crops regularly so that Fusarium wilt does not become established in one area for too long. If you do find plants infected with Fusarium wilt, discard them immediately and don’t compost them as this could spread the fungus further.
Common Pests & How To Control Them
Common pests can be a problem when growing radicchio, but they can be managed with the right techniques. Aphids, leafhoppers, slugs, and snails are the most common pests that attack radicchio plants. Prevention is key to controlling these pests and there are several steps you can take.
The first step is to keep your garden clean and free of debris.
Remove any dead foliage or plant matter from the area as it can attract insects. Keep the soil around the plants loose and well drained to minimize the risk of fungal diseases. Mulch around the plants to help retain moisture and reduce weeds.
If you notice any signs of insect damage such as yellowing leaves or wilting foliage, use an insecticidal soap or a horticultural oil spray to kill the pests. Always follow the directions on the label for proper application and safety measures. If an infestation is severe you may need to use a stronger insecticide such as pyrethrin or neem oil.
In addition to chemical control, there are some cultural practices that can help control common pests. Planting companion plants such as marigolds, nasturtiums, and garlic near radicchio plants can deter some insect species from invading your garden. Introducing beneficial predators such as ladybugs, lacewings, or praying mantis can also help keep pest populations in check.
Finally, practice crop rotation by planting radicchio in different parts of your garden each season to avoid build-up of pest populations in one spot. Regular inspections of your plants and timely treatment will help keep your radicchio healthy and free of common pests.
Beneficial Companion Plants
When planting radicchio in your vegetable garden, it is important to consider which companion plants will be beneficial. Radicchio grows best when planted in the company of other vegetables and greens that have similar cultural needs.
Carrots, beets, strawberries, tatsoi, lettuce, onions, radishes, mustard greens, and cucumbers are all good companion plants for radicchio. Lettuce is especially beneficial as it has many of the same cultural needs as radicchio. The two plants also share the same pests and diseases.
Using Your Home Grown Radicchio
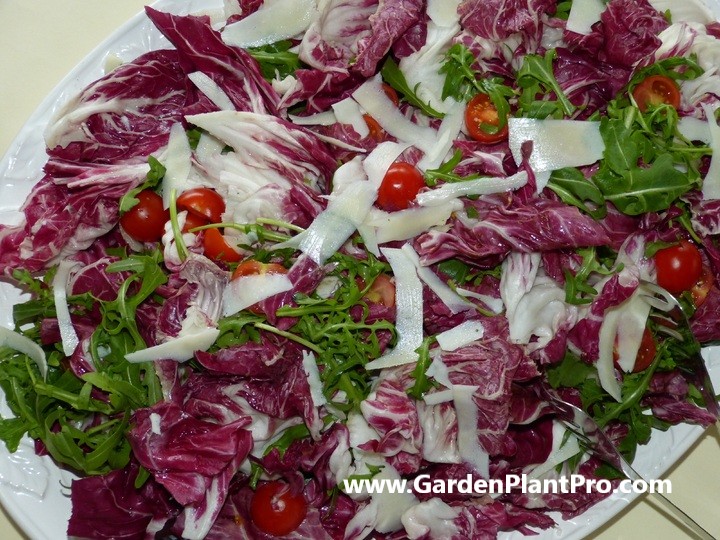
Once you have successfully grown your own radicchio, it’s time to enjoy the fruits of your hard work. Radicchio can be used in many dishes, and its slightly bitter flavor can add a unique taste to salads and sides.
Radicchio can be added to salads or used as part of a larger dish.
For example, it can be grilled and used as a side for pork or steak. It is often braised with onions and garlic for an earthy flavor that pairs well with white meats like chicken or turkey. It also makes a great addition to stir-fries and risotto dishes.
Radicchio is also delicious when roasted in the oven.
Simply cut into wedges, season with salt and pepper, drizzle with olive oil, and roast in a 400 degree oven for 15-20 minutes until lightly browned and tender.
Radicchio can also be used to make pesto.
Simply combine it with other ingredients such as chopped garlic, pine nuts, parmesan cheese, olive oil, and salt and pepper in a food processor or blender until smooth. This pesto is delicious on pasta or as a sandwich spread.
Finally, radicchio can be pickled to make a delicious condiment that pairs well with cheeses, charcuterie boards, sandwiches, and more.
To make pickled radicchio, simply bring 1 cup of white vinegar, 1/4 cup of sugar, 1/4 cup of salt, 1 teaspoon of coriander seeds (optional), 2 bay leaves (optional), and 2 cups of water to a boil in a medium saucepan over high heat. Once boiling, add one head of radicchio cut into wedges or slices and reduce the heat to low. Simmer for 10 minutes before transferring the mixture to jars or containers for storage in the refrigerator for up to two weeks. Enjoy!