
Peas are a versatile and nutritious vegetable that can be enjoyed fresh or cooked in a variety of dishes. Not only are they delicious, but they are also relatively easy to grow in your home garden. With a few simple steps and some basic equipment, you can cultivate a bountiful harvest of fresh, sweet peas that will be the envy of all your neighbors.
A Brief History
Peas have been grown for thousands of years and are thought to have originated in the Mediterranean and Middle East. Traders and travellers brought them to other areas of the world, and by the 17th century, they were widely cultivated in Europe.
Peas were traditionally cultivated in the garden on trellises or poles to keep the plants off the ground and increase air circulation. This practice is still used today, however dwarf kinds of peas that may be grown in containers or directly in the ground are now available.
Gregor Mendel, a prominent botanist and monk, conducted pioneering genetic research on peas in the nineteenth century. Mendel’s work contributed to the establishment of the fundamental concepts of heredity, and his studies with pea plants provided the groundwork for modern genetics.
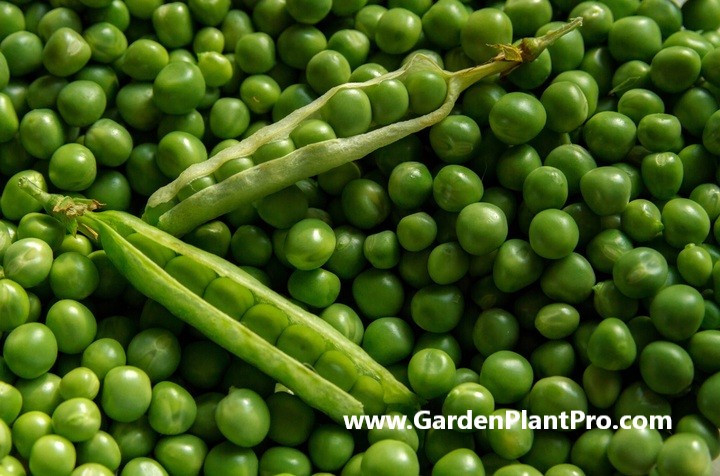
Peas are a popular and healthy vegetable that can be eaten fresh, frozen, or tinned. They make an excellent addition to any home garden and are quite simple to cultivate, making them an excellent choice for both rookie and experienced gardeners.
Peas are a cool season crop and thrive in cooler climates. They are a hardy vegetable and can be planted early in the spring or late in the fall. The best soil for growing peas is a light, well-drained soil that is rich in organic matter. Peas need plenty of sunshine during their growing season and should be planted 4-6 weeks before the last spring frost date.
Nutritional Benefits
Peas are a great addition to any diet. Not only are they an excellent source of fiber, but they are also rich in a variety of vitamins and minerals. They contain Vitamin K, which helps to activate our body’s osteocalcin, anchoring calcium to our bones. In addition, peas are an excellent source of protein and a good source of carbohydrates.
For those looking to manage their blood sugar levels, adding peas to their diet can be beneficial as they have a low glycemic index. Additionally, peas contain very few calories – only 59 per cup – making them great for weight management.
When growing your own peas at home, it is important to understand the nutritional benefits that come with them in order to select the right variety for your needs. All varieties of peas contain the same nutritional benefits, though some may be higher in certain vitamins or minerals than others.
When harvesting your home-grown peas, it is important to keep in mind that they will become sweeter as they ripen on the vine. Eating them as soon as possible after harvesting will ensure that you get the most nutrition from them. Peas can be stored in an airtight container in the refrigerator for up to a week or frozen for longer storage periods.
By understanding the nutritional benefits of growing and eating your own home-grown peas, you can ensure that you get the most out of each harvest and maximize their health benefits for you and your family.
Common Varieties & Their Uses
When it comes to growing peas at home, there are many varieties to choose from. Each variety has its own unique characteristics and uses. Here is an overview of some of the most common varieties and their uses:
Snow Peas are a popular variety that produces flat, edible pods that can be eaten fresh or cooked. These peas are best harvested young before the seeds inside start to swell.
Sugar Snap Peas have both edible pods and edible seeds. They are sweet and crunchy when eaten raw and more tender when cooked. These peas are great for salads, stir-fries, and side dishes.
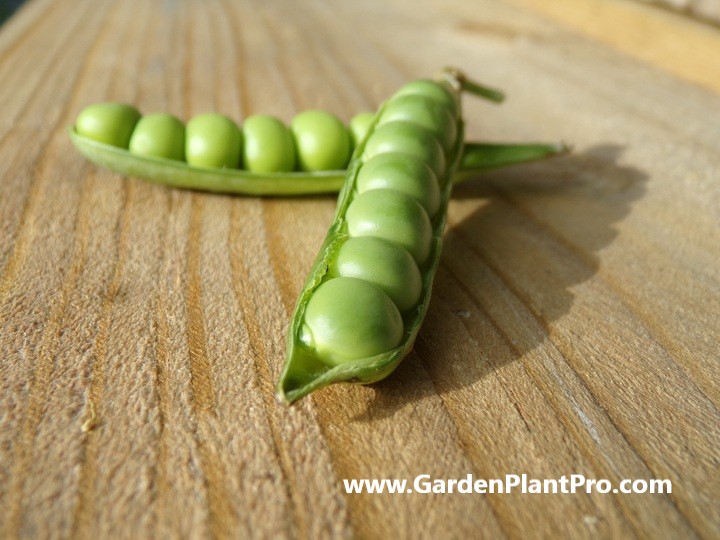
English Peas (or Garden Peas) are the most traditional type of pea. They have round, edible pods that must be shelled before eating. English peas are commonly used in soups, stews, and casseroles as well as fresh side dishes or salads.
Shelling Peas are a type of English pea that must be shelled before eating. These peas have a sweeter flavor than other varieties and are often used in stews or curries.
Climbing Peas such as Yates Telephone, Snow Peas, and Climbing Sugarsnap all benefit from having a trellis to climb on as they grow. These varieties tend to produce more pods per plant than bush-type varieties, making them ideal for large-scale production or home gardens with ample space.
No matter which variety you choose, success begins with the right soil preparation and planting techniques which we’ll look at shortly. With proper care throughout the season, your home-grown peas will be ready for harvest in no time!
When To Sow
When it comes to sowing peas, timing is key.
DIY PROJECT: Collect rainwater no matter where you live...

This DIY project is the best way to legally collect rainwater NO MATTER where you live. Get chlorine-free water, cut down on your water bills, and have enough for an emergency situation or to water your garden. Read More Here...
Peas prefer mild, cool weather and do not thrive in too hot or too cold conditions. The best time to sow peas is in the spring or autumn when temperatures are more moderate.
When choosing a suitable location in the garden, make sure it is in the sunniest spot to get the most out of your crop. Once you have selected the ideal spot, prepare the soil by loosening it and adding organic matter such as compost or well-rotted manure.
If you are planting from seedlings, transplant them 25mm deep into the prepared soil. For direct-seeding, make sure to sow the seeds 25mm deep and keep them well-watered until they germinate. Planting should be timed to avoid flowering during frosty or hot and dry spells which can cause poor pod set.
Once your peas have been planted and watered, all that’s left to do is care for them until they are ready for harvest. Ensure that they are well-watered and fertilized throughout their growth period so that they can reach their full potential.
Choosing A Suitable Location In The Garden
Choosing a suitable location in the garden is key to successful pea planting. Peas prefer full sun and soil that drains well, so look for an area that receives at least 6 hours of direct sunlight each day and has good drainage.
It’s also important to avoid areas that are prone to frost and hot, dry weather – peas are best grown in mild, cool conditions. When it comes time to sow the seeds, they will benefit from protection from strong winds and any late frosts.
When selecting an area for your peas, it’s also smart to consider companion plants like carrots, radishes or onions which can benefit each other when planted together.
Preparing The Soil
Preparing the soil is an essential step for successful pea growth. Before sowing, the soil should be tested to determine its pH level and nutrient content. Ideally, soil with a pH between 6 and 7 is ideal for peas. If the pH is too low, adding lime can help raise it.
For optimal performance, it’s also important to add organic matter such as well-rotted manure or compost to the soil prior to planting. This will add vital nutrients and improve the structure of the soil, making it easier for roots to grow. Peas are a nitrogen-fixing crop and don’t need too much phosphorus in their fertilizer. A moderate fertilizer such as 10-10-10 or a balanced organic fertilizer is usually sufficient.
It’s also important to ensure that the soil is free draining to prevent water logging, which can cause root rot in peas. If your soil has high clay content, adding organic matter such as compost or sand can help improve drainage and aeration. If your soil is sandy, adding organic matter can help retain moisture for the plants’ roots during dry periods.
Planting The Seeds Or Seedlings
Once the soil has been prepared, it is time to plant the peas.
For best results, sow seeds late in winter or early spring when the last frosts have passed and plant out once the soil has warmed up. Peas are best grown from seed sown directly into cool soil and planting is timed to avoid flowering in frosty or hot dry conditions. Plant seeds 25mm deep and fill with quality potting mix, and water thoroughly before planting.
When transplanting punnet-grown seedlings, ensure they have been watered well beforehand. Plant out in their final positions at least 25cm apart and water again afterwards. Avoid planting too deeply as this can lead to poor root development.
When sowing or planting, it is important to consider the location of the pea plants in the garden. Peas prefer a sunny spot, so try to place them in an area that receives at least 6 hours of direct sunlight each day. They also need well-drained soil, so be sure to select a spot with good drainage.
Finally, ensure that you water your plants regularly during their growing season and fertilize them with a balanced fertilizer every 6-8 weeks for optimum growth and yield. With the right care, your home-grown peas will be ready for harvest in no time.
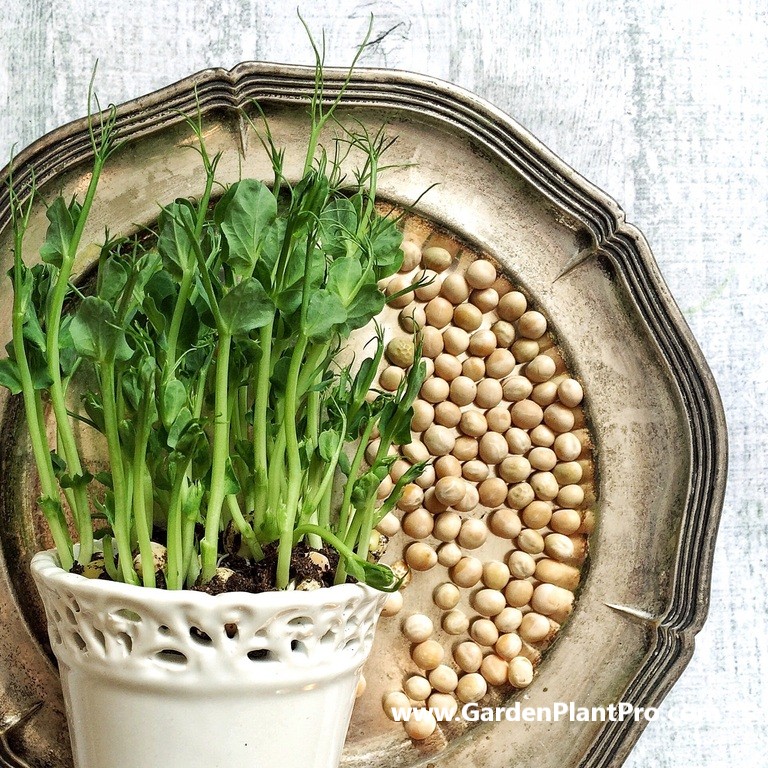
Caring For The Seedlings
Once the peas have been planted and have emerged from the soil, it is important to provide the seedlings with the necessary care and attention to ensure their good health and successful growth.
Caring for the seedlings should involve weekly feeding with Yates Thrive Natural Fish Seaweed Plant Food Concentrate, mulching around the base of the plant with organic mulch, avoiding overwatering and ensuring there is adequate water for growth.

Do you have some charcoal in your house right now? We call charcoal a “miracle leftover” for anyone who wants to be a little more self-sufficient and cut costs. That’s because it can help you with so many different things around the house and garden. You can even use it to make an energy-free fridge. Read More Here...
Organic mulch can be used to help preserve moisture levels in the soil and encourage healthy root growth. Mulching also helps to keep weeds under control, providing a clean and well-maintained garden bed for your peas.
The type of peas you plant will determine whether or not you need to stake them. Peas are classified into two types: bush peas and pole peas.
Bush peas are short and compact, reaching a height of around 2-3 feet. They do not usually require staking or any other sort of assistance. If you are planting bush peas, you can just plant them and let them grow on their own.
Pole peas, on the other hand, can grow to be 6 feet tall and more vining than bush peas. Pole peas do require some form of support to keep them from sprawling on the ground and to aid in their upward growth. The most common method of supporting pole peas is to use trellises, stakes, or netting. You can also use a combination of these methods to create a sturdy support structure for your pole peas so keep that in mind as they grow.
Watering & Fertilizing
Watering and fertilizing are essential to a successful harvest of peas. Regularly watering peas will help them grow large, succulent pods. Pea plants have a shallow root system, so they don’t do a great job at absorbing water. As such, it’s important to water the soil around the plants once or twice a week, making sure that the soil is evenly moist but not soaking wet.
Fertilizing is also important for healthy pea plants. Once the peas grow to 2 inches tall, add fertilizer. For an organic approach, use well-rotted manure or compost at planting time. Alternatively, you can use a high phosphorus fertilizer such as 10-10-10.
Fertilize peas planted in both spring and summer with a slow release fertilizer, following the manufacturer’s instructions for application rates. Feed your peas over the growing season with vegetable food and water regularly.
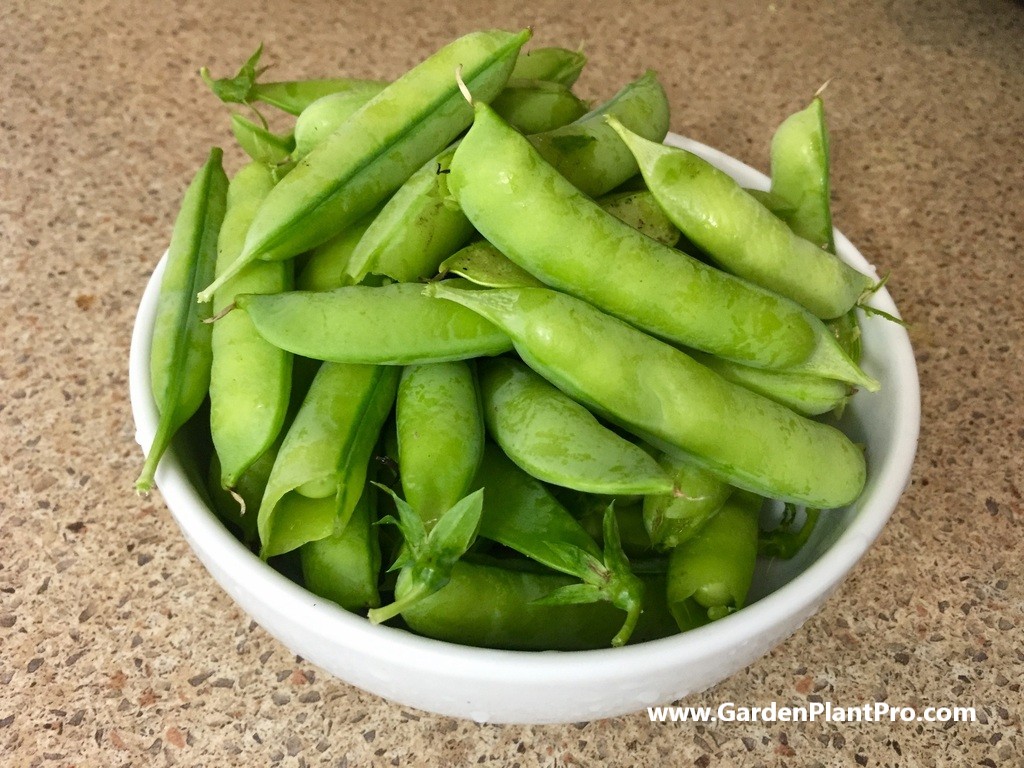
When & How To Harvest
Harvesting your home-grown peas is an exciting part of the gardening process. Peas are ready to be picked when the pods are plump and full and just starting to turn yellow. A good indicator of when your peas will be ready is when the pods can easily be snapped in half. To harvest, use your hands to gently remove the pods from the vine, or you can use scissors or a knife.
It is important to pick your peas regularly as this encourages more pods to develop. It is also best to pick peas in the morning when they are filled with the most moisture and sweetness, and are at their most tender. Once harvested, you can either eat them fresh or store them for later use.
When picking peas, be sure to handle them carefully as they are delicate and can bruise easily. Peas that have been too mature for too long will have lost their sweetness and will not be pleasant to eat.
Once you have harvested your peas, it’s important to store them correctly so they will stay fresh longer. Peas are best stored in an airtight container in the refrigerator for up to four days or in the freezer for up to six months. If freezing, make sure that you spread out your peas on a baking sheet before freezing them so they don’t stick together, then transfer them to a freezer-safe container once frozen.
Harvesting your home-grown peas is a rewarding experience that allows you to enjoy their sweet flavor in dishes or just as snacks.
Storing & Preserving
Once your peas are ready for harvest, it’s important to store and preserve them properly so they can be enjoyed for as long as possible.
Peas are best stored in an airtight container in the refrigerator for up to four days but for longer term storage the best way to do this is by either freezing or canning them.
Freezing is the easiest and quickest method of preserving green peas. Blanching your peas first will help to preserve the nutrients and flavor. To do this, simply bring a pot of water to a boil, add the peas and then cook for two minutes. After two minutes, strain the peas and immediately plunge them into a bowl of cold water to stop the cooking process. Once cooled, strain again and spread out on a baking sheet to freeze. Once frozen, you can transfer them to storage bags or containers and store in the freezer for up to 6 months.
Canning is another popular way to preserve green peas. This method is slightly more labor intensive than freezing but can provide a longer shelf life of up to one year.
Start by preparing the peas, then fill sterilized jars with the blanched peas leaving 1 inch headspace at the top of each jar. Add 1/2 teaspoon of salt per pint jar, if desired, then cover with boiling water or cooking liquid, leaving 1 inch headspace.
CASE STUDY: We've been living off the grid for the last 40 years...

In all that time an electric wire has never been connected to our house. We haven’t gotten or paid an electricity bill in over 40 years, but we have all the electricity we want. We grow everything we need, here, in our small backyard. We also have a small medicinal garden for tough times. Read More Here...
Wipe rims clean before adding lids and tightening bands, then process in a boiling water canner for 20 minutes (for pints) or 25 minutes (for quarts). Once processed, remove jars from canner and cool on a wire rack overnight before storing in a cool, dark place away from direct sunlight.
If you’re lucky enough to have an abundance of fresh green peas, these methods will ensure that you’re able to enjoy them for many months to come.
Common Diseases & How To Control Them
When growing peas, it is important to be aware of the various diseases that can affect them. Common diseases include powdery mildew, anthracnose, and root rot. In addition to providing your plants with adequate water and nutrition, there are a few steps you can take to prevent and control these diseases.
Powdery Mildew
To prevent powdery mildew, purchase commercially grown, disease free seeds or those pre-treated with fungicide. Also, make sure to rotate crops every year in order to reduce the risk of disease. Additionally, keep the soil moist but not wet and keep an eye out for any signs of infection such as white patches on the leaves. If you do spot any signs of infection, remove and destroy (don’t compost) infected plants.
Anthracnose
Anthracnose is a fungal disease caused by high humidity and moisture levels. To prevent it from occurring in your garden, make sure to avoid watering in the late afternoon or evening when leaves stay wet for longer periods of time. Additionally, make sure to sow your seeds 4-6 weeks before the last spring frost date when the soil is cool or at the desired temperature. Well-watered and well-nourished plants will have a better chance of avoiding this disease.
Root Rot
Root rot is caused by poor drainage and overwatering. To prevent root rot from occurring, make sure to choose a suitable location for your pea plants with good soil drainage and avoid overwatering them.
When watering your peas, it is best to water the soil rather than directly on the vines as this can cause disease. Soak the soil thoroughly when watering but avoid creating pools of water around your plants’ roots as this can cause root rot. If you do notice any signs of root rot such as yellowing or wilting leaves or stunted growth, make sure to remove affected plants immediately and replace them with healthy ones.
Common Pests & How To Control Them
Common pests can be a major headache for home gardeners trying to grow peas.
As with most vegetables, aphids, slugs, and other insect pests can damage the plants and reduce yields. Fortunately, there are a number of effective ways to control these pests without using harmful chemicals.
The most important step in controlling pests is to identify them correctly.
Aphids are small, soft-bodied insects that come in a variety of colors, including green, black, and yellow. They feed on the sap of plants and can cause distorted or curled leaves. Slugs are slimy mollusks that can be found under rocks or in damp areas near the garden. They feed on young leaves and stems and can cause serious damage to young plants. Other common pests include cutworms, which can chew through stems at the soil line; flea beetles, which feed on the foliage; and cabbage loopers, which feed on the leaves.
Once you have identified the pest that is damaging your peas, there are a number of methods available to control it. Hand-picking is one of the oldest methods and works best with small infestations of aphids or slugs. Picking off the insects by hand before they have time to reproduce is an effective way to keep populations under control. If you choose this method, be sure to wear gloves and dispose of any dead insects away from your garden area.
If hand-picking isn’t an option, there are several natural insecticides available that can be used to control pea pests. Neem oil is an effective organic insecticide that works by disrupting the feeding behavior of many common garden pests.
Insecticidal soaps are also effective against aphids and other soft-bodied insects; however, they should not be used on plants during hot weather as they can cause leaf burn or wilting if applied in high temperatures.
Finally, homemade traps such as beer bottles filled with soapy water can be placed around the plants to attract and capture certain pests, particularly slugs and snails. These pests are attracted to the beer, which is placed in a shallow dish or bottle, and then fall into the soapy water and drown. This is a simple and effective way to reduce the number of slugs and snails in your garden without resorting to chemical pesticides.
Beneficial Companion Plants
One of the benefits of growing peas in your garden is that they make great companion plants for other vegetables and herbs. Peas are a legume, which means they have similar nutrient and water needs as other legumes, such as beans. They are also known for their ability to fix nitrogen and improve soil fertility, which can benefit nearby vegetables and herbs.
Here are some of the best companion plants for peas:
Potatoes: Potatoes are an excellent companion plant for peas because they thrive in the same environment. Planting them side-by-side can increase their yield, as well as provide additional protection from pests and diseases.
Tomatoes: Tomatoes and peas also make good companion plants. They both require full sun and benefit from similar fertilizers and watering needs. Planting them close together can help keep weeds under control.
Beans: Green beans and drying beans work well with peas. They have similar water and nutrient requirements, making them a great choice for companion planting.
Cucumbers: Cucumbers also thrive in the same environment as pea plants, so they make good companions. They have the same watering and nutritional needs, which makes them a great option for companion planting with peas.
Carrots: Carrots are another good companion plant for peas. They can help prevent weeds from taking over the garden by providing shade to the soil, as well as encouraging beneficial pollinators to visit the garden more often.
Radish: Radishes are an excellent option for companion planting with peas because they have similar nutrient needs and water requirements. Radishes can also help provide additional protection from pests that may be attracted to your pea plants.
Eggplants: Eggplants are another good choice for companion planting with peas because they have similar nutrient needs and water requirements. Plus, eggplants can help attract beneficial pollinators to your garden that will help pollinate your pea plants, resulting in a bigger crop.
Using Your Home Grown Peas
Congratulations on your success in producing your own peas!
After you’ve collected your pea pods, use them as soon as possible to ensure optimal freshness and flavour. Here are some tasty ways to use your homegrown peas:
Raw: Peas are wonderful and refreshing when eaten raw and fresh from the garden. Simply break the stem off the pod, remove the string, and put the delicious, crunchy peas into your mouth.
Steamed: Steaming fresh peas is one of the greatest methods to cook them since it keeps their vivid colour and delicate flavour. Simply steam the pods for 3-5 minutes, or until tender but slightly crunchy. Serve with butter, salt, and pepper to taste.
Stir-Fried: Peas can be rapidly stir-fried with carrots, bell peppers, and snow peas, among other veggies. In a wok or skillet, heat a little oil, then add the vegetables and cook for 3-5 minutes, or until crisp-tender.
Soups and stews: Peas offer flavour and nutrients to any recipe when added to soups and stews. Try them in traditional split pea soup or robust vegetable stews.
Salads: Fresh peas give every salad a vibrant, delicious snap. To make a healthy and delicious salad, toss them with greens, tomatoes, cucumbers, and your favourite dressing.
Fresh peas are a genuine treat and a highlight of any summer garden, no matter how you utilise them. Enjoy your homegrown peas in all of their glory.