
Do you have a green thumb and a love for bell peppers? If so, you’re in luck! Growing bell peppers (Capsicum) at home is not as difficult as it may seem. With the right tools and knowledge, anyone can create a thriving bell pepper garden in their backyard or on their windowsill. Read on to learn how to grow your own bell peppers at home.
A Brief History
Bell peppers, or Capsicum, have a long and interesting history.
Native to Central and South America, they have been around since ancient times. The first known cultivation of bell peppers is believed to have taken place in Mexico as far back as 7500 BC. From there, they spread to other parts of the Americas and eventually Europe.
In Europe, bell peppers were initially used in cooking but eventually became popular as an ornamental plant. Spanish explorers took them to the Philippines in the 1500s, where they were further cultivated and spread across Asia. Today, bell peppers are a popular ingredient in dishes around the world.
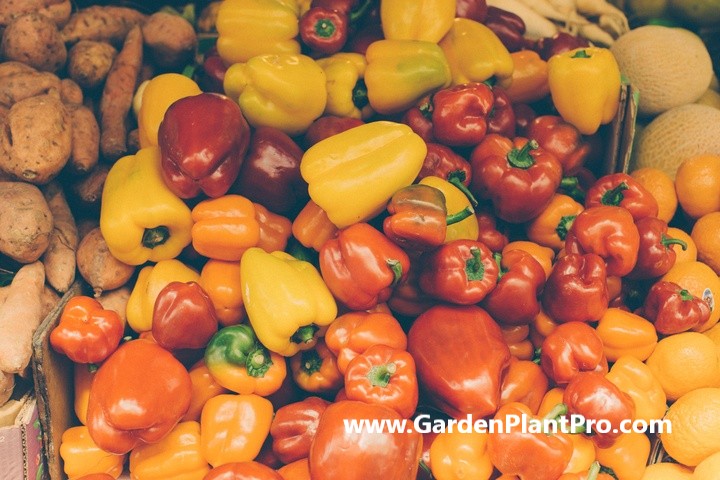
Bell peppers come in a variety of colors, shapes, and sizes. They can range from sweet to spicy depending on their variety and how they’re grown. The most common colors are green, yellow, orange, red, and purple. Despite their name, bell peppers are actually a type of berry!
Nutritional Benefits
Bell peppers (Capsicum) are a nutrient-dense vegetable, providing a range of essential vitamins and minerals. A one-cup serving of chopped green bell pepper contains 120 milligrams of vitamin C, which helps your body absorb iron and heal wounds.
Green bell pepper also has a high content of natural silicon, which may support healthy hair and nails. Additionally, bell peppers contain many healthy antioxidants, including capsanthin, violaxanthin, lutein, quercetin, and luteolin. These plant compounds are thought to help protect cells from damage caused by free radicals and may even help reduce inflammation.
When consuming bell peppers, it’s important to note the different varieties available. Some varieties are milder in taste than others, and some are spicier than others. Red bell peppers are the sweetest variety as they have been left to ripen for longer. Green bell peppers are harvested before they’re fully ripe, making them slightly bitter in taste.
To enjoy the full range of nutritional benefits that bell peppers offer, it is recommended to incorporate them into your diet in a variety of ways. Bell peppers can be used raw in salads or cooked in stir-fries and other dishes. To make sure your bell peppers retain their nutritional value when cooked, use low-heat cooking methods such as steaming or sautéing instead of boiling or frying them. You can also roast them whole in the oven or grill them on the barbeque for a smoky flavor.
Bell peppers can also be preserved for later use by pickling or freezing them. Pickling is an easy way to preserve bell pepper’s nutritional value while adding flavor to your dish. To freeze them, simply wash and dry the peppers before cutting into slices or chunks and freezing them in an airtight container or bag. Adding bell peppers to your diet is a great way to add color and flavor while gaining the many nutritional benefits.
Common Varieties & Their Uses
There are a number of different varieties of Capsicum (bell peppers) available. Each variety has its own unique flavor, colour and texture, making them a versatile ingredient in the kitchen. Here is an overview of some of the most popular varieties and their uses.
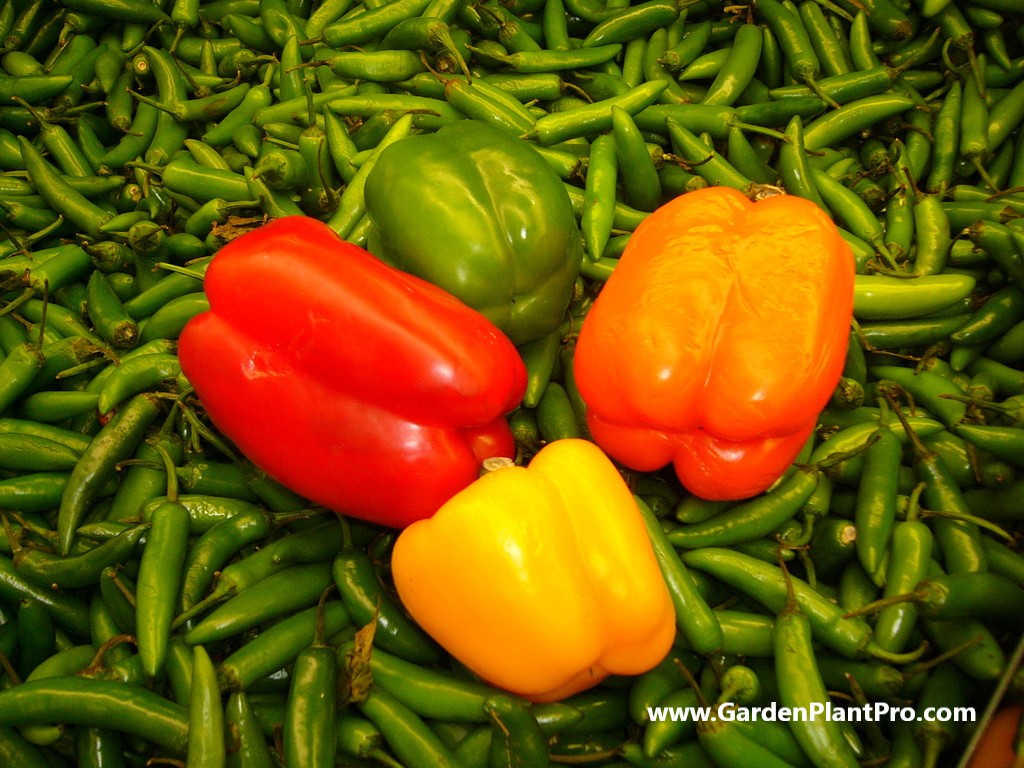
The most common variety is the green bell pepper, which is also sometimes referred to as the ‘sweet’ bell pepper or capsicum. This variety has a mild taste and crunchy texture and is most commonly used in salads, sandwiches and stir-fries. Green peppers are also delicious when roasted or grilled.
Red bell peppers are one of the sweetest varieties of Capsicum. They have a slightly sweeter taste than green peppers and a softer texture when cooked. Red bell peppers are great for adding colour to dishes such as salads, soups and stews and can be roasted or grilled for a smoky flavour.
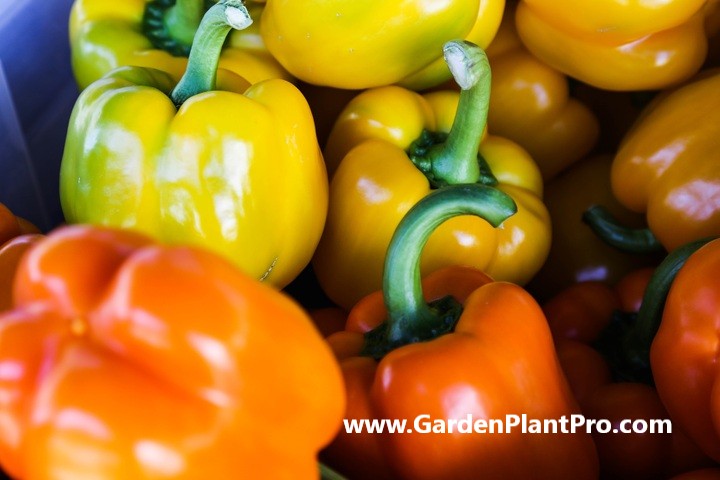
Yellow bell peppers have a slightly sweeter taste than their green counterparts and become softer when cooked. They make an excellent addition to salads, sandwiches and stir-fries. Yellow bell peppers are also great when roasted or grilled as they develop a sweet, smoky flavour.
Orange bell peppers are one of the sweetest varieties of Capsicum with a soft texture that becomes even softer when cooked. Orange bell peppers can be used in salads, sandwiches, soups and stews as well as roasted or grilled for added flavour.
Purple bell peppers have a slightly earthy taste and a crunchy texture when raw but become softer when cooked. These versatile peppers can be used in salads, sandwiches, soups, stews and stir-fries as well as roasted or grilled for added flavour.
No matter which variety you choose, Capsicum (bell peppers) are a delicious addition to many dishes and can be grown easily at home with just a little bit of knowledge and preparation.
When To Sow
When it comes to sowing bell pepper seeds, timing is key. The best time to sow bell pepper seeds (indoors) is eight to 10 weeks before your region’s average last frost date. This allows the seedlings to develop strong root systems and become well established before the hot summer weather sets in.
To get started, fill a seed tray with seed starting soil and keep the soil moist before planting. Scatter the seeds evenly over the surface of the soil, pressing them gently into the soil but not covering them with more soil. Place the tray in a warm, bright location and keep it moist until germination occurs.
DIY PROJECT: Collect rainwater no matter where you live...

This DIY project is the best way to legally collect rainwater NO MATTER where you live. Get chlorine-free water, cut down on your water bills, and have enough for an emergency situation or to water your garden. Read More Here...
The seeds need warmth to germinate, so if you live in a cool climate it may be best to start them indoors where temperatures are more consistent. Once your seedlings have developed two true leaves, they are ready to be transplanted outdoors.
If you plant to sow (or transplant your seedlings) outdoors, then wait about 2 to 3 weeks after the threat of frost has passed and the soil has reached 65°F (18°C).
Choosing A Suitable Location In The Garden
Once you’ve decided to start growing bell peppers, it’s important to choose a suitable location in the garden. Peppers need full sun to grow properly, and a balance between sandy and loamy soil will ensure that the soil drains. Make sure you pick a spot that is sheltered from strong winds, as these can harm your plants.
If you’re growing peppers indoors, choose a warm, sunny spot on a windowsill or in a heated greenhouse. It’s best to wait till the weather warms up before transplanting your seedlings into the garden as they are susceptible to frosts.
By ensuring that your peppers have full sun, good soil, and protection from strong winds, you can ensure that your plants will have all the elements they need for a successful harvest.
Preparing The Soil
Before planting your bell peppers, it’s important to prepare the soil.
To give your plants the best chance of success, choose a location that gets full sun and has well-drained, nutrient-rich soil. Work in some compost or other organic matter to improve the soil’s structure and fertility. You can also add a slow-release fertilizer to the soil before planting.
To ensure optimal moisture levels, it’s important to choose the right soil for bell peppers. A sandy-loam soil works best as it offers good drainage. If you have clay or heavy loam soils, you may need to amend them with compost or other organic matter to improve drainage and aeration.
In addition to soil preparation, you should consider adding mulch around pepper plants after they are established. Mulch helps retain moisture and suppress weeds, keeping the area around your plants tidy.
Planting The Seeds Or Seedlings
Once you have chosen a suitable location and prepared the soil, it is time to plant the seeds or seedlings. If you are sowing seeds, it is best to do so eight to 10 weeks before your region’s average last frost date. Fill a seed tray with seed-raising mix and scatter the pepper seeds on top, then cover them with about 10mm of soil. Keep the soil moist and expect germination in 10-14 days.
If you are planting seedlings, make sure to use a potting mix that contains plenty of organic material. Dig a hole for each seedling that is slightly bigger than the root ball, and water the hole prior to planting. Place the seedling in the hole and gently firm the soil around it, ensuring that all roots are covered. Water again after planting and make sure to keep the soil moist until your pepper plants become established.
For both seeds and seedlings, it is important to provide plenty of sunlight and warmth for optimal growth. If possible, move your plants outside when temperatures reach around 15°C (60°F) during the day and no lower than 10°C (50°F) at night. You can also install a cloche or other form of protection to help keep your peppers warm in cooler weather.
Caring For The Seedlings
Once the bell pepper seedlings are sown, they need to be cared for in order to grow into healthy, productive plants. Consistent water is key. Saturate the soil around the base of the stem above the roots every other day during their first few months of growth. Since bell pepper plants are susceptible to overwatering or poor draining soils, be aware of root rot and phytophthora blight, a fungal disease that can lead to wilting and yellowing of leaves.
Providing plants with adequate sunlight is also important for healthy growth. Bell peppers need full sun for at least six hours a day. If you live in a cooler climate, you may need to provide your plants with additional artificial light.
Finally, it’s important to regularly check your bell pepper plants for signs of pests or disease throughout their growing season. Early detection is key in controlling or eliminating any problems before they become too severe.
Watering & Fertilizing
Watering and fertilizing are essential to ensure that bell peppers (Capsicum) grow healthy and produce a high yield of fruits. Deep, slow watering helps the root system establish itself and consistent watering is key in order to prevent wilting, which can reduce yield and quality of the fruit. It is recommended that soil around the base of the stem above the roots be saturated every other day during the growing season.
Fertilizer should be applied fortnightly in liquid form to provide essential nutrients for healthy growth. Nearly all Capsicum varieties will benefit from this additional nutrition, though it should be noted that sweet bell peppers lack capsaicin, the active component in hot peppers that gives them their heat.

Do you have some charcoal in your house right now? We call charcoal a “miracle leftover” for anyone who wants to be a little more self-sufficient and cut costs. That’s because it can help you with so many different things around the house and garden. You can even use it to make an energy-free fridge. Read More Here...
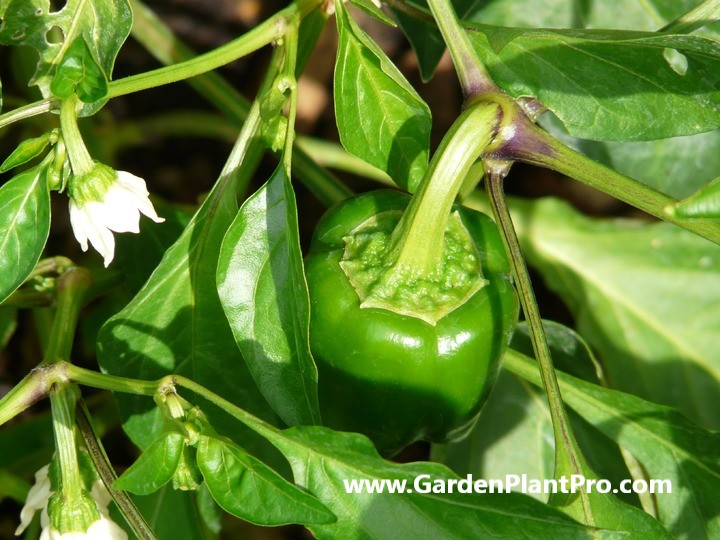
When & How To Harvest
Once the bell pepper plants have had time to develop and their fruits have reached a desirable size, it is time to harvest. The peppers should be picked when they are still firm but brightly colored. If left on the plant too long, they may become soft and mushy. To harvest, simply cut the pepper near the base of the stem with a pair of scissors or a knife.
When harvesting bell peppers, it is important to be gentle with them so as not to damage the plant or other peppers that may still be growing on it. When harvesting in bulk, take care to not pull off any of the leaves or stems as this can stunt the growth of the other peppers.
It is important to note that some varieties of bell peppers will turn from green to red once harvested. This is due to a process called ripening and will give your peppers a sweeter taste. If you wish for your peppers to reach this stage before picking, leave them on the plant for an extra few days.
Once harvested, store your bell peppers in a cool, dry place away from direct sunlight. Bell peppers will last up to one week in the refrigerator and can also be frozen for long-term storage.
Storing & Preserving
Storing and preserving bell peppers is a great way to enjoy the fruits of your labor throughout the year. Once harvested, it is important to store them properly to ensure they stay fresh and flavorful. Bell peppers can be stored in a variety of ways.
Refrigeration is the most common way to store bell peppers. Place them in a clean, plastic bag or container and store them in the refrigerator for up to two weeks. If you plan on using the bell peppers within a few days, you can leave them out on the counter. However, if you are storing them for longer than that, it is best to refrigerate them.
Another method of storing bell peppers is by freezing them. This is an ideal option if you have a large harvest, as you can easily freeze bell peppers for future use. To freeze bell peppers, wash and dry them thoroughly before slicing them into desired sizes. Place the slices on a baking sheet with parchment paper and freeze for about an hour before transferring them into an airtight container or bag for longer-term storage. Frozen bell peppers will last for up to six months in the freezer.
If you want to preserve your bell peppers for long-term storage, consider pickling or canning them. Pickling involves soaking bell peppers in vinegar and other spices like garlic, dill, mustard seeds and more; while canning involves pressure cooking them with salt and acidic liquids like vinegar or lemon juice. Both pickling and canning will provide shelf-stable bell peppers that last for up to one year when stored in a cool, dry place away from direct sunlight.
With proper care and storage techniques like refrigeration, freezing and pickling / canning, your bell peppers will remain fresh and flavorful until you’re ready to use them.
Common Diseases & How To Control Them
Common diseases in bell peppers (Capsicum) can be caused by a variety of factors, including improper growing conditions, lack of nutrients, and incorrect watering. Fortunately, there are steps you can take to prevent and control these diseases, as well as ways to treat existing infections.
Fungal Diseases
Fungal diseases such as blights, anthracnose, and downy mildew can cause discoloration and wilting of the leaves or fruit in bell peppers. To avoid these diseases, ensure that your peppers have adequate spacing to allow for air circulation and proper sun exposure. Make sure your soil is well-drained and contains enough organic matter to retain moisture without becoming waterlogged. If possible, use drip or soaker irrigation instead of overhead watering. You can also use fungicides to help control fungal diseases.
Bacterial Diseases
Bacterial diseases like bacterial leaf spot, bacterial spot canker, and bacterial fruit rot are caused by too much moisture in the soil around the pepper plants. Make sure your soil is well-draining and use drip or soaker irrigation instead of overhead watering to avoid these issues. Also be sure to practice good hygiene when working with your plants; always wear gloves when handling them and wash your hands after working in the garden. If necessary, you can also use copper-based bactericides to help control these bacterial diseases.
Viral Diseases
Viral diseases such as mosaic virus and tobacco mosaic virus cause discoloration of leaves or stunted growth in bell peppers. These viruses can be spread through contaminated seed or by contact with infected plants, so it’s important to buy certified disease-free seed or seedlings from a reputable source. Additionally, practice good hygiene when handling plants; always wash your hands after working in the garden and wear gloves when handling pepper plants. There is no cure for viral infections once they occur; however, regular monitoring of the plants can help you identify and remove the infected ones.
Common Pests & How To Control Them
When growing bell peppers (Capsicum) at home, it is important to be aware of common pests and how to control them. Aphids, spider mites, flea beetles, tomato hornworms, and cutworms are all possible pests that could potentially damage the peppers.
Here are some tips on how to prevent and control these pests.
Aphids:
Aphids can be a big problem with bell peppers. To control them, start by removing any damaged leaves or stems and dispose of them away from the garden. Next, spray an insecticidal soap or neem oil mixture directly onto the aphids. This should help to reduce their numbers significantly.
Spider Mites:
Spider mites can cause pepper plants to become stunted and have yellowish foliage. To control them, try spraying the plants with a strong jet of water several times a week. This will knock the spider mites off the plants and help reduce their numbers.
CASE STUDY: We've been living off the grid for the last 40 years...

In all that time an electric wire has never been connected to our house. We haven’t gotten or paid an electricity bill in over 40 years, but we have all the electricity we want. We grow everything we need, here, in our small backyard. We also have a small medicinal garden for tough times. Read More Here...
Flea Beetles:
Flea beetles can cause pepper plants to have holes in their leaves and can also transmit disease. To control them, try handpicking adults off of the plants as well as using row covers or floating row covers to prevent adult beetles from laying eggs on the plants.
Tomato Hornworms:
Tomato hornworms can cause severe damage to pepper plants by eating all of the leaves off of the plant. To control them, handpick any adults that you see on your plants and dispose of them away from your garden area.
Cutworms:
Cutworms can cause significant damage to pepper plants by chewing through stems just above the soil line which can cause entire plants to fall over or die back completely. To control them, try using cutworm collars around each stem of your pepper plants at planting time or use insecticidal baits around your garden area at night when cutworms are most active.
Beneficial Companion Plants
Once you have chosen the best location in your garden and prepared the soil for your bell peppers, it is a good idea to consider beneficial companion plants that can help your pepper crop thrive.
Spinach, lettuce and chard are suitable companions for peppers as they help crowd out weeds, and with their short stature and rapid maturation, they provide shade and shelter for the peppers. Marjoram is another good companion plant as it attracts beneficial insects and pollinators while also adding flavor to Italian seasoning blends.
Okra is also a great companion to bell peppers as they both need plenty of water to grow well, and okra can provide shade, shelter and support to the peppers.
Using Your Home Grown Bell Peppers
Once your bell peppers are ready to be harvested, they can be used in a variety of ways.
Fresh bell peppers can be eaten raw and added to salads, sandwiches, and other dishes. They can also be cooked in stir-fries, pizzas, stews, and other recipes. Bell peppers can also be grilled, roasted, or stuffed with a variety of fillings.
If you want to preserve your bell peppers for later use, you can pickle them or make a variety of sauces and salsas with them. Bell peppers can also be dried, either in the oven or by air-drying. Once dried, they can be ground into powder and used as a seasoning or added to recipes for added flavor.
Finally, bell peppers can also be frozen for later use. To do this, simply wash and core the bell peppers before slicing them into thin strips. Then place them in a single layer on a baking sheet lined with parchment paper and freeze until solid. Once frozen, transfer the strips to an airtight container or resealable plastic bag and store in the freezer for up to six months.