
Do you love the sweet, mild flavor of shallots but don’t want to buy them from the store? Growing your own shallots at home is a great way to enjoy them year-round. In this guide we’ll show you how to grow shallots in your own garden, from planting and harvesting tips to recipes and more.
A Brief History
Shallots have been cultivated for over 4,000 years and have been found in many ancient cultures, from the Egyptians and Greeks to the Romans and Chinese. They are believed to have originated in central Asia, but have since spread worldwide.
Shallots were used for both culinary and medicinal purposes and were even mentioned in the Bible. Today, shallots are widely used around the world as a popular ingredient in many dishes. They are especially prized for their delicate flavor and versatility; they can be used raw or cooked and added to salads, soups, stews, and other dishes. Shallots are also rich in vitamins A, C, and B6, as well as potassium and magnesium.
Nutritional Benefits
Shallots are a highly nutritious type of onion that offers many health benefits. They are rich in plant compounds with high antioxidant activity, vitamins B-9, C, and A, and minerals such as calcium, iron, magnesium, phosphorus, potassium, and zinc. Common benefits of shallots include improving diabetes control and heart health. They also improve circulation and metabolism, lower cholesterol and blood pressure, and improve heart health.
Shallots are an excellent source of essential vitamins and minerals. They contain vitamin B-9 which helps the body produce red blood cells and DNA; vitamin C which aids in the formation of collagen; and vitamins A which is important for good vision. Shallots also contain minerals such as calcium which supports strong bones; iron which helps with oxygen transport throughout the body; magnesium which contributes to muscle contraction; phosphorus for healthy teeth; potassium for proper heart rhythm; and zinc which helps the immune system to fight off disease-causing agents.
In addition to the vitamins and minerals mentioned above, shallots also contain phytonutrients that have antioxidant properties. These phytonutrients help protect your body from free radicals that can damage cells. The antioxidants in shallots can also help reduce inflammation in the body.
These health benefits make shallots a great addition to any diet. Eating them as part of a balanced diet can help you maintain good health while also providing essential nutrients to your body. Shallots can be eaten raw or cooked in dishes such as salads, soups, stews, roasts, casseroles, or stir-fries. They make a great addition to recipes for adding flavor without adding too many calories or fat.
By including shallots in your diet you can enjoy the nutritional benefits they offer while also reaping the rewards of their delicious flavor!
Common Varieties & Their Uses
Shallots come in many varieties, each with its own flavor and culinary uses.
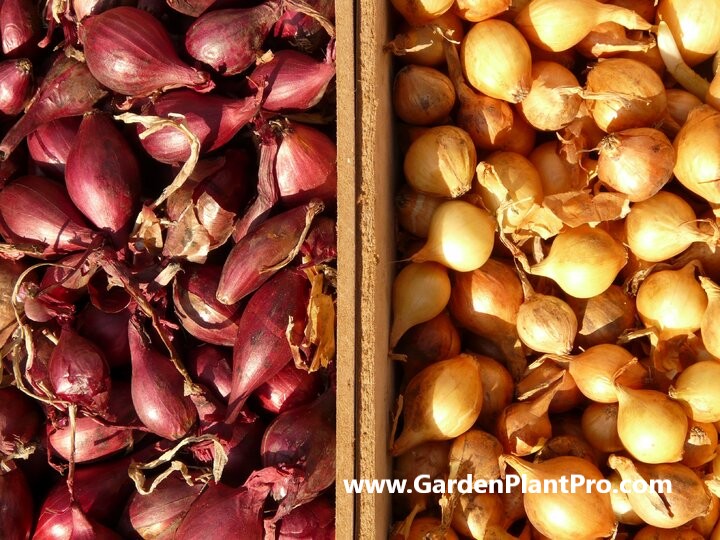
Shallot varieties range from yellow to red to brown, and even include purple-skinned varieties. The yellow-skinned varieties tend to be milder in flavor than the other colors, while red and purple-skinned varieties are more pungent. Here are a few of the most popular types:
Grey Shallots: This is the classic shallot variety that is widely used in French cuisine. It has a grey, papery skin and a delicate, sweet flavor.
Red Shallots: Red shallots have a reddish-brown skin and a slightly stronger flavor than grey shallots. They are often used in Indian and Southeast Asian cuisine.
Banana Shallots: These shallots are larger and longer than other varieties, with a mild and slightly sweet flavor. They are often used in British cooking.
Dutch Yellow Shallots: These shallots have a yellow-brown skin and a mild, sweet flavor. They are often used in Mediterranean and Middle Eastern cuisine.
French Grey Shallots: These shallots have a more elongated shape and a grayish skin. They are similar to the classic grey shallot, but have a slightly milder flavor.
Shallot varieties are also classified according to their season of harvest: early season, mid-season or late season. Early season varieties mature quickly and should be harvested within 3–4 months of being planted. Mid-season varieties take slightly longer to harvest — typically 4–5 months — while late season varieties take up to 6 months before they’re ready for harvest.
When choosing a variety of shallot to grow, it’s important to consider your climate, as some types may be better suited to certain growing conditions. It’s also worth experimenting with different varieties to see which ones work best for your culinary needs. No matter which variety you choose, shallots are a great addition to any garden and can enhance any dish with their unique flavor and aroma.
When To Sow
The best time to sow shallots depends on your climate and the growing conditions in your area. In general, shallots should be planted in the fall or early spring, when the soil is cool and moist. This allows the bulbs to establish roots before the hot summer weather sets in.
If you live in a cooler climate, it’s best to plant shallots in the early fall, about 4-6 weeks before the first frost. This will give the bulbs enough time to develop a good root system before winter sets in, and they will be ready to grow as soon as the weather warms up in the spring.
DIY PROJECT: Collect rainwater no matter where you live...

This DIY project is the best way to legally collect rainwater NO MATTER where you live. Get chlorine-free water, cut down on your water bills, and have enough for an emergency situation or to water your garden. Read More Here...
If you live in a warmer climate, it’s best to plant shallots in the early spring, as soon as the soil can be worked. This will allow the bulbs to grow during the cooler months and be ready to harvest in the early summer.
It’s also important to choose the right planting location for your shallots. They prefer well-draining soil with a pH between 6.0 and 7.0, and they should be planted in a spot that gets full sun for at least six hours per day. Proper planting and timing will help ensure a healthy and abundant crop of shallots.
Choosing A Suitable Location In The Garden
Choosing the right location in the garden for your shallots is an important step in having a successful crop. Shallots prefer full sun or part shade and a well-drained soil, so if your garden has these conditions then you’re off to a good start. If not, then you can work to improve the soil before planting by adding plenty of organic matter .
When selecting a spot for your shallots, try to avoid areas that have been recently used for growing other vegetables, as this can increase the risk of disease carrying over from one crop to another.
Shallots have a limited root system so it is important to make sure they are well spaced out and not overcrowded, as this can increase competition between plants and limit their growth. You should also consider any other vegetables that you might be planning on growing nearby, as some vegetables like onions and garlic can be planted close together without competition, while others such as potatoes need more space.
Finally, if you are planning on growing your shallots in pots rather than in the ground then make sure that you use good quality compost and provide ample drainage.
Preparing The Soil
Preparing the soil is an important part of successfully growing shallots.
Start by adding plenty compost to the soil, as well as a general garden fertiliser and lime. For best results, shallots should be planted in a sunny, well-cultivated spot that has ample drainage. Dig the soil over and remove any stones or debris before planting.
Make sure that the soil is moist but not soggy before planting your shallots. To help with drainage, it can be beneficial to mix in some sand or pebbles if the soil is very heavy or clay-like.
Shallots should be planted in rows that are 12 inches apart with each hole 6-8 inches apart. Each hole should be just 1/2 inch deep and two seeds should be placed inside each. Cover lightly with soil and water in dry conditions to keep the area around them weed free.
By taking the time to properly prepare the soil for shallot planting, you can ensure they have the best possible start in your garden.
Planting The Bulbs
Shallots are usually propagated by planting bulbs rather than seeds, as growing them from seed can be challenging and time-consuming. Here’s how to plant shallots using bulbs:
Choose a well-draining location with full sun exposure: Shallots grow best in well-draining soil that receives full sun. Choose a spot in your garden that gets at least 6 hours of direct sunlight each day.
Prepare the soil: Remove any weeds or debris from the planting area and loosen the soil to a depth of about 8 inches. Add compost or well-rotted manure to improve the soil’s fertility and drainage.
Plant the bulbs: Separate the bulbs carefully, and plant them individually, about 1 inch deep and 4-6 inches apart. Plant the bulbs with the pointed end facing up.
Water the bulbs: Water the bulbs well after planting to help them establish their roots. Keep the soil moist but not waterlogged throughout the growing season.
Mulch the planting bed: Apply a layer of organic mulch, such as straw or shredded leaves, around the base of the plants to help retain moisture and suppress weed growth.

Do you have some charcoal in your house right now? We call charcoal a “miracle leftover” for anyone who wants to be a little more self-sufficient and cut costs. That’s because it can help you with so many different things around the house and garden. You can even use it to make an energy-free fridge. Read More Here...
Care for the plants: Fertilize the shallots with a balanced fertilizer every few weeks during the growing season. Keep an eye out for pests and diseases, and address any issues promptly.
With proper care and attention, your shallot bulbs should start to grow within a few weeks of planting. They will develop into mature bulbs over the course of the growing season, and you can harvest them once the tops start to yellow and wither in late summer or early fall.
Caring For The Seedlings
Once the shallots have been planted, they require regular care to promote healthy growth. To ensure the best possible crop, it is important to keep the soil moist and perform regular weeding. The seedlings should be thinned after they have developed 2-3 true leaves if you’ve planted them too close together to ensure they have enough space and nutrients to grow.
Fertilizing is also important for healthy growth and should be done every 2-3 weeks. Choose a fertilizer with a balanced N-P-K ratio and follow the manufacturer’s instructions. Applying mulch around the plants will help to retain moisture in the soil, preventing it from drying out too quickly.
Shallots are prone to some diseases, such as onion downy mildew and white rot, so it is important to monitor them for signs of disease. If any signs of disease are present, remove the affected plants immediately and dispose of them carefully.
Finally, it is important to watch out for common pests such as aphids, caterpillars, thrips and onion fly. If pests are present, use an insecticidal soap or neem oil solution to control them. To prevent pests from returning, keep the area clean and free of debris, as this will help discourage them from coming back.
Watering & Fertilizing
Shallots need continuous water throughout the growing season, especially during dry spells. The soil should remain lightly moist, and they’ll need one inch of water per week. Applying 10-10-10 NPK liquid fertilizer every three to four weeks will also help to promote growth.
For containers, water every 14 days and give an occasional feed with a general liquid fertilizer. However, stop watering and feeding once the shallot bulbs begin to form. To ensure a good harvest, use a good general fertilizer every 3-4 weeks through spring. Stop feeding about one month before harvesting for best results.
It is important to remember that too much water or too much fertilizer can be detrimental to the health of your shallots. Monitor your plants regularly and adjust your watering and fertilizing regimen accordingly.
When & How To Harvest
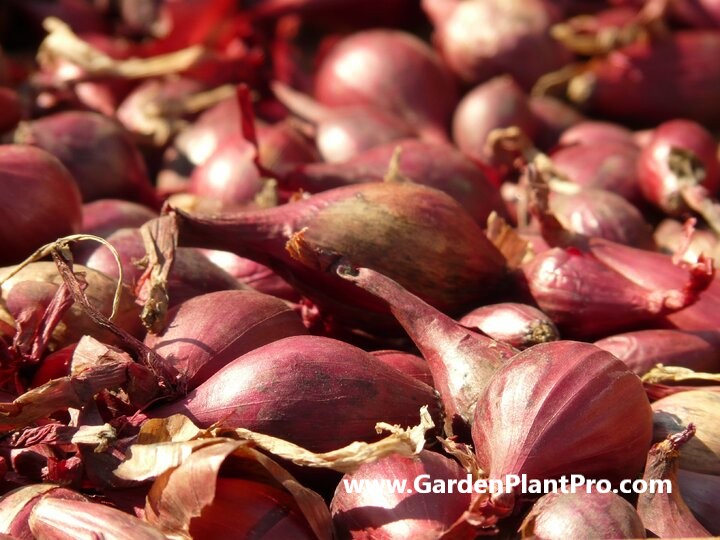
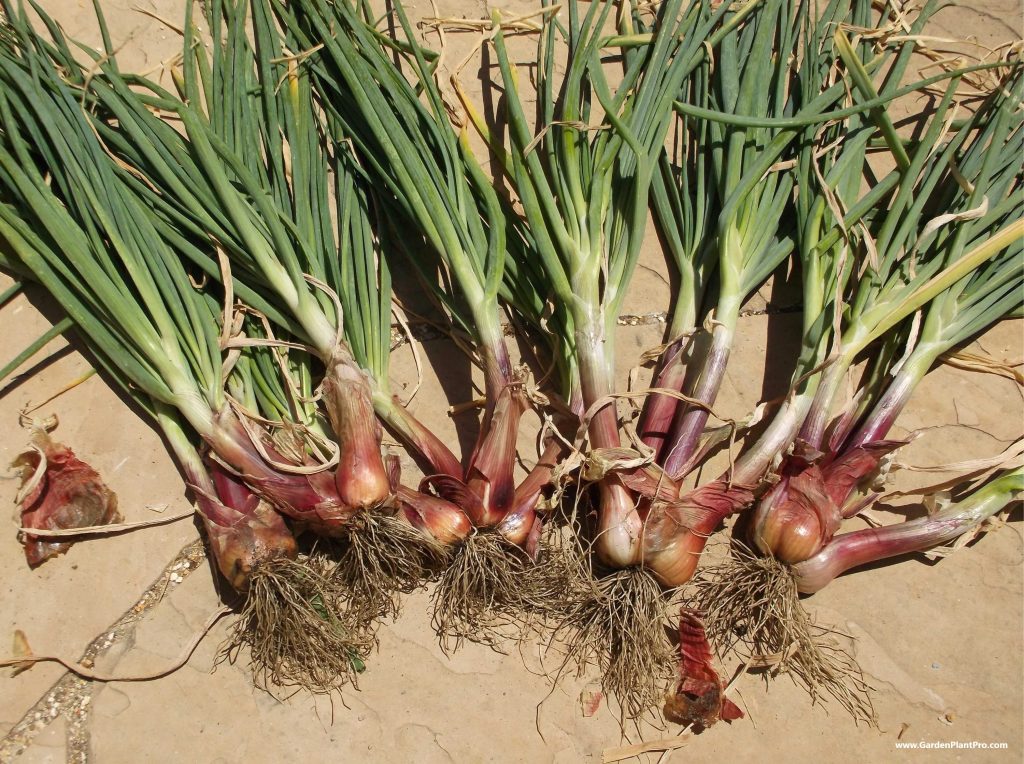
Harvesting shallots is a rewarding experience and can be done in late summer or early autumn when the bulbs are mature. Shallots usually ripen in mid- to late summer, and yellowing and toppling of the foliage is an indication they are ready for harvesting.
Lift the bulbs before the tops die back or when they appear above the ground. Don’t be tempted to pull the bulbs out by the leaves as these may snap. Harvesting should begin when the greens of the plant start to wither, fall over, and turn brown, usually around 100-120 days after planting.
To harvest shallots, first loosen up the soil around the bulb with a fork. Pull up gently on the bulb to avoid breaking it apart. If you have planted multiple shallot sets, leave some of them in the ground to continue growing. Gently clean off any excess soil with a brush or your hands and lay them out in a single layer in an area with good air circulation and shade. Allow the shallots to dry for two weeks before storing them away in a cool, dry location.
Shallots can be stored for several months if kept dry and cool – temperatures between 40-50 degrees F (4-10 degrees C) are ideal – which allows for a longer shelf life. Make sure to check regularly for signs of spoilage, such as mold or soft spots, and discard any that have gone bad.
Storing & Preserving
Once you have harvested your shallots, it’s important to store them properly to maximize their quality and shelf life. Shallots can be stored in a variety of ways, depending on your preference, but there are a few general rules to follow for optimal storage.
First, brush off any soil and allow the shallots to dry for two weeks on a wire rack in a dry and protected place. Sort the shallots into two piles – perfect, undamaged bulbs and damaged or discolored ones – and discard any rotten or diseased bulbs.
Place the perfect bulbs in net bags or trays, creating multiple layers if needed. The ideal storage environment for shallots is one with plenty of air flow, so consider constructing a drying rack outdoors where air can flow freely around the bulbs.
Once the perfect bulbs are ready for storage, you can either leave them in their net bags or trays and store them in a cool, dark place such as a cellar or basement (ideally between 45-50 degrees Fahrenheit). Alternatively, you can remove the bulbs from their containers and hang them from strings in an airy location such as an attic or garage.
CASE STUDY: We've been living off the grid for the last 40 years...

In all that time an electric wire has never been connected to our house. We haven’t gotten or paid an electricity bill in over 40 years, but we have all the electricity we want. We grow everything we need, here, in our small backyard. We also have a small medicinal garden for tough times. Read More Here...
It’s also important to check on your stored shallots regularly to ensure they are still fresh and free from any mold or fungus. If you notice any problems, discard the affected bulb(s) immediately and make sure all the remaining bulbs remain dry and well ventilated. With proper care and storage techniques, your shallots should stay fresh for up to six months.
Common Diseases & How To Control Them
Shallots, like other Allium species, are susceptible to some common diseases and pests. Knowing how to identify and prevent these ailments is key to a successful harvest.
Fungal Diseases: Fungal diseases such as powdery mildew, downy mildew, and rust can occur in shallots. These can be prevented by avoiding overhead watering, which encourages fungal growth. Dusting the plants with sulfur or copper fungicides at the first sign of disease can also help control it.
Bacterial Diseases: Bacterial diseases such as soft rot and leaf spot can occur in shallots. Soft rot is caused by a soil-borne bacterium that thrives in wet conditions, so it’s important to keep the soil well drained. Leaf spot is caused by a fungus that thrives in warm and humid conditions. The best way to prevent disease is to avoid planting your shallots in the same area where any other Allium species have been planted in the last few years.
It’s important to remember that prevention is the best cure when it comes to controlling common diseases in shallots. By following best practices when choosing a suitable location in your garden, preparing the soil, planting, watering and fertilizing your shallots and harvesting them correctly, you can ensure a healthy crop of shallots each year.
Common Pests & How To Control Them
Common pests of shallots can include aphids, thrips, cutworms and onion maggots. To help control these pests, it is important to keep the garden free of weeds and debris which can attract them. Additionally, companion planting with herbs such as chives, parsley or basil can help deter them from attacking your shallots.
If aphids are present, they can be removed by spraying the plants with an insecticidal soap or neem oil solution. Thrips can be controlled using yellow sticky traps or an insecticide containing pyrethrins. Cutworms can be prevented by burying a cardboard collar around the seedling or spraying the soil with a bacterial insecticide such as Bacillus thuringiensis (Bt).
For onion maggots, it is important to avoid overwatering and to regularly inspect the plants for signs of damage. If present, cover the soil with a layer of mulch to help prevent the maggots from reaching the bulbs. If necessary, apply an insecticide containing spinosad or neem oil to control infestations.
By following these tips and taking preventive measures such as companion planting and mulching, you can help protect your shallots from common pests and enjoy a bountiful harvest.
Beneficial Companion Plants
Beneficial companion plants can be used in conjunction with shallots to help the plants to thrive. Planting shallots with beets, cabbage, carrots, chamomile, mint, sage and thyme are good companion plants for shallots. These plants can provide shade and shelter, improve soil fertility and aeration, protect against pests and disease, and attract beneficial insects.
When planting companion plants with shallots, it is important to choose the right location in the garden. Make sure that all plants are receiving adequate sunlight and good soil drainage. If planting in containers or raised beds, ensure that the containers or beds are large enough to accommodate the root systems of all the plants.
To prepare the soil for planting companion plants with shallots, work organic matter such as compost or aged manure into the soil before sowing seeds or transplanting seedlings. This will help to improve soil fertility and aeration.
When caring for your companion plants in conjunction with your shallots, make sure that they are watered regularly but not over-watered. Additionally, fertilize your plants every few weeks with a balanced fertilizer.
Using Your Shallots
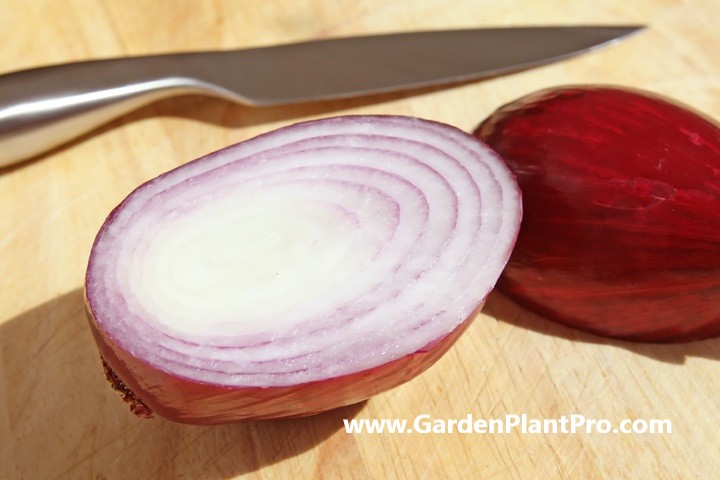
Once your shallots have been harvested, you can use them in a variety of dishes. Shallots can be eaten raw or cooked, and they have a mild onion-like flavour which makes them suitable for many recipes. They are a great addition to salads, soups, stews and sauces, adding a subtle sweetness to any dish.
Shallots can also be roasted or grilled to bring out their sweet, nutty flavour. To roast shallots, simply place them in an oven-safe dish with a little oil and bake at 350°F for about 25 minutes. Grilling shallots works in much the same way; just toss them in oil and place them on the grill over medium-high heat for about 10 minutes until lightly charred.
You can also pickle shallots by slicing them into thin rings and soaking them in vinegar and spices overnight. This is a great way to add a zesty crunch to salads or sandwiches.
Finally, you can also freeze shallots for later use. Simply clean and chop the shallots into small pieces before placing them in an airtight container and storing in the freezer for up to 6 months.