
Are you looking for a new way to spice up your meals? Look no farther than fresh chives! Chives not only give a mild onion flavour to your recipes, but they also have a number of health advantages. Furthermore, growing chives at home is simple and takes little room and work. In this guide, we’ll walk you through the process of growing and harvesting chives, as well as provide some culinary recommendations. Prepare to give a fresh, tasty touch to your dishes using homegrown chives!
A Brief History
Chives have a long history of use in cooking, medicine and as an ornamental plant. Native to Europe and Asia, they were introduced to North America in the late 1700s. Since then, they have become a popular herb in home gardens around the world.
The Egyptians used chives as an embalming agent and as a treatment for headaches and other ailments. In the Middle Ages, chives were believed to ward off evil spirits and keep away disease. In more recent times, chives have been used to add flavor to food, as well as for their medicinal properties.
Today, chives are widely used in cooking for their mild onion-like flavor. They can be used fresh or dried and are often added to salads, soups, sauces and other dishes. Chives are also known for their colorful appearance and are often used as an ornamental plant in home gardens.
Nutritional Benefits
Chives are a nutrient-dense food, meaning they are low in calories yet high in minerals and vitamins, particularly vitamins K and A. In addition to these vitamins and minerals, chives also contain flavonoid antioxidants which contribute to many of their health benefits. Eating chives may help improve a person’s sleep and bone health, as well as reduce the risk of chronic illnesses like cancer and osteoporosis.
Chives are part of the allium family of vegetables, which also includes garlic, onions, and leeks. Alliums are renowned for their heart healthy benefits, helping to reduce cholesterol levels in the body. Eating chives can also help regulate blood sugar levels and lower the risk of type 2 diabetes.
In addition to providing essential nutrients, chives also offer a wide range of phytonutrients which provide antioxidant protection against free radicals that can cause damage to cells in the body. Chives are a great source of dietary fiber which helps support healthy digestion, as well as many other compounds such as lutein and zeaxanthin which can help protect against age-related vision loss.
For those looking to add more nutrition to their diet without packing on extra calories, chives are an excellent choice. Not only do they contain essential vitamins and minerals, but they also offer many beneficial plant compounds that support overall health.
Common Varieties & Their Uses
When it comes to chives, there are two species of chives commonly grown in home gardens: common chives (Allium schoenoprasum) and garlic chives (A. tuberosum). Common chives are the most widely available variety and have a mild onion-like flavor. They are often used as a garnish or added to salads, as well as for flavoring soups, stews, and sauces. Garlic chives have a mild garlic flavor and are commonly used in Asian cuisine.
In addition to the common varieties, there are also some rare varieties of chives such as Chinese chives (A. chinense) which have a stronger garlic flavor than the common varieties and Siberian chives (A. sibericum) which have a milder, more onion-like flavor.
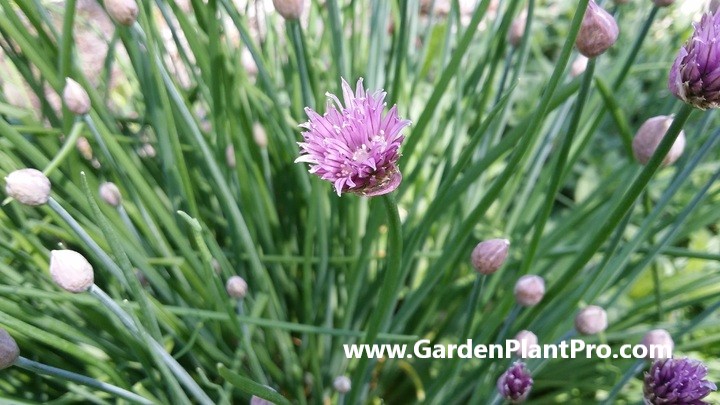
No matter what variety you choose, all of them can be used to add flavor and color to a range of dishes. Chive blossoms can also be dried and used to make herbal tea or added to salads, soups, or other dishes for flavor and color.
When To Sow
When it comes to sowing chives, you have a few options.
The best and most successful way to grow chives is to plant rooted clumps in spring, after frost danger has passed. Divide established plants every three years for best results.
You can also grow chives from seed anytime from spring to autumn. Chives seedlings are also available throughout the year, and can be planted anytime. When planting seedling clumps, space them 25cm apart. If you decide to sow, sprinkle a few seeds thinly in small pots or modular trays filled with seed compost, cover them with a thin layer of vermiculite and water regularly.
Choose The Right Location
Choosing the right location for growing chives is essential.
Chives prefer full sun, but can also be grown indoors or in part shade. For outdoor gardens, choose a spot that receives full sun or dappled sunlight, and has well-drained soil. If you’re growing chives in a pot, select a large container of soil-based compost that can be placed either on a balcony or patio, or even indoors near a sunny window.
When selecting an outdoor planting site, it’s important to keep in mind that chives prefer moist soil and at least 6 to 8 hours of sunlight per day. If you’re growing chives in an area with heavy clay soil, consider amending it with compost before planting.
Once you’ve found the perfect spot for your chives, you’re ready to start preparing the soil and planting your seeds or seedlings.
Prepare The Soil
Preparing the soil for growing chives is essential for successful cultivation.
DIY PROJECT: Collect rainwater no matter where you live...

This DIY project is the best way to legally collect rainwater NO MATTER where you live. Get chlorine-free water, cut down on your water bills, and have enough for an emergency situation or to water your garden. Read More Here...
The easiest and most successful way of growing chives is planting rooted clumps in soil that is moist, fertile, and well-draining. Before planting, incorporate 4 to 6 inches of well-composted organic matter. Work compost into the top 8 to 12 inches of soil.
Ideally, the soil should be rich in organic matter. Dig in plenty of organic matter – such as garden compost, well-rotted manure or other soil improver – around the plants before planting or sowing seeds. This will work to improve fertility and drainage while also adding vital nutrients to the soil.
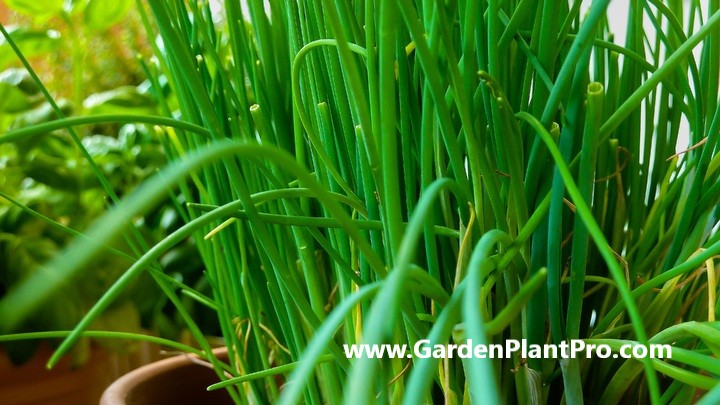
Chives are hardy perennials so they will pop back up after their winter dormancy. Make sure the soil around them is weeded and cleared of mulch, fallen leaves and other debris to ensure they won’t be competing with weeds for nutrients or light.
Grow chives in moist but well-drained soil or compost in full sun to partial shade. Water regularly and fertilize monthly during the growing season for best results. When harvesting leaves and flowers, do so sparingly as over-harvesting can lead to reduced growth.
Plant The Seeds Or Seedlings
When it comes to planting the seeds or seedlings, you have a few options.
If you’re sowing directly in the garden, sow two inches apart or broadcast them on the planting area and cover lightly with ¼ inch of soil. Keep the earth moist but not waterlogged.
Outdoors, sow seeds as soon as the soil is workable in the spring. Note that they can take a few weeks to germinate, so don’t panic!
For best germination results, sow seed directly in the garden or start in punnets. Seedlings will establish in the garden easily, rapidly growing into a clump around 30 × 30 centimeters.
If you’re growing chives indoors, find a windowsill where they can get at least six hours of sunlight per day and use a heated propagator to create a warm environment for germination. To start chive plants indoors, sow seeds into a small pot or module filled with soil and water regularly until fully grown. Once your seedlings are established and ready for transplanting outdoors, introduce them gradually to outdoor conditions before planting them in their final location.
Whichever route you take – sowing directly in the ground or starting indoors – it’s important to remember that chives thrive in full sun and well-drained soil rich in organic matter. Water regularly and fertilize according to your soil type for optimal growth and health of your chive plants.
Water Regularly
Watering is an important part of growing chives at home. Chives need to be watered regularly and deeply in order to thrive.
For indoor chives, water when the soil is dry to the touch on the top. It is best to water to a depth of 6 inches weekly and give them extra water whenever the ground feels dry at a depth of 7 inches. Newly transplanted chives should be watered well and allow excess water to drain out of the bottom of the containers.
For outdoor chives, water them regularly, preferably daily if planted in pots. Liquid feed with a general garden fertilizer or seaweed tonic regularly. This will help them grow and produce healthy foliage. As with any plant, overwatering can lead to root rot and other problems, so it’s important not to saturate the soil when watering your chives.
Fertilizing
Fertilizing is an important part of keeping chives healthy and strong. Use a very light application of a 5-10-5 (NPK) organic fertilizer at half of the recommended strength every four to six weeks for plants grown in sunlight without additional watering.
For plants grown in containers, feed them every four to six weeks throughout spring and summer with a water-soluble fertilizer mixed at half-strength. If the plant begins to show signs of stress, you can begin applying diluted liquid organic fertilizer each spring.
Additionally, chives don’t like very acidic soils so you should apply lime or dolomite to the soil once or twice a year to help regulate pH levels. Lastly, top up the bed with compost each spring to ensure adequate nutrient levels and improved soil structure.

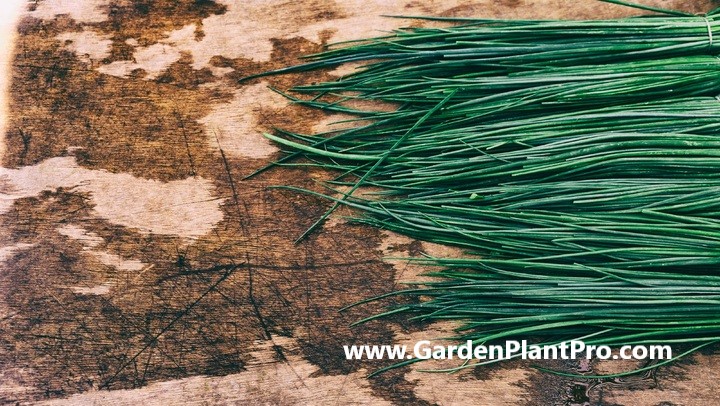
Harvesting
Harvesting chives is a simple process that can be done from early summer until the plant starts to die back in autumn. The best way to harvest chives is to use a sharp pair of kitchen shears, snipping the leaves from the base of the plant close to the base. This will stop them from growing too tall and becoming leggy. It’s also important to remember that when harvesting chives, you should leave some of the leaves on the plant so they can continue to photosynthesize and provide energy for growth.

Do you have some charcoal in your house right now? We call charcoal a “miracle leftover” for anyone who wants to be a little more self-sufficient and cut costs. That’s because it can help you with so many different things around the house and garden. You can even use it to make an energy-free fridge. Read More Here...
If you’ve chosen a common variety, such as Allium schoenoprasum, then you can harvest it multiple times throughout the season. However, some varieties are better suited for single harvests and should be harvested once all at once.
You can use chives in many different ways in your cooking – from adding flavor to salads or soups, or even as a garnish for dishes or cocktails. Once harvested, you can store chives in an airtight container or bag in your refrigerator for up to four days. You can also freeze them for up to six months.
Harvesting chives is an easy process that can be done quickly and efficiently when done correctly. With proper care and harvesting techniques, you’ll have fresh chives all season long!
Storing & Preserving
Storing and preserving chives is an important part of ensuring you get to enjoy their flavor and nutrients throughout the year. The best way to store chives is to quickly harvest them and freeze them. To do this, wash and dry the chives, then cut into small pieces. Place the chopped chives into a freezer-safe bag or container and store in the freezer for up to six months.
If you’d rather store chives for a shorter period of time, you can dry them. To dry chives, cut off the tops and place them on a wire rack or in dehydrator. Make sure they are spread out to ensure even drying. Once dried, store in an airtight container for up to six months.
You can also preserve chives by pickling them or making them into a pesto or sauce. To pickle chives, blanch the chopped chives for two minutes, then add to a jar of vinegar and some spices of your choice. To make a pesto or sauce, add blanched or raw chopped chives with other ingredients such as olive oil, nuts, garlic, and Parmesan cheese. Store your preserved chives in an airtight container in the refrigerator for up to four weeks.
Common Diseases & How To Control Them
Chives are generally very resilient to disease, but there are a few common diseases that can affect them. The most common diseases that affect chives are leaf and bulb rot, or mildew. Both of these are often caused by poor drainage, overcrowding, or improper fertilizing.
To prevent these diseases, it is important to ensure proper drainage, space plants with adequate room for airflow in between, and use organic fertilizers such as blood and bone in spring and autumn.
In general, chives are incredibly easy to maintain. Just keep them well watered, especially during long dry spells in summer; snip off any faded leaves and spent flowers; and apply blood and bone once or twice a year in spring and autumn for best results.
Common Pests & How To Control Them
Common pests to look out for when growing chives include aphids, whiteflies and mealybugs. All of these pests can be controlled using a variety of methods, including physical removal, natural predators, and organic insecticides.
Physical Removal: One of the most effective ways to control these pests is to physically remove them from the plant. For aphids, spray them with a garden hose projecting a reasonably hard pressured mist to dislodge them. Repeat this action regularly until the aphids have been eliminated. For whiteflies and mealybugs, handpicking is the recommended option.
Natural Predators: Another way to control these pests is to introduce natural predators such as ladybugs into the garden. Ladybugs are an effective way to control aphids because they feed on them.
Organic Insecticides: If all else fails, an organic insecticide can be used as a last resort. Be sure to follow the instructions on the label and spray in the early evening when there are fewer bees present, as they are vulnerable to these products too.
It’s also important to keep an eye out for signs of pests and take preventative measures if necessary, such as checking for eggs or larvae regularly and removing any affected leaves or stems from the plant. Doing so will help you keep your chive plants healthy and productive for years to come!
Companion Planting
When it comes to companion planting with chives, you’ll want to choose plants that are beneficial to the health of your chive plants. Chives are a great companion plant for many different herbs and vegetables. Not only do they help protect the other plants from certain pests, but they can also help them grow larger and healthier.
Carrots, for example, grow larger and healthier when planted near chives. They also help delay parsley from going to seed. Apple trees benefit from chives as well, as they help keep away pests and diseases. Basil, bell peppers and hot peppers, broccoli, cauliflower, celery, cilantro, cucumbers, and dill all make great companion plants for chives as well.
To get the most benefit from companion planting with chives, it’s important to remember that each plant has different needs when it comes to soil type, water requirements, sunlight exposure, and fertilizer requirements. Make sure you research the specific plant you’re looking at planting next to your chive plants before you start planting.
CASE STUDY: We've been living off the grid for the last 40 years...

In all that time an electric wire has never been connected to our house. We haven’t gotten or paid an electricity bill in over 40 years, but we have all the electricity we want. We grow everything we need, here, in our small backyard. We also have a small medicinal garden for tough times. Read More Here...
Aside from helping other plants in your garden grow larger and healthier, chives will add a tasty flavor to any dish you prepare. Be sure to add them to your herb pots for quick access when needed. They can be chopped up and used in salads or cooked dishes. You can also dry them and use them in homemade spice blends or as a garnish on top of dishes.

Using In Your Cooking
Chives are a popular addition to many dishes, adding flavor and nutrition.
While they are usually used fresh, they can also be stored and preserved for use in cooking. Here’s a few ideas on how to use chives in your cooking:
Fresh: To add fresh chives to your dish, cut the leaves as close to the base as possible using scissors. The more often you harvest them, the more new leaves will be produced.
Dried: If you want to store or preserve chives for future use, you can hang them in small bunches or spread them out on a cookie sheet and put them in a warm, dry place for several days. Once dried, store the chives in an air-tight container away from light and humidity.
Ground: To grind dried chives into a powder form, use a mortar and pestle or spice grinder. This is useful when adding flavor to sauces and dressings without the texture of chopped chives.
Frozen: If you want to keep your fresh chives for later use, you can freeze them by briefly blanching them in boiling water before plunging into ice water. Once cooled, drain and place in air-tight containers before freezing.
Chives are versatile and can be used for many different dishes. They add a mild onion flavor to salads and soups, as well as topping baked potatoes or scrambled eggs. They also pair well with cream cheese for dips or spreads. Use fresh or frozen chives as a garnish for main dishes or let their flavor shine through by adding them during the cooking process.