
Arnica is an intriguing herb that has been used for centuries to treat a variety of diseases, including bruises, sprains, and muscular stiffness. This herbaceous perennial is native to Europe and North America and may be grown in your garden with some care. Growing arnica, however, is only the beginning, since this plant has numerous uses beyond its medical virtues.
This guide will go through how to cultivate and use arnica in your garden, from selecting the perfect spot to harvesting and storing the plant’s blooms and roots. You’ll discover lots of ideas and tactics to help you get the most out of this adaptable plant, whether you’re a seasoned gardener or a beginner. So let us jump in and find out.
A Brief History
Arnica has been used medicinally since the 16th century, when it was believed to have magical healing properties. Arnica was used to treat a broad range of ailments, from bruises and strains to heart palpitations and toothache. It was also believed to have the power to ward off evil spirits.
In modern times, Arnica has become popular for its anti-inflammatory, antiseptic and healing properties. It is commonly used as a topical cream for muscle aches, pains and bruises. Research has also shown that Arnica may help reduce pain associated with arthritis, bursitis and other inflammatory conditions.
The genus Arnica belongs to the Asteraceae family, which is found in Europe, North America and parts of Asia. The most commonly used species is Arnica montana (also called Wolf’s Bane or Leopard’s Bane), which grows in the mountains of Europe and Siberia. Other species of Arnica include A. chamissonis (found in North America) and A. lappa (found in Asia).
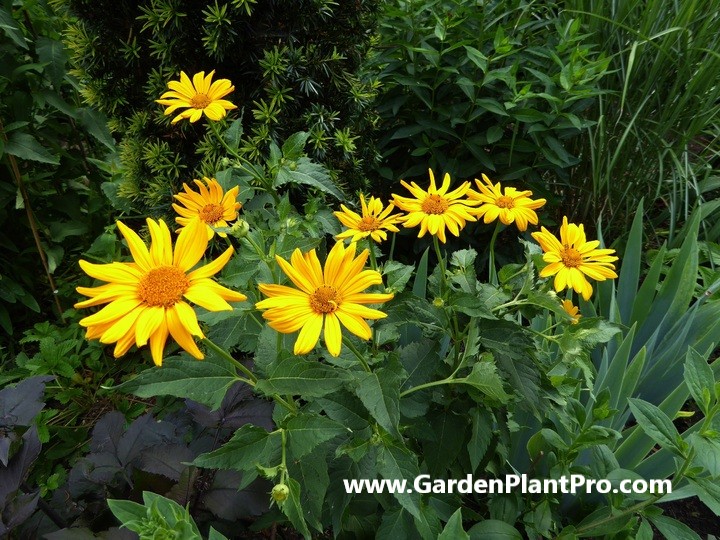
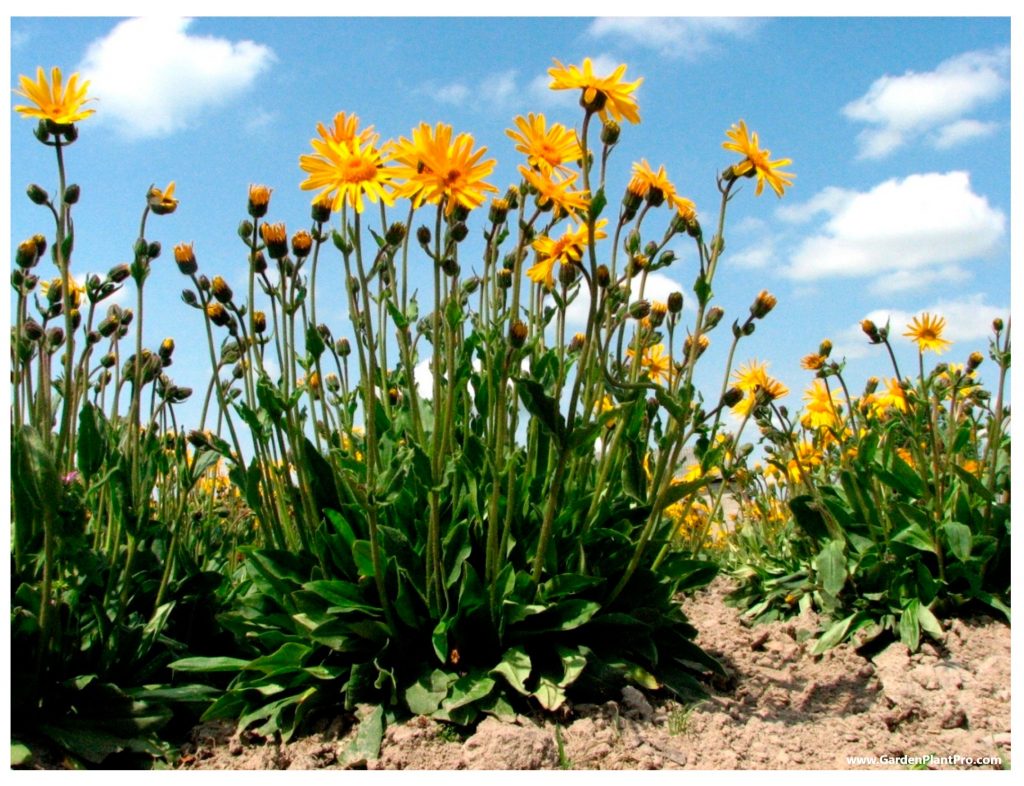
Arnica is an easy plant to grow in most temperate climates and can be propagated from cuttings or seeds. It prefers full sun exposure with moist but well-drained soil. The flowers are typically yellow or orange and bloom from early summer through late fall. Harvesting the flowers is best done when they are just starting to open, as this will ensure maximum potency of the active ingredients.
In addition to its medicinal uses, Arnica can also be used as an ornamental plant in gardens or planters. Its bright flowers will add color and charm to any outdoor space!
Nutritional Benefits
Arnica is more than just a medicinal plant. It’s also packed with essential vitamins and minerals that can help to improve overall health and wellbeing. Arnica contains vitamin A, vitamin C, calcium, magnesium, iron, phosphorus and potassium. It’s also rich in flavonoids, which are powerful antioxidants that help to fight against disease-causing free radicals in the body.
Arnica is known to have anti-inflammatory properties that can help reduce swelling and pain associated with arthritis, gout and sore muscles. In addition, it is thought to help boost the immune system and reduce fatigue. Arnica is also thought to have beneficial effects on the nervous system, helping to reduce anxiety and improve sleep quality.
In terms of its nutritional content, arnica is a good source of dietary fiber. This helps to keep the digestive system healthy and can even help regulate cholesterol levels. It’s also low in calories so it won’t add bulk to your daily calorie intake.
Arnica can be consumed in various forms such as teas, tinctures or as an essential oil. To make a tea from arnica flowers, simply steep 1 – 2 teaspoons of dried flowers in boiling water for 5 – 10 minutes. This tea can be enjoyed up to 3 times per day for maximum benefit.
To make an arnica tincture, steep one part dried arnica flowers in five parts of 80 proof vodka for two weeks before straining and bottling the mixture. For an essential oil blend, mix 2 drops of arnica oil with 2 drops of lavender oil and massage into affected areas for pain relief and inflammation reduction.
Common Varieties & Their Uses
Arnica plants come in a range of varieties and they all have different uses. The most common varieties are Arnica montana, Arnica chamissonis, and Arnica cordifolia.
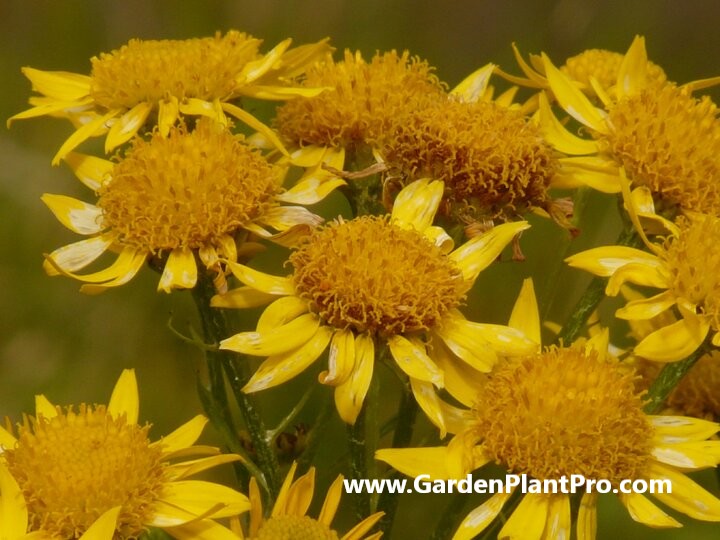
Arnica montana is the most commonly used type of arnica. It grows best in warm climates and can reach heights of up to one meter when fully grown. It has yellow flowers and is used for reducing inflammation and pain caused by trauma and overexertion.
Arnica chamissonis is a low-growing variety that grows well in cooler climates. It has white flowers and is effective for treating joint pain, muscle aches, and skin ailments.
Arnica cordifolia is the tallest variety of arnica, reaching heights of up to three meters tall. It has yellow-orange flowers and is used to reduce swelling, bruising, and pain associated with minor injuries or overexertion.
No matter which variety you choose, it’s important to gather the arnica flowers soon after they bloom because they tend to get buggy if left in storage for too long. When harvesting, be sure to use gloves as the flowers can irritate the skin if handled without protection.
When To Sow
Depending on the region and climate, the ideal time to sow arnica is usually late summer or early fall. However, in warmer climates, sowing can occur in the spring. It is important to note that the soil temperature should be consistent at 55°F (13°C) or higher for the best germination results.
Before sowing, it is necessary to prepare the soil with a light seeding mix that contains sand, forest loam and peat moss (or coir). Make sure the mix is free of lime and pressed firmly into place. To help ensure successful germination, soak the seeds in water overnight before planting. Once ready, sprinkle the seeds lightly over the surface of the prepared soil and cover them with a light layer of sand or very fine, friable soil.
DIY PROJECT: Collect rainwater no matter where you live...

This DIY project is the best way to legally collect rainwater NO MATTER where you live. Get chlorine-free water, cut down on your water bills, and have enough for an emergency situation or to water your garden. Read More Here...
It is important to keep an eye on the soil moisture level throughout germination as arnica seeds are usually reliable and take around one month to sprout. However, in some cases they can take up to two years to appear. To ensure successful germination, keep an eye on the conditions of your soil and water regularly when needed.
Choose The Right Location
Selecting the perfect spot in your garden to grow arnica requires some careful consideration. This plant is known for its delicate nature, and as such, it requires a location that provides the right growing conditions.
Arnica thrives in well-draining soil that is rich in organic matter, with a slightly acidic to neutral pH. It also prefers partial shade or filtered sunlight to protect its fragile leaves and flowers from the intense heat of direct sunlight. When deciding on a planting location, be sure to choose an area that is sheltered from strong winds, as arnica’s slender stems are susceptible to damage from gusty conditions.
Additionally, it’s best to avoid planting arnica in areas prone to flooding or standing water, as this can cause the roots to rot.
If you plan to grow arnica in pots, make sure you choose a location that receives bright, indirect sunlight and maintains temperatures of approximately 55 F (13 C). When planting arnica outdoors, be sure to give it plenty of space and avoid overcrowding other plants. With a little attention to detail and the right growing conditions, you can enjoy a healthy and fruitful arnica harvest.
Prepare The Soil
Preparing the soil for growing Arnica montana is an important step in the process. Before you begin planting, it is necessary to ensure that the soil has a good drainage system and that it is not too acidic or alkaline. The plant thrives in moist soil with a pH level of 6.5 to 7.5.
To get started, work a generous amount of organic matter such as compost or aged manure into the soil. This will help improve drainage and provide nutrients for the plants. You should also incorporate some sand into the soil to improve its texture and drainage.
Once you have prepared the soil, it is important to test its pH level. This can be done with a simple soil testing kit or by sending a sample of your soil to a lab for testing. If your soil is too acidic or alkaline, you can adjust its pH level by adding lime or sulfur respectively.
Plant The Seeds, Seedlings Or Cuttings
Once you’ve chosen the right location and prepared the soil, it’s time to plant the arnica seeds or seedlings. For seeds, lightly sprinkle them on the prepared soil in late summer and cover lightly with sand or fine soil. You can also press them into the surface of the soil or soilless starting mix. When planting seedlings, make sure to space them 25 cm apart in rows.
It’s important to keep the soil evenly moist, in bright, indirect sunlight and ensure that they are not exposed to extreme temperatures for germination. Arnica seeds usually take about a month to germinate, but can take as long as two years. Make sure to water regularly but not too much, as arnica does not like wet feet.
For those starting plants from seedlings, use a basic light seedling mix and fill containers at least two-thirds full before planting. Place your seedlings in a sunny spot with protection from strong winds and keep the soil evenly moist until they are established in their new environment.
When it comes to fertilizing, a basic light seedling mix is best for providing arnica with the nutrients it needs. If you’re using organic fertilizers, they should be applied in small amounts and only when necessary. Remember that overwatering and overfertilizing can lead to root rot and other problems.
Growing arnica from cuttings is also an easy and cost-effective way to propagate new plants. To get started, take cuttings from healthy arnica plants in the spring or early summer when the plant is actively growing. Select cuttings that are about 4-6 inches long and have at least 2-3 pairs of leaves. Cut the stems at a 45-degree angle just below a node, and remove the lower leaves from the stem.
Dip the cut end of the stem into rooting hormone powder, then plant it in a well-draining soil mixture of peat moss and sand. Water the cutting thoroughly and cover it with a clear plastic bag or plastic wrap to create a mini greenhouse. Keep the soil moist and place the cutting in a bright, but shaded location.
In about 3-4 weeks, the cutting should start to develop roots. Once the roots are well-established, you can transplant the new arnica plant into its permanent location in your garden.
Watering
Watering is a key component of successful arnica growing. The plants need to be kept consistently moist, but not waterlogged. The soil should be damp enough to support the plant, but not so wet that it causes the roots to rot.
When watering, it’s important to water deeply and evenly. Use a soaker hose or drip irrigation system to ensure that the water gets down into the root zone. If you are using a garden hose or sprinklers, make sure to water for at least 15 minutes to ensure that the soil has been saturated.

Do you have some charcoal in your house right now? We call charcoal a “miracle leftover” for anyone who wants to be a little more self-sufficient and cut costs. That’s because it can help you with so many different things around the house and garden. You can even use it to make an energy-free fridge. Read More Here...
During the summer months, arnica may require watering every 5-7 days, depending on your climate and soil type. In periods of extended dry weather, you may need to water more frequently. In general, it is best to water in the morning and avoid wetting the foliage if possible as this can lead to fungal diseases.
Fertilizing
Fertilizing is not necessary for arnica, as it can thrive in nutrient-poor soils. However, if you do decide to fertilize, it should be done in early spring before you plant. Use a light fertilizer, such as an all-purpose 10-10-10, or a fertilizer specifically formulated for sub-alpine plants. Avoid using high nitrogen fertilizers since they can cause the plant to become too lush and attractive to insect pests.
When planting arnica seedlings, you can use a transplant fertilizer with a balanced ratio of nutrients (e.g., 8-8-8). Mix the fertilizer in the soil at the bottom of the planting hole and water it in well before planting the seedlings.
If you decide to use a liquid fertilizer, make sure that it is diluted according to the instructions on the package and applied to the soil around the base of the plant. Avoid getting any of the fertilizer on the foliage as this can cause leaf burn. Apply only once during the season and avoid fertilizing during hot weather as this can result in wilting or scorching of leaves.
When & How To Harvest
Once your arnica plants have reached maturity, it’s time to harvest.
The harvesting process is fascinating; each flower is individually hand-picked at its optimum potency, when the central florets are open wide, and the petals are still attached to the stem. It’s best to harvest when the sun is low in the sky or early in the morning as this ensures that the essential oils needed for medicinal use are at their peak. You can also cut off the whole flower head with scissors or a knife and hang it upside down to dry.
To collect arnica seeds, you can wait until they are mature, which usually happens in late summer and early autumn. When the heads turn brown and dry out, use your fingers to take out the seeds from inside. Make sure you keep them in a cool, dry place for future planting.
It’s important to note that arnica is a slow-growing plant and takes several years to reach maturity. Once you have harvested your flowers and seeds, be sure to replant so that you can continue to enjoy them year after year.
Storing & Preserving
Once you’ve harvested your arnica flowers, the next step is to store and preserve them properly. This will help to ensure that you can enjoy the benefits of arnica for as long as possible.
The best way to store fresh arnica flowers is in a cool, dry place. A refrigerator is ideal, but if you don’t have one, an airtight container away from direct sunlight is also suitable. Properly stored, arnica flowers can last up to two weeks.
If you want to preserve your arnica for longer periods of time, you can dry it in an oven or dehydrator. Alternatively, you can hang it upside down in a cool, dark place for several weeks until it has dried out completely. Once dry, store it in an airtight container away from direct sunlight.
You can also use the flowers to create a medicated oil or poultice by covering 1 part of flowers with 4 parts oil and allowing the infusion to steep for at least two weeks before straining off the liquid and discarding the plant material. Popular oils include olive oil, almond oil and castor oil.
The final way to store arnica is by freezing it in cubes of water or olive oil. Place your arnica flowers in ice cube trays and either fill with water or a mixture of water and oil (depending on what you plan on using it for), then freeze for future use.
By following these simple steps, you can extend the life of your harvested arnica and enjoy its many healing properties for months after harvest.
Common Diseases & How To Control Them
Common diseases of arnica can be caused by fungi, bacteria, and viruses.
Fungal diseases such as powdery mildew, rust, and leaf spots can be controlled by avoiding wet foliage and overcrowding, as well as by providing good air circulation. To treat fungal disease, use a fungicide specifically designed for arnica.
Bacterial diseases such as bacterial leaf spot and crown rot can be prevented by avoiding overwatering and ensuring that the plant has good drainage. If a bacterial disease is present, it is best to remove any affected parts of the plant and treat with an appropriate antibiotic.
CASE STUDY: We've been living off the grid for the last 40 years...

In all that time an electric wire has never been connected to our house. We haven’t gotten or paid an electricity bill in over 40 years, but we have all the electricity we want. We grow everything we need, here, in our small backyard. We also have a small medicinal garden for tough times. Read More Here...
Viral diseases such as mosaic virus can be difficult to control. Avoid planting arnica from sources that may have been contaminated with virus-carrying aphids or other pests. If symptoms appear, remove the affected parts of the plant and dispose of them away from other plants.
To prevent any diseases from affecting your arnica plants, practice regular crop rotation and make sure to keep your tools clean when pruning or harvesting. Additionally, keep an eye out for signs of disease such as wilting leaves or discoloration, and take action quickly if any symptoms are observed.
Common Pests & How To Control Them
Common pests are a common problem in gardens. Unfortunately, they can quickly destroy the hard work that you’ve put into growing your plants. To protect your garden, it’s important to be aware of the common pests that attack arnica and how to control them.
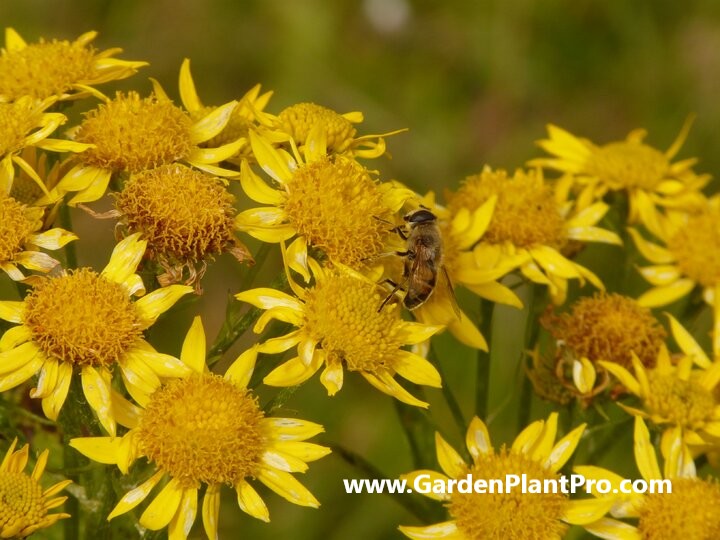
Aphids are one of the most common pests found on arnica. These small insects suck on the sap of plants, leaving behind a sticky residue called honeydew. To reduce aphid populations, use natural predators such as ladybugs or lacewings, or spray the plant with an insecticidal soap or neem oil solution.
Other common pests that attack arnica include slugs and snails. Slugs and snails feed on the foliage of arnica plants, leaving behind distinctive trails of slime. To control these pests, place copper barriers around the plants or sprinkle sharp sand or diatomaceous earth around their bases.
Spider mites are also a problem for arnica plants. These tiny insects suck on the plant’s leaves, leaving them discolored and distorted. To get rid of spider mites, spray the plant with a hose to knock them off and reduce their populations, or use an insecticidal soap or neem oil solution to kill them outright.
Companion Planting
Companion planting is a great way to help your arnica plants thrive. By planting certain plants near arnica, you can help increase yields, repel pests, and attract beneficial insects.
For example, rosemary is a natural pest repellent and also helps to reduce the amount of water needed for arnica to grow. Marigolds are also great companions for arnica as they help to repel nematodes and other pests. Basil is another good companion for arnica as it helps to improve the flavor of the crop. Finally, lavender is a great companion for arnica as it helps to attract beneficial insects such as ladybugs and bees, which help pollinate your plants.
When planting companions with arnica, be sure to plant them at least 6 inches away from the main plant so that they don’t compete for resources. Additionally, you should avoid planting too many different types of companion plants near each other as this can lead to overcrowding and competition for resources.
Overall, companion planting is an excellent way to ensure that your arnica plants are getting the best nutrition possible while also helping to ward off pests and attract beneficial insects. With a little bit of planning and research, you can easily create a companion planting plan that will help your arnica garden thrive.
Using Your Harvest
Once you’ve harvested your arnica, it’s time to put it to use.
Arnica can be used for a variety of medicinal and culinary purposes, depending on the variety you’ve chosen. For example, the flowers of Arnica montana can be used as a topical analgesic for pain relief, while the leaves can be boiled and made into a tea.
For culinary applications, the roots, stems, and leaves can all be eaten fresh or cooked. The stems and leaves have a bitter flavor, so they are often added to salads or soups. The roots can be boiled, mashed, or made into a flour.
For those looking to make their own arnica remedies at home, there are several options available. The flowers can be dried and infused in oil or alcohol to create an ointment or tincture that can then be applied topically to soothe sore muscles and skin conditions. The leaves can also be dried and brewed into a tea that is said to help relieve headaches and other symptoms of colds and flu.
When it comes to storing your harvest, it’s important to keep in mind that arnica will quickly lose its potency when exposed to light or heat for too long. Once you’ve harvested your arnica flowers or leaves, keep them in an airtight container in a cool and dark place until you are ready to use them. This will help ensure that your arnica remains fresh for as long as possible.