Potatoes are a common household staple and an excellent addition to any vegetable garden. Growing your own potatoes not only gives you access to fresh and delicious produce, but it also provides an opportunity to gain knowledge about the growth process and take control of any pesticides and chemicals used (or go organic and use none at all).
Growing your own potatoes in a vegetable garden can be a rewarding and tasty experience, they are relatively easy to grow and have few requirements, making them a great choice for beginner gardeners. From choosing the best type and preparing the soil to harvesting and storing your potatoes, we will walk you through the process of creating your own potato garden in this guide.
A Brief History Of Potatoes
The potato is one of the oldest known crops in the world, with origins dating back to 200 BC when they were first cultivated by the Inca Indians in Peru. In 1537, Spanish Conquistadors discovered the potatoes and brought them back to Europe where they quickly became a staple crop for many countries. Potatoes are now grown all over the world, and are a popular choice for home vegetable gardens.
Growing potatoes provides a number of nutritional benefits and can be used in a variety of dishes. There are many common varieties available, each with their own distinctive taste and uses. Knowing when and how to sow, choose a suitable location, prepare the soil, plant, care for the seedlings, water and fertilize will ensure a successful harvest. It is also important to know how to store potatoes, recognize common diseases and pests, and which plants make beneficial companions.
With proper planning and care, anyone can enjoy a successful harvest of homegrown potatoes.
Nutritional Benefits
The potato is a nutrient-dense vegetable, providing a variety of essential vitamins and minerals. It is an excellent source of fiber, boasting 45 percent of your daily vitamin C needs in a single medium-sized potato. It is also a good source of B6, an essential vitamin for energy production. Potatoes are also packed with other essential vitamins and minerals, such as potassium and magnesium.
In addition to being a powerhouse of essential vitamins and minerals, potatoes are also a great source of protein. A single medium-sized potato contains almost as much protein as a cup of lentils (on a dry-weight basis). This makes potatoes an excellent addition to any vegetarian or vegan diet.
The nutritional benefits of potatoes can be maximized by proper planting and care.
Planting potatoes in a sunny spot with at least 6 hours of direct sunlight will help them to thrive and produce higher yields. Potatoes should be planted in well-drained soil with plenty of organic material mixed in to improve fertility. Proper fertilization is also important for maximizing the nutritional benefits of potatoes.
By following the step in this guide you can ensure that your harvest is full of the valuable vitamins and minerals that potatoes have to offer.
Common Varieties & Their Uses
When it comes to growing potatoes in your vegetable garden, there are a wide variety of common varieties to choose from. Each variety has its own unique flavor and texture, as well as its own ideal uses for cooking.
The most popular common varieties are Russet, Red Pontiac, and Yukon Gold.
Russet potatoes are large and light-brown in color, with a dry and mealy texture. They are best for baking, mashing, and French fries.
Red Pontiac potatoes are red on the outside and white on the inside, with a waxy texture that holds its shape well when boiled or roasted. They are best for boiling, potato salads, and casseroles.
Yukon Gold potatoes have a golden-yellow skin and yellow flesh that is creamy when cooked. They are best for roasting, grilling, or scalloping.
Other popular common varieties include Purple Majesty potatoes with their deep purple skin and flesh; Kennebec potatoes which have a white skin with yellowish flesh; Fingerling potatoes; All Blue potatoes; and Yellow Finn potatoes that have an intense yellow flesh when cooked.
When choosing the right potato variety for your garden, it is important to consider what recipes you plan to make with them. Potatoes cook differently depending on their texture and starch content, so be sure to select the type of potato best suited to the dish you plan to make.
When To Sow Potatoes
When determining when to sow potatoes in the vegetable garden, it is important to consider the climate of the region. Generally, potato planting should occur two or three weeks after the last frost date in your area.
It is also important to be aware of your soil temperatures. Potatoes prefer a soil temperature between 8-10°C, so it may be necessary to wait until later in the spring if temperatures are still too cold.
In addition to these considerations, it is important to make sure that you are planting potatoes at the right time of year for your specific variety. Some varieties, such as fingerlings and new potatoes, can be planted earlier in the spring, while others such as Yukon Golds and Russets need a slightly longer growing season and should be planted later on.
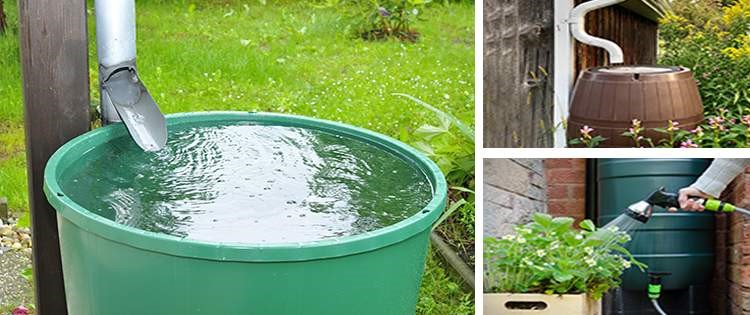
DIY PROJECT: Collect rainwater no matter where you live...
This DIY project is the best way to legally collect rainwater NO MATTER where you live. Get chlorine-free water, cut down on your water bills, and have enough for an emergency situation or to water your garden. Read More Here...
Once you have determined when to plant your potatoes, it is important to prepare your soil and create a suitable environment for them to grow. This includes turning over the soil and fertilizing it with compost or manure before planting. For more information on preparing your soil for optimal potato growth, please see the section on “Preparing The Soil”.
Choosing A Suitable Location In The Garden
Choosing a suitable location for growing potatoes in your vegetable garden is essential for a high-yield crop. Potatoes require a sunny spot with at least 6 hours of direct sunlight each day. The tubers need to grow in fertile, loose, well-drained soil; hard, compacted soil will lead to smaller tubers and reduced yields.
If you want to make the task of weeding easier (and you have the space), plant your potatoes at least two feet apart so that you can weed around them. Once you have chosen your location, prepare the soil with Tui Potato Fertiliser (or a similar amendment) and you are ready to plant.
Preparing The Soil
Preparing the soil for potato planting is key to a successful harvest. Start by testing the soil to determine its pH level. Optimum pH level for potatoes is 5.8 to 6.5, so use a soil testing kit or take a sample to your local agricultural extension office to have it tested.
If the soil is too acidic, add garden lime; if it is too alkaline, add sulfur.
Next, enrich the soil with compost or well-rotted manure at least two months before planting potatoes. This helps improve the soil’s physical structure, drainage, and fertility. It also increases the amount of organic matter in the soil and helps it retain moisture better.
When it comes time to plant potatoes, make sure to choose a sunny location with at least 6 hours of direct sunlight each day. Dig furrows in the bed approximately 8-10 inches deep and wide enough for the tubers to fit comfortably with space for them to spread out.
Add 2-3 inches of compost or well-rotted manure in the bottom of each furrow, then fill with enough soil so that the seed potatoes will be just below ground level when planted. If planting in commercial growing bags, fill with several inches of a mixture of compost and soil until the bag is two-thirds full and plant as described above.
Now you’re ready for planting! Follow these steps for successful potato planting in your vegetable garden and you’ll be on your way to enjoying fresh potatoes straight from your own backyard.
Planting
When it comes to planting potatoes, the most important factor is to ensure that the tubers are planted in a sunny place with at least six hours of direct sunlight each day. The soil should be fertile, loose, and well-drained. For best results, you can add pea or lucerne straw to the soil before planting.
Commercial growing bags can be used as an alternative to planting in a garden bed. Simply fill the bag with a few inches of soil-compost mixture, then plant your seed potato segments cut-side down (eyes up). Space each segment 12-inches apart on all sides. Then add more soil or compost mixture between each segment.
Once your potatoes are planted, water them regularly and continue to mound the soil or add pea or lucerne straw around the plants as they grow. Fertilizing with a balanced fertilizer every two weeks will also help promote healthy growth.
Harvesting potatoes usually takes about three months from planting, depending on the variety. When the foliage begins to yellow and die back, you can begin harvesting your potatoes. Carefully dig around the plants and remove any tubers that are at least two inches in diameter. Be sure not to bruise them as this will reduce their storage life.
Finally, store your harvested potatoes in a cool, dark place for up to several months.
Caring For The Seedlings
Once potatoes have been planted, the seedlings need to be properly cared for to ensure a successful harvest. The key steps for caring for potato seedlings are watering, mulching, and hilling.
Watering is important for potatoes as it helps them to produce large, healthy tubers. The soil should be kept moist but not soggy. You can use a soaker hose or drip irrigation system to provide the potatoes with an even amount of water. It is best to water the potatoes in the morning so that the foliage has time to dry before nightfall.
Mulching helps conserve moisture and keep weeds away from the potato plants. Organic mulches such as grass clippings, straw, or shredded leaves are ideal for this purpose. Spread a 3-4 inch layer of mulch around the base of the plants after they have emerged from the soil.
Do you have some charcoal in your house right now? We call charcoal a “miracle leftover” for anyone who wants to be a little more self-sufficient and cut costs. That’s because it can help you with so many different things around the house and garden. You can even use it to make an energy-free fridge. Read More Here...
Hilling is the process of mounding soil around the base of the plants. This helps to improve drainage and protect the tubers from frost damage in cooler climates. It is also beneficial because it helps keep weeds away from the potato plants and encourages them to form more tubers. Hilling should be done when the plants are 8-10 inches tall and again later when they are 12-14 inches tall.

Watering & Fertilizing
For best results, potatoes should be watered and fertilized regularly throughout the growing season.
Watering is essential for growing healthy potatoes. When tubers form, which happens when you see flowers appear, increase the watering schedule to give potato plants water every two or three days. To ensure that your potatoes get an adequate supply of water, make sure to spread out your irrigation evenly over the entire garden bed.
When it comes to fertilizing potato plants, a natural formula that is high in phosphorus but low in nitrogen is best. Too much nitrogen will give you beautiful foliage at the expense of tubers. Manure should be avoided as a fertilizer immediately before planting or during the growing season as it tends to promote scab development on potatoes. It’s best to work manure into the soil several months before plant so it has time to mature.
When & How To Harvest
Harvesting potatoes is an exciting step in the potato growing process.
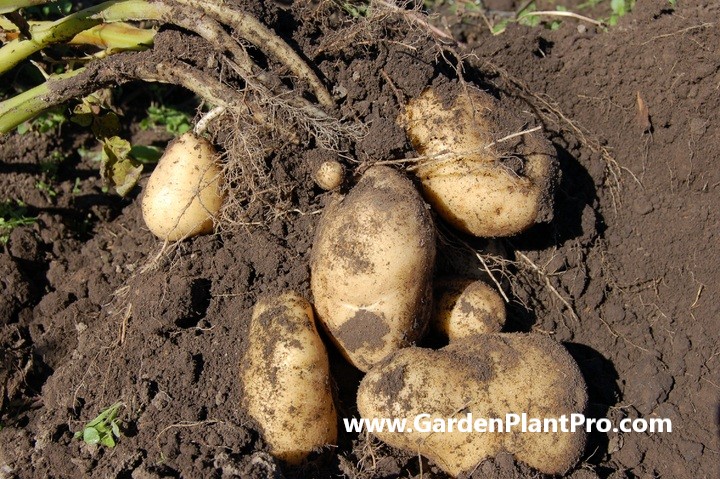
Depending on the type and variety of potato, the harvesting process will vary. For new potatoes, harvest 2-3 weeks after plants stop flowering when the potatoes are small and tender. Larger potatoes can be harvested several weeks after the plants have stopped flowering – wait until the plants have died down and the skin has hardened.
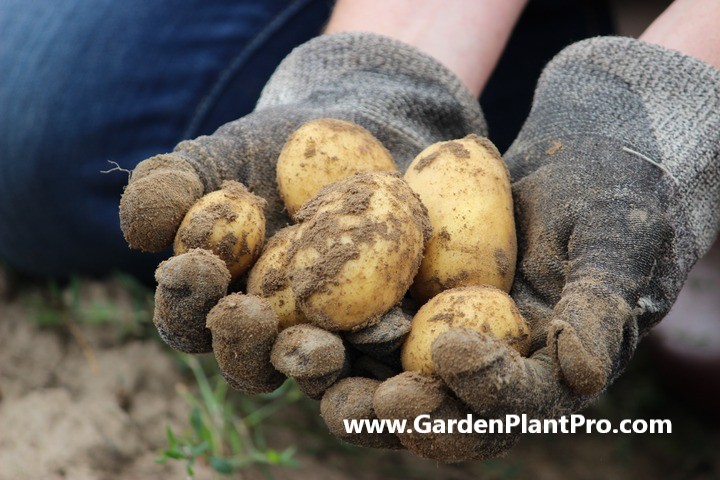
When harvesting potatoes, use a garden fork or spade to carefully dig around the plant in order to loosen the soil. The soil should then be gently brushed away from each potato to prevent damage to the skin. Handle with care as rough handling can cause bruising or blemishes on the potatoes which will make them less suitable for storage.
If you are storing your harvested potatoes for later use, it is important that you leave them in a warm, dry place for a few days in order to cure them. This will harden the skin and make them more suitable for long-term storage. After curing, store your potatoes in a cool, dark place such as a cellar or shed where they can be kept for several months.
Harvesting potatoes is an enjoyable task that can provide you with delicious vegetables for months – just remember to handle with care and cure before storing.

Storing Potatoes
Storing Potatoes is an important part of the potato growing process. Proper storage will help to maintain the quality and flavor of the potatoes for an extended period of time.
When harvesting potatoes, it is important to be gentle and avoid bruising them. Bruised potatoes should be eaten immediately, as they are more prone to spoilage. Potatoes should be stored in a cool (45-50°F), dark, and well-ventilated area. The ideal storage environment is a dry root cellar with temperatures around 40°F. If your home does not have a root cellar, you can store potatoes in a cool basement or garage.
When storing potatoes, make sure that there is adequate air circulation.
Place the potatoes in a single layer in paper or cardboard boxes, or ventilated mesh bags. Avoid storing potatoes in plastic bags as they can trap moisture and cause the potatoes to spoil.
Potatoes should be checked periodically for signs of spoilage such as soft spots, green spots, sprouts, mold, and rot. Any spoiled potatoes should be discarded immediately to prevent them from spreading disease or spoiling other potatoes.
If stored properly, potatoes will last for several months before needing to be replaced. To extend their shelf life even further, add a few apples or pears to the storage container – these fruits emit ethylene gas which helps to prevent potato sprouting.
Common Diseases & How To Control Them
Potatoes can suffer from a range of diseases, including late blight, common scab, black dot, and powdery mildew. Each of these diseases can have a devastating effect on a potato crop if it is not controlled in time. The key to managing any of these diseases is to be aware of the symptoms and take action quickly.
Late Blight
Late blight is one of the most serious diseases that affects potatoes. It is caused by the fungus-like organism Phytophthora infestans and is most prevalent in warm, wet weather. Symptoms include brown or black spots on the leaves and stems, as well as white mold on the surface of the leaves. If this disease is left untreated, it can spread quickly and cause extensive damage to the crop.
CASE STUDY: We've been living off the grid for the last 40 years...
In all that time an electric wire has never been connected to our house. We haven’t gotten or paid an electricity bill in over 40 years, but we have all the electricity we want. We grow everything we need, here, in our small backyard. We also have a small medicinal garden for tough times. Read More Here...
To control late blight, it is important to remove any affected plants immediately and treat the area with a copper-based fungicide.
Common Scab
Common scab is another disease that affects potatoes. It is caused by the bacteria Streptomyces scabies and results in lesions or spots on the skin of the potatoes. These lesions are typically raised and can be small or large in size, depending on the severity of the infection.
To prevent common scab from spreading to other plants, affected potatoes should be removed immediately and disposed of in a sealed bag away from other plants. To prevent common scab from occurring in future seasons, rotate crops each year so that potatoes do not follow each other in succession.
Black Dot
Black dot is another disease that affects potatoes, caused by Colletotrichum coccodes. This disease results in dark spots on both stems and leaves as well as dark circles beneath the skin of potatoes. Black dot can be prevented by rotating crops each year, avoiding overly wet conditions around plants, and maintaining adequate spacing between plants so that they have plenty of air circulation.
Powdery Mildew
Powdery mildew is another fungal disease that affects potatoes, caused by Erysiphe cichoracearum. This disease results in a white powdery coating on the leaves, stems, and sometimes even the tubers of the potato plant. If left untreated, powdery mildew can lead to reduced yields, stunted growth, and reduced quality of the tubers.
To prevent the spread of powdery mildew, it’s important to maintain good cultural practices, such as providing adequate air circulation, avoiding overhead watering, and removing infected leaves promptly. Fungicides can also be applied to control the spread of powdery mildew, but should be used as a last resort, as they can be harmful to the environment and beneficial insects
Common Pests & How To Control Them
Common pests can be a major problem for vegetable gardeners, but with the right preventive measures and treatments, you can control them and protect your potato crop. Some of the most common potato pests include Colorado potato beetles, flea beetles, aphids, wireworms, and mites.
Colorado Potato Beetles
Colorado Potato Beetles are the most destructive pests of potatoes. They feed on foliage and weaken plants.
To prevent and control these pests, practice crop rotation and companion planting. Planting tansy or basil next to your potatoes will help repel the beetles. If you do spot any larvae or adults, handpick them off the plants or use a horticultural oil spray to kill them.
Flea Beetles
Flea beetles are small black beetles that feed on young leaves and seedlings. They chew small holes in leaves, leaving a lacy pattern on the foliage.
To help prevent infestations, use row covers over the seedlings until they’re established. If you do spot any adult beetles, handpick them off the plants or spray them with an insecticidal soap or horticultural oil spray.
Aphids
Aphids are small green or black insects that can cause stunted growth in potatoes due to their sap-feeding habits. To keep aphids away from your plants, practice companion planting by planting mint near your potatoes as it will repel aphids naturally.
If an infestation does occur, try using insecticidal soap or horticultural oil sprays to kill them off. Make sure to target both sides of the leaves as aphids often hide there when spraying.
Wireworms
Wireworms are small yellowish-brown larvae that feed on root systems of potatoes and other vegetables in the garden. To discourage them from invading your potato patch, rotate crops every year so that there is no food source for them in the same area for more than two years at a time.
Beneficial Companion Plants
Potatoes are a versatile and tasty addition to any vegetable garden. To ensure a healthy harvest, it’s important to provide your potatoes with the right companions. Planting companion plants alongside potatoes can offer many benefits, including pest control, improved soil health, and increased yields.
Cabbage family crops like broccoli, cabbage, cauliflower, and kale are great companion plants for potatoes. These shallow-rooted veggies help prevent weeds from taking over while providing nutrients to the soil. Plus, they improve air circulation around the plants which helps reduce pest infestations.
Radishes and scallions are also good companion plants for potatoes. Radishes have a shallow root system that helps prevent weeds from growing near the potatoes while their peppery flavor can repel certain pests. Scallions have a similar shallow root system as radishes but their pungent smell repels pests even more effectively.
Another beneficial companion plant for potatoes is horseradish. This hardy perennial is an excellent natural pesticide and its strong smell deters many pests from invading your potato patch. It’s also been known to increase yields when planted near potatoes.
Lettuce and spinach are also great companion plants for potatoes as they both have shallow root systems that help keep weeds at bay while adding nutrients to the soil. They’re easy to grow, fast-growing, and can be harvested throughout the growing season for salads and other dishes.
When planting your companion plants alongside potatoes, it’s important to give them enough space so they don’t compete too much with each other for resources like light, water, and nutrients. Planting them in alternate rows or sections is usually best to maximize air circulation and sunlight penetration into the potato patch.
By paying attention to these tips when selecting and planting companion crops with your potatoes you can ensure a plentiful harvest free of pests and disease.


