Are you looking to add some fresh vegetables to your garden this year? Look no further than Brussels sprouts. Not only are they easy to grow, but they also make a delicious addition to any meal. In this guide, we’ll show you how to grow Brussels sprouts in your vegetable garden.
A Brief History
Brussels sprouts are believed to have originated in the 16th century in what is now Belgium. It is believed that this vegetable was first cultivated by farmers in the region, who recognized its potential as a nutritious, winter-hardy crop. The popularity of the vegetable soon spread throughout Europe and it is now grown worldwide.
It wasn’t until the late 1800s when the Brussels sprout was introduced to the United States. Since then, its popularity has grown, and now it is a popular vegetable for home gardeners to grow.
Brussels sprouts are a great source of nutrition and are packed with vitamins C, K and B6 as well as iron and fiber. Not only do they make a delicious side dish, but they can also be used in a variety of recipes such as salads and soups.
Nutritional Benefits
Brussels sprouts are an incredibly nutritious vegetable.
They are a cruciferous vegetable, meaning they are part of the cabbage family. They are high in protein and contain significant amounts of vitamin A and C along with other vitamins and minerals. This makes them a great addition to any meal.
Brussels sprouts are also high in fiber, which can be beneficial for digestion. Additionally, the antioxidants found in Brussels sprouts may help protect cells from free radical damage and reduce inflammation in the body. This can help reduce the risk of numerous health conditions, including cancer and heart disease.
Eating Brussels sprouts has also been associated with improved mental health, as they contain folate, which helps to support healthy brain function. Furthermore, they contain choline, which is an essential nutrient for memory and cognitive development.
Given their nutritional benefits, it’s no wonder that Brussels sprouts should be included in your diet! Growing your own Brussels sprouts is a great way to make sure you get plenty of these nutritious vegetables in your diet.
Common Varieties & Their Uses
When it comes to growing Brussels Sprouts, there are several varieties available that you can choose from. Depending on the variety, you may be able to harvest them earlier or later in the season, or choose varieties with specific flavor profiles or colors.
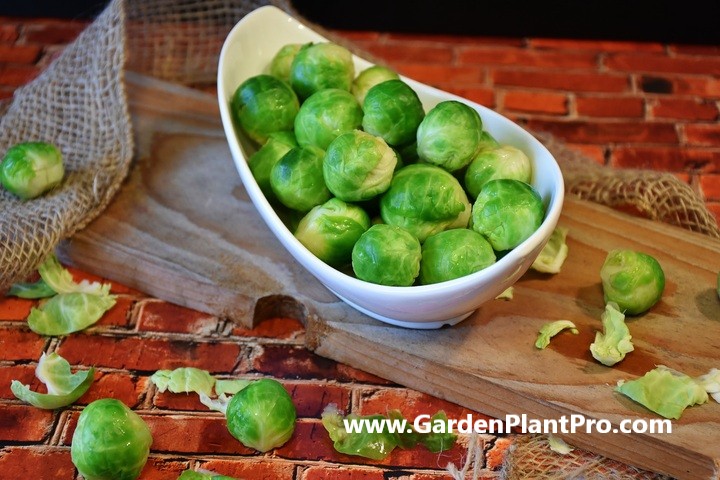
The most common variety is the ‘Long Island Improved’, which produces large, dark green heads that are ready for harvest in late fall. Another popular variety is the ‘Green Ball’, which produces heads that are rounder and slightly smaller than those of the ‘Long Island Improved’. The ‘Red Ball’ variety is similar to the ‘Green Ball’ but produces red-tinged sprouts instead.
If you’re looking for an early-maturing variety, the ‘Diablo’ is a great choice. It matures about six weeks earlier than other varieties and produces round heads with sweet flavor. The ‘Giant White’ is another early-maturing variety with large, white sprouts that have a mild flavor.
If you want to grow Brussels Sprouts in a container, the ‘Trafalgar’ is a great choice. This compact variety only grows to about 18 inches tall and produces small sprouts in shades of green and purple.
For unique flavor varieties, try ‘Falstaff’ which has a nutty taste, or ‘Lancelot’ which has a more pronounced broccoli-like flavor.
No matter which variety you choose, make sure to plant your seeds or seedlings at least 50-70cm apart in rows for best results. Feed your sprouts over the growing season with vegetable food and water regularly for optimal growth and yield.

When To Sow
Brussels sprouts should be sown outdoors early spring, or mid – to late summer for a crop that matures in the fall. It is best to start them off early in order to get the best crop. If direct-sowing seeds outdoors, sow them about 2-3 inches apart and about ½ inch deep. When seedlings are around 7cm high, transplant them into the garden bed, spacing them 50-70cm apart. Water in well and lightly cover with organic mulch like pea straw.
It is important to choose a location that is away from strong winds and in a sunny spot, as Brussels sprouts prefer full sun. The soil should be heavy clay soil and it should be prepared by digging in plenty of organic matter like compost or manure before sowing.
Caring for the seedlings requires regular watering and fertilizing. For best results, use early, mid-season and late varieties of Brussels sprouts to extend the harvest season.
Choosing A Suitable Location In The Garden
Choosing the right location in the garden for your Brussels sprouts is key to getting a good crop. They prefer full sun and rich soil, so select a spot that meets these criteria. If you live in a warm area, be sure to pick a spot protected from aphids, as these pests can quickly take over the plants. It’s also worth considering the effect of prevailing winds – Brussels sprouts are susceptible to damage from windy conditions.
In terms of soil preparation, enriching the soil with Yates Thrive Natural Blood Bone with Seaweed will help your plants to thrive. Dig it into the soil to a depth of at least 15 cm before planting or sowing your seeds.
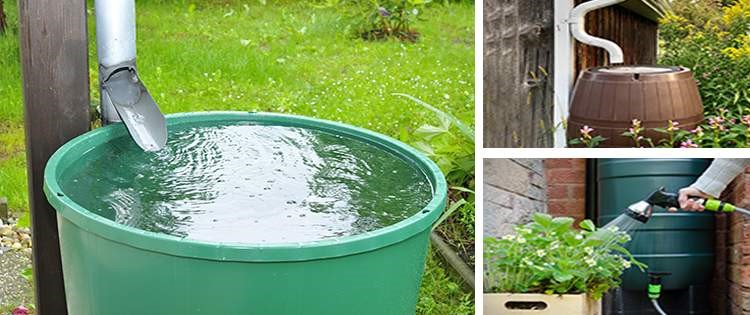
DIY PROJECT: Collect rainwater no matter where you live...
This DIY project is the best way to legally collect rainwater NO MATTER where you live. Get chlorine-free water, cut down on your water bills, and have enough for an emergency situation or to water your garden. Read More Here...
Once you’ve chosen and prepared the right spot in your garden, it’s time to start planting or sowing your Brussels sprouts. For winter use in very cold climates, it may be advisable to sow under cloches or fleece, or in a coldframe, from early early spring, or mid- to late summer for a crop that matures in the fall. This will help protect the seedlings until they’re ready for harvesting.
Preparing The Soil
Preparing the soil for growing Brussels sprouts is an essential step in ensuring a successful crop. Before planting, it’s important to make sure the soil is in prime condition. To do this, start by removing any weeds, rocks or debris from the soil. It’s important to get rid of these as they can interfere with root growth and reduce the quality of the crop.
Next, work organic matter into the soil; this can be done by adding compost or manure, as well as by using an organic fertilizer like fish emulsion. Incorporating organic matter helps to improve the soil’s fertility and structure, which is especially important when growing in containers.
Once the compost or manure has been added, it’s time to test your soil pH. The ideal pH range for Brussels sprouts is 6.2-7.0; if your soil falls outside this range, you’ll need to adjust it accordingly by adding lime or sulfur. This can be done a few weeks before planting to give the amendments time to take effect.
Finally, rake the soil to create a smooth planting surface, then break up any clumps with a garden fork and rake again until it’s level and even. This will ensure that your Brussels sprouts are able to develop strong and healthy roots without getting tangled up in clumps of soil.
Planting The Seeds Or Seedlings
Once you have chosen a suitable spot and prepared the soil, it’s time to get planting! Brussels sprouts can be started from seed indoors or sown directly into the garden. It is recommended to start sprouts from seed indoors, as this gives seedlings a head start and allows for easy transplanting when the time comes.
When starting seeds indoors, seeds should be planted around a half inch deep in trays filled with seed-starting mix. Then, once the seedlings have emerged and become larger, they should be thinned to around 18 to 24 inches apart.
If you are sowing seeds directly into the garden, Brussels sprouts are traditionally sown in a separate seed bed rather than on the main veg plot. Sow seeds around a half inch deep and 3 inches apart, then once the seedlings have emerged they should be spaced around 18 to 24 inches apart.
If you’re short on space or want to try container gardening, Brussels sprouts can also be grown in pots. Look for a pot that is at least 500-600mm in size, such as a half wine barrel, and only grow one plant per pot. Plant seeds around a half inch deep and water thoroughly after planting.
Once your Brussels sprouts are planted, they need plenty of sunlight and water to thrive. Try to choose a sunny spot away from strong winds for best results. After planting your sprouts and ensuring they’re well watered, it’s time to tend your crop!
Caring For The Seedlings
Caring for the seedlings is an important step in growing Brussels Sprouts. Once the seedlings are 7 cm high, they should be transplanted into the garden bed, spacing them 50-90 cm apart.
Water in well and lightly cover with organic mulch such as pea straw to help retain moisture. Regularly check the soil and water when necessary. Ensure that the soil is not too wet or too dry.
Fertilizing is also important to provide essential nutrients for healthy growth and development of the plants. An organic nitrogen-rich fertilizer can be used, following the manufacturer’s instructions. As Brussels sprouts are a heavy feeder, additional mulch may be beneficial over the growing season to help retain moisture and add additional nutrients to the soil.
It is also important to thin seedlings out when necessary, leaving around 18 to 24 inches between each plant. This will ensure that each plant has enough space to grow, as overcrowding can reduce yields and cause stunted growth.
Watering & Fertilizing
Watering and fertilizing are crucial to successful growth of Brussels sprouts. The soil should be kept moist, but not soggy, throughout the growing season. Watering should be done deeply, aiming for 1-2 inches of water per week. Potted plants may need more frequent watering. If the soil is not draining well, consider adding organic matter to improve drainage.
Fertilize with a nitrogen-rich product after thinning. Brussels sprouts need a constant supply of nitrogen; they can receive this either from periodic application of compost, manure, or a nitrogen fertilizer. Applying organic fertilizers such as fish emulsion or seaweed extract every three weeks will help ensure the plants have enough nutrients to produce healthy foliage and tasty sprouts.
If you have selected a site that has heavy clay soil, it is important to improve your soil by adding well-rotted manure or compost in spring or fall. Do not use fresh manure as it can damage the plants’ roots and increase the risk of disease. If you are using a chemical fertilizer, read and follow the instructions on the label carefully to avoid over-fertilizing.
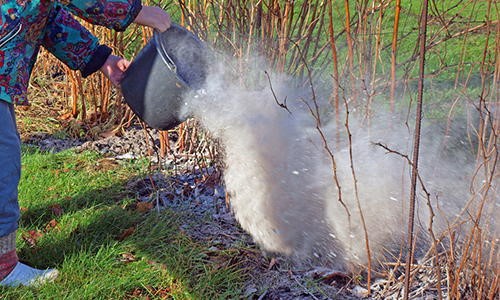
Do you have some charcoal in your house right now? We call charcoal a “miracle leftover” for anyone who wants to be a little more self-sufficient and cut costs. That’s because it can help you with so many different things around the house and garden. You can even use it to make an energy-free fridge. Read More Here...
When & How To Harvest
Harvesting Brussels sprouts is an exciting part of growing them in your vegetable garden. Depending on the variety and the conditions, Brussels sprouts will be ready for harvest between 70 and 140 days after planting. To ensure that you are harvesting at the right time, look for firm buds that are about 1 – 2 inches (2.5 – 5 cm) in diameter. The lower buds tend to mature earlier than the higher ones.
Once you have identified the mature buds, they should be plucked off gently and carefully by hand. Be sure to remove any yellowing or wilted leaves that may be present near the base of the plant as these can harbour disease and pests. For larger harvests, you can use a sharp knife or pruning shears to cut through the stem and remove multiple buds at once.
It is important to note that Brussels sprouts will continue to grow even after they have been harvested. To ensure continuous growth, it is best to pick off only a few buds per plant at a time and leave some of the smaller, immature ones on each plant. This way, you will have a steady supply of Brussels sprouts over time.
For best results, it is recommended that you harvest your Brussels sprouts in the morning when temperatures are cooler and humidity is higher. This will help keep them fresh longer once harvested.
If you plan on storing your Brussels sprouts for later use, wrap them in damp newspaper or paper towels and place them in an airtight container before storing them in your refrigerator for up to two weeks. Following these steps will ensure that you can enjoy fresh Brussels sprouts from your vegetable garden all season long.
Storing
Once your Brussels sprouts have been harvested, you can store them for up to two weeks in the refrigerator. To do this, place them in a perforated plastic bag and store them in the coldest part of the fridge. It is important to make sure the sprouts are completely dry before you store them, as any moisture can cause them to spoil quickly.
Brussels sprouts can also be frozen for later use. Blanch them in boiling water for 3-4 minutes before cooling in cold water. Once they’re cooled, drain off the water and place them on a tray. Place the tray in the freezer and allow the sprouts to freeze before transferring them to an airtight container or freezer bag. This will help maintain their flavor and texture when they’re cooked later on.
If you want to maximize their shelf life and flavor, you can pickle your Brussels sprouts by adding vinegar and spices of your choice. To do this, blanch your sprouts, as mentioned above, then add them to a jar with white wine vinegar, garlic cloves, peppercorns, mustard seeds and dill. Fill the jar with enough vinegar to cover the sprouts completely and refrigerate for up to one month. Enjoy!
Common Diseases & How To Control Them
Brussels sprouts are prone to a few common diseases, such as clubroot, blackleg, and white rot.
Clubroot is caused by a soil-borne fungus and is characterized by stunted growth, yellowing of leaves, and wilting of plants. To control clubroot, rotate your crops every three years and use raised beds to keep the soil dry. If necessary, you can also use fungicides containing mancozeb or chlorothalonil.
Blackleg is caused by a bacterium and is characterized by dark lesions on lower stems. To prevent this disease, practice crop rotation, avoid overhead watering, and remove infected plants from the garden.
White rot is caused by a fungus that causes yellowing leaves, dying stems and root rots. To control this disease, avoid overwatering, practice crop rotation and remove infected plants.
Common Pests & How To Control Them
Brussels sprouts are susceptible to attack from a variety of pests, including aphids, cabbage loopers, cabbage worms, flea beetles, harlequin bugs and root maggots.
In order to keep these pests from damaging your crop, it is important to practice good garden hygiene and keep an eye out for infestations.
Aphids are small insects that feed on the leaves of Brussels sprouts, causing them to curl and become discolored. To control aphids, try spraying the affected plants with a strong jet of water or use an insecticidal soap. Additionally, planting companion plants such as garlic, chives or nasturtiums can help deter aphids.
Cabbage loopers are small green caterpillars that feed on Brussels sprouts leaves. They can be controlled by handpicking them off the plants or using Bacillus thuringiensis v. kurstaki (Btk). This is a naturally occurring bacterium that is harmless to humans but toxic to caterpillars, such as cabbage loopers.
Cabbage worms are yellowish-green caterpillars that feed on Brussels sprouts leaves and can cause significant damage if left unchecked. These can be controlled by handpicking them off your plants or using Btk as well as floating row covers which prevent adult moths from laying eggs on your crops.
CASE STUDY: We've been living off the grid for the last 40 years...
In all that time an electric wire has never been connected to our house. We haven’t gotten or paid an electricity bill in over 40 years, but we have all the electricity we want. We grow everything we need, here, in our small backyard. We also have a small medicinal garden for tough times. Read More Here...
Flea beetles are tiny black bugs that feed on the foliage of Brussels sprouts. These can be controlled by using insecticidal soaps and floating row covers.
Harlequin bugs are shield-shaped insects that suck sap from the stems and leaves of Brussels sprouts. These can be controlled by handpicking them off your plants or using insecticides such as pyrethrin or neem oil. Additionally, you can use floating row covers to prevent adult bugs from reaching your crops and laying eggs on them.
Beneficial Companion Plants
Brussels sprouts are a member of the Brassica oleracea (cabbage) family, so it’s no surprise that the best companion plants for brussels sprouts are also from the same family. These include sage, chamomile, garlic, marigold, dill, onions, basil, celery, mint, peas, carrots, rosemary and beans. Planting them together can help to make your brussels sprouts more succulent and tasty.
Garlic is particularly easy to grow and is a great companion plant for brussels sprouts as it can help to repel pests. To grow garlic in your garden you’ll need to purchase individual cloves from the bulb. Plant these about 2-4 inches deep in the soil and about 4-5 inches apart. Make sure to water regularly and wait for the leaves to turn brown before harvesting.
Marigolds are another great companion plant for brussels sprouts as they can help deter pests like whitefly and nematodes. Plant them around your brussels sprouts in the springtime when sowing your seeds or seedlings and they will provide a beautiful display of color throughout the summer months.
Basil is another herb that pairs well with brussels sprouts as it has a strong flavor that can help to mask any bitter notes in the brassica family of plants. Plant basil near your brussels sprouts to add a fragrant aroma to your garden as well as additional flavor when you cook them up in meals.
Finally, rosemary is an excellent companion plant for brussels sprouts as it will help to improve the flavor of your crop while also helping to repel pests like cabbage moths and cabbage loopers. Simply plant rosemary around your brussels sprouts when sowing or transplanting in order to enjoy its benefits.

Using Brussel Sprouts In Cooking
Brussels sprouts are an incredibly versatile vegetable that can be used in a variety of different dishes. Whether you’re looking for a side dish to accompany a main meal, or wanting to whip up a healthy snack, Brussels sprouts are an excellent choice.
When cooking with Brussels sprouts, it’s important to note that they can have a strong flavor. To counteract this, you may want to consider pairing them with other vegetables or herbs that have subtle flavors, such as garlic and onions. You can also opt for more delicate preparations like steaming or roasting.
When it comes to preparing Brussels sprouts, there are several options available. You can choose to steam, roast, sauté or even fry them. The method of preparation will depend largely on the dish you’re making and your personal preference.
Steaming is an excellent way to preserve the flavor and nutrients of Brussels sprouts, as well as retain their bright green color. To do this, you will need a steamer basket and a large pot of boiling water. Place the washed and trimmed Brussels sprouts in the steamer basket and cover with a lid. Allow the water to come back up to a boil before reducing the heat and steaming for about 5 minutes or until tender.
To roast Brussels sprouts, preheat your oven to 400°F (204°C). Wash and trim the Brussels sprouts before tossing them in olive oil and seasonings of your choice (such as salt and pepper). Spread the seasoned vegetables on a baking sheet lined with parchment paper or foil and bake for 15-20 minutes until they are golden brown and tender on the inside.
Sautéing is another great way to prepare Brussels sprouts quickly. Start by heating some oil in a large skillet over medium-high heat before adding the washed and trimmed Brussels sprouts cut-side down.
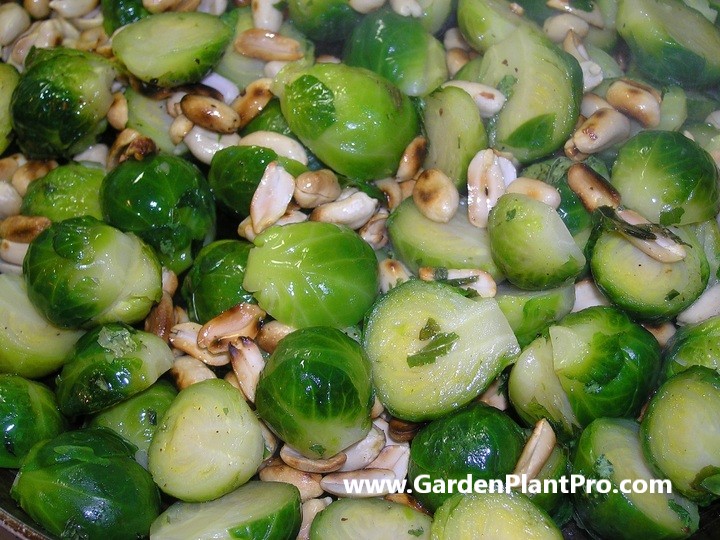
Allow them to cook for 2-3 minutes until they are browned and slightly charred, then stir them and continue cooking for an additional 2-3 minutes. Season with salt and pepper to taste, and add other seasonings or ingredients such as garlic or bacon for added flavor. Serve immediately as a side dish or add to a main course for a delicious and healthy addition.


