

Your plants are starving in sterile dirt—here is how to bring them back to life. Commercial potting mix is often heat-treated and sterile, leaving your plants to fend for themselves. Living soil is a thriving ecosystem that feeds your garden 24/7. Stop buying dead dirt and start building biology.
I have spent the better part of forty years with my hands in the earth, and if there is one thing I have learned, it is that most folks are trying to grow plants in a cemetery. When you walk into a big-box store and grab a yellow bag of potting mix, you are buying a product that has been steamed, cooked, and stripped of its soul. It might look dark and rich, but it is biologically vacant. Without the microscopic helpers that nature intended, your plants are essentially on life support, waiting for you to dump a bottle of blue liquid on them just to survive another week.
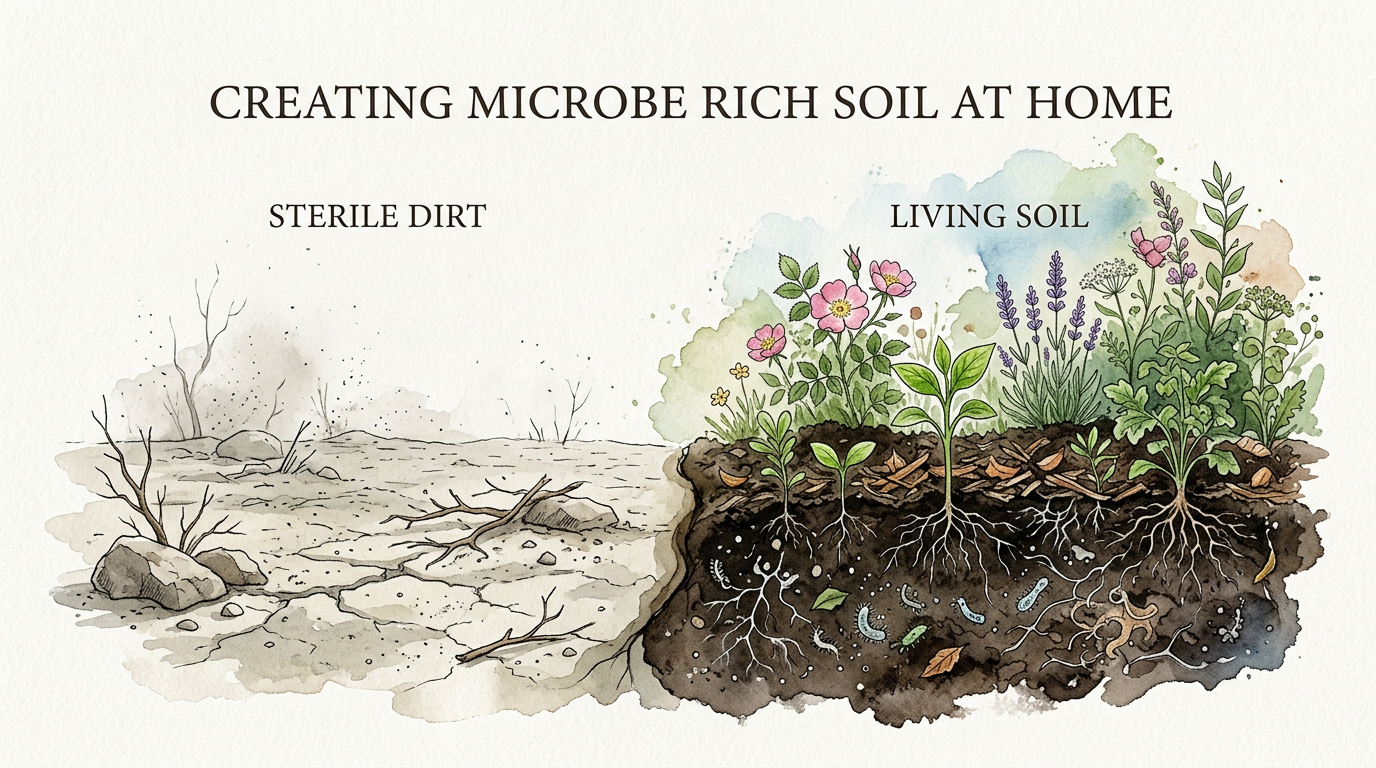
Living soil is different. It is a community of billions of tiny organisms working together to recycle nutrients, protect roots, and hold onto water like a sponge. When you switch from “dead dirt” to living soil, you stop being a chemist and start being a manager of an invisible workforce. It is a more relaxing way to garden, and the results speak for themselves—bigger yields, better flavor, and plants that do not keel over the moment a heatwave hits or a pest shows up.
Nurturing this life does not require a degree in biology, but it does require a bit of patience and a shift in how you look at the ground beneath your boots. We are going to walk through how to build this system from scratch, right in your own backyard. Whether you are working with a single 20-liter (5-gallon) bucket or a row of 3-meter (10-foot) raised beds, the principles remain the same. Let’s get to work on bringing that dirt back to life.
Creating Microbe Rich Soil At Home
Living soil is a self-sustaining ecosystem where plants and microorganisms share a mutual bond. In this system, the plant provides carbon and sugars—the “rent”—and the soil microbes provide minerals, water, and protection in exchange. It is a miniature version of a forest floor or an undisturbed prairie, compressed into your garden bed or container. While sterile mixes are designed to be predictable and inert, living soil is dynamic and constantly evolving.
Imagine your soil as a busy city. The sand, silt, and clay are the buildings and infrastructure. The organic matter is the warehouse full of supplies. But without the people—the bacteria, fungi, and protozoa—nothing moves. In sterile soil, the city is empty. In living soil, the streets are crowded with workers who are constantly breaking down old roots, mining minerals from rocks, and building “glue” that holds the soil together. This biological activity creates a stable environment where plants can thrive without constant human intervention.
Gardeners typically use this approach when they want to move away from synthetic fertilizers and toward a more “closed-loop” system. It is ideal for organic vegetable gardening, fruit trees, and perennial beds where you want to build long-term fertility. Because this soil is alive, it actually gets better over time. Unlike a bag of peat mix that wears out and needs replacing every season, living soil can be used for decades if you treat it right.
How the Soil Food Web Works
To build good soil, you need to know who the main players are. This is what we call the Soil Food Web. It starts with the tiny decomposers and moves up to the larger predators. Each one has a specific job to do, and if one is missing, the whole system starts to stutter.
The Decomposers: Bacteria and Fungi
Bacteria are the smallest workers. They are the first ones on the scene when you add fresh organic matter. They consume simple sugars and proteins, locking those nutrients into their tiny bodies so they do not wash away in the rain. Fungi are the heavy lifters. They have long, thread-like structures called hyphae that can reach several meters (feet) away from a plant to find water and phosphorus. They are the only ones capable of breaking down tough, woody materials like lignin.
The Predators: Protozoa and Nematodes
Nutrients are locked inside the bodies of bacteria and fungi like money in a vault. To get those nutrients out and into your plants, you need predators. Protozoa and beneficial nematodes eat the bacteria and fungi. Because these predators do not need as many nutrients as their prey contains, they “poop” out the excess in a form that plant roots can immediately absorb. This is nature’s slow-release fertilizer system, delivering food directly to the root zone exactly when the plant needs it.
The Engineers: Earthworms and Arthropods
Larger critters like earthworms and tiny soil mites act as the construction crew. They shred large pieces of leaves and mulch, making them small enough for the microbes to eat. As earthworms tunnel through the soil, they create pathways for air and water to reach deep into the ground. Their castings (manure) are some of the most microbe-rich substances on the planet, often containing five to ten times more available nutrients than the surrounding soil.
Building Your Base: The Living Soil Recipe
If you are starting from scratch, you want a base that provides plenty of “apartments” for microbes to live in and enough “food” to get the party started. I like to use a simple three-part ratio that has never let me down. It is easy to remember and works for almost any climate.
- 1 Part Aeration: Use perlite, pumice, or crushed lava rock. This ensures the soil stays fluffy and never compacts, which is vital because microbes need oxygen to breathe.
- 1 Part Base Material: Sphagnum peat moss or coconut coir works best. This holds onto moisture and provides a structure for roots to grip. If you use peat, make sure to hydrate it well before mixing.
- 1 Part High-Quality Compost: This is the most important part. This is where your biology comes from. Use a mix of homemade compost, worm castings, and well-rotted manure if you can get it.
For every 30 liters (about 1 cubic foot) of this mix, I like to add a few handfuls of rock dust or basalt. This provides the minerals that the microbes will “mine” for the plants. Once you have your ingredients, spread them out on a large tarp and turn them with a shovel until they are thoroughly blended. If the mix feels dusty, add about 5 liters (1.3 gallons) of water per 100 liters (26 gallons) of soil to keep it moist but not soggy.
After mixing, let the soil “cook” for at least two weeks before planting. During this time, the microbes will begin to colonize the new material. You might even see the soil temperature rise to 40°C–50°C (104°F–122°F) as the bacteria start working. This is a great sign. Just keep it covered and moist, and let nature do the heavy lifting.
Inoculating Your Soil with Life
If your soil feels a bit sluggish, you can give it a “biological jumpstart” through inoculation. This is the process of intentionally adding concentrated amounts of beneficial microbes. You do not need to buy expensive bottles for this; you can find everything you need in your local environment or your compost bin.
Compost Extracts and Teas
A compost extract is the easiest way to move biology from your compost pile into your garden beds. Take two or three handfuls of high-quality worm castings or finished compost and put them in a mesh bag. Submerge the bag in a bucket of clean, dechlorinated water and massage it for about five minutes. The water will turn dark brown—this is a “soup” of microbes and humic acids. Pour this directly onto the soil around your plants. It is best to do this in the early morning or evening so the sun does not dry out the microbes before they can swim into the soil.
Indigenous Microorganisms (IMO)
This is a trick I learned from Korean Natural Farming. You can capture the microbes that are already adapted to your local climate. Cook a small batch of rice until it is slightly firm, put it in a wooden box, and bury it under a layer of leaf litter in a healthy local forest or under an old tree. Leave it for 3 to 5 days. When you dig it up, you should see a white, fuzzy mold covering the rice. This is a collection of local fungi and bacteria. Mix this with an equal weight of brown sugar to preserve it, and you have a powerful microbial concentrate you can dilute in water and apply to your garden.
The Measurable Benefits of Living Soil
Switching to living soil is not just about feeling good; it produces tangible results that you can see and measure in your harvest. When the biology is clicking, the whole garden runs more efficiently.
| Factor | Sterile/Traditional Dirt | Living Soil System |
|---|---|---|
| Nutrient Delivery | Depends on human-applied liquid feeds. | Microbes cycle nutrients 24/7 based on plant demand. |
| Water Retention | Dries out quickly; can become hydrophobic. | Organic matter and fungal glues hold 2-3x more water. |
| Pest Resistance | Plants are “tasty” to pests due to high salt/sugar imbalance. | Microbes trigger Systemic Acquired Resistance (SAR). |
| Cost Over Time | High; requires constant purchase of fertilizers. | Low; requires only mulch and occasional compost. |
| Maintenance | High; requires frequent monitoring and feeding. | Moderate; requires mulching and moisture management. |
One of the most incredible benefits is the “Wood Wide Web” created by mycorrhizal fungi. These fungi colonize the plant roots and extend their reach by up to 100 times. This allows the plant to access pockets of water and phosphorus that the roots could never reach on their own. In a drought, plants in living soil often stay green and vibrant while plants in sterile dirt wither and die.
Furthermore, living soil improves the actual flavor and nutrition of your food. Because the microbes are providing a wide spectrum of trace minerals—rather than just the N-P-K (Nitrogen, Phosphorus, Potassium) found in synthetic fertilizer—the fruits and vegetables develop more complex sugars and antioxidants. A tomato grown in living soil doesn’t just taste like a tomato; it tastes like the sun and the earth it came from.
DIY PROJECT: Collect rainwater no matter where you live...

This DIY project is the best way to legally collect rainwater NO MATTER where you live. Get chlorine-free water, cut down on your water bills, and have enough for an emergency situation or to water your garden. Read More Here...
Common Mistakes to Avoid
Even the best-intentioned gardeners can accidentally kill off their soil life. The most common mistake is treated like a “bottled nutrient grow.” If you start dumping synthetic fertilizers onto living soil, the salts in those fertilizers will dehydrate and kill your microbes. It is like pouring salt on a slug. If you need to feed your plants, stick to organic top-dressings like kelp meal, fish hydrolysate, or more compost.
Another big pitfall is overwatering. Living soil is very efficient at holding moisture. If you water it as often as you would a sterile peat mix, you will drown the microbes. When the soil stays soggy, it becomes anaerobic (lacking oxygen). This kills the “good guys” and encourages pathogens that cause root rot. Always use the “knuckle test”—stick your finger 5 centimeters (2 inches) into the soil. If it feels moist, leave it alone.
Finally, avoid the urge to “tidy up” too much. In nature, the soil is always covered. Bare soil is an emergency. The sun’s UV rays can sterilize the top 2 centimeters (about 1 inch) of soil in a single afternoon, killing billions of microbes. Always keep your soil covered with a layer of mulch, such as straw, shredded leaves, or wood chips. This protects the biology and keeps the temperature stable.
Limitations and Practical Considerations
Living soil is a powerful tool, but it is not a magic wand that works instantly in every situation. It takes time to build a robust microbial community. If you are starting with completely depleted, “dead” dirt, it might take a full growing season before the biology is truly thriving. You have to be okay with a slightly slower start as the ecosystem stabilizes.
There is also the matter of initial effort. Building a high-quality living soil mix from scratch is more labor-intensive and can be more expensive upfront than buying a cheap bag of potting soil. You need to source diverse ingredients and spend time mixing and “cooking” the soil. For a very small indoor garden with only one or two plants, the effort might not feel worth it to some, although the health of the plants usually proves otherwise.
Lastly, living soil requires a consistent environment. If you let your pots or beds dry out completely until they are “bone dry,” you will lose a large portion of your microbial population. While the soil will eventually bounce back when re-hydrated, you will suffer a temporary dip in nutrient cycling. Living soil is a “pet” that needs regular, albeit minimal, attention to its moisture and food levels.
Practical Tips for Ongoing Success
Once you have your living soil established, the goal is to keep it thriving with as little disturbance as possible. Here are a few “old-timer” tips to keep that biology humming year after year.
- Adopt the No-Dig Method: Every time you turn the soil with a shovel, you tear the fungal hyphae and disrupt the microbial cities. Instead of digging, simply layer new compost and mulch on top. The earthworms will pull the nutrients down for you.
- Use Cover Crops: If a bed is going to be empty for a month or two, plant a “green manure” like clover, vetch, or rye. Living roots exude sugars that keep the microbes fed during the off-season.
- Watch the Water Quality: Tap water often contains chlorine or chloramine to kill bacteria. Unfortunately, it doesn’t distinguish between bad bacteria and your good soil microbes. If you can, use rain barrels or let your tap water sit out for 24 hours to let the chlorine dissipate.
- Re-amend After Harvest: When you pull a plant out, you are taking nutrients with it. Top-dress the area with 2 centimeters (1 inch) of fresh worm castings and a new layer of mulch to “recharge” the area for the next crop.
Advanced Considerations: The Pulse of the Soil
For those who want to take their soil health to the next level, you can start looking at things like fungal-to-bacterial ratios. Different plants prefer different soil “personalities.” Most vegetable crops thrive in soil that has a balanced 1:1 ratio of fungi to bacteria. However, fruit trees and perennial shrubs prefer a more fungal-dominant soil. You can tilt the balance toward fungi by adding more woody materials like wood chips or leaf mold to your mulch.
If you are really serious, you might even consider getting a basic microscope. Being able to see a strand of fungal hyphae or a fast-moving protozoan in a drop of soil water is the ultimate way to know if your management practices are working. When you see the life under the lens, you stop guessing and start knowing.
Another advanced concept is the production of glomalin. This is a “super glue” produced by mycorrhizal fungi that is responsible for creating stable soil aggregates. It accounts for up to 27% of the carbon stored in soil. By encouraging fungi, you are literally pulling carbon out of the atmosphere and locking it into the ground, making your garden a small but significant part of the climate solution.
Example: Reviving a “Dead” Raised Bed
Let’s look at a real-world scenario. A neighbor of mine had a raised bed that had grown tomatoes for five years straight using only synthetic liquid fertilizer. The soil had become gray, dusty, and hard as a brick. Water just sat on top and then ran off the sides. The plants were stunted and plagued by aphids every year.
Instead of digging it all out, we spent a weekend “re-wilding” it. First, we poked holes into the compacted dirt with a broadfork to let air in, but we didn’t turn the soil over. We then drenched the bed with 40 liters (about 10 gallons) of a high-quality compost extract to reintroduce the biology. On top of that, we added 5 centimeters (2 inches) of fresh worm castings and 10 centimeters (4 inches) of spoiled hay mulch.
Within six weeks, the soil began to change color from gray to a deep, chocolate brown. By the next season, the earthworm population had exploded. The new tomato plants grew 2 meters (over 6 feet) tall without a single drop of bottled fertilizer, and the aphid problem completely vanished because the plants were healthy enough to defend themselves. That bed is now more productive than it was when it was brand new ten years ago.
Final Thoughts
Building living soil is a journey back to the basics of how nature has grown plants for millions of years. It requires us to step away from the “fast-food” mentality of synthetic gardening and embrace the slow, steady rhythm of biological cycles. When you focus on feeding the soil rather than just the plant, you create a resilient system that can weather almost anything.
Start small if you need to. Try making one batch of compost extract or building one “living” container this season. Watch how the plants respond. Notice the way the soil smells—it should have a rich, earthy aroma like a forest after rain. Once you see the difference in the health of your garden and the ease of your maintenance, you will never want to go back to buying dead dirt again.
The microbes are waiting for you to give them a home. All they need is a little bit of organic matter, a bit of moisture, and for us to get out of their way. Happy gardening, neighbor. May your soil always be teeming with life.