

Why settle for synthetic fillers when the ultimate muscle relief is growing in your backyard? I traded my pharmacy gels for home-grown arnica, and my muscles have never felt better. Here is the raw truth about what you are putting on your skin vs. what nature provides directly from your garden.
DIY Arnica Salve Benefits
A DIY arnica salve is a concentrated herbal preparation made by infusing the medicinal properties of arnica flowers into a carrier oil and thickening it with beeswax. This centuries-old remedy serves as a potent topical treatment for physical trauma, specifically designed to address musculoskeletal discomfort and skin-level bruising.
While you can find arnica products in any local drugstore, making your own ensures you are using PURE ARNICA rather than a SYNTHETIC CREAM diluted with petroleum-based binders or artificial fragrances. In the real world, gardeners use this salve to recover from a long day of “garden back”—that unique ache that comes from hours of weeding, transplanting, and hauling mulch.
The magic lies in a compound called helenalin, which acts as a powerful anti-inflammatory by inhibiting the chemicals that trigger swelling in the body. When you apply this salve to a bruise or a sore joint, you are essentially delivering a concentrated dose of nature’s most effective recovery agent exactly where it’s needed.
Choosing the Right Arnica for Your Garden
Success starts with choosing a variety that will actually survive in your local conditions. Many beginners rush to buy seeds for Arnica montana, the classic European mountain species, only to find it is notoriously finicky. It demands high altitudes, very specific acidic soil with a pH between 4.5 and 6.0, and cool summers.
If you live at lower elevations or in a typical suburban climate, Arnica chamissonis (Meadow Arnica) is your best friend. This North American native is significantly easier to cultivate, hardy from Zones 3 to 10, and—most importantly—is considered medicinally interchangeable with its mountain cousin by the German Commission E. It spreads via rhizomes, meaning one happy plant will soon become a lush carpet of yellow daisy-like blooms.
Consider the growth habit when planning your space. A. montana grows in tidy clumps, while A. chamissonis is a “walker” that will fill in gaps between other acid-loving plants like blueberries or heathers. Both produce vibrant yellow-orange flowers that not only provide medicine for you but act as a magnet for local pollinators like bumblebees and butterflies.
Environmental Factors and Garden Conditions
Arnica is a plant that thrives on “tough love” and specific soil chemistry. It evolved in lean, nutrient-poor environments, which means the heavy, rich compost you use for your tomatoes will actually overwhelm it. To mimic its native habitat, you need a site with excellent drainage and acidic soil.
If your native soil is alkaline or heavy clay, don’t even try to plant arnica directly in the ground. Instead, create a dedicated raised bed or a rock garden trough using a mix of peat moss, coarse sand, and fine gravel. This creates the “breathable” root environment arnica requires to prevent the dreaded root rot that kills so many seedlings in the first year.
Full sun is generally preferred, especially in northern regions. However, if you are gardening in a climate where summer temperatures regularly soar above 30°C (86°F), your arnica will appreciate a bit of afternoon shade. These plants are not drought-tolerant; they expect consistent moisture similar to a mountain meadow, so keep the soil lightly damp but never soggy.
How to Grow Arnica from Seed to Harvest
Starting arnica from seed requires a bit of patience and a gentle touch. These seeds are light-dependent germinators, meaning if you bury them under a thick layer of soil, they will never see the sun and will simply rot. Sprinkle them lightly on the surface of your starting mix and press them in just enough to ensure good contact.
Germination is often erratic, taking anywhere from 2 to 8 weeks. Keep your seed trays in a cool spot around 13–18°C (55–65°F) rather than on a hot heat mat. Once the seedlings have their second set of true leaves, they can be hardened off and moved to the garden after the danger of frost has passed.
Harvesting usually happens in mid-summer when the flowers are at their peak. For the most potent salve, pick the blossoms just as they are beginning to open fully, as this is when the helenalin concentration is highest. Avoid picking in the heat of the afternoon; early morning, once the dew has evaporated, is the ideal window to capture the plant’s volatile oils before the sun bakes them away.
How It Works: Preparing the Infused Oil
The oil infusion is the soul of your salve. You cannot simply throw fresh flowers into a pot of wax and expect results. You must first extract the medicinal properties into a carrier oil like organic olive, jojoba, or sweet almond oil. Drying the flowers first is a non-negotiable step for the home gardener.
Fresh flowers contain a surprising amount of water. If you put fresh blossoms directly into oil, that water will get trapped, creating a perfect breeding ground for mold and bacteria that can ruin your entire batch in days. Spread your harvested flowers on a screen in a dark, well-ventilated area until they are “potato chip dry” and crumble easily between your fingers.
There are two primary ways to create your infusion:
- The Solar Method: Fill a clean glass jar half-full with dried flowers and cover them with oil, leaving about an inch (2.5 cm) of headspace. Seal the jar and place it in a brown paper bag on a sunny windowsill. The bag protects the oil from UV degradation while allowing the sun’s warmth to gently coax the medicine out over 4 to 6 weeks.
- The Slow Heat Method: If you need relief now, use a double boiler. Place the dried flowers and oil in the top pot and heat over the lowest possible setting for 4 to 8 hours. The oil should never exceed 77°C (170°F). Low and slow is the secret to preserving the delicate compounds.
DIY Arnica Salve Formulation
Once you have your golden, arnica-infused oil, it is time to turn it into a portable salve. The standard ratio is 1 ounce (28g) of beeswax for every 8 ounces (236ml) of oil. This creates a medium-firm consistency that stays solid in your pocket but melts instantly upon contact with your skin.
Gently melt the beeswax in a double boiler. Once liquid, pour in your strained arnica oil and stir constantly. If you want a more luxurious feel, you can replace a small portion of the oil with shea butter or cocoa butter. These fats add a protective barrier to the skin, making the salve even more effective for gardeners with cracked or dry hands.
Many seasoned herbalists add a teaspoon of Vitamin E oil at this stage. Not only is Vitamin E excellent for skin health, but it also acts as a natural antioxidant, preventing the carrier oils from going rancid and extending the shelf life of your salve by months. Once everything is blended, pour the liquid into small tins or amber glass jars and let it set completely before capping.
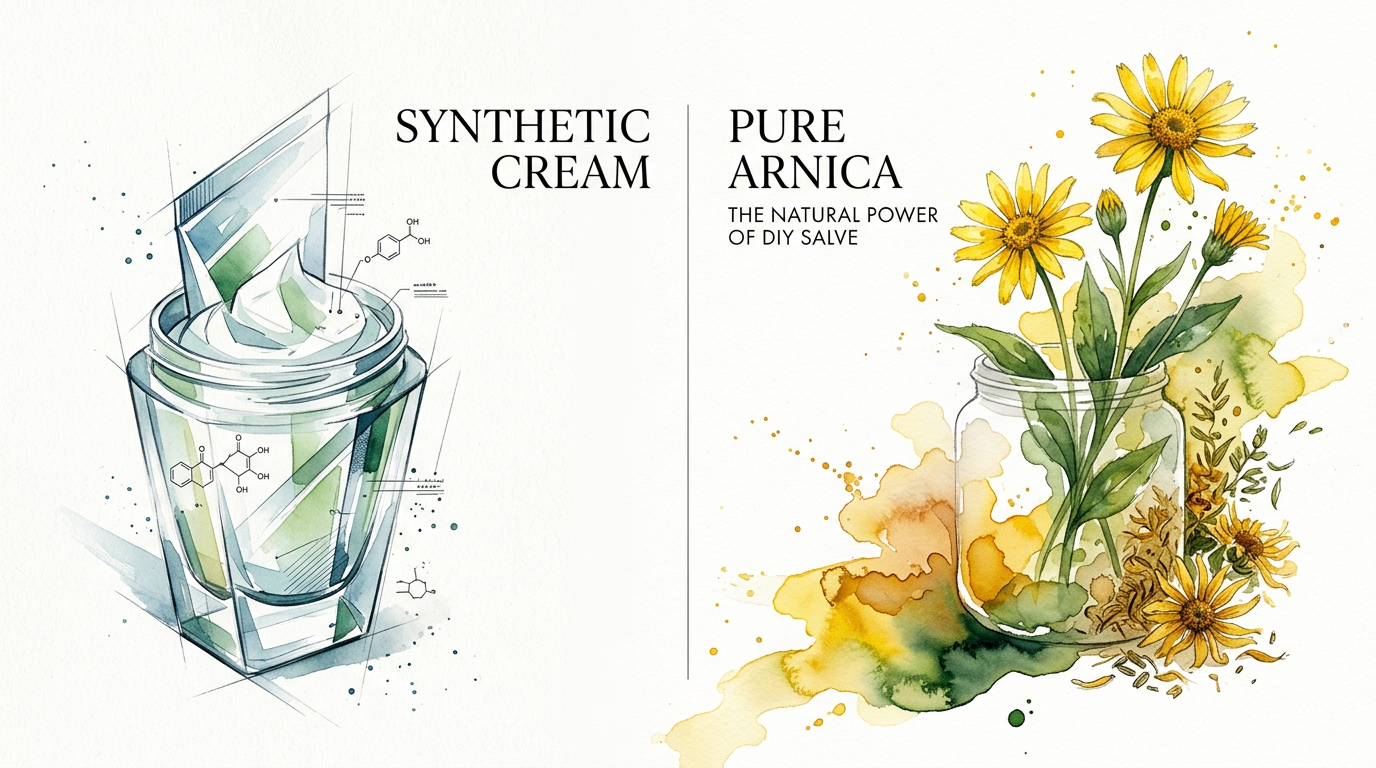
DIY Arnica Salve vs. Synthetic Cream
When comparing PURE ARNICA salves to store-bought SYNTHETIC CREAM, the differences are measurable in both cost and chemical purity. A commercial tube often contains less than 1% active arnica extract, with the rest of the volume made up of water, emulsifiers, and petroleum by-products that can actually block skin absorption.
DIY PROJECT: Collect rainwater no matter where you live...

This DIY project is the best way to legally collect rainwater NO MATTER where you live. Get chlorine-free water, cut down on your water bills, and have enough for an emergency situation or to water your garden. Read More Here...
| Feature | Homegrown Arnica Salve | Commercial Synthetic Cream |
|---|---|---|
| Active Concentration | High (1:5 herb-to-oil ratio) | Low (Often under 1%) |
| Base Ingredients | Plant oils, beeswax, butters | Water, petroleum, parabens |
| Shelf Life | 6–12 months | 24+ months (via preservatives) |
| Skin Absorption | Deep and rapid | Often sits on the surface |
| Cost per Ounce | Minimal (pennies if homegrown) | $5.00 – $12.00 |
Common Mistakes and How to Avoid Them
The most frequent error is using arnica on broken skin. This is a powerful herb, and those same compounds that reduce inflammation can be highly irritating if they enter the bloodstream directly through a cut or scrape. Always wait for the skin to close before applying your salve to a bruise.
Another pitfall is “greasy salve” syndrome. This happens when the oil-to-wax ratio is off, or when using a heavy oil like unrefined olive oil that takes a long time to absorb. If you find your salve too oily, try remelting it and adding a bit more beeswax, or next time, use a “drier” oil like grapeseed or jojoba as your carrier.
Finally, never skip the drying process for your flowers. Even a tiny bit of residual moisture from the morning dew can cause your salve to develop fuzzy white mold within a month. If you see mold, do not try to “scrape it off”—the spores have already permeated the oil. Throw it out and start fresh with bone-dry plant material.
Limitations and Safety Considerations
While arnica is a miracle worker for many, it is not for everyone. If you have an allergy to the Asteraceae family (daisies, sunflowers, marigolds, or ragweed), you should perform a small patch test on your inner arm before applying it liberally. Redness or itching is a clear sign to stop use immediately.
Arnica is strictly for external use. Ingesting the plant or the oil can lead to serious heart irregularities, dizziness, and digestive distress. Keep your tins clearly labeled and out of the reach of children who might mistake the herbal scent for something edible. Furthermore, pregnant or breastfeeding women should consult a healthcare provider before use, as the safety of arnica during these periods has not been fully established in medical literature.
Environmental limitations are also a factor. Arnica will not thrive in “black thumb” conditions where soil drainage is neglected. It is a specialist plant, and if you cannot provide the acidic environment it craves, you might find yourself frustrated by slow growth or plant death. In such cases, purchasing high-quality dried blossoms from a reputable supplier is a perfectly valid alternative to growing your own.
Advanced Considerations for Serious Practitioners
For those looking to take their herbal medicine to the next level, consider a double infusion. This involves straining out your first batch of flowers after the infusion period and then adding a fresh set of dried blossoms to the same oil for a second round. This creates a “super-concentrated” oil that is unmatched in potency.
You can also tailor your salve for specific types of pain. Adding dried ginger or cayenne to your arnica infusion creates a “warming” salve that increases blood flow—ideal for chronic joint stiffness or old injuries that act up in cold weather. Conversely, adding dried peppermint or a few drops of eucalyptus essential oil creates a “cooling” effect that is perfect for acute, throbbing muscle strains.
Storage also plays a role in potency. Light and heat are the enemies of herbal compounds. While a tin in your pocket is fine for daily use, store your “master batch” in the refrigerator or a cool, dark cellar. Professional practitioners often use amber or cobalt blue glass containers to filter out the light waves that degrade the helenalin over time.
Practical Scenario: The Post-Pruning Recovery
Imagine it is early spring, and you have just spent six hours pruning your fruit trees and heavy shrubs. Your forearms are tight, your shoulders are burning, and you can feel the familiar ache setting in. Instead of reaching for a bottle of pills, you head to the cabinet for your DIY arnica salve.
Because you used a base of fast-absorbing grapeseed oil and added 10 drops of ginger essential oil, the salve sinks in immediately. You massage a pea-sized amount into your rotator cuffs and the meaty part of your thumbs. Within 20 minutes, the “sharp” edge of the muscle fatigue softens. By the next morning, instead of the usual stiffness that makes it hard to grip a coffee mug, your hands feel supple and ready for another day in the soil. This is the difference between treating a symptom with a chemical and supporting the body’s recovery with a targeted botanical.
Final Thoughts
Building a bridge between your garden and your medicine cabinet is one of the most rewarding steps a gardener can take. Growing arnica—whether it is the regal A. montana or the resilient A. chamissonis—gives you a direct connection to the healing power of the earth. It turns a chore like weeding into an act of self-sufficiency.
Making your own salve is about more than just saving money. It is about knowing exactly what is touching your skin and trusting that nature, when handled with respect and patience, provides everything we need for recovery. Start small with a few plants this season, and soon you will find yourself reaching for your own golden tins instead of the pharmacy aisle.
Once you master the art of the arnica salve, you might find yourself exploring other herbal allies. Topics like soil health and composting will help you grow stronger plants, while learning about plant care for other medicinals like calendula or comfrey can help you expand your home apothecary even further. The garden always has more to teach if you are willing to listen.