
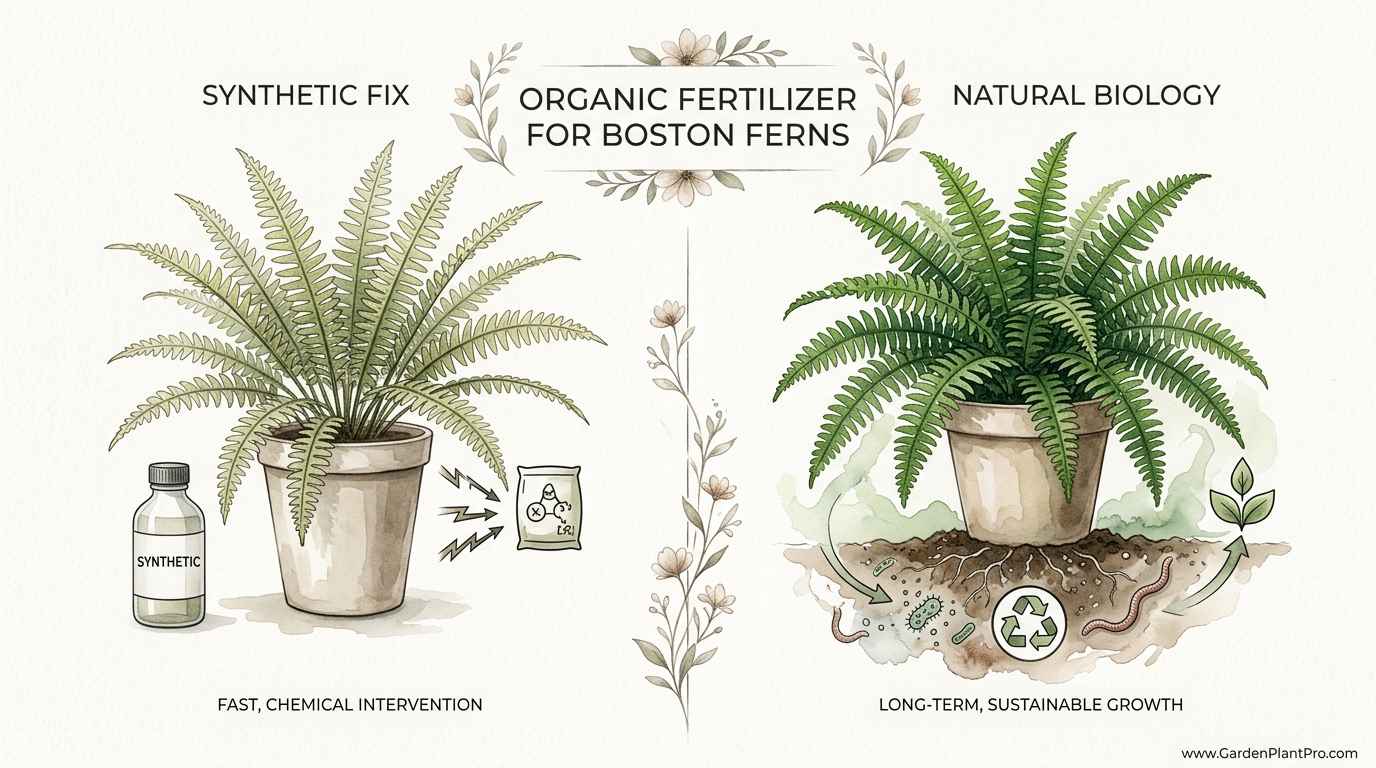
Are you feeding your fern a chemical cocktail or building a living ecosystem for its roots? Synthetic fertilizers are like fast food for your Boston fern—a quick energy hit that leaves the soil sterile and the plant’s immune system weak. Discover how natural, biological amendments create a ‘living’ soil that feeds your plant for years, not just days.
I remember my grandmother’s porch back in the day, lined with Boston ferns so thick you could barely see the wicker chairs behind them. She didn’t have a shelf full of plastic bottles with neon-colored liquids. What she had was a compost pile and a deep understanding of what those feathery green giants actually wanted. To her, a plant wasn’t just a decoration; it was a hungry guest that preferred a home-cooked meal over a drive-thru snack.
Most folks today see a yellowing frond and run for the strongest blue crystals they can find at the big-box store. They want a “synthetic fix” that promises instant greening. But those chemical salts are harsh on the delicate, hair-like roots of a Nephrolepis exaltata. Over time, those salts build up, turning your potting soil into a miniature desert where nothing lives but the plant—and even the plant starts to look ragged. Transitioning to natural biology isn’t just about being “green”; it’s about making your gardening life easier by letting nature do the heavy lifting.
When you feed the soil, the soil feeds the fern. It’s a simple partnership that has worked for millions of years in the humid floor of tropical forests. By the time we’re done here, you’ll know exactly how to mimic that forest floor in a simple ceramic pot on your windowsill.
Organic Fertilizer For Boston Ferns
Organic fertilizer for Boston ferns is less about a specific “product” and more about providing a balanced diet of decomposed organic matter, beneficial microbes, and trace minerals. Unlike synthetic fertilizers that deliver high doses of Nitrogen, Phosphorus, and Potassium (NPK) in a form that is immediately available but also easily leached away, organic options release their goodness slowly. They rely on the life in your soil—the bacteria and fungi—to break down the material into a form the fern can sip on as needed.
In the real world, you’ll find these ferns growing as epiphytes on trees or nestled in the rich, leafy “duff” of the forest floor. They aren’t used to getting hit with a 20-20-20 chemical blast. They prefer a steady, gentle supply of nutrients derived from rotting leaves, bird droppings, and the occasional dead insect. In a home environment, we use things like fish emulsion, liquid seaweed, worm castings, and compost tea to recreate this menu.
Think of organic fertilizer as a slow-cooker meal. It takes a little longer to get started, but the flavors are deeper, the nutrition is better, and it keeps you full for a lot longer. For a Boston fern, this means lush, deep-green fronds that don’t suddenly “crash” or turn crispy at the tips because the soil got too salty. It builds a plant that is resilient against pests and more tolerant of the occasional missed watering.
How to Feed Your Fern Naturally
Feeding a Boston fern with organic amendments is a bit different than just measuring out a teaspoon of powder. You have to consider the “delivery system.” Since these plants have very fine, shallow root systems, they respond best to liquid applications or very fine top-dressings. If you dump heavy, chunky manure on top of a fern, you might actually cause more harm than good by trapping too much moisture against the crown and inviting rot.
The first rule of thumb is to always water before you fertilize. If you pour a nutrient-rich liquid into bone-dry soil, the roots will suck it up too fast, which can lead to “fertilizer burn,” even with organic sources. I like to give my ferns a good soak with plain rainwater, wait about 30 to 60 minutes, and then go in with the organic “tea” or diluted emulsion. This ensures the roots are already hydrated and the nutrients can distribute evenly through the pot.
Applying Liquid Fertilizers: For fish emulsion or seaweed extract, a standard dilution is 1 tablespoon (15 ml) per gallon (3.8 liters) of water. However, for ferns, I usually go half-strength—about 1.5 teaspoons (7.5 ml) per gallon. Use this mixture once every two weeks during the active growing season (spring and summer). When you apply it, pour it around the base of the plant, avoiding getting too much on the fronds unless you are specifically doing a foliar feed.
Top-Dressing with Worm Castings: This is my favorite “set it and forget it” method. Once every 3 to 4 months, I take about a handful (approx. 100 grams / 3.5 oz) of pure worm castings and sprinkle them over the surface of the soil. I use my fingers to gently scratch it into the top half-inch (1.2 cm) of the potting mix. Every time you water after that, you’re essentially brewing a tiny bit of “worm tea” that trickles down to the roots.
The Benefits of Going Biological
Choosing natural biology over a synthetic fix offers more than just a clear conscience. The practical, measurable benefits for the plant are significant. When you use organic fertilizers, you are also adding organic matter to the soil, which improves its structure. Boston ferns need soil that stays moist but never gets “mucky” or “swampy.” Organic matter acts like a million tiny sponges, holding onto water and nutrients so they don’t just flush out the bottom of the pot.
- Reduced Salt Buildup: Synthetic fertilizers are made of mineral salts. As the water evaporates, the salts stay behind, eventually forming a white, crusty layer on the soil that literally sucks the moisture out of the plant’s cells. Organics don’t do this.
- Microbial Symbiosis: Organic fertilizers support mycorrhizal fungi. These fungi attach to the fern’s roots, effectively extending the root system by 10 to 100 times. This allows the plant to find water and minerals in corners of the pot it couldn’t reach on its own.
- Stronger Immunity: Plants fed a “slow and steady” organic diet develop thicker cell walls. This makes them less attractive to pests like spider mites and scale, which love the soft, watery growth produced by high-nitrogen chemical fertilizers.
- Micronutrient Diversity: While synthetics usually focus on N-P-K, organic sources like seaweed contain over 60 trace minerals, including iron, magnesium, and zinc, which prevent the “yellow-between-the-veins” look (chlorosis) that plagues many ferns.
Common Mistakes to Avoid
One of the biggest mistakes I see beginners make is thinking “if a little is good, a lot is better.” Just because a fertilizer is organic doesn’t mean it can’t be overdone. Fish emulsion, for example, is quite high in nitrogen. If you use it full-strength every week, you’ll end up with a fern that has massive fronds but very weak stems that flop over and snap under their own weight. Always lean toward under-feeding rather than over-feeding.
Another frequent error is ignoring the pH of the water. Boston ferns are “acid-loving” plants, preferring a soil pH between 5.0 and 5.5. Many municipal water systems are treated to be alkaline (pH 7.0 to 8.0) to prevent pipe corrosion. If you use this hard water along with organic fertilizers, the microbes might struggle to survive, and the plant won’t be able to “unlock” the nutrients you’re giving it. If you can’t collect rainwater, let your tap water sit out for 24 hours to let the chlorine dissipate, and consider adding a tiny splash of apple cider vinegar (about a teaspoon per gallon) to bring the pH down.
Finally, don’t forget the dormancy period. Boston ferns don’t grow much in the winter, especially in Northern hemispheres where the days are short. Feeding a sleeping plant is a recipe for root rot and salt accumulation. Stop all fertilizing once the first frost hits your region (even for indoor plants) and don’t start again until you see those first light-green “fiddleheads” uncurling in the spring.
Limitations: When Organics Might Not Be Ideal
It wouldn’t be fair to tell you that organics are perfect in every single scenario. There are practical boundaries to consider. First and foremost: The Smell. High-quality fish emulsion smells like a harbor on a hot day. If your fern is in a small, unventilated room, you might want to stick to worm castings or “deodorized” liquid kelp, or at least apply the fishy stuff on a day when you can leave the windows open.
Second, organic fertilizers require warmth to work. The soil microbes that break down the organic matter are mostly active when temperatures are between 65°F and 85°F (18°C to 29°C). If you keep your house very cool in the spring, your organic fertilizer will just sit there, and your fern might look hungry despite your efforts. In very cold environments, a highly diluted synthetic fertilizer might actually be more effective as a “bridge” until the weather warms up.
Lastly, there is the cost and availability. A bag of chemical pellets is cheap and lasts forever. High-quality liquid seaweed or worm castings can be more of an investment. However, as an old-timer will tell you, you usually get what you pay for. You’re paying for the health of the soil, not just the greenness of the leaf.
Synthetic vs. Natural Comparison
| Feature | Synthetic Fertilizer | Natural Organic Fertilizer |
|---|---|---|
| Action Speed | Instant results (1–3 days) | Slow release (1–3 weeks) |
| Root Safety | High risk of salt burn | Very low risk of burn |
| Soil Health | Depletes microbes over time | Builds “living soil” ecosystem |
| Trace Minerals | Usually N-P-K only | Rich in 60+ micronutrients |
| Application Frequency | Frequent (every 1-2 weeks) | Infrequent (every 4-8 weeks) |
Practical Tips for Success
If you want to really see those ferns take off, try foliar feeding. Boston ferns can absorb nutrients directly through their fronds. Mix your liquid seaweed or compost tea at quarter-strength—very, very diluted—and put it in a fine misting bottle. Every week, give the fronds a light spray. It’s like a vitamin shot that bypasses the soil entirely. This is especially helpful if your plant is recovering from a stressful event like a move or a repotting.
DIY PROJECT: Collect rainwater no matter where you live...

This DIY project is the best way to legally collect rainwater NO MATTER where you live. Get chlorine-free water, cut down on your water bills, and have enough for an emergency situation or to water your garden. Read More Here...
Another tip: Check your pot size. Ferns like to be a little bit “snug” in their pots. If the pot is too big, the organic matter in the soil can stay too wet for too long, leading to anaerobic (oxygen-free) conditions that kill the very microbes you’re trying to cultivate. A slightly root-bound fern is actually much easier to fertilize effectively than one floating in a giant tub of soil.
- Use rainwater whenever possible; it’s naturally acidic and free of the chemicals that kill soil life.
- Rotate your fern every time you fertilize so all sides get equal light and nutrient distribution.
- If you see a white crust on the soil, flush it immediately by running 3 or 4 gallons of plain water through the pot to wash out the salts.
- Combine worm castings with a bit of coco coir or peat moss when repotting to provide an immediate organic base.
Advanced Consideration: Microbial Inoculants
For the gardener who wants to go beyond the basics, let’s talk about microbial inoculation. You can actually buy “beneficial bacteria” and “mycorrhizae” in a powdered form. When I repot a Boston fern, I sprinkle a little of this “magic dust” directly onto the root ball. This ensures that the plant has its fungal partners right from the start.
Studies have shown that ferns inoculated with Glomus species of fungi are significantly more resistant to drought. Since “the fern dried out” is the #1 cause of plant death in most households, anything that improves water-use efficiency is worth its weight in gold. These microbes also produce a sticky substance called glomalin, which helps the soil particles stick together in a “crumbly” way that allows roots to breathe. If you’re serious about building a living ecosystem, don’t just feed the microbes—introduce the right ones to the party.
Example Scenario: The Revitalization
Let’s look at a real-world case. Suppose you have a Boston fern that’s been sitting in the same pot for three years, fed only with grocery-store spikes. It’s “leggy,” the center is thinning out, and the tips of the fronds are permanently brown. Here is how I would bring it back using a biological approach:
- Flush the Soil: Take the pot to the bathtub. Run room-temperature water through the soil for 10 minutes to wash out the old synthetic salts.
- The Gentle Prune: Cut away any completely brown fronds right at the base. This tells the plant to stop wasting energy on dead parts.
- The Biological Boost: Once the soil has drained, top-dress with 0.5 inches (1.25 cm) of fresh worm castings.
- The Liquid Diet: For the next two months, water only with half-strength liquid kelp. The hormones in the kelp (auxins and cytokinins) will stimulate the plant to grow new roots and push out fresh “fiddleheads” from the center.
Within 6 to 8 weeks, you should see a noticeable change in the color—a deeper, more “foresty” green—and the new growth will be stronger and more upright.
Final Thoughts
Building a living ecosystem for your Boston fern is about patience and observation. It’s moving away from the “fix it now” mentality of modern chemistry and toward the “nurture it always” wisdom of the natural world. When you see your fern thriving, not because of a chemical surge, but because its roots are woven into a rich, microbial-rich soil, you’ll realize that gardening is much more than just a hobby—it’s a stewardship of life.
Start small. Maybe just swap your next synthetic feeding for a bottle of liquid seaweed or a bag of worm castings. Watch how the plant responds. You’ll likely notice fewer pests, less browning, and a plant that feels like it belongs in the wild. If you’re interested in keeping this “living soil” momentum going, you might want to look into other practices like composting your kitchen scraps or learning about pest management that doesn’t involve harsh sprays. Every step you take away from the chemical cocktail is a step toward a more vibrant, resilient garden.
So next time you’re standing over your fern with a watering can, ask yourself: am I just giving it a drink, or am I tending to a tiny, beautiful world? The answer will make all the difference in the world—and in your fern.