

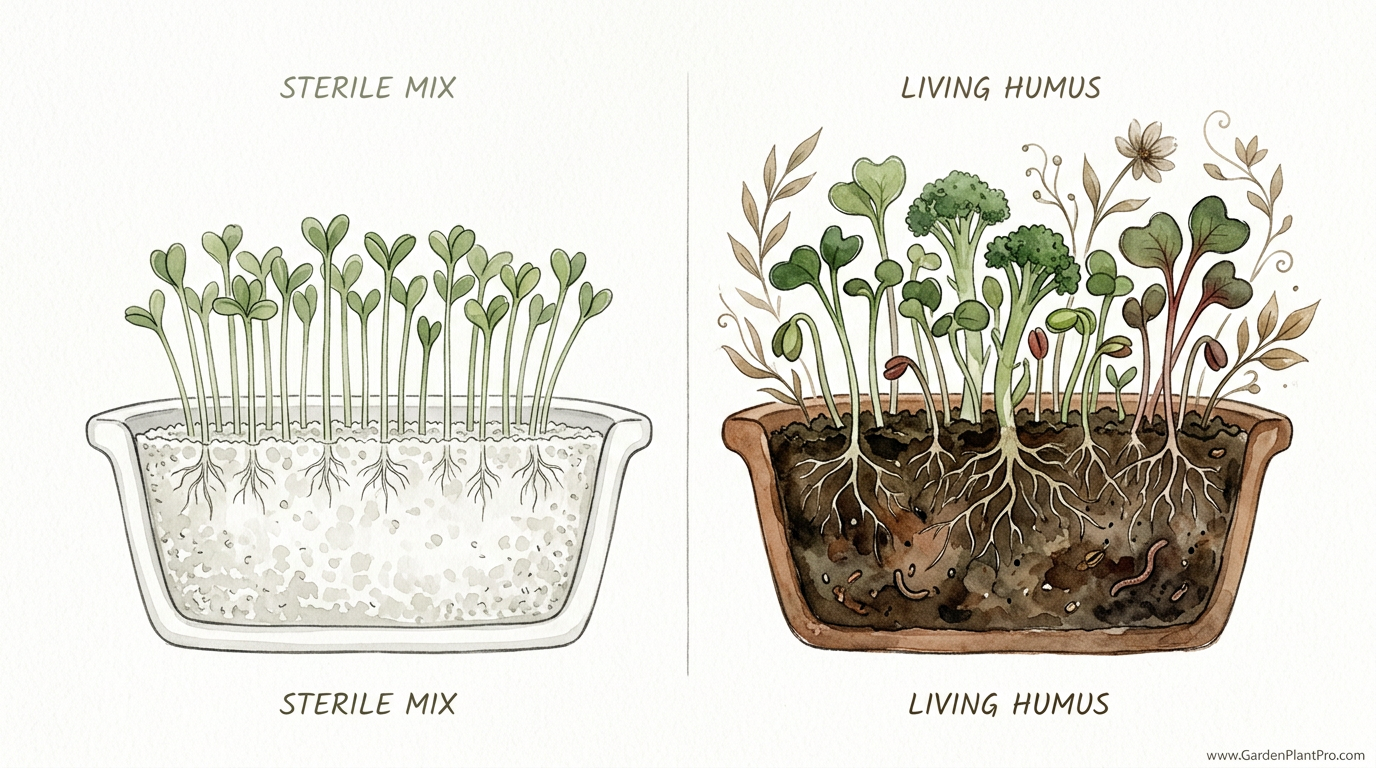
The secret to super-sprouts isn’t the fertilizer—it’s the microscopic life already in the soil. Bagged ‘sterile’ soil might be clean, but it’s a biological desert. To grow truly nutrient-dense sprouts, you need a living ecosystem. Living humus provides the fungal and bacterial networks that feed your sprouts’ roots from day one, resulting in 3x the vitamins and 10x the flavor.
You might have noticed how store-bought sprouts often taste like… well, crunchy water. There is a reason for that. Most commercial growers use hydroponics or sterile mats to keep things “safe” and fast. But when you lean over the garden fence and look at how nature does it, you see a completely different story. A seed falling onto a forest floor doesn’t just wake up to water; it wakes up to a vibrant, buzzing community of microbes that are ready to trade nutrients for sugars the moment that first root hair emerges.
I have spent forty years getting my hands dirty, and if there is one thing I have learned, it is that you cannot cheat the biology of a plant. If you want a sprout that is actually a superfood, you have to treat it like a living being from the start. That means moving away from those dead, gray bags of peat and perlite and moving toward something with a little more “soul” in it. We are talking about living humus, the dark, rich gold that makes the difference between a garnish and a powerhouse meal.
Best Growing Medium For Nutrient-dense Sprouts
Living humus is the final stage of organic matter decomposition. It is not just “dirt” or “compost.” Think of it as the stable, concentrated essence of everything that was once alive. While fresh compost is still “cooking” and can sometimes be too aggressive for tender seeds, humus is calm, steady, and packed with complex carbon chains that hold onto minerals like a magnet. This medium exists in the top layers of healthy forests and well-tended organic gardens where the soil has not been turned or poisoned for years.
In a real-world setting, this medium serves as both a pantry and a communication network. When a seed is placed in living humus, it enters a “bio-active” zone. This isn’t just about the nitrogen, phosphorus, and potassium (NPK) you see on a fertilizer bag. It is about trace minerals like boron, manganese, and molybdenum that are only made “available” to the plant through the work of bacteria. Sterile mixes don’t have these workers, so the plant has to struggle to find what it needs, often resulting in lower levels of vitamins C and E.
Gardeners use living humus specifically when they want to maximize the “secondary metabolites” of a plant. These are the compounds that give a radish sprout its spicy kick or a sunflower shoot its nutty richness. Without the microbial activity in a living medium, the plant doesn’t feel the “stress” or the “partnership” required to produce these complex flavors. This is why soil sprouts grown in humus are vastly superior in taste and nutrition to those grown in a plastic jar of water.
How Soil Biology Ignites Seed Vitality
The process of growing super-sprouts in living humus begins the moment the seed coat cracks. This is a delicate transition. Most people think the seed contains everything it needs to grow for the first few days, and while that is true for basic survival, it is not true for peak performance. Think of the seed as a battery—it has enough juice to get started, but living humus is like plugging that battery into a high-speed charger the second the connection is made.
As the primary root, or radicle, emerges, it immediately starts leaking “exudates.” These are little drops of sugar and protein that the plant uses as a “bribe” to attract beneficial fungi and bacteria. In a sterile mix, these bribes go nowhere because there is no one there to pick them up. In living humus, the microbes rush to the root, forming a protective sleeve called the rhizosphere. This relationship is what allows the plant to uptake 2 to 3 times more nutrients per millimeter of root compared to a plant in dead soil.
You can follow these steps to set up your own living-soil sprout system:
- Sourcing the Medium: Find well-aged forest humus or make your own by letting compost sit for an extra six months until it is dark, crumbly, and smells like a rainy forest.
- The Shallow Bed: Use a tray with about 2 to 5 centimeters (1 to 2 inches) of humus. You do not need a deep pot because sprouts are harvested quickly.
- Seed Spacing: Scatter your seeds densely but avoid stacking them. They need room for air to circulate, which prevents the common pitfall of “damping off” or mold.
- Moisture Control: Mist the soil so it feels like a wrung-out sponge. Avoid soaking it to the point of puddles, as this drowns the aerobic bacteria that make the humus “living.”
- Temperature Regulation: Keep your trays between 20°C and 24°C (68°F to 75°F). This range is the sweet spot where both the seed and the microbes are most active.
One common mistake I see neighbors making is trying to “boost” their sprouts with liquid fertilizer. If you are using true living humus, you must put the fertilizer bottle away. Adding synthetic nitrogen can actually “lazify” the plant and break the relationship with the soil microbes, leading to a sprout that grows fast but is watery and weak.
The Tangible Benefits of Living Soil
The most measurable benefit of this approach is the sheer nutrient density. Research indicates that micro-scale greens grown in biologically active media can contain significantly higher concentrations of vitamins C, K, and E compared to their mature counterparts. When you add the microbial factor, those numbers jump even higher. The mycorrhizal fungi in the humus help the plant absorb minerals like zinc and iron that are often locked away in non-living systems.
Flavor is the next big advantage. If you have ever had a sprout that tasted “flat,” it was likely grown in a sterile environment. The complex aromatic compounds that we perceive as flavor are actually the plant’s defense and communication chemicals. Because living soil contains a diverse range of “friendly” stressors and partners, the plant produces more of these compounds. You will get a 10x increase in that “true” vegetable flavor—the sweetness of a pea shoot or the sharp bite of a mustard sprout.
Safety is also a surprising benefit. Many people are afraid of sprouts because of bacteria like E. coli. However, a “biological desert” in a sterile jar is actually more vulnerable to bad bacteria because there is no “good” bacteria to fight them off. Living humus is populated by billions of beneficial organisms that act as a microscopic security team, outcompeting pathogens and keeping the environment balanced and healthy for you to eat.
Common Hurdles and How to Clear Them
The most frequent error is overwatering. Because humus holds onto water so well—much better than peat—it is very easy to turn your tray into a swamp. When the soil becomes anaerobic (oxygen-free), the beneficial microbes die off and are replaced by “stinkers” that rot the roots. If you see a white fuzz that smells like sour milk, you have overwatered. Always check the soil with your fingertip before adding more moisture.
Another mistake is using “green” or fresh compost instead of stable humus. Fresh compost is still being broken down by aggressive bacteria. These microbes are so busy eating the carbon in the compost that they will actually steal nitrogen away from your tiny sprouts. This leads to yellowing leaves and stunted growth. Make sure your medium has finished its “heat cycle” and has rested long enough to become true, stable humus.
Light management is the third hurdle. While sprouts don’t need much light to germinate, they need a good source once they pop their heads up. If they are kept in a dark corner, they will become “leggy”—stretching their stems and becoming thin and stringy. Aim for 12 to 14 hours of indirect sunlight or a simple LED shop light to keep them stocky and nutrient-packed.
Limitations and Realistic Constraints
Living humus isn’t a “set it and forget it” miracle. It requires a bit more observation than a sterile mat. Because it is a living system, it can be affected by the environment of your home. If your house is very dry in the winter, the biological activity can slow down as the surface of the humus crusts over. You have to be proactive about maintaining that “forest floor” humidity.
Space can also be a boundary. If you are living in a tiny apartment and want to grow kilos of sprouts every week, the weight and “mess” of soil can be a drawback compared to simple water-jar sprouting. You have to decide if the 3x boost in vitamins is worth the bit of extra cleanup. For me, the taste alone makes it a non-negotiable choice, but for a busy professional, the water method might be a necessary trade-off for convenience.
Lastly, living humus is not infinite. After a few crops of sprouts, the “active” part of the humus—the easily accessible nutrients—will start to dwindle. You can’t just keep planting in the same tray forever without “recharging” it with a fresh sprinkle of worm castings or a bit of high-quality compost. Think of it as a battery that needs a trickle-charge between big uses.
Sterile Mix vs Living Humus: The Real Cost
| Factor | Sterile Seed Starting Mix | Living Humus |
|---|---|---|
| Nutrient Availability | Low; relies on added salts | High; broad spectrum of trace minerals |
| Flavor Profile | Mild, often “watery” | Intense, complex, and “true to type” |
| Maintenance | Simple; just add water and NPK | Moderate; requires moisture/temp monitoring |
| Biological Safety | Sterile at start, but vulnerable to contamination | Resilient; beneficial microbes outcompete pathogens |
| Long-term Value | Disposable; usually thrown out after one use | Recyclable; can be added back to the garden |
Practical Tips for the Home Sprouter
If you want to get the best results, start by “priming” your seeds. Soaking your seeds in room-temperature water for 8 to 12 hours before planting tells the seed that the “rainy season” has arrived. This triggers the internal enzymes to start breaking down phytic acid—an “anti-nutrient” that makes seeds hard to digest. By the time you lay them on the humus, they are already in high gear.
DIY PROJECT: Collect rainwater no matter where you live...

This DIY project is the best way to legally collect rainwater NO MATTER where you live. Get chlorine-free water, cut down on your water bills, and have enough for an emergency situation or to water your garden. Read More Here...
I also recommend using a “weighted” germination period. For the first two or three days after sowing, place an empty tray on top of your seeds with a small weight (like a brick or a heavy book). This mimics the pressure of being underground. It forces the sprouts to develop thick, strong stems and ensures their roots make firm contact with the living humus. Once they start pushing the tray up, remove the weight and let them see the light.
- Airflow is King: Use a small fan if you are growing in a humid basement. Stagnant air is the friend of mold and the enemy of your sprouts.
- Harvesting: Use a sharp pair of scissors to snip the sprouts just above the soil line. If you pull them out, you’ll get soil in your salad.
- Succession Sowing: Plant a new small tray every 3 days. This ensures a constant supply of fresh greens without having to harvest a huge, overwhelming batch all at once.
Advanced Considerations for Serious Practitioners
Once you have mastered the basics, you can start looking into the Cation Exchange Capacity (CEC) of your humus. This is a fancy way of saying “how well the soil holds onto nutrients.” You can increase this by adding a small amount of biochar or zeolite to your humus. These porous materials act like tiny “condos” for the beneficial bacteria, giving them a place to hide and multiply even when conditions aren’t perfect.
You might also experiment with “microbial inoculants.” While high-quality humus should have plenty of life, you can “supercharge” it by adding a liquid solution of compost tea or specific mycorrhizal spores. This is like giving your soil a probiotic shot. It ensures that the very best “strains” of fungi are the first ones to meet your seeds’ roots, further increasing the bioavailability of minerals like phosphorus.
Consider the “seasonal rhythm” of your indoor garden as well. Even indoors, plants can sense the subtle changes in atmospheric pressure and day length. I have found that sprouts grown in the winter months benefit from a slightly warmer soil temperature—perhaps 25°C (77°F)—to compensate for the cooler air in the house. This keeps the microbial metabolism high when the rest of the world is sleeping.
The Kitchen Windowsill Scenario
Let’s look at a practical example. Imagine you have two trays of broccoli seeds. Tray A is filled with a standard peat-based sterile mix. Tray B is filled with aged living humus from your backyard compost pile. You provide both with the same amount of water and light. By day seven, Tray A looks green and healthy, but the stems are thin and the flavor is slightly bitter and “cabbage-y.”
Tray B, however, has stems that are nearly twice as thick. When you taste them, there is a distinct sweetness followed by a powerful, peppery kick. This “kick” is the sulforaphane—a potent antioxidant that broccoli is famous for. Because the living humus provided the precursors and the microbial “stress” required, Tray B contains up to 30% more of this compound than Tray A. You are getting more medicine and more flavor from the exact same amount of space.
When you finish harvesting Tray B, you don’t throw the “dirt” away. You take that root-filled mat of humus and toss it back into your main garden or compost pile. The “waste” from your indoor sprout project actually becomes a biological starter for your outdoor vegetables. It is a closed-loop system that keeps on giving.
Final Thoughts
Growing super-sprouts isn’t about buying the most expensive equipment or the fanciest “superfood” seeds. It is about returning to the fundamental partnership between plants and the soil. When you provide a living home for your seeds, they reward you with a level of nutrition and flavor that simply cannot be found in a grocery store. It is a small, quiet way to take control of your health right from your kitchen counter.
I encourage you to stop looking at soil as just a “prop” to hold a plant up and start seeing it as a living, breathing partner. Once you taste that first handful of humus-grown radish or sunflower sprouts, you will never want to go back to the sterile way of doing things. It’s like switching from a black-and-white television to full color; the world of gardening just gets deeper and richer.
Don’t be afraid to experiment with different types of organic matter and see what your local environment provides. Whether you are building your own composting system, learning about deep-mulch gardening, or simply trying to improve your family’s diet, the principles of soil health will always lead you in the right direction. Happy growing, neighbor!