

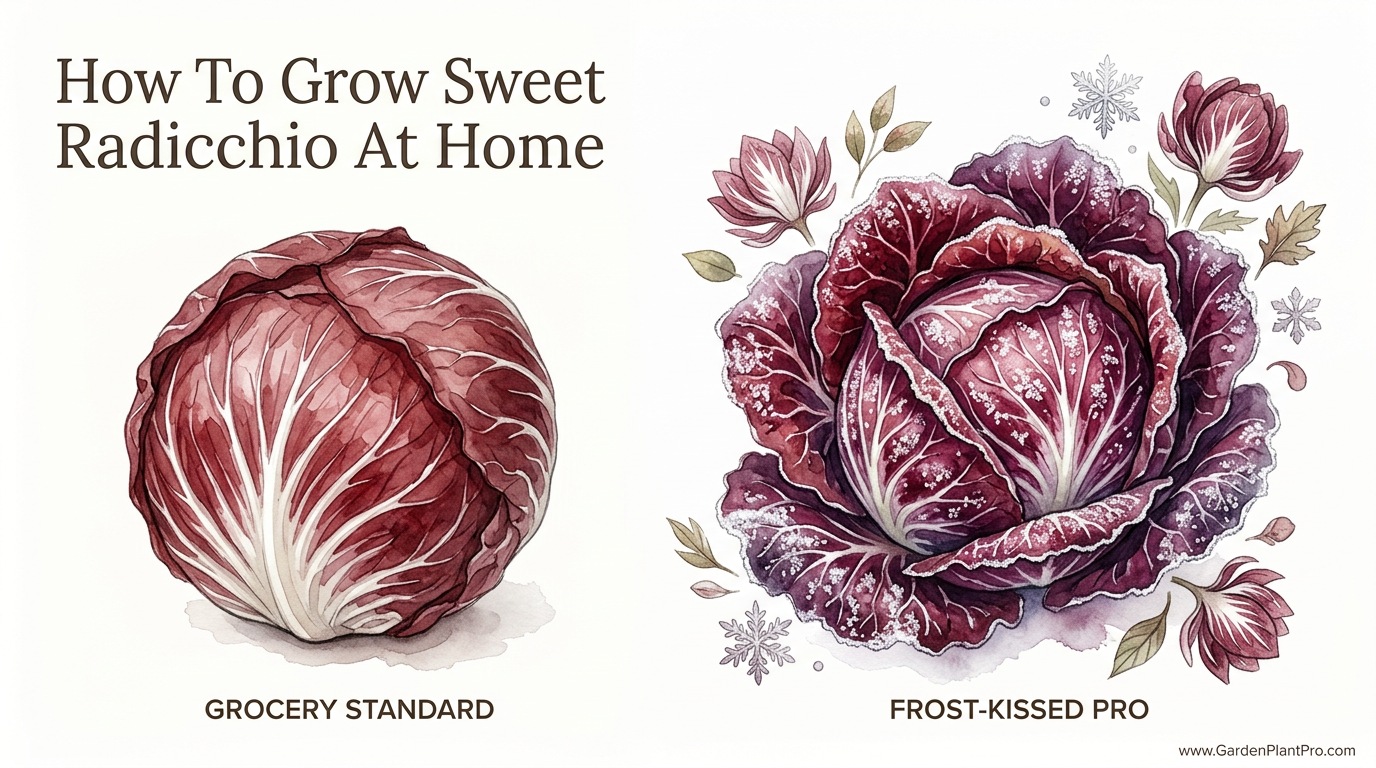
You think you hate radicchio because you have only ever tasted the grocery store version. Stop buying bitter greens! True radicchio needs the kiss of winter frost to unlock its hidden sweetness and ruby-red color. While the supermarket sells you stressed plants, a pro gardener knows that the cold is actually your best friend for a gourmet harvest.
Many people find the sharp, almost medicinal bitterness of shop-bought chicories off-putting. This happens because those plants are often grown in high-heat environments or harvested before the sugars have a chance to develop. When you grow it yourself and time the harvest with the first hard frosts, the plant undergoes a chemical transformation.
This guide will show you how to work with the seasons to produce heads that are crisp, wine-red, and remarkably balanced. We are moving beyond the standard “one-size-fits-all” garden advice and diving into the nuances of Italian chicory culture. You will learn why the timing of your summer sowing is the most critical decision you will make all year.
Whether you are in a chilly Zone 4 or a mild coastal region, understanding the relationship between temperature and flavor is the key. Let us walk through the process of turning this “bitter weed” into the crown jewel of your winter garden.
How To Grow Sweet Radicchio At Home
Radicchio (Cichorium intybus) is not a lettuce, but a perennial chicory that gardeners usually treat as a cool-season annual. It originated in the Veneto region of Northern Italy, where the damp, chilly winters provide the perfect environment for its distinctive colors to develop. Unlike common garden lettuce, radicchio has a deep taproot that allows it to pull minerals and moisture from deep within the soil.
The secret to its flavor lies in a compound called lactucopicrin. In the heat of summer, this compound can become overwhelming, making the leaves unpalatably bitter. However, once temperatures drop below 50°F (10°C) and the first light frosts arrive, the plant begins to convert starches into sugars to protect its cells from freezing. This natural “anti-freeze” mechanism is what provides the sweetness that balances the bitterness.
In the real world, radicchio is used as more than just a salad garnish. Serious gardeners grow it for grilling, roasting, and adding to risottos. The heads come in various shapes—from the tight, cabbage-like globes of the Chioggia type to the elegant, elongated spears of the Treviso. Each variety has its own specific requirements for light and cold exposure.
Choosing the Right Variety for Your Climate
Success begins with selecting a cultivar that matches your local weather patterns. Not all radicchios are created equal, and choosing the wrong one can lead to “bolting” (going to seed) or a failure to form a head.
The Heading Varieties (Palla Rossa / Chioggia)
These are the most recognizable radicchios, resembling small, dense red cabbages. Varieties like ‘Chioggia’ and ‘Giulio’ are known for their reliability. They are often the best choice for beginners because they form tight heads relatively quickly, usually within 60 to 75 days. They are moderately frost-tolerant and hold their quality well in the garden even as the weather turns.
The Elongated Varieties (Treviso)
‘Treviso’ types are shaped more like a large Belgian endive or a football. There are two main sub-types: Precoce (early) and Tardivo (late). Precoce varieties form heads in the field and are easier for home gardeners. Tardivo varieties are for the dedicated practitioner; they require a secondary “forcing” process in water or dark sand to develop their famous curly, white-ribbed leaves.
The Speckled Beauties (Castelfranco)
Known as the “Tulip of Winter,” ‘Castelfranco’ is a cross between radicchio and escarole. It does not turn solid red but instead features creamy, pale-green leaves with stunning blood-red flecks. It is one of the mildest and most tender varieties, often described as having a buttery texture. It requires a long, cool autumn to reach its full potential.
How to Plant and Establish Your Crop
Timing is the single most important factor when growing radicchio. For a fall and winter harvest, you must sow your seeds in mid-to-late summer, usually between June and August depending on your latitude.
Soil Preparation and Sowing
Radicchio thrives in loose, fertile, loamy soil with a pH between 6.5 and 8.0. Because of its deep taproot, it appreciates soil that has been worked deeply and enriched with aged compost. Avoid high-nitrogen fertilizers, as excess nitrogen can lead to rapid, watery growth that is more prone to rot and less likely to sweeten.
Sow seeds about 1/4 inch (6 mm) deep. Space rows about 12 to 18 inches (30 to 45 cm) apart. If you are starting seeds in flats, aim for soil temperatures between 60°F and 68°F (15°C to 20°C) for optimal germination. Be aware that radicchio seeds can enter “thermal dormancy” if soil temperatures exceed 77°F (25°C), so keep your seed trays in a cool, shaded spot during the height of summer.
Thinning and Spacing
Once your seedlings reach about 3 inches (7.5 cm) tall, thin them to stand 8 to 12 inches (20 to 30 cm) apart. Proper spacing is vital for air circulation. Radicchio is susceptible to various fungal rots if the plants are crowded and the foliage stays damp. You can eat the thinnings as “baby” greens, though they will be significantly more bitter than the mature heads.
Maintenance and Ongoing Care
Consistency is the name of the game for radicchio. The plant is sensitive to stress, and any interruption in its growth can trigger bolting or increased bitterness.
Watering Requirements
Keep the soil consistently moist but never waterlogged. Radicchio needs about 1 to 1.5 inches (2.5 to 3.8 cm) of water per week. If the soil dries out completely, the plant will become stressed and the leaves will turn tough and leathery. Drip irrigation is highly recommended to keep the moisture at the root level and the leaves dry.
Mulching for Temperature Control
Apply a 2 to 3-inch (5 to 7.5 cm) layer of organic mulch, such as straw or shredded leaves, around the base of the plants. This helps to suppress weeds and maintain a cool soil temperature during the tail end of summer. It also provides a clean bed for the heads to rest on as they mature.
Managing Pests and Diseases
Radicchio is generally hardier than lettuce, but it does have its enemies. Keep an eye out for the following:
- Slugs and Snails: They love the cool, damp environment under the leaves. Use copper tape or iron phosphate bait.
- Aphids: These can hide deep inside the developing heads. A strong blast of water or insecticidal soap can manage them.
- Downy Mildew: This appears as yellow spots on the upper leaves and gray fuzz underneath. Ensure good spacing and avoid overhead watering.
The Science of the Kiss of Frost
Why does cold weather make such a difference? As autumn progresses and the days shorten, the plant’s metabolism slows down. When temperatures drop, the plant begins to accumulate anthocyanins—the pigments responsible for the deep reds and purples. This is not just for looks; these pigments help the plant absorb more solar radiation to keep its tissues warm.
DIY PROJECT: Collect rainwater no matter where you live...

This DIY project is the best way to legally collect rainwater NO MATTER where you live. Get chlorine-free water, cut down on your water bills, and have enough for an emergency situation or to water your garden. Read More Here...
More importantly, the cold inhibits the enzymes that create the most bitter compounds and activates those that convert starch into glucose and fructose. A radicchio harvested after several light frosts will have a complex flavor profile: a hit of sweetness on the tip of the tongue, followed by a pleasant, nutty bitterness at the back.
In regions where temperatures stay above freezing, you can simulate this effect to some degree by ensuring the plants are well-watered and shaded from the afternoon sun, but nothing truly replaces the magic of a 28°F (-2°C) night.
Advanced Techniques: Forcing and Blanching
For the gardener who wants to reach “pro” status, forcing (imbianchiamento) is the ultimate skill. This technique is most commonly used with ‘Treviso Tardivo’ and ‘Castelfranco’ varieties to produce the most tender, pale hearts.
Field Blanching
About two to three weeks before harvest, you can gather the outer leaves of the plant and tie them together with a soft string or a rubber band. This blocks out the light from the inner heart. Without light, the inner leaves cannot produce chlorophyll, so they turn white or pale pink and become incredibly tender.
Traditional Forcing (The Venetian Method)
This involves digging up the entire plant, including the taproot, in late fall. The outer leaves are trimmed away, and the roots are placed in crates of sand or buckets of water in a dark, cool cellar (about 50°F / 10°C). Over the next few weeks, the energy stored in the root pushes out a new, perfectly blanched head of radicchio. This “second growth” is the pinnacle of the gardener’s craft.
Harvesting and Storage
You will know a head is ready for harvest when it feels firm to a gentle squeeze, much like a head of iceberg lettuce. This usually happens between 65 and 90 days after sowing.
How to Harvest
Use a sharp knife to cut the head off at the soil line. Do not be alarmed if the outer leaves look battered, brown, or frost-damaged. These “wrapper” leaves have done their job protecting the tender heart. Simply peel away the outer layers until you reveal the pristine, colorful head beneath.
Regrowth Potential
If you leave the stump in the ground after harvesting, it will often produce several small “min-heads” or rosettes in the following weeks. While not as large as the primary head, these are delicious and extend your harvest window into late winter.
Storing Your Harvest
Radicchio is surprisingly long-lived in storage. Wrap the heads in a damp paper towel and place them in a perforated plastic bag in the refrigerator. They can stay crisp for three to four weeks. If you have a root cellar, you can store varieties like ‘Chioggia’ even longer by keeping them in boxes of damp sand.
Benefits of Homegrown Radicchio
Choosing to grow your own radicchio offers several advantages over relying on the supermarket:
- Flavor Complexity: You can wait for the frost to do its work, resulting in a much sweeter product.
- Variety: Seed catalogs offer dozens of Italian heirlooms that are never seen in commercial stores.
- Nutritional Density: The bitter compounds in radicchio are excellent for digestion and liver health, and the anthocyanins provide powerful antioxidants.
- Visual Appeal: A winter garden filled with ruby-red heads against the frost or snow is a sight every gardener should experience.
Challenges and Common Mistakes
Even experienced gardeners can run into trouble with chicories. Here are the most frequent pitfalls:
- Planting Too Early: If you sow your winter crop in May or early June, the long days and heat will cause the plants to bolt immediately. They will shoot up a flower stalk and become woody.
- Inconsistent Moisture: Drought stress is the primary cause of “extreme” bitterness that cannot be fixed by frost.
- Lack of Cold: In tropical or subtropical climates, radicchio may never develop its deep red color or sweetness. It will remain green and bitter.
- Over-fertilizing: Heavy doses of nitrogen produce soft growth that rots easily when the autumn rains arrive.
Comparing Radicchio Types
The following table compares the two most common types to help you decide which to plant first.
| Feature | Chioggia (Round) | Treviso (Long) |
|---|---|---|
| Maturity Speed | Faster (60-70 days) | Slower (80-100+ days) |
| Ease of Growth | Beginner-friendly | Intermediate to Advanced |
| Bitterness Level | Medium to High | Low (especially Tardivo) |
| Frost Tolerance | Good | Excellent |
| Best Use | Salads, shredding | Grilling, roasting, risotto |
Practical Tips for Success
If you are ready to start your first patch, keep these “fence-post” tips in mind:
- The Ice Water Trick: If your harvest is still a bit too bitter for your taste, slice the head and soak the pieces in ice-cold water for 30 minutes before serving. This leaches out some of the excess lactucopicrin.
- Succession Sowing: Plant a small batch of seeds every 10 days during your summer planting window. This ensures that at least one group will hit the “sweet spot” of weather and maturity perfectly.
- Companion Planting: Radicchio grows well alongside other cool-weather crops like carrots, onions, and parsnips. It can also be tucked into spaces where summer crops like bush beans have just finished.
- Protect from Heavy Snow: While radicchio loves frost, a heavy, wet snow can crush the heads and lead to rot. A simple low tunnel or a piece of frost cloth (remay) can provide enough protection to keep the harvest going into January.
Advanced Considerations for Serious Growers
For those looking to scale up or refine their practice, consider the soil biology. Chicories have a strong relationship with mycorrhizal fungi. Using minimal-tillage methods and keeping a living root in the soil year-round can improve the plant’s ability to uptake the minerals that contribute to its “nutty” flavor profile.
Another advanced strategy is “slotting.” Professional growers in Italy don’t just plant one variety; they plant several varieties of the same type (like ‘Verona’) that have staggered maturity dates—55, 75, 95, and 120 days. This allows for a continuous harvest from October through February from a single weekend of sowing.
Example Scenario: A Fall Garden Timeline
Imagine you live in a temperate region where the first frost usually hits in mid-October. Here is how your season might look:
- July 15: Sow seeds in flats in a cool, shaded area. Ensure they stay moist during the summer heat.
- August 10: Transplant the seedlings into the garden. Space them 10 inches (25 cm) apart and apply a thick layer of straw mulch.
- September 15: The plants are growing large, green, floppy leaves. They don’t look like radicchio yet. Keep them well-watered as they begin to “heart up” in the center.
- October 20: The first frost arrives. The green outer leaves start to tinge with red. You resist the urge to harvest.
- November 10: After three or four more frosts, you cut your first head. You peel back the tattered green wrappers to find a tight, ruby-red globe.
Final Thoughts
Radicchio is a vegetable that rewards patience and a willingness to work with the elements rather than against them. It is the perfect bridge between the abundance of summer and the quiet of winter. By moving your harvest into the colder months, you are tapping into a tradition that turns a humble bitter green into a gourmet delicacy.

Do you have some charcoal in your house right now? We call charcoal a “miracle leftover” for anyone who wants to be a little more self-sufficient and cut costs. That’s because it can help you with so many different things around the house and garden. You can even use it to make an energy-free fridge. Read More Here...
Do not be discouraged if your first few heads are more bitter than expected or if a few plants bolt during a late-summer heatwave. Every garden is a classroom, and radicchio is a master teacher of timing and soil health. Once you have tasted a head that has been truly “kissed by frost,” you will never look at those plastic-wrapped grocery store versions the same way again.
Experiment with different Italian varieties and find the ones that sing in your specific microclimate. Whether you are grilling wedges over a winter fire or tossing a speckled ‘Castelfranco’ salad with citrus and walnuts, you are enjoying one of the most sophisticated flavors the home garden has to offer. Keep learning about soil health and seasonal planning to further refine your winter harvests.