

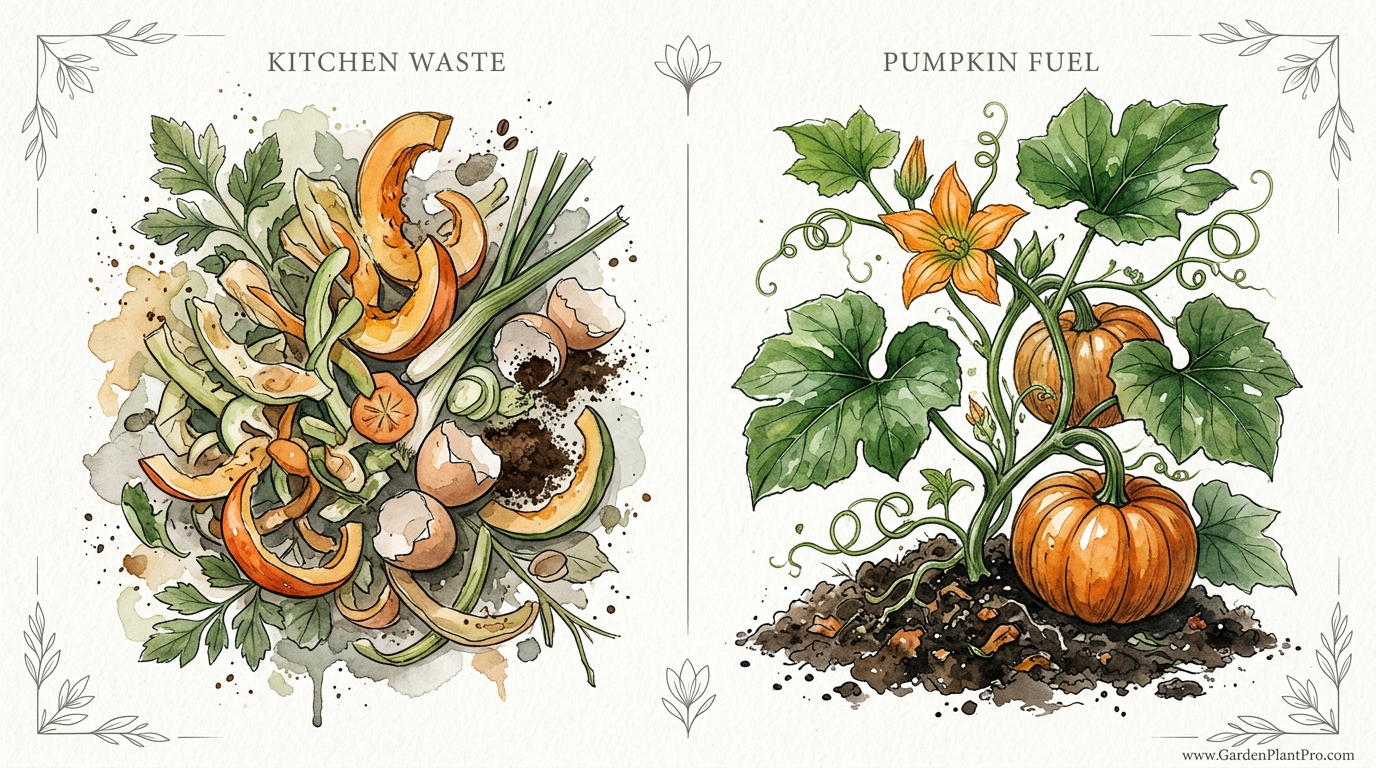
Did you know your kitchen waste is the secret to growing 100lb pumpkins? Most gardeners toss their kitchen scraps and old vines into the bin. The pros turn that ‘waste’ into the nutrient-dense fuel that grows record-breaking pumpkins. Here is exactly how to close the loop and feed your patch for free.
I have spent many mornings leaning against the garden gate, watching the mist rise off my pumpkin patch. Over the years, I have learned that you do not need fancy store-bought chemicals to grow a prize-winner. In fact, some of the best fertilizer I have ever used came straight out of a kitchen bucket and the very vines that grew the previous year’s crop.
Growing a massive pumpkin, whether it is a 100lb (45kg) beauty or a literal ton, requires a lot of energy. These plants are heavy feeders. They act like sponges, soaking up every bit of nitrogen, phosphorus, and potassium they can find. If you want to see those vines crawl across the yard at a rate of 6 inches (15cm) a day, you have to give them the right fuel.
How To Compost Pumpkin Vines For Fertilizer
Composting pumpkin vines is a way of recycling the very nutrients the plant pulled from the soil back into the earth. When a pumpkin vine reaches the end of its life, it is a massive storehouse of nitrogen and organic matter. Instead of letting that resource go to waste in a landfill, you can break it down into a dark, crumbly “black gold” that will feed your next generation of giants.
In the world of gardening, we call fresh, green vines “green” materials. They are high in nitrogen, which is the engine that drives leafy growth. If you let those vines dry out until they turn brown and brittle, they become “brown” materials, which are high in carbon. Both are useful, but the fresh green vines provide a more immediate nitrogen kick once they begin to decompose.
Using these vines as fertilizer helps maintain a closed-loop system in your garden. This means you are not constantly taking away from the soil without giving anything back. Every leaf and tendril contains trace minerals and macronutrients like nitrogen (N), phosphorus (P), and potassium (K) that were specifically gathered for pumpkin growth. By composting them, you ensure that the specific “recipe” of nutrients a pumpkin needs is available for the next planting season.
Real-world application often involves chopping these vines into smaller pieces, roughly 2 to 4 inches (5 to 10cm) long. Smaller pieces have more surface area for microbes and fungi to attack, which speeds up the breakdown process. I often use a sharp spade or even a lawnmower to shred the vines after the harvest is done. This preparation is the first step in turning a tangled mess of old vegetation into high-quality plant food.
Turning Kitchen Scraps Into Pumpkin Fuel
Your kitchen is a goldmine for pumpkin nutrients. Every time you peel a potato or crack an egg, you are holding potential fertilizer. Understanding which scraps offer specific benefits allows you to tailor your compost to the needs of a growing giant.
Banana peels are perhaps the most famous kitchen scrap for gardeners. They are packed with potassium, which is critical during the fruiting stage. Potassium helps the pumpkin develop strong cell walls, making the fruit sturdy and resistant to splitting as it packs on the pounds. I like to chop my peels fine and either toss them into the compost or bury them directly near the base of the plant.
Eggshells provide a slow-release source of calcium. For a pumpkin, calcium is like the “glue” that holds cells together. It prevents the fruit from becoming soft or developing blossom end rot, a common issue where the bottom of the fruit starts to decay. To make the calcium available faster, I dry the shells and crush them into a fine powder before adding them to the patch.
Coffee grounds are another powerhouse. They are rich in nitrogen, which is essential during the early weeks of the season when the plant is focused on building its “solar panels”—those massive green leaves. Coffee grounds also help improve soil structure and attract earthworms, which are the hardest workers in any garden. Just be careful not to use them in massive quantities all at once, as they can be slightly acidic.
Vegetable peelings, apple cores, and even the “guts” from last year’s carved pumpkins are all fair game. These materials break down quickly and provide a balanced mix of micronutrients like magnesium and sulfur. Magnesium is the heart of the chlorophyll molecule, meaning it is the key to that deep green color and efficient photosynthesis.
The Deep Feed: Using Trench Composting
Trench composting is often called the “lazy man’s method,” but I prefer to think of it as the most efficient way to get nutrients where they belong. Instead of maintaining a big, steaming pile of compost that you have to turn every week, you bury your waste directly in the soil.
To start a trench, you dig a hole about 12 to 18 inches (30 to 45cm) deep. This depth is important because it keeps the waste out of reach of curious critters like raccoons or dogs. You fill the bottom 4 to 6 inches (10 to 15cm) with a mix of kitchen scraps and chopped pumpkin vines. Then, you simply fill the hole back up with the soil you dug out.
This method works beautifully for pumpkins because of how they grow. Pumpkin roots are surprisingly extensive. While there is a main taproot, the plant also sends out secondary roots from every node where the vine touches the ground. By burying your “fuel” in trenches along the path where the vines will travel, you create an underground buffet for those secondary roots.
Nature does the heavy lifting in a trench. Earthworms move up through the soil, eat the decomposing scraps, and leave behind nutrient-rich castings. At the same time, beneficial fungi like mycorrhizae colonize the area, helping the pumpkin’s roots absorb water and minerals more efficiently. By the time the vine reaches that spot on the surface, the soil underneath is rich, moist, and ready to support rapid growth.
Benefits of Organic Waste for Giant Pumpkins
Using kitchen and garden waste provides advantages that synthetic fertilizers simply cannot match. The biggest benefit is the improvement of soil structure. Organic matter acts like a sponge, holding onto moisture even during the heat of mid-summer. For a 100lb (45kg) pumpkin, which is mostly made of water, consistent hydration is the difference between a record-breaker and a dud.
Organic fertilizers also release their nutrients slowly. Synthetic options often provide a massive spike of nitrogen that can cause the vine to grow too fast, making it brittle and susceptible to cracking. Kitchen waste breaks down at the pace of the soil biology, providing a steady, reliable stream of food that matches the plant’s natural growth cycle.
There is also the matter of soil health. Commercial fertilizers can sometimes harm the delicate balance of microbes in the dirt. Compost and kitchen scraps, on the other hand, feed those microbes. A healthy soil community acts like an immune system for your plant, helping it fight off soil-borne diseases and pests.
Finally, there is the cost. Growing giant pumpkins can become an expensive hobby if you are buying bags of specialized fertilizers every week. Closing the loop by using what you already have in your kitchen and garden allows you to grow massive fruit for essentially zero dollars. It is a rewarding feeling to know that your morning coffee and last night’s salad are the reasons your pumpkin is the talk of the neighborhood.
DIY PROJECT: Collect rainwater no matter where you live...

This DIY project is the best way to legally collect rainwater NO MATTER where you live. Get chlorine-free water, cut down on your water bills, and have enough for an emergency situation or to water your garden. Read More Here...
Challenges and Common Mistakes
While using waste is a brilliant strategy, there are a few traps you need to avoid. The biggest danger when composting pumpkin vines is disease. If your vines were covered in powdery mildew or suffered from a squash vine borer infestation, you must be very careful.
Powdery mildew spores can survive in a “cold” compost pile. If you take diseased vines and simply rot them down without reaching high enough temperatures, you might just be planting next year’s infection. A “hot” compost pile needs to reach about 140 to 150°F (60 to 65°C) to kill off those pathogens. If your pile is just sitting there at room temperature, it is better to dispose of diseased vines elsewhere rather than putting them back into your patch.
Another common mistake is an improper balance of materials. If you add too many “green” kitchen scraps without enough “brown” carbon materials like straw or dried leaves, your compost will turn into a slimy, stinky mess. This is known as anaerobic decomposition, and it can actually produce compounds that are harmful to plant roots. Always try to keep a ratio of about three parts brown material to one part green material.
Pest attraction is also a reality. If you don’t bury your kitchen scraps deep enough in a trench, or if your compost pile isn’t secured, you are essentially setting out a dinner bell for local wildlife. Once a raccoon learns there is a buffet under your pumpkin leaves, it will keep digging until it finds every scrap, often destroying your pumpkin roots in the process.
Limitations of Using Only Kitchen Waste
It is important to be realistic about what kitchen scraps can do. While they are excellent for soil health, they are not always a complete replacement for a balanced feeding program if you are aiming for truly massive pumpkins. Kitchen waste can be unpredictable in its nutrient concentration. One banana peel might have more potassium than the next, depending on how it was grown.
If you are a serious practitioner looking for a 100lb (45kg) or 500lb (225kg) result, you should use kitchen waste as the foundation, but not the only tool. Soil testing is a vital step. A laboratory test will tell you exactly what your soil is lacking. You might find that despite all your compost, your soil is still low in boron or manganese—micro-nutrients that are hard to get in large enough quantities from just potato peels.
Environmental factors also play a role. In very cold climates, the soil biology slows down, meaning your buried scraps won’t break down fast enough to feed a spring-planted pumpkin. In these cases, you need to start your composting or trenching the previous autumn to give the worms and microbes time to do their work before the seeds go into the ground.
Comparison: Kitchen Waste vs. Synthetic Fertilizers
Choosing between natural waste and store-bought chemicals often comes down to your goals for the season. Both have their place, but they work in very different ways.
| Factor | Kitchen & Vine Waste | Synthetic Fertilizer |
|---|---|---|
| Cost | Free / Very Low | Moderate to High |
| Nutrient Release | Slow and steady | Immediate spike |
| Soil Structure | Greatly improves tilth | No improvement / can degrade |
| Precision | Estimated nutrient levels | Exact N-P-K ratios |
| Risk of Burn | Very Low | Moderate to High |
Synthetic fertilizers provide a targeted “hit” of nutrients. If your plant is showing a clear nitrogen deficiency (yellowing leaves), a synthetic liquid feed will fix it in days. Kitchen waste won’t do that; it is a long-term investment in the soil bank. Most veteran growers use the waste to build the “house” (the soil) and then use small amounts of targeted fertilizers to “decorate” (fine-tune) the growth.
Practical Tips for Success
Experience has taught me a few tricks that make this process much smoother. These small adjustments can significantly improve the rate at which your waste turns into usable fertilizer.
- Chop everything small. Whether it is a vine or a broccoli stalk, use a knife or a spade to break it into pieces no larger than 2 inches (5cm). This increases the surface area for bacteria.
- Control the moisture. Your compost pile or trench should feel like a wrung-out sponge. If it is too dry, decomposition stops. If it is dripping wet, it will rot and smell.
- Layer your materials. If you are using a bin, alternate layers of “greens” (kitchen scraps) with “browns” (shredded cardboard or straw) to prevent compaction.
- Watch the pH. Pumpkins prefer a slightly acidic to neutral soil, between 6.0 and 6.8. If you add too many citrus peels or too much coffee, you might drop the pH too low. A little wood ash can help bring it back up if needed.
- Keep a diary. I always mark on my garden map where I buried my trenches. This prevents me from accidentally digging them up later and helps me track which areas of the patch perform best.
Another tip is to use “compost tea” during the height of summer. You can take some of your finished compost or even just some banana peels and coffee grounds, soak them in a 5-gallon (19-liter) bucket of water for 48 hours, and then use that liquid to water your plants. This provides a quick boost of water-soluble nutrients that the leaves can absorb almost instantly.
Advanced Considerations: Soil Biology
For those who want to move beyond the basics, the real magic happens at the microscopic level. When you add kitchen waste and old vines to your soil, you aren’t just adding chemicals; you are feeding a living ecosystem.
One of the most important components of this ecosystem is mycorrhizal fungi. These fungi form a symbiotic relationship with pumpkin roots. They extend far beyond the root tips, bringing back water and phosphorus that the plant couldn’t reach on its own. Organic matter from your compost provides the carbon these fungi need to thrive.
As you build up the organic matter in your patch—aiming for about 3% to 6%—you will notice the soil starts to smell like a fresh forest floor. This is a sign of actinomycetes, a type of bacteria that helps break down tough materials like the woody stems of pumpkin vines. This biological activity generates a small amount of heat, which can actually help keep the root zone slightly warmer in the early spring, giving your seedlings a head start.
Another advanced technique is the use of “Bokashi.” This is a Japanese method that uses specific microbes to ferment kitchen waste in an airtight bucket before burying it. Because it is fermented, it breaks down in the soil much faster than raw scraps—often in just two to three weeks. This can be a game-changer if you realize mid-season that your patch needs more nutrients.
Scenario: A Season of Recycling
Let’s look at how this works in a real garden over the course of a year. Imagine it is late autumn. You have just harvested your pumpkins. Instead of hauling the vines to the curb, you spend an afternoon shredding them and burying them in a long trench right where you plan to grow next year.
Over the winter, the soil stays relatively quiet, but the freezing and thawing cycles help break down the tough plant fibers. In the spring, you start a fresh kitchen scrap bucket. Every day, you add coffee grounds, eggshells, and vegetable trimmings. Two weeks before you plant your seeds, you dig small “feeding holes” around your planting site and bury these fresh scraps.

Do you have some charcoal in your house right now? We call charcoal a “miracle leftover” for anyone who wants to be a little more self-sufficient and cut costs. That’s because it can help you with so many different things around the house and garden. You can even use it to make an energy-free fridge. Read More Here...
By mid-summer, your pumpkin vine is 20 feet (6 meters) long. You notice a slight yellowing in the older leaves, so you brew a batch of compost tea from your bin and give the plant a deep soak. In late August, as the fruit starts to swell rapidly, you bury finely chopped banana peels near the nodes of the vine where new roots are forming.
By harvest time, you have a 100lb (45kg) pumpkin that grew almost entirely on the “waste” from your own home. The soil is darker and more full of life than it was a year ago. You have successfully closed the loop.
Final Thoughts
Closing the loop in your garden is about more than just saving money; it is about working with the natural rhythms of the earth. When you see a 100lb (45kg) pumpkin sitting in your patch, it is easy to forget that it is made of sunlight, water, and the recycled remains of previous seasons. Every kitchen scrap you bury is a deposit into your soil’s “savings account.”
The real secret to those massive pumpkins isn’t a secret at all—it’s just patience and a little bit of dirt under your fingernails. I encourage you to start small. Keep a bucket under the sink. Chop up your vines this autumn. You will be amazed at how the soil responds when you stop treating waste like trash and start treating it like fuel.
As you continue your journey, you might find yourself exploring other ways to improve your patch, like managing irrigation or building soil health through cover crops. The lessons you learn from a simple compost pile will stay with you forever. Happy growing, and I hope to see a giant in your patch next season.