

Stop paying the city to water your sidewalk and start feeding your soil. Overhead sprinklers are a relic of the past. They waste water, promote fungal disease on foliage, and miss the roots entirely. See why precision drip irrigation is the only way to grow a productive garden in a changing climate.
I have spent forty years with dirt under my fingernails, and if there is one thing I have learned, it is that plants do not drink through their leaves. For decades, the standard approach was to set up a tripod sprinkler, let it whir for an hour, and watch half the water evaporate before it even touched the ground. We were essentially watering the air and the concrete more than our tomatoes.
Modern gardening requires a shift in mindset. Instead of mimicking a rainstorm, we need to focus on the root zone. Precision drip irrigation allows us to deliver moisture exactly where the plant can use it, keeping the rest of the garden dry and the weeds at bay. It is a more thoughtful, quiet, and efficient way to steward a piece of land.
This guide will walk you through the practicalities of making the switch. We will look at the mechanics of soil moisture, the hardware you need to get started, and the lessons I have learned the hard way—usually involving a muddy pair of boots and a popped fitting. Whether you are tending a few raised beds or a small orchard, understanding the difference between standard sprinklers and precision drip is the first step toward a more resilient garden.
Drip Irrigation Vs Sprinklers For Gardens
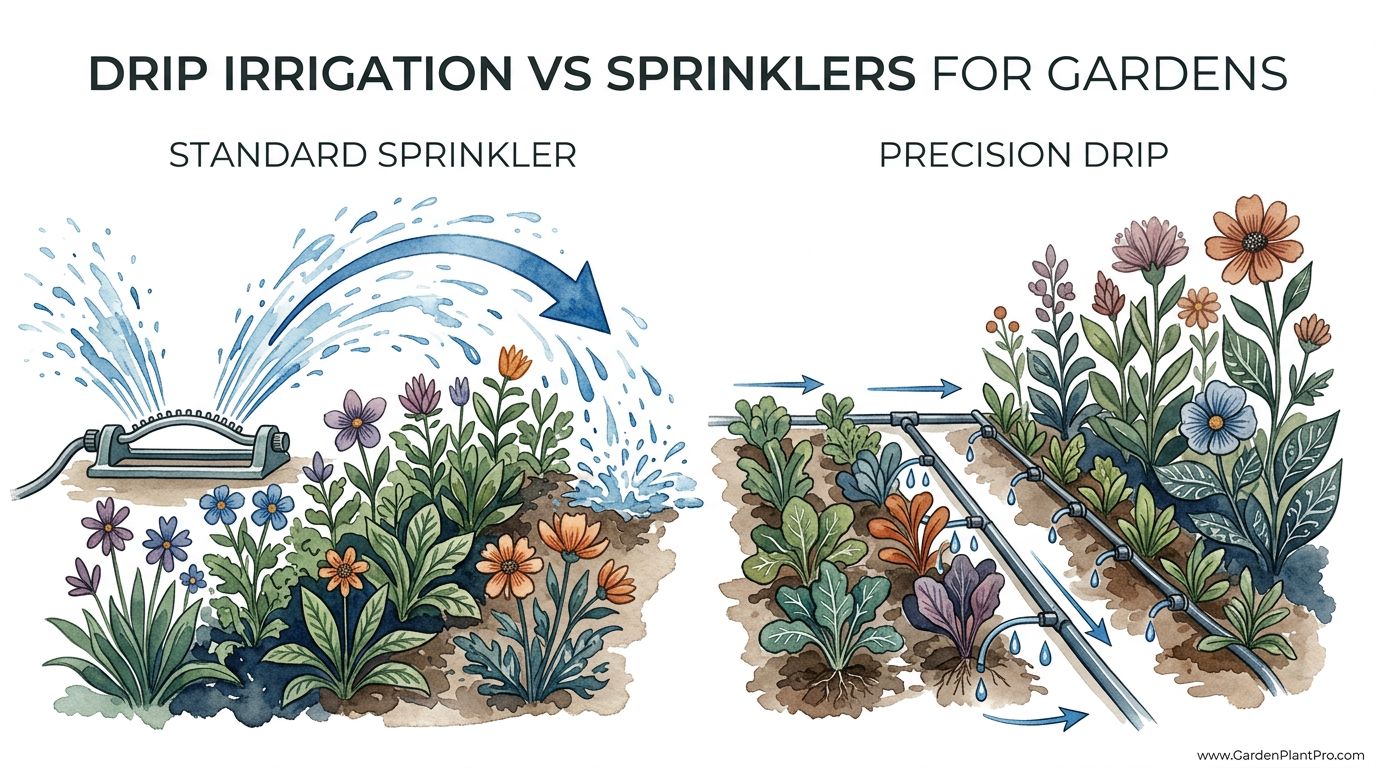
The fundamental difference between these two systems lies in their delivery method. A standard sprinkler system is designed for broad coverage, throwing water through the air to cover a wide area. It is fantastic for a football field or a large lawn, but it is often the wrong tool for a garden full of diverse plants with different thirst levels.
Drip irrigation, often called micro-irrigation or trickle irrigation, uses a network of flexible tubes to deliver water at a very slow, metered rate. Instead of gallons per minute, we talk about liters per hour (L/h) or gallons per hour (GPH). This water is applied directly to the soil surface or even subsurface, right where the roots are waiting to drink.
Think of a sprinkler like a fire hose and a drip system like a slow-release IV drip. While the sprinkler creates a humid environment that can invite powdery mildew and other fungal issues, the drip system keeps the foliage dry. In many regions, especially those facing drought restrictions, the efficiency of drip irrigation is not just a preference; it is a necessity for keeping a garden alive.
Studies show that drip systems are roughly 90% efficient, whereas overhead sprinklers often hover between 50% and 70% due to wind drift and evaporation. If you are in a climate where the sun is high and the air is dry, that 20% to 40% difference represents thousands of liters of water saved over a single growing season.
How Precision Drip Irrigation Works
Building a drip system is less like plumbing and more like assembling a giant LEGO set. The system starts at your water source—usually a hose bib or a dedicated irrigation valve—and moves through several critical components before the first drop reaches a plant.
First, you need a backflow preventer. This simple device ensures that the water in your irrigation lines, which might be sitting in the sun or mixed with soil, never flows back into your home’s clean drinking water. It is a small piece of insurance for your family’s health.
Next comes the pressure regulator. Most home water lines run at 50 to 80 PSI (pounds per square inch), but a drip system is a low-pressure environment that prefers 15 to 30 PSI (1.0 to 2.0 bar). Without a regulator, your emitters will likely pop right out of the tubing like tiny plastic rockets.
The filter is perhaps the most overlooked part. Because drip emitters have tiny openings—often as small as 0.2 mm to 2.0 mm—the slightest bit of grit or sediment from your pipes will clog them. A 150 to 200-mesh filter catches these particles before they can cause trouble downstream.
The water then travels through mainline tubing, typically 1/2-inch (13mm) or 5/8-inch (16mm) poly tubing. From there, you can use a punch tool to attach 1/4-inch (6mm) “spaghetti” tubing or emitters directly to the line. These emitters are the brains of the operation, controlling exactly how much water exits the system at each point.
Understanding Soil Behavior
Once the water leaves the emitter, soil physics takes over. Water moves through the soil in two ways: vertically due to gravity and horizontally due to capillary action. In heavy clay soils, water tends to spread out wide, creating a broad “bulb” of moisture. In sandy soils, water moves straight down, requiring emitters to be placed closer together—often every 12 inches (30 cm) rather than every 18 to 24 inches (45 to 60 cm).
Benefits of Making the Switch
The most immediate benefit you will notice is weed suppression. When you use a sprinkler, you are watering every dormant weed seed in the garden. When you use drip, you only water the plants you want to grow. The areas between your plants stay dry, which significantly slows down the growth of unwanted “volunteers.”
Improved plant health is another major factor. Many of our favorite garden staples, like tomatoes and roses, are highly susceptible to leaf diseases. By keeping the foliage dry, you remove the moist environment that fungi need to take hold. Furthermore, the slow delivery of water prevents “slugging” the soil, which can compress the earth and squeeze out the oxygen that roots need to breathe.
From a practical standpoint, the time savings are immense. Once you put your system on a simple battery-operated timer, you no longer have to stand outside with a hose at dawn. You can go on vacation knowing your garden is being tended to with more precision than you could ever provide manually.
Finally, the environmental and financial impact cannot be ignored. Reducing your water usage by 30% to 50% helps preserve local aquifers and keeps your utility bills manageable during the hottest months of the year.
Challenges and Common Mistakes
The biggest hurdle for most beginners is the “invisible” nature of the system. With a sprinkler, you can see the water flying. With drip, you often see nothing but a small wet spot on the surface. Many gardeners panic and leave the system running too long, leading to overwatering. A good rule of thumb is to dig down a few inches after a watering cycle to see how deep the moisture actually goes.
Mismatched emitters are another frequent error. You cannot put a high-flow emitter (8 L/h or 2 GPH) on a desert-dwelling agave and expect it to be happy next to a thirsty hydrangea. You must match the flow rate of the emitter to the specific needs of each plant.
DIY PROJECT: Collect rainwater no matter where you live...

This DIY project is the best way to legally collect rainwater NO MATTER where you live. Get chlorine-free water, cut down on your water bills, and have enough for an emergency situation or to water your garden. Read More Here...
Incompatible thread types often frustrate DIYers. The irrigation world is split between “hose threads” (what you find on your garden faucet) and “pipe threads” (what you find on PVC plumbing). Trying to screw a pipe-thread filter onto a hose-thread faucet will result in leaks and a lot of swearing. Always double-check your fittings before leaving the hardware store.
Limitations of Drip Irrigation
While I am a firm believer in drip for most applications, it is not a “magic bullet” for every situation. It is generally unsuitable for large lawns. If you are trying to keep a 1,000-square-foot lawn green, a traditional pop-up sprinkler is much more efficient at providing the uniform coverage required by turfgrass.
Drip systems are also vulnerable to physical damage. A wayward shovel, a hungry squirrel, or a weed whacker can easily slice through poly tubing. While these are easy to fix with a $0.50 coupler, they do require you to keep a closer eye on your lines than you might with underground PVC sprinklers.
Finally, there is the clogging issue. If you have extremely hard water or get your water from a well or pond, you will need a robust filtration and perhaps a regular flushing schedule to prevent mineral buildup from sealing your emitters shut over time.
Comparing Precision Drip and Standard Sprinklers
To help you decide where to invest your effort, consider how these systems stack up across different categories. Each has its place in a well-rounded landscape design.
| Feature | Standard Sprinkler | Precision Drip |
|---|---|---|
| Water Efficiency | 50–70% (High loss) | 90%+ (Minimal loss) |
| Primary Use | Lawns, groundcover | Garden beds, trees, pots |
| Disease Risk | High (Wet foliage) | Low (Dry foliage) |
| Installation Cost | Lower for large areas | Higher per square foot |
| Maintenance | Adjusting spray heads | Cleaning filters, fixing leaks |
Practical Tips and Best Practices
If you are ready to start digging, there are a few tricks that will save you a headache later. First, always use pressure-compensating (PC) emitters. These little devices ensure that the plant at the very end of your 100-foot (30-meter) line gets the exact same amount of water as the plant closest to the faucet. Without them, gravity and friction will leave your furthest plants thirsty.
Mulching is your best friend. After you lay your drip lines, cover them with 2 to 3 inches (5 to 7 cm) of wood chips or straw. This protects the plastic from UV damage, keeps the soil even cooler, and hides the tubing so your garden looks tidy. Just make sure the emitters are not buried too deep in the soil itself, as this can lead to “root intrusion” where the plant grows right into the emitter to find the water source.
Zoning is crucial. Group your plants by their “hydro-zones.” Put your thirsty leafy greens on one line and your drought-tolerant herbs on another. This allows you to set different run times for different needs. If you must have them on the same line, use different flow rates—a 4 L/h (1 GPH) emitter for the herb and two or three such emitters for a larger, thirstier shrub.
Always include a flush valve at the end of each major line. Once a season, open these valves and run the system for a minute. This clears out any fine silt that has made it past your filter and settled at the low points of your system.
Advanced Considerations for the Serious Gardener
For those looking to take things further, consider fertigation. You can install a small injector at the head of your system that adds a dilute liquid fertilizer to the water stream. This feeds your plants in tiny, digestible doses rather than the “feast or famine” approach of granular fertilizers. It is incredibly effective for high-intensity vegetable gardening.
Smart controllers are another worthwhile upgrade. Modern timers can connect to local weather stations via Wi-Fi. If the forecast calls for rain, the system automatically skips its cycle. This level of automation ensures you never waste a drop during a summer storm.
If you are dealing with slopes, remember that water will naturally pool at the bottom of the line after the system shuts off. You can combat this by using check valves or emitters with “anti-siphon” features that seal shut the moment the pressure drops, preventing the lines from draining out at the lowest point.
Real-World Example: The Tomato Patch
Let’s look at a practical setup for a row of ten tomato plants. In a standard sprinkler setup, you might run a spray head for 15 minutes, wetting the entire 4×20 foot (1.2×6 meter) bed. You would lose significant water to evaporation, and the wet leaves would likely develop early blight by mid-summer.
With a precision drip setup, you would run a 1/2-inch mainline down the row. For each tomato plant, you could install two 2 L/h (0.5 GPH) emitters on 1/4-inch distribution lines, placed about 6 inches (15 cm) from the stem on opposite sides. This provides 4 liters (about 1 gallon) of water per hour directly to the root zone. By running the system for one hour, three times a week, you deliver 12 liters of water per plant with almost zero waste. The soil surface between the plants stays bone dry, the tomato leaves stay healthy, and your water meter barely moves.
Final Thoughts
Transitioning from overhead sprinklers to precision drip irrigation is more than just a plumbing upgrade; it is a commitment to better gardening. It forces us to pay attention to our soil type, our plant needs, and the way moisture moves through the earth. While the initial setup requires more thought and a slightly higher investment in parts, the long-term rewards are undeniable.
You will find that your plants are more resilient, your weeding chores are cut in half, and your water bill becomes a much smaller burden. Gardening should be a joy, not a constant battle against the elements or a race to save parched plants with a hose in the dark.
Start small if you need to. Convert one raised bed or one row of shrubs this season. Once you see the difference in plant vigor and the ease of maintenance, you will likely never want to go back to “watering the sidewalk” again. Experiment with different emitters, learn the rhythm of your soil, and enjoy the peace of mind that comes with a truly efficient garden.

Do you have some charcoal in your house right now? We call charcoal a “miracle leftover” for anyone who wants to be a little more self-sufficient and cut costs. That’s because it can help you with so many different things around the house and garden. You can even use it to make an energy-free fridge. Read More Here...