

Are you killing your marjoram by being too ‘careful’ during the harvest? Most gardeners treat marjoram like a delicate flower, but it actually thrives on tough love. If you want a bushier plant and ten times the harvest, you need to stop picking leaves and start pruning stems. Strategic cuts signal the plant to double its growth.
Whenever I see a neighbor delicately plucking a single leaf here and there for their evening stew, I have to bite my tongue. It feels like you are being kind to the plant, but in reality, you are telling the marjoram it is okay to get leggy, woody, and eventually, quite sparse. I have spent decades watching these little Mediterranean sub-shrubs respond to the shears, and the lesson is always the same: the more you take (within reason), the more they give.
If you treat marjoram with a bit of a firm hand, it rewards you with a dense, aromatic mound of foliage that smells like a mix of sweet pine and citrus. This herb is not just a weaker version of oregano; it is a complex, floral powerhouse that deserves a permanent spot in your garden beds or containers. Understanding how to handle it during the peak of the growing season is the difference between a struggling annual and a thriving, productive harvest that lasts until the first frost.
How To Harvest Marjoram Properly
Harvesting marjoram properly means moving away from the idea of “picking” and embracing the concept of “pruning.” Marjoram, or Origanum majorana, is a member of the mint family, and like its cousins, it has a specific way of growing that responds to where and how you make your cuts. When you simply pull off leaves, you leave the stem intact, which eventually turns woody and stops producing the tender, flavorful growth we want for the kitchen.
Proper harvesting involves using sharp garden shears to cut entire stems back to a growth node. A node is that little bump on the stem where a set of leaves emerges. When you cut just above that spot, the plant’s hormones—specifically auxins—redistribute themselves and tell the two dormant buds at that node to start growing. Instead of one single stem reaching for the sky, you now have two stems branching out.
This technique is essential because marjoram is a tender perennial, often grown as an annual in regions with cold winters. Because it has a relatively short window to produce a lot of biomass, every cut needs to count toward building a sturdier, bushier structure. Whether you are growing sweet marjoram, pot marjoram, or a variegated variety, the principle remains: cut for growth, not just for the kitchen.
The Anatomy of a Perfect Harvest
To master the harvest, you first need to recognize the stages of the plant. Sweet marjoram goes through a distinct lifecycle each season. In the early weeks, it focuses on establishing a root system and sending up soft, grayish-green stems. During this phase, your goal is to “pinch” the tips. Use your thumbnail and forefinger to nipping off the very top inch (2.5 cm) of growth. This prevents the plant from becoming a single, lonely stalk.
As the season progresses toward midsummer, the plant will begin to develop what look like small green knots at the ends of the branches. These are the flower buds, which is why marjoram is sometimes called “knotted marjoram.” This is the critical moment for a major harvest. The essential oils—the compounds that give marjoram its signature sweet and spicy scent—are at their absolute peak concentration just before these buds open into tiny white or pink flowers.
If you wait until the plant is in full bloom, the energy shifts from the leaves to seed production. The leaves can become smaller, tougher, and may even take on a slightly bitter edge. For the best culinary results, you want to time your largest harvests for the “bursting bud” stage. This is when the plant is most fragrant, and the flavor is most balanced.
The “One-Third” Rule for Herb Health
A common pitfall for new gardeners is over-harvesting, which can shock the plant and lead to a slow death, especially during the heat of July or August. The gold standard for any herb harvest is the one-third rule. Never remove more than one-third of the total plant mass at any one time. This ensures the marjoram still has enough foliage to photosynthesize and recover quickly.
If your marjoram plant is 12 inches (30 cm) tall, you can safely take about 4 inches (10 cm) off the top of every stem. This keeps the plant in a perpetual state of “youth.” By leaving the bottom two-thirds of the plant, you maintain the structural integrity and the older, established leaves that provide the energy for the next flush of growth.
In my experience, if you follow this rule, you can often get three or even four substantial harvests in a single growing season. Between these major cuts, you can still snip small sprigs for daily cooking, but always try to take the whole tip rather than just the leaves. This constant “tipping” keeps the plant from getting leggy and ensures a continuous supply of the most tender growth.
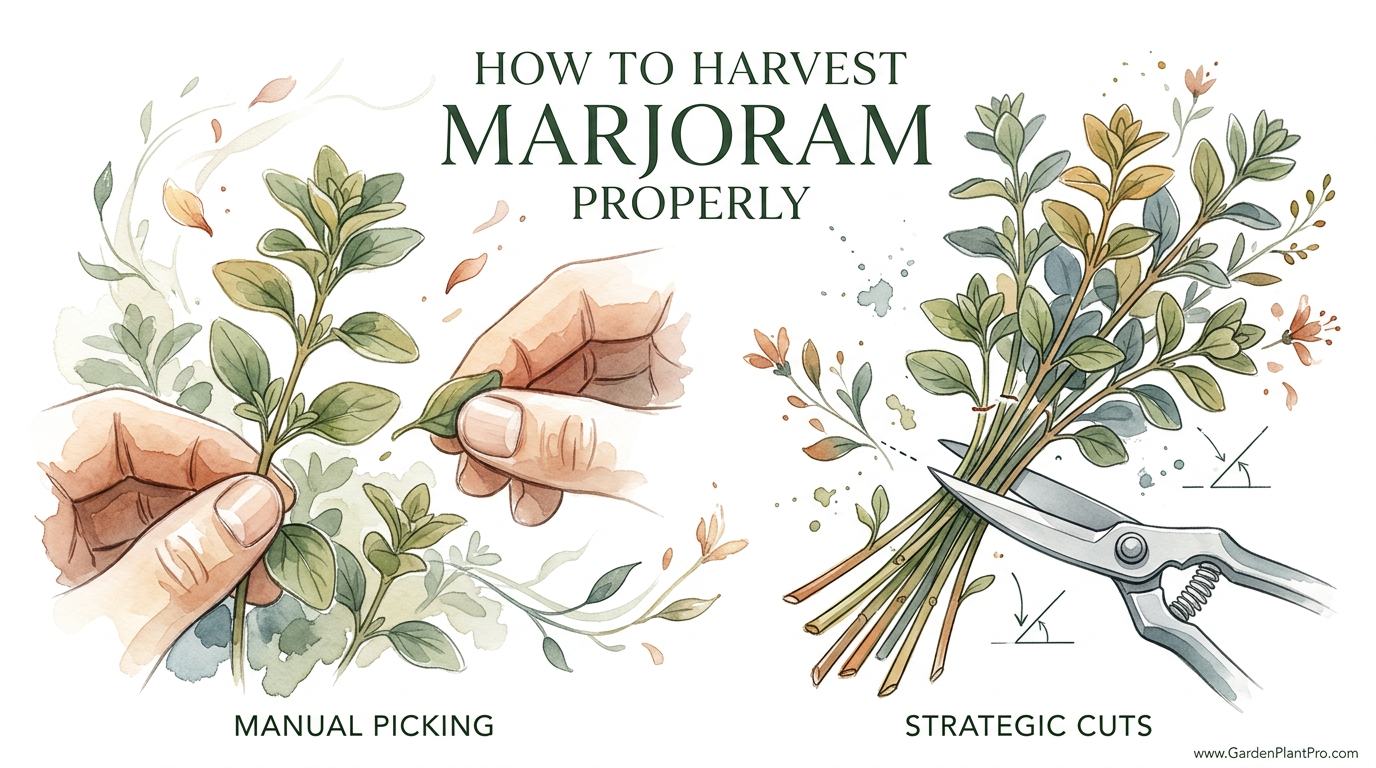
Strategic Cuts vs. Manual Picking
There is a fundamental difference in how a plant reacts to being “plucked” versus being “pruned.” Manual picking, where you grab a leaf and pull it off, often results in tearing the delicate outer skin of the stem. This creates an entry point for pathogens and pests like aphids or spider mites. Furthermore, it leaves the “growing tip” of the branch active. The plant continues to pump all its energy into that one tip, making it longer and thinner.
Strategic cuts with sharp, sterilized scissors or snips create a clean wound that heals quickly. When you cut back to a node, the plant’s biological response is to branch out. This creates a dense canopy of leaves that shades the soil, helping to retain moisture and keep the root system cool. A bushy marjoram plant is a resilient plant.
| Feature | Manual Leaf Picking | Strategic Stem Pruning |
|---|---|---|
| Plant Shape | Leggy and sparse | Bushy and compact |
| Total Yield | Lower; limited by stem count | Higher; doubles stems with each cut |
| Flavor Quality | Tends to get woody quickly | Keeps leaves tender and fresh |
| Plant Health | Risk of tearing and disease | Clean cuts allow for fast healing |
| Harvest Efficiency | Slow and tedious | Fast and productive |
Environmental Factors and Timing
The environment plays a massive role in when you should reach for your shears. The best time of day to harvest marjoram is in the early morning, just after the dew has evaporated but before the sun begins to beat down with its midday intensity. At this hour, the plant is fully hydrated, and the essential oils are concentrated in the foliage. Once the heat of the day hits, the oils begin to dissipate or move deeper into the plant to protect it from the sun, leading to a less fragrant harvest.
Temperature is also a factor. Marjoram thrives in temperatures between 60°F and 70°F (16°C to 21°C), though it can handle much higher heat if the roots are kept cool with a good layer of mulch. In very hot climates, like the southern United States or parts of Australia, the flavor can actually intensify as the plant struggles slightly, but you must be careful not to harvest during a heatwave. If the plant looks wilted or stressed, wait for a cooler day or until after a deep watering session.
Seasonal patterns also dictate your strategy. In the spring, your focus is on shaping. In the summer, your focus is on production and preventing flowering. In the late fall, if you live in a region where marjoram is treated as an annual, you can perform a “final harvest” where you cut the entire plant back to about 2 to 3 inches (5 to 7 cm) from the ground before the first hard frost. This final bounty can be dried or frozen for winter use.
Where Gardeners Use This Technique
This “tough love” harvesting method is not just for the backyard vegetable patch. It is equally effective for container gardeners. Because marjoram has a shallow root system, it is a favorite for window boxes and patio pots. In a confined space, pruning is even more important because it prevents the plant from outgrowing its container and becoming a tangled mess.
I have seen many indoor herb gardens fail because the owners were too timid to cut their plants. If you are growing marjoram on a sunny windowsill, it will naturally reach for the light and become “stretched.” Regular harvesting forces the growth to stay low and dense, making for a much more attractive—and useful—indoor plant.
For those using marjoram as an edible groundcover or edging plant, this pruning technique ensures the “carpet” remains thick. A thick carpet of marjoram is excellent for suppressing weeds and providing a habitat for beneficial insects. The small flowers, if you let a few stems go to bloom, are magnets for pollinators, though you should keep most of the plant pruned for culinary quality.
DIY PROJECT: Collect rainwater no matter where you live...

This DIY project is the best way to legally collect rainwater NO MATTER where you live. Get chlorine-free water, cut down on your water bills, and have enough for an emergency situation or to water your garden. Read More Here...
Practical Steps for a Bountiful Harvest
When you are ready to head out to the garden, follow these steps to ensure you are helping the plant while filling your basket.
- Prepare your tools: Use a sharp pair of herb snips or bypass pruners. Dull blades will crush the stems rather than cutting them, which can lead to rot. Wipe the blades with rubbing alcohol to ensure you aren’t spreading any garden diseases.
- Identify your targets: Look for the longest, most vigorous stems that have at least 4 to 6 inches (10 to 15 cm) of growth. Focus on the ones that are starting to show those “knot” buds at the tips.
- Locate the growth node: Follow the stem down until you see a spot where two leaves are growing out. This is your cut point.
- Make the cut: Snip the stem about 1/4 inch (5 mm) above that set of leaves. This leaves enough room for the node to heal without damaging the new buds that will soon emerge.
- Work in a circle: I like to work from the outside of the plant toward the center. This helps maintain a rounded, mounded shape rather than leaving a hole in the middle of your marjoram bush.
- Check for “hitchhikers”: As you harvest, keep an eye out for aphids or spider mites. If you see a cluster of small bugs on the underside of the leaves, you can spray them off with a sharp stream of water or use an insecticidal soap after you’ve finished your harvest.
The Benefits of Regular Pruning
The most immediate benefit of this method is the sheer volume of herbs you will produce. A marjoram plant that is regularly “headed back” can produce several times more foliage than one left to its own devices. Beyond the quantity, the quality of the leaves remains superior. Younger leaves are more tender and have a higher concentration of the delicate, sweet notes that distinguish marjoram from the more pungent oregano.
Regular pruning also improves air circulation within the plant’s canopy. Marjoram is susceptible to fungal issues like powdery mildew or root rot if the foliage becomes too dense and stays damp for too long. By thinning the stems through harvesting, you allow wind and sunlight to penetrate the center of the plant, keeping the leaves dry and the environment less hospitable to mold.
Finally, you are extending the useful life of the plant. Marjoram that is allowed to flower and go to seed often starts to decline rapidly afterward. By continuously removing the flower buds through harvesting, you “trick” the plant into staying in its vegetative state for much longer, potentially pushing your harvest window well into the autumn months.
Challenges and Common Mistakes
Even the most seasoned gardeners can run into trouble if they lose focus. One of the most frequent errors is harvesting too early. While you can certainly snip a few leaves once the plant is established, wait until it is at least 6 inches (15 cm) tall before taking a major harvest. The plant needs enough “engine” (root and leaf mass) to recover from a heavy cut.
Another mistake is ignoring the woody base. As marjoram matures, the bottom of the stems will naturally become brown and tough. Avoid cutting into this woody growth during a routine harvest. New growth rarely emerges from the old, hard wood. Always make your cuts in the green, flexible part of the stem to ensure the plant can bounce back.
Don’t forget to feed the plant after a heavy harvest. Cutting off a third of the plant is like a person undergoing a minor surgery; it takes energy to heal. I recommend a light application of compost tea or a diluted organic liquid fertilizer after a major harvest to give the marjoram the nutrients it needs to push out that new growth. This is also a great time to check your mulch and ensure the soil health is maintained.
Limitations: When Not to Harvest
There are times when you should put the shears away. If your region is experiencing a prolonged drought and you aren’t able to provide supplemental irrigation, hold off on harvesting. A stressed plant is much more likely to die if it is pruned during a water shortage. Marjoram is drought-tolerant, but only when it isn’t being asked to rebuild its entire canopy.
Similarly, if you are approaching the end of the season and you live in a cold climate (Zone 8 or lower), stop heavy harvesting about a month before the expected first frost. You want the plant to have time to harden off. While marjoram isn’t typically winter-hardy in these areas, allowing it to remain intact gives it a slightly better chance of surviving a light frost, or at least stays healthy enough for you to take cuttings for indoor overwintering.
If you notice signs of disease, such as yellowing leaves with black spots (which could indicate root rot) or a white powdery coating (powdery mildew), stop harvesting for the kitchen immediately. You should still prune away the infected parts to save the plant, but do not consume those leaves. Clean your tools thoroughly between every single cut to prevent the spread of the pathogen to healthy stems.
Advanced Considerations: Cultivar Selection
Serious practitioners know that not all marjoram is created equal. Depending on your goals, you might choose a specific cultivar that responds differently to harvesting.
- Sweet Marjoram (O. majorana): The classic culinary choice. It responds best to the 1/3 rule and has the most delicate flavor profile.
- Pot Marjoram (O. onites): Slightly hardier and more robust. It can handle more aggressive pruning and is often more perennial in nature. The flavor is a bit closer to oregano.
- Golden Marjoram (O. aureum): Mostly grown for its beautiful yellow foliage. It is less vigorous than the green varieties, so you should be more conservative with your harvests—perhaps removing only a quarter of the plant at a time.
- Variegated Marjoram: Similar to Golden, it grows more slowly. I find it is best used as a garnish, where you only need small amounts, rather than for large-scale drying.
Integrating these varieties into your garden planning allows for a staggered harvest. You can use the vigorous sweet marjoram for your big batches of dried herbs and the slower-growing ornamental types for fresh daily use.
Preserving the Harvest: Drying and Storing
Once you have your basket full of stems, you need to preserve that flavor. Marjoram is one of the few herbs that retains its flavor exceptionally well when dried. In fact, many people prefer the concentrated taste of dried marjoram in slow-cooked stews and sauces.
The traditional method is air drying. Bundle five or six stems together and tie them with kitchen twine. Hang the bundles upside down in a dark, warm, well-ventilated area. Darkness is crucial because sunlight will bleach the chlorophyll and dissipate the essential oils, leaving you with gray, tasteless leaves. A pantry or a dry attic is often perfect. Your marjoram should be “cracker dry” in about one to two weeks.
If you live in a humid environment, air drying can be risky as the herbs may mold before they dry. In this case, a food dehydrator is a wise investment. Set the temperature to its lowest setting—ideally around 95°F to 115°F (35°C to 46°C). At these low temperatures, the moisture is removed without “cooking” the leaves. It usually takes 1 to 4 hours. Once the leaves crumble easily between your fingers, they are done. Store them in airtight glass jars away from heat and light; they will stay potent for up to a year.
Example: A Mid-July Harvest Scenario
Imagine it is a Tuesday morning in mid-July. You have three sweet marjoram plants in a large terracotta pot on your patio. They are about 10 inches (25 cm) tall and looking a bit wild, with some stems starting to lean over the edge. You notice the tiny “knots” of flower buds appearing at the tips of the tallest stems.
You take your clean shears and head out at 8:00 AM. You identify the ten longest stems and follow them down to a node about 3 inches (7.5 cm) from the top. You snip them all, making sure to leave plenty of green growth below. You then “pinch” the tips of the shorter stems that aren’t quite ready for a full cut.

Do you have some charcoal in your house right now? We call charcoal a “miracle leftover” for anyone who wants to be a little more self-sufficient and cut costs. That’s because it can help you with so many different things around the house and garden. You can even use it to make an energy-free fridge. Read More Here...
After bringing your handful of herbs inside, you give the pot a long, deep drink of water mixed with a bit of liquid seaweed extract. Within ten days, you’ll see two new bright green shoots emerging from every single one of those cut nodes. By August, your marjoram will be twice as thick as it was in July, and you’ll have a jar of high-quality dried herbs ready for winter.
Final Thoughts
Harvesting marjoram is a dance between taking what you need and giving the plant what it requires to thrive. By shifting your mindset from “picking leaves” to “pruning stems,” you unlock the true potential of this ancient Mediterranean herb. Those strategic cuts are not just about collecting a culinary ingredient; they are a vital part of the plant’s maintenance, ensuring it stays healthy, bushy, and productive.
Do not be afraid to be a little bold with your shears. As long as you respect the one-third rule and time your harvests for the cool of the morning, your marjoram will bounce back stronger every time. It is a rewarding cycle that keeps your kitchen stocked and your garden looking lush.
Whether you are a beginner just starting your first herb pot or an experienced gardener with a dedicated herb garden layout, mastering the marjoram harvest is a fundamental skill. Experiment with different varieties, pay attention to the signals your plants are sending, and enjoy the incredible aroma that follows every cut. Your marjoram—and your cooking—will thank you for it.