
You think you’re eating healthy, but most grocery kale has lost 50% of its nutrients before it hits your plate. Most grocery store kale travels 1,500 miles (2,414 km) to reach you, losing flavor and life along the way. Here is why the garden version is a different species entirely in terms of crunch and vitamin density.
I’ve been leaning over this garden fence for forty years, and if there is one thing I’ve learned, it’s that a leaf of kale should never be limp. When you buy those rubber-banded bunches at the store, you’re often getting a shadow of what the plant intended to be. By the time that kale is harvested, cooled, shipped, and stocked, the very life force—the vitamins and the sugars—has started to fade away.
Growing your own isn’t just about saving a few dollars at the checkout counter. It is about reclaiming the flavor of a vegetable that has been unfairly maligned for being “bitter” or “tough.” In reality, fresh kale from the backyard is sweet, tender, and so packed with minerals you can almost feel the energy boost after a single salad.
Let’s walk through what makes the garden version so special and how you can get a crop started in your own patch of dirt. Whether you have a sprawling backyard or just a few pots on a sunny balcony, you can grow better greens than any supermarket could dream of stocking.
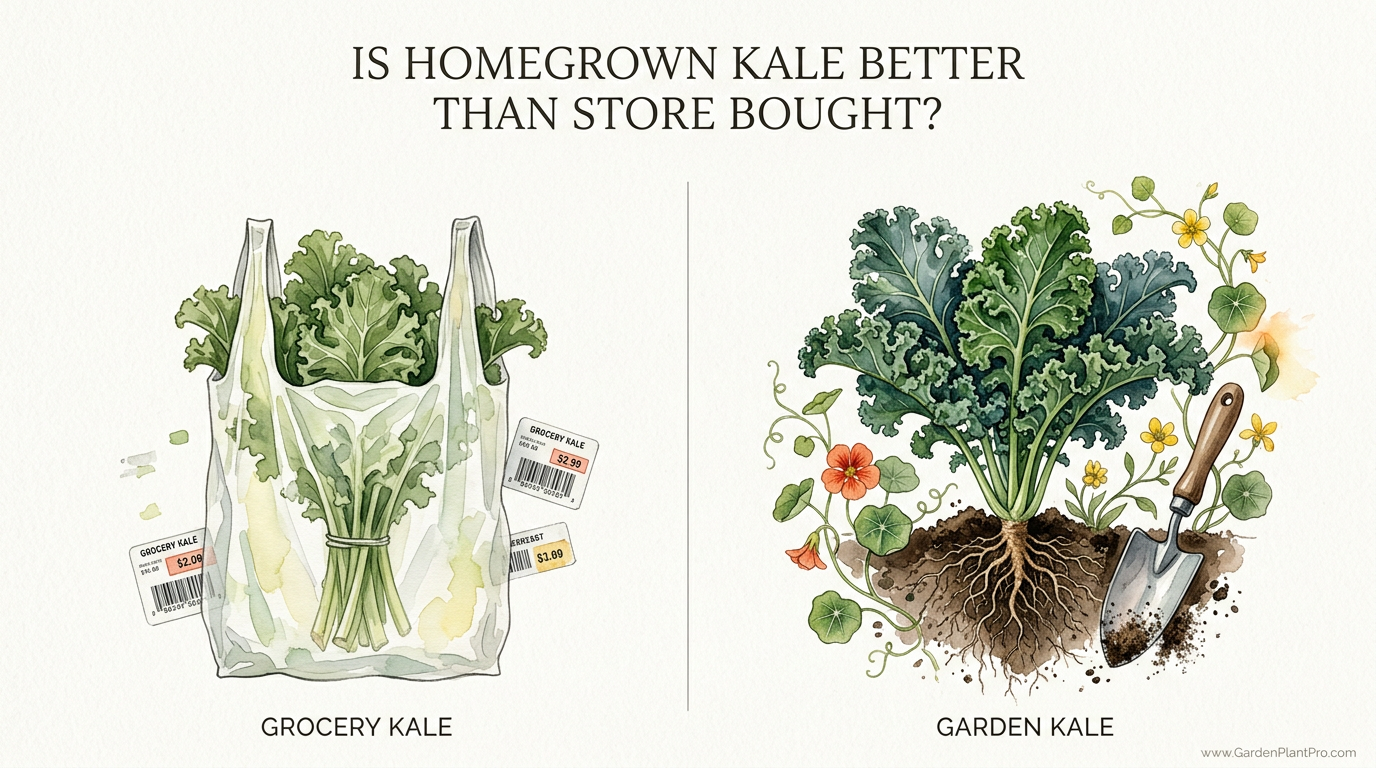
Is Homegrown Kale Better Than Store Bought
The short answer is a resounding yes, but the reasons go deeper than just taste. When we talk about GROCERY KALE vs GARDEN KALE, we are looking at two different timelines. Most grocery store kale is bred for shelf life and durability during transport, not for the delicate nuances of flavor or peak nutrition.
The primary reason homegrown wins is the nutrient density. Leafy greens like kale start losing Vitamin C and antioxidants the moment the stem is severed from the root. Studies show that some greens can lose a significant portion of their nutritional value within just 48 to 72 hours if not kept in ideal conditions. Since store-bought kale often spends days in a truck, it’s rarely at its peak when you eat it.
Then there is the “Jack Frost” factor. Commercial growers often harvest based on a schedule to keep the supply chain moving. A home gardener, however, has the luxury of waiting for the first frost. When temperatures drop below freezing, the kale plant undergoes a chemical change, converting starches into sugars to act as a natural antifreeze. This process makes the leaves incredibly sweet—a flavor you almost never find in a grocery store bunch.
Finally, you have the choice of variety. Stores usually stock one or two types: Curly or Lacinato. In your garden, you can grow Russian Reds with purple stems, Siberian giants that thrive in the snow, or Italian Nero di Toscana that looks like a prehistoric palm tree. Each has its own texture and use in the kitchen.
How to Start Your Own Kale Patch
Getting kale into the ground is one of the more rewarding tasks for a beginner because the plant is remarkably hardy. It doesn’t demand the constant coddling that a tomato or a pepper might. Here is how I’ve found success over the years, step by step.
Choosing the Right Timing
Kale is a cool-season crop. In most regions, you have two windows: early spring and late summer. For a spring crop, you want to get your seeds or transplants in the ground about 4 weeks before the last expected frost. Kale can handle a light freeze, so don’t be afraid if the weather is still a bit nippy.
For a fall harvest—which is actually my favorite—you should sow your seeds about 6 to 8 weeks before the first fall frost. This allows the plant to mature just as the weather cools down, which leads to the best flavor. If you live in a climate with mild winters, you can even grow kale right through the coldest months.
Soil Preparation and Spacing
Kale isn’t too picky, but it loves a soil rich in organic matter. I always mix in about 2 inches (5 cm) of well-rotted compost or aged manure before I plant. The ideal soil pH is between 6.0 and 7.5. If your soil is too acidic, the plant might struggle to take up the minerals it needs to stay healthy.
When it comes to spacing, give them room to breathe. I space my plants about 12 to 18 inches (30 to 45 cm) apart. If you crowd them, you’re just inviting pests like aphids to set up shop in the stagnant air between the leaves. If you’re growing in rows, keep the rows about 2 feet (60 cm) apart so you have a clear path to walk and harvest.
Watering and Mulching
Consistency is the secret to tender leaves. If the soil dries out completely, the plant gets stressed and the leaves turn tough and bitter. I aim for about 1 to 1.5 inches (2.5 to 3.8 cm) of water per week. A thick layer of straw or shredded leaf mulch around the base of the plants helps keep the roots cool and holds that moisture in the ground.
The Practical Benefits of Growing Your Own
Beyond the health perks, there are several “real-world” advantages to having a kale plant or two in your backyard. It changes the way you look at grocery shopping and meal planning entirely.
- Harvesting on Demand: You only pick what you need. Instead of a bag of kale turning to slime in your fridge drawer, your “storage” is the living plant in the garden.
- Chemical-Free Peace of Mind: Kale often appears on the “Dirty Dozen” list for pesticide residues. When you grow it, you control exactly what touches the leaves.
- Zero Food Waste: Since you can harvest leaf-by-leaf (the “cut and come again” method), you never have to throw away half a bunch because you couldn’t finish it in time.
- Year-Round Availability: In many zones, kale is the last thing standing in the garden. I’ve brushed snow off Lacinato leaves in January to make a fresh winter soup.
The flavor is the most immediate benefit. Garden kale has a “snap” and a sweetness that makes it palatable even for people who usually claim to hate greens. When you eat it within minutes of picking, the texture is crisp rather than leathery.
Challenges and Common Mistakes
I wouldn’t be a good neighbor if I didn’t warn you about the hurdles. Gardening isn’t always sunshine and butterflies—in fact, sometimes the butterflies are the problem.
The Cabbage White Butterfly
If you see a pretty white butterfly fluttering around your kale, don’t be fooled. It’s looking for a place to lay eggs. Those eggs turn into small green caterpillars (cabbageworms) that can skeletonize a plant in days. I recommend using a lightweight row cover to physically block the butterflies from reaching the plants. If you already have worms, hand-picking them or using an organic Bacillus thuringiensis (Bt) spray is very effective.
Heat Stress and Bolting
Kale hates a heatwave. If the temperature stays consistently above 80°F (27°C), the plant may “bolt,” which means it sends up a flower stalk and focuses all its energy on making seeds. Once this happens, the leaves become very bitter and tough. To prevent this, make sure your kale is well-watered and perhaps give it some afternoon shade during the peak of summer.
DIY PROJECT: Collect rainwater no matter where you live...

This DIY project is the best way to legally collect rainwater NO MATTER where you live. Get chlorine-free water, cut down on your water bills, and have enough for an emergency situation or to water your garden. Read More Here...
Aphid Infestations
Grey-green aphids love to hide in the curly nooks of kale leaves. They suck the sap and can stunt the plant’s growth. I find that a strong blast of water from the garden hose every few days is usually enough to knock them off. If the infestation gets bad, an organic insecticidal soap or neem oil spray usually clears things up. Just be sure to spray the undersides of the leaves where they like to hide.
Comparison: Garden Fresh vs. Grocery Store
To really see the difference, it helps to look at the numbers and the logistics. Here is a breakdown of how the two usually compare in a standard kitchen scenario.
| Feature | Garden Kale | Grocery Store Kale |
|---|---|---|
| Travel Distance | 10 to 50 feet | 1,500 miles (avg) |
| Vitamin C Content | Peak (100%) | Reduced (Often 50-70%) |
| Flavor Profile | Sweet/Nutty (esp. after frost) | Bland or Bitter |
| Texture | Crisp and Tender | Limp or Leathery |
| Cost per Pound | Pennies (Cost of seed) | $2.00 – $4.00 |
| Variety Choice | Dozens of Heirlooms | 1 or 2 standard hybrids |
Practical Tips for a Better Harvest
Over the years, I’ve picked up a few tricks that make the difference between a mediocre crop and a spectacular one. These are the “best practices” that keep my kitchen stocked with greens for most of the year.
Harvest from the bottom up. Never pull the whole plant out of the ground unless you’re finished with it for the season. Instead, snap off the lowest, oldest leaves. The center of the plant (the crown) will keep producing new leaves, allowing you to harvest from the same plant for months.
Wait for the cold. If you’re growing for flavor, the best time to harvest is after a few nights of frost. The cold triggers the plant to release those protective sugars. If you’ve never had “frost-kissed” kale, you haven’t really tasted what this plant can do.
Use mulch for cleanliness. Rain can splash soil up into the curly leaves, making them a pain to wash. A thick layer of clean straw keeps the leaves high and dry, saving you a lot of time at the kitchen sink.
Keep an eye on the soil moisture. In the height of summer, I check the soil by sticking my finger in about 2 inches (5 cm). If it feels dry, it’s time to water. Stress is what leads to bitterness.
Advanced Considerations for Serious Growers
If you’ve mastered the basics and want to take your kale game to the next level, there are a few things you can do to optimize your garden’s performance. These strategies focus on long-term sustainability and higher yields.
Crop Rotation: Never plant kale (or its cousins like broccoli and cabbage) in the same spot two years in a row. This helps prevent the buildup of soil-borne diseases like clubroot and keeps the local pest population from getting a foothold. A three-year rotation cycle is standard for most healthy gardens.
Overwintering: In many climates, kale is actually a biennial. If you leave it in the ground through the winter, it will often survive and produce a flush of very sweet, tender “raabs” (flower buds) in the early spring. These are a gourmet treat that you’ll never find in a store. Just make sure to pull the plant before it fully goes to seed, as the leaves will turn bitter once the flowers open.
Seed Saving: If you find a variety that performs exceptionally well in your specific microclimate, consider letting one or two plants go to seed. You can collect the pods once they turn brown and dry. This allows you to develop a “landrace” strain that is perfectly adapted to your backyard’s soil and weather patterns.
Real-World Scenario: The Fall Transition
Imagine it is late September. Your summer tomatoes are starting to look tired, and the first hint of chill is in the air. This is where your garden kale really starts to shine. While the rest of the garden is shutting down, your kale is just hitting its stride.
Last year, I had a row of ‘Winterbor’ kale that looked a bit ragged in August because of the heat. But as soon as the October rains came and the night temperatures dropped to 40°F (4°C), the plants exploded with new, deep-green growth. By November, after two hard frosts, those leaves were so sweet I was eating them raw right off the stem.
Contrast this with a grocery store run in the same month. You’d be buying kale that was grown in a different climate, likely harvested weeks ago, and kept in a refrigerated warehouse. The difference in vitality is palpable. In your garden, the plant is actively responding to the local weather, building up nutrients to protect itself—nutrients that then end up on your dinner plate.
Final Thoughts
Growing your own kale is a simple way to bridge the gap between “eating healthy” and “eating well.” It is one of the most forgiving plants in the garden, providing a massive return on investment for very little effort. Once you experience the crunch of a leaf picked moments before it hits the bowl, you’ll find it very hard to go back to the supermarket version.
Start small if you need to. A single large container with two plants can provide enough greens for a weekly stir-fry or a daily smoothie. As you get comfortable, you can explore the wonderful world of heirloom varieties and seasonal timing. The goal is to create a system where your food is as fresh as possible, as often as possible.
Don’t be afraid to experiment with your soil or your harvest methods. Gardening is a conversation with the land, and every season is a chance to learn something new. Whether you’re interested in improving your soil health, mastering irrigation, or just enjoying the peace of a morning harvest, kale is the perfect companion for your journey. Happy growing!

Do you have some charcoal in your house right now? We call charcoal a “miracle leftover” for anyone who wants to be a little more self-sufficient and cut costs. That’s because it can help you with so many different things around the house and garden. You can even use it to make an energy-free fridge. Read More Here...