
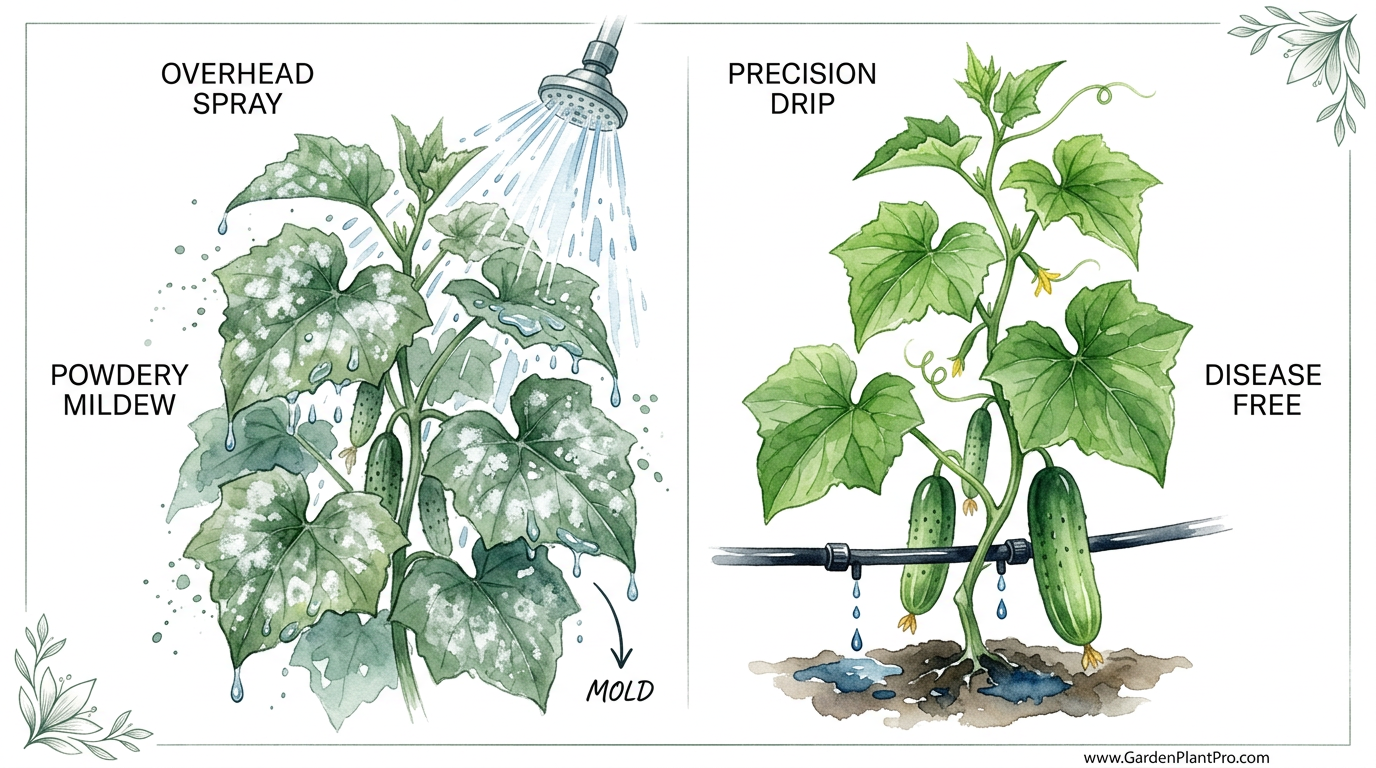
Wet leaves are an invitation for disease—learn the precision secret to cucumber health. Cucumbers are notorious for powdery mildew, often caused by standard overhead watering. Switching to precision drip irrigation keeps moisture at the roots where it belongs and off the leaves where it causes chaos. See the difference in vine health.
I have spent more summers than I can count watching beautiful cucumber vines turn from a vibrant, deep green to a ghostly, sickly white. It usually starts as a small, dusty-looking spot on an older leaf, and before you know it, the whole patch looks like someone took a flour sifter to it. That is powdery mildew, a fungal foe that has broken the heart of many a backyard gardener. Over the years, I have learned that while you can fight it with sprays, the real battle is won by changing how you deliver water.
Most of us grew up using a garden hose with a spray nozzle or a simple oscillating sprinkler. It feels natural to simulate rain, but in a confined garden space, that “rain” often does more harm than good. When you spray from above, you create a humid microclimate right in the middle of your cucumber patch. Those wet leaves are essentially a welcome mat for fungal spores. Precision drip irrigation changes the game by delivering water exactly where the plant needs it—at the root zone—while keeping the foliage bone-dry.
This approach is about more than just avoiding disease; it is about efficiency and plant vigor. When a cucumber plant does not have to spend its energy fighting off a fungal infection, it puts that energy into producing crisp, sweet fruit. Transitioning to a drip system might seem like a technical hurdle, but it is one of the most rewarding upgrades you can make for your garden. Let me walk you through why this works and how you can set it up to save your harvest this year.
Preventing Cucumber Powdery Mildew With Drip Irrigation
Powdery mildew is a fungal disease caused by species like Podosphaera xanthii and Erysiphe cichoracearum. Unlike many other garden fungi that require leaves to be soaking wet to germinate, powdery mildew thrives in high humidity and warm, stagnant air. It is a bit of a paradox: the fungus likes it humid, but “free” water—like a heavy rain or a blast from a hose—can actually wash the spores off. However, the lingering moisture and the spike in humidity after overhead watering provide the perfect window for new infections to take hold.
In the real world, cucumbers are often grown in crowded rows or on trellises. When you water from above, the water gets trapped in the dense canopy. It sits there for hours, especially if you water in the evening. This creates a “sauna effect” that allows the mildew to spread rapidly from leaf to leaf. Drip irrigation bypasses this entire problem. By using a network of tubes and emitters, you deliver water directly to the soil surface or even just below it. This ensures the leaves stay dry and the humidity within the plant canopy remains low.
Gardening experts often refer to the “Disease Triangle,” which consists of a susceptible host, a pathogen, and the right environmental conditions. You cannot always change the host (cucumbers are naturally susceptible) or the pathogen (spores are everywhere in the air), but you can absolutely change the environment. Drip irrigation is the primary tool for breaking that triangle. It is used by commercial growers worldwide to ensure high yields, and it is just as effective in a 4-foot by 8-foot (1.2 meters by 2.4 meters) raised bed.
How Drip Irrigation Works for Cucumbers
Setting up a drip system is essentially building a plumbing network for your plants. The goal is to provide a slow, steady “drip” of water that soaks deep into the earth, encouraging the cucumber roots to grow downward rather than staying near the surface. This deep root system makes the plants more resilient to heat waves and drought. For cucumbers, which have a high water content, consistent moisture is the difference between a bitter fruit and a sweet one.
Step 1: The Head Assembly
Your system starts at the faucet (or hose bib). You need a few specific components here to protect your lines. First is a backflow preventer, which ensures garden water doesn’t get sucked back into your home’s drinking supply. Next is a filter (120 to 155 mesh is standard) to catch any sediment that might clog those tiny emitters. Finally, you need a pressure regulator. Most home water pressure is around 40–60 psi (2.7–4.1 bar), but drip systems are designed for low pressure, usually between 10 and 25 psi (0.7–1.7 bar).
Step 2: Laying the Mainline
From the head assembly, you run a mainline—usually 1/2-inch (13 mm) poly tubing—to your cucumber bed. This is the “trunk” of your system. You can snake this along the edge of the garden or bury it slightly to keep it out of the way of your hoe. I usually pin mine down with landscape staples every 3 feet (about 1 meter) so it doesn’t move around when the sun warms the plastic.
Step 3: Distribution Lines or Drip Tape
For cucumbers, you have two main choices. You can use drip tape, which is a thin-walled tube with pre-installed emitters every 12 inches (30 cm). This is great for long, straight rows. Alternatively, you can use 1/4-inch (6 mm) distribution tubing with individual emitters “punched” into the mainline. I prefer individual emitters for cucumbers spaced on hills, as I can place two emitters per plant to ensure even coverage on both sides of the stem.
Step 4: Scheduling and Automation
The beauty of this system is the timer. Cucumbers do best when watered early in the morning—around 5:00 AM or 6:00 AM. This allows any accidental moisture to evaporate as the sun rises. Aim for about 1 to 1.5 inches (25–38 mm) of water per week. With a drip system, this usually translates to running the system for 30 to 60 minutes every other day, depending on your soil type. Sandy soil drains fast and needs more frequent, shorter bursts, while clay soil holds water and prefers longer, less frequent watering.
Benefits of Precision Drip Systems
The most immediate benefit is the reduction in disease. Since the leaves are not getting hit with water, the spores of powdery mildew have a much harder time establishing a colony. You will notice that the lower leaves—the ones usually most susceptible to splash-back from the soil—stay green and healthy much longer into the season. This extended leaf life means the plant can continue photosynthesizing and producing fruit long after overhead-watered plants have shriveled up.
Another major advantage is water conservation. Standard sprinklers lose a massive amount of water to evaporation and wind drift. It is estimated that drip irrigation is about 90% efficient, whereas sprinklers can be as low as 50-60%. In regions where water is scarce or expensive, this makes a huge difference. You are putting the water exactly where it is needed, not watering the paths between your rows or the weeds that are trying to steal nutrients from your cucumbers.
Furthermore, drip systems allow for fertigation. This is a fancy word for “fertilizing while you irrigate.” You can install a simple venturi injector or a tank at the head of your system to deliver water-soluble fertilizer directly to the roots. Cucumbers are heavy feeders, especially once they start vining out. Being able to spoon-feed them nutrients without getting chemicals on the leaves is a massive boost to their overall health and productivity.
Challenges and Common Mistakes
The most common pitfall I see with new drip systems is clogging. Because the emitter holes are so tiny, even a single grain of sand or a bit of algae can shut a line down. This is why a high-quality filter is non-negotiable. I always tell folks to check their emitters once a week. If you see one plant looking wilted while its neighbor is thriving, you likely have a clogged dripper. You can often clear them by gently tapping the emitter or soaking it in a bit of vinegar to dissolve mineral buildup.
Another mistake is incorrect pressure. If you don’t use a regulator, the high pressure from your home’s pipes will eventually pop the fittings or split the drip tape. Conversely, if your pressure is too low, the emitters at the far end of the row won’t put out any water. It is a balancing act. If you have a very large garden, you may need to divide it into “zones” so that you aren’t trying to water too many plants at once from a single faucet.
Physical damage is also a factor. I can’t tell you how many times I have accidentally nicked a drip line with a shovel or a pair of garden shears. Luckily, poly tubing is easy to repair with “goof plugs” and couplers. Also, be mindful of wildlife. In dry summers, squirrels or rabbits might chew on the lines to get to the water. Keeping your lines under a thin layer of mulch can help hide them from thirsty critters.
Limitations and Realistic Constraints
While drip irrigation is a miracle for disease prevention, it won’t stop powdery mildew entirely if your environmental conditions are truly terrible. If you live in a region with 90% humidity and no wind, the air itself might carry enough moisture to trigger an outbreak. In those cases, drip irrigation is just one part of the puzzle. You still need to think about plant spacing and airflow.
DIY PROJECT: Collect rainwater no matter where you live...

This DIY project is the best way to legally collect rainwater NO MATTER where you live. Get chlorine-free water, cut down on your water bills, and have enough for an emergency situation or to water your garden. Read More Here...
There is also the initial cost and setup time. Unlike a $10 sprinkler, a complete drip kit for a medium garden can run you $50 to $150. It takes a Saturday morning to measure, cut, and install everything correctly. For a gardener who only grows two or three plants, this might feel like overkill. However, if you are growing enough cucumbers for pickling and fresh eating, the system usually pays for itself in one or two seasons through increased yields and decreased water bills.
Finally, drip systems require seasonal maintenance. In colder climates, you cannot leave water in the lines over winter, or they will freeze and crack. You have to drain the system, blow out the lines, or bring the more sensitive components (like timers and regulators) indoors. It is not a “set it and forget it” solution for the life of the garden; it requires an annual routine of startup and shutdown.
Comparison: Overhead Spray vs. Precision Drip
To help you visualize the trade-offs, here is a breakdown of how these two methods compare specifically for cucumber cultivation.
| Feature | Overhead Spray | Precision Drip |
|---|---|---|
| Disease Risk | High (Wet leaves, high humidity) | Low (Dry leaves, targeted roots) |
| Water Efficiency | Low (Evaporation & Wind loss) | High (90%+ direct to soil) |
| Setup Complexity | Very Low | Moderate |
| Maintenance | Low | Moderate (Filter cleaning, winterizing) |
| Weed Growth | High (Waters entire surface) | Low (Only waters plant base) |
| Automation | Easy | Advanced & Precise |
Practical Tips and Best Practices
If you are ready to make the switch, here are a few “pro tips” from my years in the garden trenches:
- Mulch is your best friend: Once your drip lines are laid, cover them with 2-3 inches (5–7 cm) of organic mulch like straw or shredded leaves. This does two things: it protects the plastic lines from UV damage and it prevents water from splashing soil-borne pathogens onto the leaves when the drip starts.
- Check the “Wet Spot”: After your system has run for 30 minutes, dig down a few inches near the plant. The soil should be moist about 6-8 inches (15–20 cm) deep. If it’s only wet on the surface, you need to run the system longer.
- Spacing for Airflow: Even with drip, don’t crowd your plants. Space cucumbers at least 12–18 inches (30–45 cm) apart. If you are growing on a trellis, use a “vertical” drip line that runs along the base of the fence.
- Use a Pressure Gauge: Spend the extra $10 for a small pressure gauge at the end of your mainline. It will tell you instantly if your system is operating at the peak 15-20 psi (1.0–1.4 bar).
- Group by Needs: Don’t put your cucumbers on the same line as your drought-tolerant herbs like rosemary or sage. Cucumbers need a lot of water; herbs don’t. Give the cucumbers their own dedicated zone.
Advanced Considerations: Going Beyond the Basics
For those who want to take their cucumber game to the professional level, consider soil moisture sensors. These are small probes you bury in the root zone that connect to your smart timer. They will actually prevent the system from turning on if the soil is already moist from a recent rain. This prevents overwatering, which can lead to root rot—another common cucumber killer.
Another advanced technique is sub-surface drip. Instead of laying the lines on top of the soil, you bury them 2-4 inches (5–10 cm) deep. This completely eliminates surface evaporation and ensures that the very top layer of soil stays dry, which can further reduce humidity and weed germination. However, this is harder to maintain because you can’t see the emitters to check for clogs.
Lastly, pay attention to the micronutrients. Cucumbers need more than just Nitrogen, Phosphorus, and Potassium. They crave Calcium and Magnesium. Using your drip system to deliver a “cal-mag” supplement during the flowering stage can significantly reduce “blossom end rot” and improve the crunchiness of your pickles. Since you are delivering it via drip, the plant absorbs it more efficiently than a foliar spray.
Example Scenario: The July Heatwave
Imagine it is mid-July. The temperature is hitting 95°F (35°C) every day, and the humidity is thick enough to chew. A gardener using a sprinkler has to water every evening to keep the vines from wilting. Because the air is so heavy, the leaves stay wet all night. By Thursday, they notice white spots. By Sunday, the vines are crisp and white, and the cucumbers are stunted.
Meanwhile, the drip-irrigated garden is on a timer for 5:00 AM. Each plant receives exactly 0.5 gallons (about 1.9 liters) of water every other day. The surface mulch stays dry, reflecting the heat, while the roots stay cool and hydrated. The humidity in the vine canopy stays 20% lower than the sprinkler-watered patch. The vines stay green, the mildew never gains a foothold, and the gardener spends their evening on the porch instead of dragging a hose around.
Selecting Disease-Resistant Cucumber Varieties
While drip irrigation is a powerful tool, you can stack the deck in your favor by choosing the right seeds. Plant breeders have spent decades developing varieties that have a natural “immune system” against powdery mildew. When you combine a resistant variety with a precision drip system, you are creating a near-impenetrable defense.
Recommended Slicing Varieties
‘Marketmore 76’ is the gold standard for many home gardeners. It is an open-pollinated variety that produces uniform, dark green fruits and has excellent resistance to both powdery and downy mildew. Another great choice is ‘Diva’, which is seedless and has a very thin skin, making it perfect for salads.
Recommended Pickling Varieties
For those who love to preserve their harvest, ‘Spacemaster 80’ is a bush-type plant that works incredibly well with drip irrigation in small spaces. It is highly resistant to multiple diseases. ‘Homemade Pickles’ is another reliable producer that stays healthy even when the late-summer humidity tries its worst.
Final Thoughts
Managing cucumber health is a matter of understanding the environment as much as the plant. Powdery mildew doesn’t have to be an inevitable part of the summer. By shifting your perspective from “watering the garden” to “nourishing the roots,” you remove the primary trigger for fungal outbreaks. Precision drip irrigation is the most effective way to achieve this balance.
It might take a little effort to get the tubes laid out and the timer programmed, but the reward is a season filled with healthy vines and a harvest that doesn’t quit. You will find yourself using less water, pulling fewer weeds, and spending less money on organic fungicides. It is a more professional, more nostalgic way of gardening—getting back to the basics of what a plant truly needs.
I encourage you to start small. Try one bed with a simple drip kit this year and compare it to your traditional watering methods. I suspect that once you see the difference in those cucumber leaves, you will never want to pick up a spray nozzle again. Happy gardening, and may your cucumbers be ever crisp and green.