
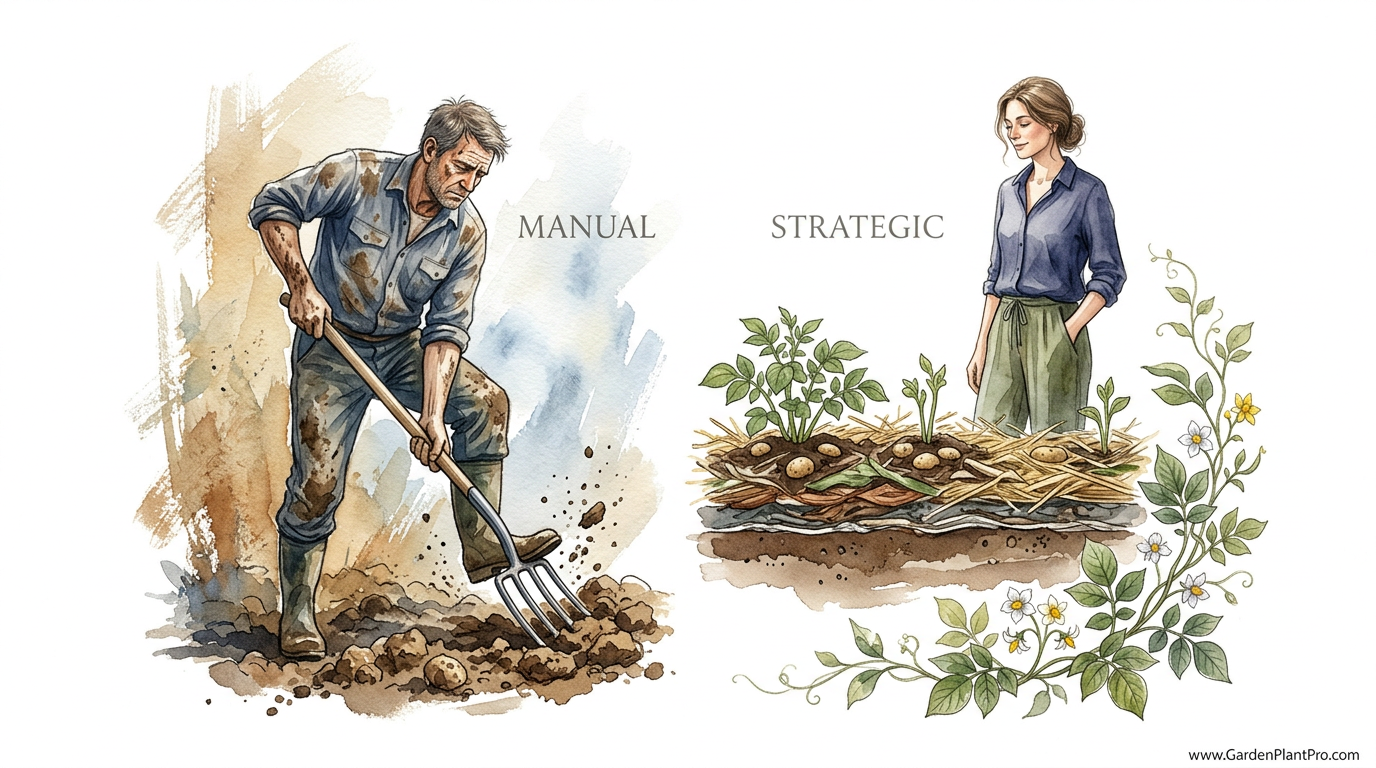
You’ve been breaking your back for half the harvest you actually deserve. Why spend four hours straining your spine when 15 minutes of strategic mulching produces cleaner, bigger spuds? The no-dig method isn’t just for ‘lazy’ gardeners—it’s for smart ones who want better soil and better fries.
Many of us grew up watching our elders double-dig trenches, sweating under a mid-morning sun just to bury a few seed potatoes. We were told that potatoes “break up the soil” for us, but the truth is quite the opposite. When we turn the earth, we destroy the very biological networks that help plants thrive.
Moving toward a no-dig approach is less about being idle and more about working with nature instead of against it. It focuses on building the soil from the top down, mimicking how a forest floor creates fertility.
This guide walks through every step of this rewarding process. You’ll learn how to set up your beds, choose your mulch, and harvest a bounty of potatoes that look like they’ve been polished before they even hit the kitchen sink.
No-dig Potato Growing Guide
The no-dig potato method is a cultivation technique where seed potatoes are placed on or near the soil surface and covered with organic matter rather than being buried in deep trenches. It relies on the principle of minimal soil disturbance, which protects the complex ecosystem of fungi, bacteria, and earthworms living beneath our feet.
In a traditional garden, you might dig a hole 6 inches (15 cm) deep for every single potato. In a no-dig garden, you simply lay the “seed” on the ground. Instead of hilling up heavy soil around the growing stems, you pile on loose, light materials like straw, hay, or finished compost.
This method works anywhere from small suburban raised beds to large rural plots. It is particularly effective for gardeners dealing with heavy clay or rocky soil where digging is physically exhausting or practically impossible. By adding organic layers on top, you create a perfect, friable environment for tubers to expand without resistance.
Think of it like building a lasagna. Each layer of mulch provides protection from the sun, retains moisture, and eventually breaks down into rich humus. The potatoes grow in this loose “middle layer,” making them incredibly easy to find when harvest time rolls around.
How the No-Dig Method Works Step-by-Step
Preparation is the secret to a high-yielding no-dig patch. You want to start with a clean slate, but “clean” doesn’t mean bare dirt. If you are starting on a grassy patch or a weedy area, the first step is to lay down a layer of plain, brown cardboard. Ensure all tape and staples are removed first.
Cardboard acts as a light-blocking barrier that kills off existing weeds and grass. Over the course of a few months, earthworms will eat through the cardboard, pulling nutrients down into the soil. If your garden bed is already established and weed-free, you can skip the cardboard and go straight to the compost.
Spread a layer of well-rotted compost about 2 to 4 inches (5 to 10 cm) thick over your planting area. This provides the initial nutrient boost your potatoes need. Potatoes are hungry plants, often requiring significant nitrogen and potassium to develop lush foliage and large tubers.
“Chitting” your potatoes—allowing them to grow small green sprouts in a cool, bright spot indoors—gives them a head start. Once your soil temperature reaches at least 45°F (7°C), it is time to plant. Place your seed potatoes directly on top of the compost or the cardboard if you’ve cut small slits in it. Space them about 12 to 15 inches (30 to 38 cm) apart in every direction.
Cover the seed potatoes immediately with another layer of mulch. Many gardeners prefer straw because it is easy to handle and provides excellent insulation. Aim for an initial covering of 4 to 6 inches (10 to 15 cm). As the green shoots emerge and reach about 6 inches (15 cm) in height, add another thick layer of mulch, leaving only the very tips of the leaves exposed.
Benefits of the No-Dig Approach
Physical health is often the most immediate benefit. Gardeners with back pain, arthritis, or limited mobility find that no-dig gardening extends their ability to grow their own food by years. You aren’t lifting heavy shovelfuls of wet earth or bending over for hours to trench and hill.
Soil health is the long-term winner here. Every time you turn the soil, you expose mycorrhizal fungi to the air, which kills them. These fungi form a symbiotic relationship with potato roots, helping the plants access water and minerals that would otherwise be out of reach. No-dig preserves these “highways” in the soil.
Water retention is significantly higher in no-dig beds. The thick layers of mulch act like a sponge, soaking up rain and preventing evaporation from the soil surface. In many climates, no-dig potatoes require half the supplemental irrigation of traditional rows. This is a massive advantage during dry summer spells.
The harvest itself is a joy rather than a chore. Traditional harvesting often results in “spearing” a few of your best potatoes with a garden fork. With no-dig, you simply pull back the mulch and pick up the potatoes. They come out clean, often needing nothing more than a light brush to be ready for the pantry.
Environmental Factors and Timing
Soil temperature is the most critical factor for a successful start. Planting too early into cold, soggy ground can lead to the seed potato rotting before it ever has a chance to sprout. Use a soil thermometer to check that the ground is consistently above 45°F (7°C), though 55°F (13°C) is even better for rapid growth.
Frost is a lingering threat for early-season potatoes. While the tubers are safe under their mulch “blanket,” the green leafy growth is very sensitive to freezing temperatures. If a late frost is predicted after your shoots have emerged, simply throw an extra few inches of loose straw over them or use a frost cloth to protect the tender tips.
DIY PROJECT: Collect rainwater no matter where you live...

This DIY project is the best way to legally collect rainwater NO MATTER where you live. Get chlorine-free water, cut down on your water bills, and have enough for an emergency situation or to water your garden. Read More Here...
Sunlight is the engine that drives tuber production. Potatoes need at least 6 to 8 hours of direct sun daily. If they are grown in too much shade, the plants will become “leggy,” stretching toward the light and producing small, disappointing tubers. Ensure your no-dig bed is positioned in the sunniest part of your garden.
Drainage remains important even without digging. If your garden is in a low-lying area that holds water, the potatoes at the bottom of your mulch pile may sit in a “bathtub” of moisture. In these cases, it is better to build a slightly raised no-dig bed using a frame or a taller mound of compost to ensure oxygen can still reach the roots.
Selecting the Right Potato Varieties
Variety choice can make or break your harvest. “First Earlies” like Red Duke of York or Lady Christl are fantastic for no-dig because they grow quickly and are often harvested before pests like slugs or diseases like blight become a major issue. These are your classic “new potatoes” with thin, delicate skins.
“Second Earlies” such as Charlotte or Nicola take a bit longer but offer a more substantial harvest. These varieties are often waxy and hold their shape perfectly in salads. They thrive in the consistent moisture levels found under a thick no-dig mulch.
“Maincrop” varieties like Maris Piper or King Edward take the longest to mature, usually 15 to 20 weeks. These are the big producers meant for mashing, roasting, and winter storage. Because they stay in the ground longer, they benefit the most from the soil-building properties of the no-dig method, but they also require a more diligent mulching schedule to keep them covered.
Drought resistance is another factor to consider. Varieties like Desiree are known for being tough in dry conditions. If you live in a region with scorching summers and water restrictions, choosing a hardy variety like this—and pairing it with the moisture-saving no-dig method—is a winning strategy for a resilient garden.
Challenges and Common Mistakes
Slugs are the most frequently cited downside to no-dig gardening. The moist, cool environment under a layer of straw is a paradise for these gastropods. To manage them, avoid over-watering and try to use well-rotted mulch rather than fresh, green material. Encouraging natural predators like ground beetles and toads in your garden also helps keep populations in check.
Voles and mice can sometimes find your “potato lasagna” and decide it’s a five-star restaurant. If you have a known rodent problem, you might need to avoid using cardboard or very thick hay, as these provide perfect tunnels. Some gardeners find success by placing a layer of hardware cloth (metal mesh) at the very bottom of the bed before planting.
Green tubers are a mistake caused by light exposure. If the mulch layer settles or isn’t thick enough, sunlight will reach the developing potatoes. This causes them to produce solanine, which turns them green and makes them toxic. The fix is simple: check your patch every week and “hill up” with more straw or compost any time you see a hint of a potato peeking through.
Using the wrong mulch is another pitfall. Avoid using hay that is full of seeds, or you will spend the rest of the season pulling out grass. Always look for “clean” straw or “seedless” mulch. Also, be wary of straw that may have been treated with persistent herbicides, as these can stunt or kill your potato plants and linger in your soil for years.
Maintenance and Long-Term Care
Watering a no-dig bed is different from watering a tilled one. The surface of the straw may look dry as a bone, but if you stick your hand deep into the mulch, you’ll likely find the soil is still perfectly damp. Only water when the soil beneath the mulch starts to feel dry to the touch.
Feeding your potatoes can be done easily through the mulch. Since you aren’t digging, you can’t easily till in fertilizer, but you don’t need to. Use a liquid feed like comfrey tea or a diluted seaweed extract. These liquids travel through the mulch and deliver nutrients directly to the root zone exactly when the plant needs them most.
Weeding is remarkably easy in a no-dig system. Because the soil isn’t being turned over, you aren’t bringing dormant weed seeds to the surface where they can germinate. Any weeds that do manage to blow in and take root in the mulch are usually very easy to pull out by hand because the growing medium is so loose.
Ongoing mulching is the one “chore” you must stay on top of. As the season progresses, the initial straw or compost will break down and settle. Every 3 or 4 weeks, take a few minutes to add another layer. This keeps the tubers protected, the soil cool, and the moisture locked in.
When No-Dig May Not Be Ideal
Extreme wind can be a nightmare for straw-based no-dig systems. If you live on a flat, windy plain, your mulch might end up in the neighbor’s yard overnight. You can solve this by using heavier mulches like compost or by securing your straw with a layer of bird netting or weighted-down cattle panels.
Perennial weeds with deep taproots, like bindweed or thistle, can sometimes push right through a no-dig setup. While the method kills most annual weeds, these tough survivors may require targeted hand-digging or a much thicker barrier than just a single sheet of cardboard before you start your bed.
Lack of organic matter can also be a barrier. The no-dig method is “material hungry.” If you don’t have access to a reliable source of compost or straw, the cost of buying it in can add up quickly. For those on a very tight budget with no local resources, a hybrid approach might be more practical until you can build up your own composting system.

Do you have some charcoal in your house right now? We call charcoal a “miracle leftover” for anyone who wants to be a little more self-sufficient and cut costs. That’s because it can help you with so many different things around the house and garden. You can even use it to make an energy-free fridge. Read More Here...
Small-scale vertical growers might find that no-dig in a flat bed takes up too much footprint. If space is your biggest constraint, growing potatoes in bags or towers uses a similar “filling up” principle but allows you to stack your harvest vertically instead of across the ground.
Advanced Considerations for Serious Gardeners
Carbon sequestration is a major talking point in modern gardening. By not digging, you are keeping carbon locked in the soil rather than releasing it into the atmosphere. Over several years, a no-dig potato patch can significantly increase the organic carbon content of your land, making it more resilient to climate extremes.
Succession planting is easier when you don’t have to re-till. Once your early potatoes are harvested in mid-summer, the soil is in prime condition for a following crop. You can immediately plant leeks, brassicas, or a quick-growing salad mix right into the same spot. The “work” of preparing the bed was already done in the spring.
Large-scale applications of no-dig often involve “sheet mulching.” If you have a large field you want to convert to garden space, potatoes are the perfect “pioneer crop.” They grow aggressively and the heavy mulching required for them will clear the ground of weeds and improve the soil structure for whatever you decide to plant the following year.
Using “living mulches” is a technique some experienced practitioners experiment with. While traditional no-dig uses dead organic matter, some gardeners plant low-growing clover around their potatoes. This can help fix nitrogen in the soil, though it requires careful management to ensure the clover doesn’t compete too heavily with the potato tubers for space.
Example: A Season in a No-Dig Patch
Imagine a gardener named Sarah who has 100 square feet (about 9 square meters) of tired garden soil. Instead of spending her Saturday morning with a heavy fork, she buys three bales of straw and two bags of compost.
She lays out her seed potatoes—about 80 of them—straight onto the ground in early April. She covers them with a thin dusting of compost and 5 inches (12 cm) of fluffed-up straw. Total work time: 45 minutes.
By June, the plants are waist-high and lush. She has only watered them twice during a particularly dry week. She adds another 3 inches (7 cm) of straw to keep the developing tubers dark. In July, she reaches under the straw and pulls out a handful of “golf ball” sized new potatoes for dinner, without disturbing the plant at all.
By August, the vines start to yellow and die back. Sarah doesn’t need a shovel. She simply rolls back the straw like a carpet. Resting on the soil surface are over 150 pounds (68 kg) of clean, blemish-free potatoes. She gathers them into crates, rakes the remaining straw back over the bed, and is ready to plant her garlic for the winter in less than an hour.
Practical Tips for Success
- Use “Certified” Seed: Don’t just use old potatoes from the grocery store. They are often treated with sprout inhibitors and may carry diseases that can linger in your soil for years.
- Chit for Speed: Giving your potatoes 3 to 4 weeks of light and warmth indoors before planting can result in a harvest that is 2 weeks earlier.
- Check for “Holes”: Always look for light leaks in your mulch. If you see the soil surface, add more cover.
- Water the Mulch: When you do water, make sure you soak the straw or compost thoroughly. It can sometimes act like a thatched roof, shedding water away from the roots if you only give it a light sprinkle.
- Rotate Your Crops: Even with no-dig, try not to grow potatoes in the same spot more than once every three or four years to prevent the buildup of soil-borne diseases.
Final Thoughts
The no-dig method is a transformation in how we view our relationship with the garden. It shifts our role from a conqueror of the soil to a facilitator of its natural processes. By stepping back and letting the earthworms and fungi do the heavy lifting, we end up with healthier plants and a much happier back.
You don’t need a lot of expensive equipment or a degree in soil science to get started. A bit of cardboard, some compost, and a few bales of straw are all that stand between you and the best potato harvest of your life. It is a process of observation and gradual improvement, where the soil gets better every single year you leave it undisturbed.
If you are tired of the annual struggle with the spade, give the no-dig method a try this season. Start small if you need to, perhaps with just a single row or a small corner of your plot. Once you see those clean, beautiful tubers sitting on top of the soil, you’ll likely never want to pick up a trenching shovel again. Experiment, keep your mulch thick, and enjoy the “treasure hunt” that comes every harvest time.