
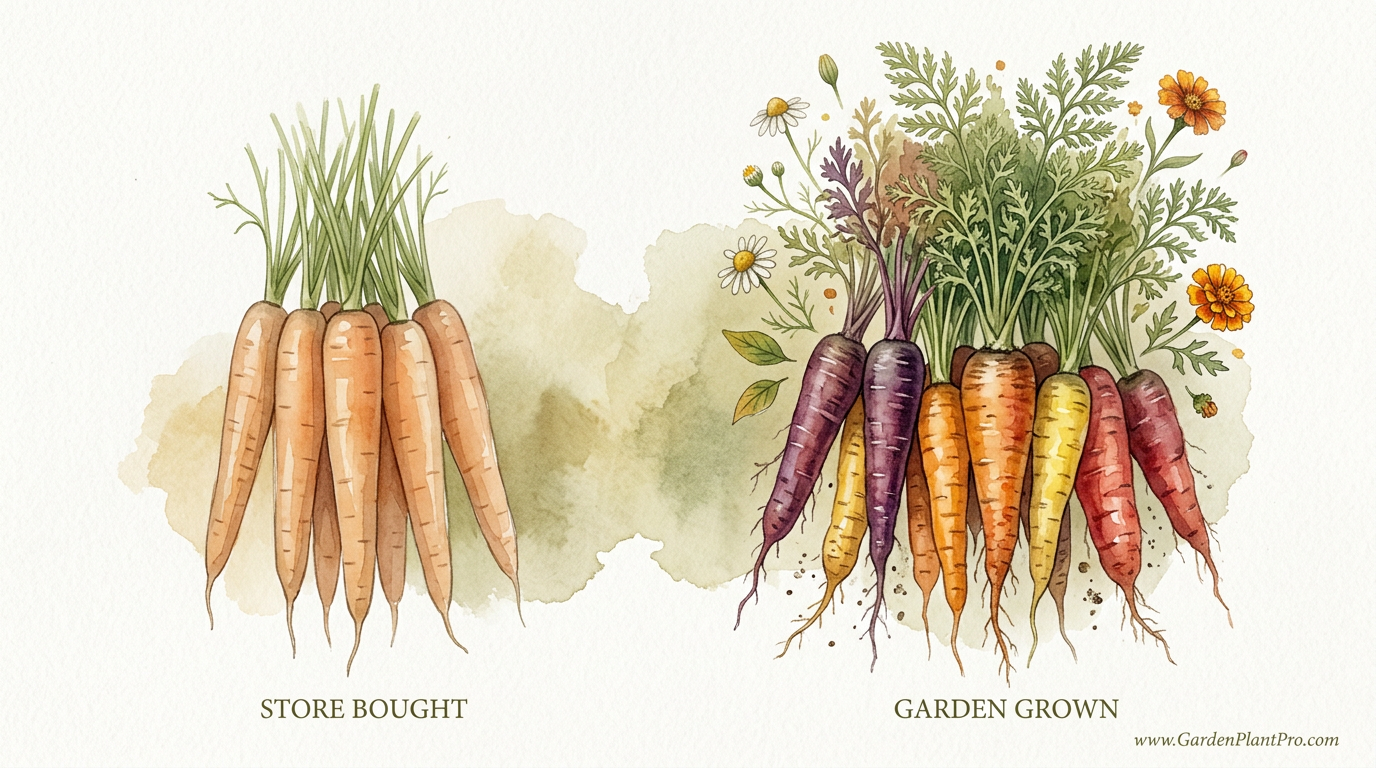
The grocery store has been hiding the true spectrum of carrot flavor from you for decades. That orange stick in the plastic bag? It is a bland shadow of a real carrot. Real carrots have oils, sweetness, and a rainbow of colors you will never find on a shelf. It is time to stop being a consumer and start producing the best food you have ever tasted.
When you grow your own heirloom varieties, you are not just growing a snack; you are cultivating a piece of history that has been selected for taste rather than how well it survives a three-thousand-mile truck ride. Most commercial carrots are bred for uniform shape and tough skin to withstand mechanical harvesting. In the garden, we can prioritize the crisp snap of a Nantes or the deep, earthy richness of a Black Nebula.
Understanding how to coax the maximum flavor out of these roots requires a bit more than just dropping seeds in a hole and hoping for the best. It takes a seasoned eye for soil texture and a bit of patience during the slow germination process. Once you pull that first frost-kissed heirloom from the ground, you will realize that the supermarket varieties are hardly the same species.
Growing Heirloom Carrots For Maximum Flavor
Growing heirloom carrots is a practice in patience and soil management. Unlike modern hybrids, which are often bred for disease resistance or uniformity, heirloom carrots are open-pollinated varieties that have been passed down for generations. These varieties exist because someone, somewhere, decided they were too delicious to lose. They come in four primary shapes—Nantes, Chantenay, Danvers, and Imperator—each suited to different garden conditions and culinary uses.
Real-world gardening often involves making the best of what you have, and heirloom carrots are surprisingly adaptable if you choose the right type. If you have deep, sandy loam, you can grow the long, elegant 10-inch (25 cm) Imperators. If your garden is a battle against heavy clay, the short, stocky Chantenay types will power through where others would fork or stunt.
The secret to that “maximum flavor” often cited by old-timers is a combination of genetics and environmental stress. Specifically, the balance of sugars and volatile compounds called terpenes determines whether a carrot tastes like candy or like a pine tree. When you control the growing environment, you can tip the scales toward sweetness every single time.
How to Select the Right Heirloom for Your Soil
Before you even touch a shovel, you need to pick a variety that matches your soil’s physical reality. Forcing a long carrot into heavy clay is a recipe for disappointment and crooked roots.
- Nantes Types: These are the gold standard for fresh eating. They are cylindrical with blunt ends and have almost no core. Varieties like Scarlet Nantes or Touchon are incredibly sweet and crisp. They prefer loose, well-amended soil but are more forgiving than long types.
- Chantenay Types: These are short, wide at the shoulders, and tapered. Because they are stocky, they can push through heavier soils. Red Cored Chantenay is a classic that develops a deep, rich flavor that is perfect for roasting.
- Danvers Types: These are the “classic” carrot shape—tapered to a point. They are very hardy and store well. Danvers 126 is a reliable producer that handles heat better than most, making it ideal for regions with erratic spring temperatures.
- Imperator Types: These are the long, slender carrots often seen in high-end markets. They require deep, stone-free soil to reach their full 9–12 inch (23–30 cm) potential. Imperator 58 is a common heirloom with a traditional, savory carrot flavor.
- Specialty Colors: Do not overlook colors. Lunar White is mild and crunchy, reminiscent of wild ancestors. Cosmic Purple has a stunning violet skin with a bright orange interior, offering a complex flavor profile rich in anthocyanins.
Matching Variety to Climate
Climate plays a massive role in variety selection. If you live in a region where the heat turns on like a faucet in June, look for heat-tolerant varieties like Kuroda. For those in northern latitudes where the growing season is short, quick-maturing Nantes types will be your best bet, often reaching harvest size in just 60 to 70 days.
Preparing the Perfect Seedbed
Soil preparation is the most critical step in carrot success. Carrots are the ultimate “honest” vegetable; they tell you exactly what the soil was like three inches underground. If the root hits a rock, it forks. If it hits a hardpan layer of clay, it twists.
Ideally, you want a sandy loam with a pH between 6.0 and 7.0. If your soil is naturally heavy or rocky, consider building a raised bed at least 12 inches (30 cm) deep. Fill it with a mix of screened topsoil, finished compost, and a healthy dose of horticultural sand.
Avoid adding fresh manure or high-nitrogen fertilizers right before planting. High nitrogen encourages the plant to grow a massive, beautiful green top while neglecting the root. Even worse, fresh manure can cause the roots to fork or grow “hairy” secondary roots that ruin the texture. Stick to well-rotted compost applied the previous autumn, or a low-nitrogen, high-phosphorus organic amendment at planting time.
The Depth Requirement
Tilling or double-digging to a depth of 12–14 inches (30–35 cm) ensures that the taproot can plunge downward without resistance. In my experience, even a small 1-inch (2.5 cm) stone can cause a “J” hook in a developing root. Sift your soil if you have to; the effort pays off in perfectly straight, uniform harvests.
The Art of Sowing and Germination
Carrot seeds are tiny, and they are notoriously finicky about germination. They require consistent moisture and can take anywhere from 7 to 21 days to emerge. If the soil surface crusts over during that time, the delicate sprouts will be trapped beneath the surface and die.
Sow seeds about 1/4 inch (6 mm) deep. A common mistake is planting them too deep where they run out of energy before hitting the light. Because the seeds are so small, many gardeners mix them with dry sand or coffee grounds to help distribute them more evenly and prevent overcrowding.
The “Plank Trick” for Germination
One of the most effective ways to ensure even germination is to cover the seeded row with a piece of untreated lumber or a burlap sack. This keeps the soil surface moist and prevents it from baking into a hard crust. You must check under the board every single day. The moment you see the first green “hook” emerging from the soil, remove the cover immediately so the plants can get sunlight.
Succession Planting
To avoid a “carrot glut” where everything is ready at once, sow a new row every 3 weeks from early spring until mid-summer. This ensures a steady supply of young, tender roots throughout the season. Stop sowing about 10 to 12 weeks before your first expected fall frost to allow the final crop time to mature.
Maintenance and Ongoing Care
Once your carrots have emerged and reached about 2 inches (5 cm) in height, the real work of maintenance begins. Thinning is the most painful part of the process for many beginners, but it is non-negotiable.
The Importance of Thinning
If carrots are crowded, they will wrap around each other or remain spindly. Aim for a final spacing of 2–3 inches (5–7 cm) between plants. Use a pair of small scissors to snip the extras at the soil line rather than pulling them. Pulling can disturb the delicate taproots of the plants you intend to keep, leading to forked roots later on.
Watering for Flavor
Consistent moisture is the key to sweet, tender carrots. If the soil dries out completely and then gets drenched, the roots can split wide open. Aim for about 1 inch (2.5 cm) of water per week. In sandy soils, you may need to water more frequently but in smaller amounts to keep the root zone hydrated.
DIY PROJECT: Collect rainwater no matter where you live...

This DIY project is the best way to legally collect rainwater NO MATTER where you live. Get chlorine-free water, cut down on your water bills, and have enough for an emergency situation or to water your garden. Read More Here...
Mulching
Apply a light layer of weed-free straw or shredded leaves once the plants are 4–6 inches (10–15 cm) tall. This helps retain moisture and keeps the “shoulders” of the carrots covered. If the top of the carrot is exposed to sunlight, it will turn green and bitter. Keeping them tucked in with mulch prevents this.
Understanding the Flavor Profile: Terpenes vs. Sugars
The unique taste of a carrot comes from a tug-of-war between sugars (sucrose, glucose, and fructose) and terpenoids. Terpenoids provide the “earthy” or “piney” aroma. When a carrot is young, or grown in very hot weather, the terpene levels can be high, leading to a harsh, soapy, or bitter taste.
As the carrot matures and the weather cools, the plant stores more sugar in the root. This is why “winter carrots” are so legendary. When soil temperatures drop, the plant converts its starches into sugars as a natural antifreeze.
The Cold Advantage
To get the absolute best flavor out of your heirloom crop, leave them in the ground for at least two or three hard frosts. The difference in sweetness between a carrot pulled in September and one pulled in November is staggering. The cold weather suppresses terpene production and spikes the brix (sugar) levels.
Managing Challenges: Pests and Diseases
Even the best-prepared gardener will face hurdles. The most common adversary for the carrot grower is the Carrot Rust Fly.
Carrot Rust Fly
The adult fly lays eggs at the base of the carrot greens. The larvae then hatch and burrow into the root, leaving unsightly, rusty-colored tunnels. The best organic defense is a physical barrier. Cover your rows with a lightweight floating row cover from the day you plant until the day you harvest. If the fly cannot reach the soil near the plants, it cannot lay eggs.
Forking and Hairy Roots
If your carrots look like they have “legs” or are covered in fine white hairs, it is usually an environmental issue rather than a disease.
- Forking: Usually caused by obstacles (rocks), compacted soil, or the presence of fresh manure.
- Hairy Roots: Often a sign of inconsistent watering or excessive nitrogen. The plant is desperately trying to find moisture or processing too much fuel at once.
Harvesting and Long-Term Storage
Harvesting is the moment of truth. Use a garden fork to loosen the soil several inches away from the row before trying to pull the carrots. If you just grab the tops and tug, you will likely end up with a handful of greens and a broken root still stuck in the ground.
Storage Options
Heirloom carrots are excellent keepers if handled correctly. Do not wash them if you plan on long-term storage; the natural soil protects the skin from drying out.
| Method | Description | Expected Shelf Life |
|---|---|---|
| Refrigerator | Trim tops to 1 inch (2.5 cm), place in a sealed bag with a damp paper towel. | 1–2 months |
| Root Cellar | Pack unwashed roots in boxes of damp sand or sawdust at 33–40°F (0.5–4°C). | 4–6 months |
| Garden Clamping | Leave in the ground and cover with 12 inches (30 cm) of straw and a tarp. | Until the ground freezes solid |
The “Clamp” Method
In many climates, you can keep your carrots in the “outdoor refrigerator” of the garden bed. After the greens die back, pile a foot of straw or shredded leaves over the row and cover it with a weighted tarp. You can peel back the “blanket” and dig fresh, ice-cold carrots all winter long, provided the ground doesn’t freeze so hard you can’t get a shovel in.
Advanced Considerations: Seed Saving
If you fall in love with a particular heirloom, you might want to save your own seed. It is important to remember that carrots are biennials. They do not produce seed in their first year.
To save seed, you must overwinter the roots. In mild climates, they can stay in the ground. In harsh climates, you must dig them, store them in sand, and replant them the following spring. The carrot will send up a tall, beautiful white flower umbel that looks much like Queen Anne’s Lace.
Isolation Distances
Carrots will readily cross-pollinate with wild carrots (Queen Anne’s Lace). If you have the wild version growing in your ditches or nearby fields, your saved seed will likely produce woody, white, inedible roots the following year. To maintain purity, you need an isolation distance of at least 0.5 miles (800 meters), or you must use blossom bags or cages to exclude insects.
Practical Examples: A Seasonal Growth Scenario
Imagine you are in a temperate region with a last frost date of May 1st.
April 15th: You prepare a 4×8 foot raised bed. You sift the soil to remove rocks and mix in two bags of horticultural sand. You sow Scarlet Nantes in three rows, 12 inches apart. You cover the rows with a 2×4 board.
May 5th: You see tiny green sprouts under the board. You remove the board and water gently with a misting nozzle.
May 20th: The carrots are 2 inches (5 cm) tall. You spend an hour thinning them so there is a 3-inch (7.5 cm) gap between each plant. You use the thinnings in a salad.
July 15th: You begin “thiefing” a few carrots here and there—pulling every other one to eat as “baby carrots” while leaving the rest to size up.
October 15th: After two light frosts, you harvest the bulk of the crop. The flavor is remarkably sweet. You pack the unwashed roots into a bucket of damp sand and store them in the coolest corner of your garage.
Final Thoughts
The journey from a tiny, dust-like seed to a crisp, flavor-packed heirloom carrot is one of the most rewarding experiences in the garden. While the grocery store offers convenience, it can never offer the complex oils and sugars that come from soil you have personally tended. By choosing the right variety for your soil and mastering the art of germination, you can reclaim a flavor that most people have forgotten exists.
Remember that gardening is a conversation with the earth. If your first batch is crooked, your soil is telling you to dig deeper. If they are bitter, your climate is telling you to wait for the frost. Every harvest is a lesson that makes the next season even better.

Do you have some charcoal in your house right now? We call charcoal a “miracle leftover” for anyone who wants to be a little more self-sufficient and cut costs. That’s because it can help you with so many different things around the house and garden. You can even use it to make an energy-free fridge. Read More Here...
Experiment with different colors and shapes. Don’t be afraid to try a purple variety or a round Parisian market carrot. Once you start producing your own food with this level of care, the produce aisle will never look the same again. Happy planting, and may your roots always grow straight and sweet.