
The secret reason your home-grown onions never get bigger than a golf ball. Store-bought sets are convenient, but they are genetically programmed to bolt. If you want softball-sized onions that actually last, you need to start with professional seedlings.
I have spent many years leaning over my garden fence, chatting with neighbors who wonder why their onion patches look like a sea of green stalks but result in bulbs no bigger than a marble. It is a common frustration that usually stems from one simple misunderstanding of how an onion actually grows. Most folks head down to the local hardware store in April and pick up a mesh bag of those little dried-up bulbs called sets, thinking they are getting a head start on the season. In reality, they are often setting themselves up for a harvest of “bolters” and tiny, woody bulbs.
Onions are fascinating creatures with a biological clock more precise than a Swiss watch. They respond to the length of the day, the temperature of the soil, and the specific nutrients available in the first few weeks of their life. When you understand these triggers, you stop fighting against the plant and start working with its natural rhythm. It is the difference between struggling for a few small pickling onions and harvesting a bin full of heavy, storage-ready giants that will feed your family all winter long.
In this guide, I want to share the practical, hands-on lessons I have gathered from decades in the dirt. We are going to look at why those convenient sets often fail, how to choose the right variety for your specific latitude, and the exact feeding schedule that turns a spindly seedling into a massive bulb. Whether you are a beginner or have been gardening for years, there is always a little more to learn about the humble onion.
Growing Onions From Seeds Vs Sets
To understand why your onions might be underperforming, we have to look at the biology of the plant. Onions are biennials, which means they have a two-year life cycle. In the first year, they are supposed to grow from a tiny seed into a leafy plant that eventually stores energy in a bulb. In the second year, that bulb uses its stored energy to send up a flower stalk, produce seeds, and then die. This is the natural order of things, and it is the key to choosing your planting material.
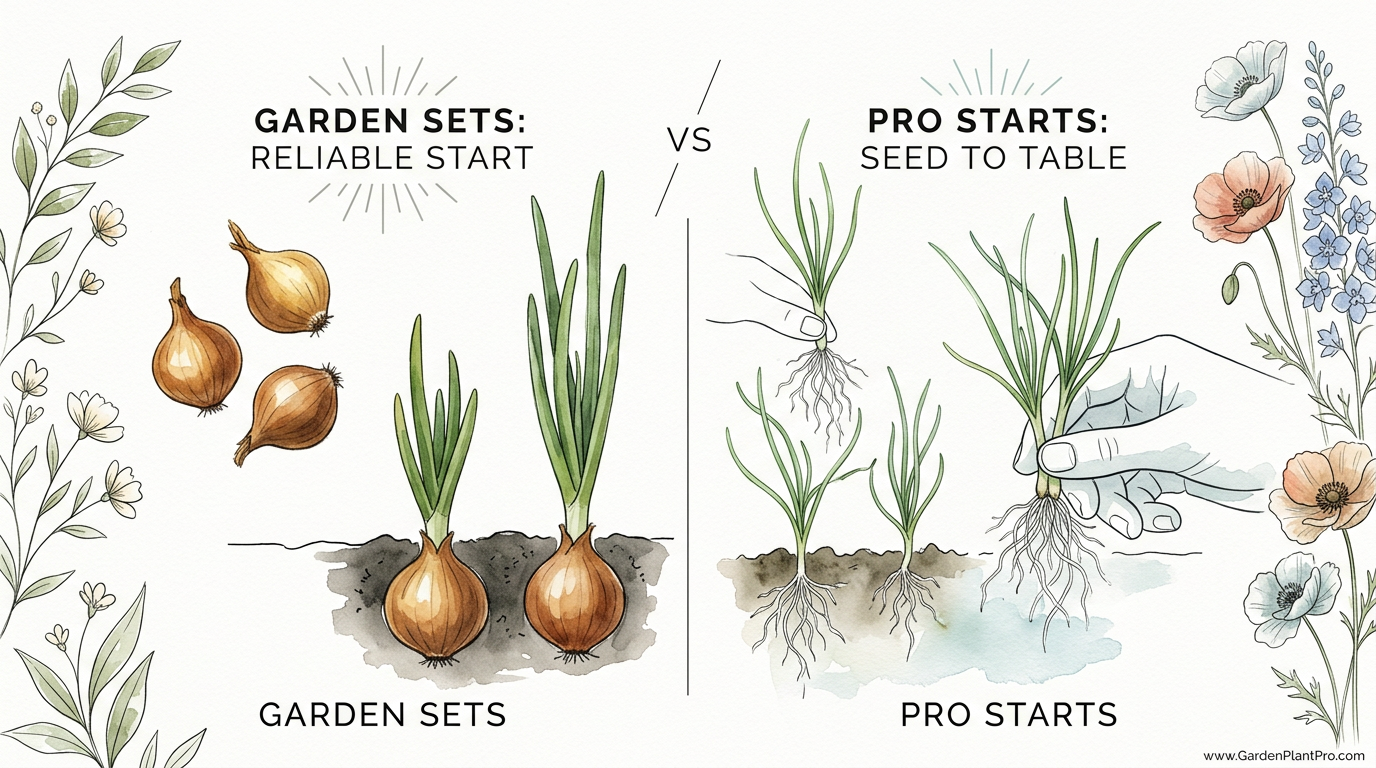
When you buy a bag of onion sets, you are actually buying onions that are already in their second year of life. These were grown from seed the previous year, harvested while they were still small (about 1.25 cm to 2 cm or 1/2 to 3/4 inch in diameter), and then dried and kept in cold storage. When you stick them back in the ground, the plant thinks it has finished its “rest” period and is ready to fulfill its destiny: making flowers and seeds. This process is called bolting. Once an onion bolts, the center of the bulb becomes hard and woody, and it will never get any bigger.
Seedlings or “transplants,” on the other hand, are young plants that have never gone through a dormant period. They are still in their first year of life. When you plant a professional seedling, its only goal is to grow as many leaves as possible before the summer sun triggers it to form a bulb. Because it is not trying to flower, it can put 100% of its energy into swelling that bulb. This is why seedlings almost always produce larger, better-storing onions than sets do. Sets have their place—they are great for quick green onions or “scallions”—but for real storage bulbs, seedlings are the gold standard.
Direct-sowing seeds is another option, but it requires a very long growing season and perfect soil conditions. For most of us in climates where the ground stays frozen until spring, starting with vigorous seedlings gives the plant the 10 to 12 weeks of cool-weather growth it needs to build a massive root system before the heat of summer arrives. Think of seedlings as the “sweet spot” between the difficulty of seeds and the genetic limitations of sets.
The Science of Day Length (Photoperiodism)
One of the biggest mistakes a gardener can make is buying an onion variety that is not suited for their location. Onions are categorized into three types based on how many hours of daylight they need to start forming a bulb: Short-Day, Intermediate-Day, and Long-Day. This is not just a suggestion; it is a biological requirement programmed into the DNA of the plant.
Short-Day onions are typically grown in the southern latitudes, roughly below the 35th parallel. These varieties start forming bulbs when the days reach 10 to 12 hours of light. If you try to grow these in the North, they will “see” 12 hours of light very early in the spring when the plants are still tiny. They will immediately stop growing leaves and start making a tiny bulb the size of a grape. You will get an early harvest, but you will never get a large onion.
Long-Day onions are for the northern states and Canada, generally above the 37th parallel. These require 14 to 16 hours of daylight to trigger bulbing. In the North, the summer days are very long, which gives the plant plenty of time to grow 10 or 12 massive leaves before the bulbing trigger kicks in. If you grow these in the South, the days may never get long enough to trigger the bulb at all, and you will end up with nothing but thick-necked green onions.
Intermediate-Day onions, sometimes called “Day-Neutral” onions, sit right in the middle. They usually need 12 to 14 hours of light. These are very versatile and can often be grown successfully in most parts of the country, except for the very far North or the deep South. When I am talking to a neighbor who is unsure of what to plant, I usually suggest a high-quality intermediate variety like “Candy” because it is so forgiving of different environments and soil types.
Recommended Varieties by Latitude
| Type | Daylight Required | Best Regions | Popular Varieties |
|---|---|---|---|
| Short-Day | 10–12 Hours | Southern Latitudes (e.g., Texas, Georgia) | Texas Legend, Red Creole, Vidalia |
| Intermediate-Day | 12–14 Hours | Central Latitudes (e.g., Kansas, Virginia) | Candy, Super Star, Red Candy Apple |
| Long-Day | 14–16 Hours | Northern Latitudes (e.g., Oregon, Maine) | Walla Walla, Copra, Redwing |
How It Works: The Leaf-to-Bulb Connection
If you want to grow a giant onion, you have to focus on the leaves first. This is a secret that many commercial growers use, but it is rarely explained to home gardeners. Every leaf on an onion plant represents one layer of the bulb. If your plant has only five small leaves when it starts to bulb, your onion will only have five layers and will be quite small. However, if you can get that plant to grow 12 or 15 large, healthy leaves before the day-length trigger hits, those leaves will transfer all their stored energy into the base of the plant, creating a massive bulb.
Nitrogen is the fuel for leaf growth. In the early stages of the onion’s life, from the moment it hits the ground until the bulb begins to swell, the plant is a nitrogen hog. You want to provide a consistent supply of nitrogen to keep those leaves growing fast. Once the bulb starts to swell—you will notice the soil cracking around the base of the plant—you should stop the high-nitrogen feeding. Too much nitrogen late in the season can actually lead to “thick necks” and poor storage life because the plant keeps trying to grow leaves instead of curing the bulb.
Sulfur also plays a hidden role in the garden. While it does not necessarily make the onion bigger, it is responsible for the “heat” and pungency. Onions grown in high-sulfur soils will be much sharper and have a longer shelf life. If you prefer those famous “sweet” onions, you actually want to grow them in soil with lower sulfur levels. This is why certain regions, like Vidalia, Georgia, are famous for sweet onions; their soil is naturally low in sulfur compounds.
How to Do It: Step-by-Step Planting
The first step to onion success is preparing the bed. Onions have notoriously shallow and weak root systems, usually extending only about 10 cm to 30 cm (4 to 12 inches) deep. They do not like to fight through heavy clay or compacted soil. I always recommend a “loose and fluffy” bed. Incorporating well-rotted compost or aged manure a few weeks before planting provides the organic matter needed to keep the soil friable and hold onto moisture.
When you receive your professional seedlings, they might look like dried-out little pieces of grass. Do not be discouraged; they are incredibly resilient. You should plant them as soon as the soil can be worked in the spring and temperatures are consistently above -6°C (20°F). Onions are remarkably cold-hardy, and that early cool weather is exactly what they need to establish their roots before the summer heat arrives.
- Spacing: Plant seedlings about 10 cm (4 inches) apart if you want large bulbs. If you want huge, exhibition-sized onions, go for 15 cm (6 inches). If you plant them too close, they will compete for light and nutrients, resulting in smaller onions.
- Depth: This is a common pitfall. Do not bury them deep! You only want to plant the seedlings about 2.5 cm (1 inch) deep. If you bury the white part of the stem too deep, the bulb will be restricted by the soil and may come out elongated or misshapen.
- Watering: Because of their shallow roots, onions need consistent moisture. They cannot go looking for water deep in the subsoil. A good rule of thumb is about 2.5 cm (1 inch) of water per week, either from rain or irrigation. Mulching with a light layer of straw or grass clippings can help keep the moisture in the top few inches of soil.
Practical Tips for Ongoing Care
Weed management is perhaps the most important chore in an onion patch. Because onions have narrow, upright leaves, they do not provide much shade to the soil. This means weeds have plenty of sunlight to germinate and grow. Because the onion’s roots are so shallow, those weeds will quickly steal the water and nutrients meant for your bulbs. I spend a few minutes every couple of days “tickling” the soil with a hand hoe to keep weeds from ever getting a foothold.
When it comes to feeding, I prefer a “spoon-feeding” approach. Rather than dumping a massive amount of fertilizer all at once, I give them a light dose of a high-nitrogen fertilizer (like a 21-0-0 or blood meal) every three weeks. Sprinkle it about 7 cm to 10 cm (3 to 4 inches) away from the plants so you do not burn the tender stems, and then water it in well. This consistent supply keeps the leaf production at its peak right up until the bulbing process begins.
DIY PROJECT: Collect rainwater no matter where you live...

This DIY project is the best way to legally collect rainwater NO MATTER where you live. Get chlorine-free water, cut down on your water bills, and have enough for an emergency situation or to water your garden. Read More Here...
Another trick I have learned is to watch the base of the plant. As the onion grows, the bulb will naturally push itself up out of the soil. This is a good thing! Do not “hill” the soil up around the bulbs like you would with potatoes. The bulb needs to be able to expand freely. If the soil is too heavy or piled too high, it acts like a corset, preventing the onion from reaching its full potential diameter.
Challenges and Common Mistakes
The biggest mistake I see is the “top-bending” myth. You might have heard an old-timer say that you should bend the green tops over to “force the energy into the bulb.” This is actually counterproductive. The leaves are the factory that creates the sugars and energy for the bulb. When you break those leaves, you are shutting down the factory. The onion will stop growing immediately. Only bend the tops if you are trying to force a harvest early because of an incoming frost; otherwise, let the tops fall over on their own when the plant is naturally finished.
Another challenge is the “thick neck” onion. Sometimes an onion stays green and keeps growing leaves long after its neighbors have matured. These onions usually have a very thick, fleshy neck that never dries down properly. Thick necks are often caused by late-season nitrogen spikes or uneven watering. These onions will not store well and should be eaten immediately, as the moisture trapped in that thick neck will lead to rot within a few weeks of harvest.
Pests can also be a headache. Onion thrips are tiny, needle-like insects that suck the juice out of the leaves, leaving behind silvery streaks. If the infestation is bad enough, the leaves will wither and die, stunting the bulb. I find that a strong blast of water from the hose can knock them off, or you can use a light application of neem oil if they become a serious problem. Keeping the area around your garden free of weeds and tall grass also helps, as thrips love to hide in those wild areas during the winter.
Harvesting and Curing for Long-Term Storage
Knowing when to harvest is an art form. You want to wait until about 50% to 75% of the tops have naturally fallen over. Once this happens, the plant has stopped growing and the neck is starting to “pinch” shut. I like to use a garden fork to gently lift the bulbs out of the ground. Do not pull them by the tops, as this can damage the connection between the leaves and the bulb, creating an entry point for bacteria.
Curing is the process of drying the outer skins and the neck so the onion becomes dormant. This is the difference between an onion that lasts two weeks and one that lasts ten months. After lifting the onions, I leave them on top of the soil for a day or two to let the sun dry the roots, provided there is no rain in the forecast. Then, I move them to a shaded, well-ventilated area—like a porch or a garage—where they can sit in a single layer for two to three weeks.
You know an onion is cured when the outer skin is papery and rustles like autumn leaves, and the neck is completely shrunken and dry all the way through. Once they are fully cured, you can trim the roots to about 0.5 cm (1/4 inch) and cut the tops off about 2.5 cm (1 inch) above the bulb. Store them in mesh bags or crates in a cool, dark, and dry place. Ideal storage temperatures are between 0°C and 4°C (32°F and 40°F), but the most important thing is to keep them away from moisture and light, which will cause them to sprout.
Benefits of Professional Seedlings over Sets
If you are still on the fence about whether to switch from sets to seedlings, consider the practical benefits I have seen in my own garden year after year. While sets are certainly cheaper and easier to find at the big-box stores, the “cost per pound” of your harvest is much lower with seedlings because the resulting bulbs are so much larger and higher in quality.
- Uniformity: Seedlings tend to grow at a much more consistent rate. With sets, you often get some that bolt, some that stay small, and some that rot. Seedlings provide a much more even harvest.
- Variety Choice: When you buy sets, you are usually limited to “Yellow,” “Red,” or “White.” When you buy professional seedlings, you can choose specific varieties bred for storage, sweetness, or disease resistance.
- Storage Life: Because seedlings are less likely to bolt or develop thick necks, the resulting bulbs are structurally sounder. A well-grown seedling onion like “Copra” or “Patterson” can easily last until the following spring in a cool cellar.
- Disease Resistance: Many professional-grade seedlings are treated or bred to resist common soil-borne pathogens that can plague older, dormant sets.
Advanced Considerations: Soil Microbiology
For the serious gardener who wants to go beyond the basics, it is worth looking at what is happening under the surface. Onions have a very symbiotic relationship with arbuscular mycorrhizal fungi. Because onion roots are so poor at scavenging for phosphorus—a nutrient essential for root and bulb development—they rely on these fungi to extend their reach in the soil. The fungi “trade” phosphorus to the onion in exchange for sugars.
You can encourage this relationship by avoiding heavy-duty synthetic fertilizers with high phosphorus numbers (the middle number on the bag), as too much easy-access phosphorus will make the plant “lazy” and it won’t form the fungal bond. Instead, use a balanced organic approach and avoid over-tilling, which breaks up the delicate fungal networks. I have noticed that beds treated with high-quality compost consistently produce larger onions because the biological health of the soil is supporting the plant’s limited root system.
Crop rotation is also vital. Never grow onions in the same spot two years in a row. A four-year rotation is ideal. This prevents the buildup of “Onion White Rot” or “Pink Root,” two fungal diseases that can live in the soil for years and are nearly impossible to get rid of once they take hold. If you notice your onions suddenly wilting or the roots turning a strange pink color, you likely have a soil-borne issue and need to move your patch immediately.
Final Thoughts
Growing onions that actually fill up your hand is not about luck; it is about understanding the clock that ticks inside every bulb. By skipping the hardware store sets and starting with professional seedlings, you are giving your garden the best possible foundation. You are avoiding the genetic trap of bolting and giving the plant the full season it needs to build those all-important layers.
Remember to focus on the leaves in the spring. Feed them, water them, and keep the weeds at bay. Those leaves are the blueprint for the bulb you will be eating in December. Once you see the soil start to crack and those bulbs start to swell, you will know that all that early-season care was worth it. There is a deep satisfaction in pulling a heavy, firm onion from the earth, knowing it grew into a champion because you gave it exactly what it needed.
I hope this encourages you to try something different this year. Gardening is a lifelong experiment, and the humble onion is one of the best teachers we have. If you can master the onion, you can master just about anything in the vegetable patch. Take care of your soil, watch the sun, and enjoy the harvest. Your future self, standing in a kitchen full of the aroma of homegrown onions, will definitely thank you.