
That massive plant taking up half your garden bed isn’t a problem; it’s a free fertilizer factory. Don’t let those giant leaves go to waste. Elecampane is a powerhouse of biomass. Use the chop and drop method to turn those sun-catching leaves into nutrient-rich mulch for your entire garden.
I’ve spent forty years watching folks pull out perfectly good plants because they grew “too big” or “too fast.” It breaks my heart to see a gardener haul a wheelbarrow full of Elecampane to the green waste bin when their tomatoes are sitting right there, hungry for the very nutrients that plant just pulled out of the deep soil. We often get caught up in the idea of a tidy garden, but nature isn’t tidy; it’s cyclical.
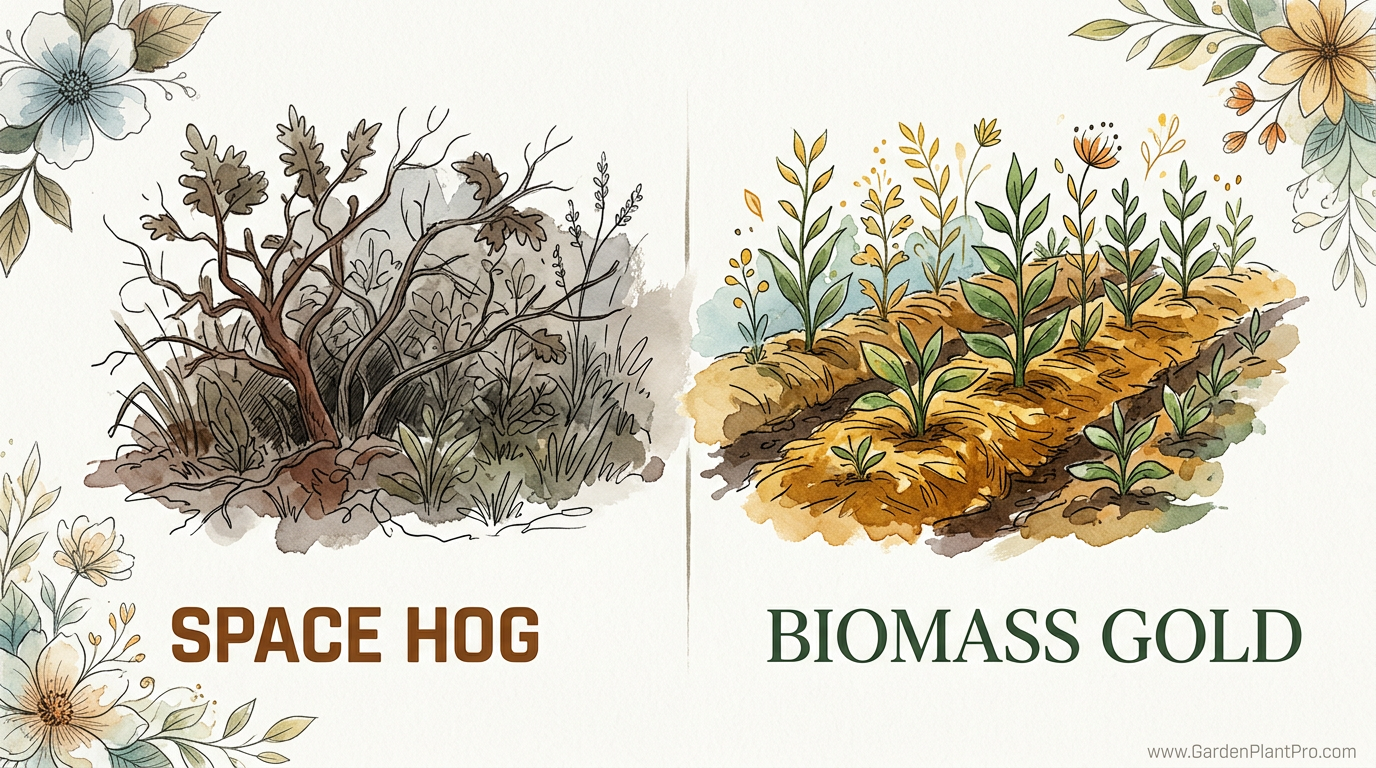
If you have a corner of your yard that’s damp or a bit of heavy clay that nothing else seems to like, that’s where you put your Elecampane. It’s a plant that works while you sleep. While your lettuce and carrots are fussing over the top few inches of topsoil, this giant is sending a taproot down through the hardpan, mining for gold. When you understand how to use that growth, you stop seeing a “space hog” and start seeing a “biomass gold” mine.
Elecampane Mulch Benefits
Elecampane (Inula helenium) is what we call a dynamic accumulator. That’s a fancy way of saying it has a long, sturdy taproot that reaches deep into the subsoil—places where standard garden vegetables can’t go—and pulls up minerals like potassium, phosphorus, and calcium. It stores these in its massive, felt-like leaves. When you chop those leaves and lay them on the surface, you’re essentially “pumping” deep-earth minerals onto your garden beds.
The sheer volume of biomass is the first thing you’ll notice. A single mature Elecampane can produce leaves that are 2 to 3 feet (60–90 cm) long and nearly a foot (30 cm) wide. In a good year, a single plant can provide several heavy “crops” of mulch. Research suggests that certain Asteraceae family members, like Elecampane, can yield between 9 and 13 tonnes of dry aboveground biomass per hectare (roughly 4–6 tons per acre). For a backyard gardener, that translates to a lot of free organic matter.
Using these leaves as mulch does more than just feed the soil; it protects it. Those giant leaves create a thick, heavy carpet that suppresses weeds better than almost any store-bought straw. Because the leaves are wide and flat, they lock in moisture. In the heat of July, when the sun is trying to bake your soil into a brick, a layer of Elecampane mulch keeps the ground underneath cool and damp. I’ve often peeled back a week-old leaf to find the soil crawling with earthworms that would have otherwise retreated deep underground to escape the heat.
Finally, there’s the benefit of soil structure. As these leaves break down—and they break down surprisingly fast because of their high nitrogen and moisture content—they feed the fungal networks in your soil. You’re not just adding “dirt”; you’re adding life. The carbon in the stems and the minerals in the leaves act as a slow-release fertilizer that builds tilth over time, making heavy clay more friable and sandy soil more water-retentive.
The Chop and Drop Method: Step-by-Step
The “chop and drop” system is exactly what it sounds like, but there’s a bit of an art to the timing. You want to harvest the biomass when the plant is at its peak energy but before it has spent all that energy on making seeds. If you wait until the stalks are 8 feet (2.4 m) tall and the yellow flowers have turned to fluff, the leaves will be tougher and less nutrient-dense.
Step 1: Timing the First Cut
In late spring or early summer, once the plant has established a large rosette of leaves but before the central flower stalk begins to skyrocket, take your first harvest. Use a sharp pair of garden shears or a clean scythe. Cut the outer leaves first, leaving the small, central growing point intact. If the plant is very vigorous, you can take up to 70% of the foliage in one go. I usually wait until the leaves are at least 18 inches (45 cm) long.
Step 2: The Harvest Technique
Cut the leaves near the base of the stem. You don’t need to be surgical about it; Elecampane is tough. However, try to avoid damaging the crown of the plant where the new growth emerges. If you’re dealing with a second-year plant that’s trying to flower, you can also chop the flower stalk itself. These stalks are pithy and full of moisture, and they break down beautifully if you snap them into 6-inch (15 cm) sections.
Step 3: Placement
Carry your bundle over to your “heavy feeders”—think tomatoes, peppers, squash, or young fruit trees. Lay the leaves flat on the soil surface, slightly overlapping them like shingles on a roof. You want a layer that is at least 2 to 3 inches (5–7 cm) thick. Within a few days, the leaves will wilt and form a tight, dark mat against the soil.
Step 4: Managing the Regrowth
Elecampane is a perennial, and it’s a fast mover. Within three to four weeks of your first cut, the plant will have pushed out a whole new set of leaves. You can often get three good “chops” in a single growing season. Stop harvesting about six weeks before your expected first frost to allow the plant to store enough energy in its roots to survive the winter.
Cultivating Your Fertilizer Factory
To get the most biomass, you need to treat your Elecampane like a crop, not just a weed in the corner. While it will grow almost anywhere, it thrives in moist, nitrogen-rich environments. It loves “wet feet,” so if you have a spot near a downspout or a low area of the yard that stays boggy, that’s its happy place.
When planting, give it space. Remember the “space hog” reputation? A mature Elecampane can reach 3 feet (90 cm) in width and 6 to 8 feet (1.8–2.4 m) in height when in bloom. Space your plants at least 3 feet (90 cm) apart. If you crowd them, you’ll get smaller leaves and more issues with airflow, which can lead to powdery mildew in the late summer.
Soil pH isn’t a huge deal for this plant, as it tolerates a range from 5.5 to 7.5, but it prefers a slightly acidic to neutral loam. If your soil is particularly poor, top-dress the area with a bit of aged manure or compost in the early spring. Once the plant is established—usually by its second year—it won’t need much from you other than an occasional deep watering during extreme droughts.
Elecampane vs. Comfrey: A Comparison
Most permaculture folks talk about Comfrey as the king of biomass, and they aren’t wrong. But Elecampane is a serious contender that offers some unique advantages. Let’s look at how they stack up for the average backyard gardener.
| Feature | Elecampane | Comfrey (Bocking 14) |
|---|---|---|
| Max Height | 6–8 feet (1.8–2.4 m) | 2–3 feet (0.6–0.9 m) |
| Leaf Size | Massive (2–3 ft) | Medium (1–1.5 ft) |
| Biomass Quality | Higher carbon in stalks | Higher nitrogen in leaves |
| Invasiveness | Seeds can spread; easy to dig | Sterile seeds; impossible to dig |
| Best Use | Fruit tree guilds, heavy mulch | Liquid tea, vegetable beds |
The big difference I’ve noticed in my years of gardening is the root behavior. If you decide you don’t want Elecampane in a certain spot, you can dig up the root and move it. It’s a thick, clumping root system. Comfrey, on the other hand, is a lifetime commitment. If you leave a tiny piece of comfrey root behind, you’ll have a new plant. Elecampane offers the “biomass gold” without the “forever” contract, provided you deadhead the flowers before they go to seed.
Challenges and Common Mistakes
One of the biggest mistakes gardeners make with Elecampane is letting it go to seed. Those beautiful yellow sunflowers are a delight for bees, but they produce hundreds of seeds that catch the wind. If you aren’t careful, you’ll have Elecampane popping up in your gravel driveway, your gutters, and your neighbor’s prized rose bed. If you’re growing it for mulch, deadhead the flowers as soon as they start to fade.
Another pitfall is “chopping too low.” While the plant is resilient, cutting into the crown (the very base where the leaves emerge from the root) can invite rot, especially in wet climates. Always leave an inch or two (2–5 cm) of stem above the ground. This protects the growing point and ensures the plant bounces back quickly for your next harvest.
DIY PROJECT: Collect rainwater no matter where you live...

This DIY project is the best way to legally collect rainwater NO MATTER where you live. Get chlorine-free water, cut down on your water bills, and have enough for an emergency situation or to water your garden. Read More Here...
Finally, watch out for powdery mildew. Because Elecampane has such large, slightly fuzzy leaves, they can act like a sponge for fungal spores if the air is stagnant. If you see a white, dusty coating on the leaves in August, don’t panic. This is often just a sign of the season’s end. However, I wouldn’t use heavily mildewed leaves as mulch around sensitive plants like cucumbers or squash. Instead, toss those into the center of a hot compost pile where the heat can kill the spores.
Practical Scenarios: Where to Use the Mulch
I find that Elecampane mulch is best suited for what I call “The Hungry Three”: Fruit trees, Tomatoes, and Pumpkins. These are plants that need a steady supply of nutrients and consistent moisture to thrive.
In a fruit tree guild, I plant the Elecampane right at the “drip line”—the edge of the tree’s canopy. Twice a year, I walk around the tree, chop the Elecampane leaves, and drop them right there. This creates a self-fertilizing system. The tree’s roots and the Elecampane’s roots occupy different depths, so they aren’t competing; they’re cooperating. The mulch protects the tree’s shallow feeder roots and provides a slow drip of potassium, which is essential for fruit production.
For tomatoes, I use the leaves as a bottom-layer mulch. I lay down the Elecampane leaves and then cover them with a light layer of straw. The Elecampane provides the nutrient “punch,” while the straw provides a clean surface that prevents soil-borne diseases from splashing up onto the tomato leaves during rain. This “sandwich” mulch is my secret weapon for 2-pound (0.9 kg) heirlooms.
Advanced Considerations: Soil Biology
If you really want to get technical, the value of Elecampane mulch isn’t just in the minerals; it’s in the inulin. Elecampane roots and leaves are rich in inulin, a type of prebiotic fiber. When this breaks down in the soil, it acts as a high-quality food source for beneficial soil bacteria. You aren’t just feeding the plants; you’re cultivating a microbial community that makes nutrients more available over the long term.
Serious practitioners should also consider the Carbon-to-Nitrogen (C:N) ratio. The leaves are relatively high in nitrogen (green biomass), while the mature stalks are high in carbon (brown biomass). By mixing the two during your “chop,” you create a balanced mulch that won’t “tie up” nitrogen in the soil. If you only use the thick, woody stalks late in the season, consider sprinkling a little organic nitrogen source (like diluted urine or fish emulsion) over them to help the microbes break down the carbon.
Final Thoughts
Gardening isn’t about fighting against the “space hogs”; it’s about learning how to use their energy. Elecampane is a giant, yes, but it’s a generous one. It spends its days reaching deep into the earth to bring up gifts for the rest of your garden. When you start using the chop and drop method, you stop being a consumer of store-bought fertilizers and start being a producer in your own backyard ecosystem.
Don’t be afraid to let a few of these monsters take up residence in the damp corners of your yard. Once you see the way your soil changes—how it becomes darker, richer, and more alive—you’ll wonder how you ever gardened without it. Experiment with the timing of your cuts, see which of your plants respond best to the mulch, and most importantly, enjoy the process of closing the loop in your garden.
Next time you’re standing over a massive Elecampane with a pair of shears, remember: you aren’t just weeding. You’re harvesting gold. Your tomatoes will thank you, your earthworms will thank you, and your wallet will thank you too.