
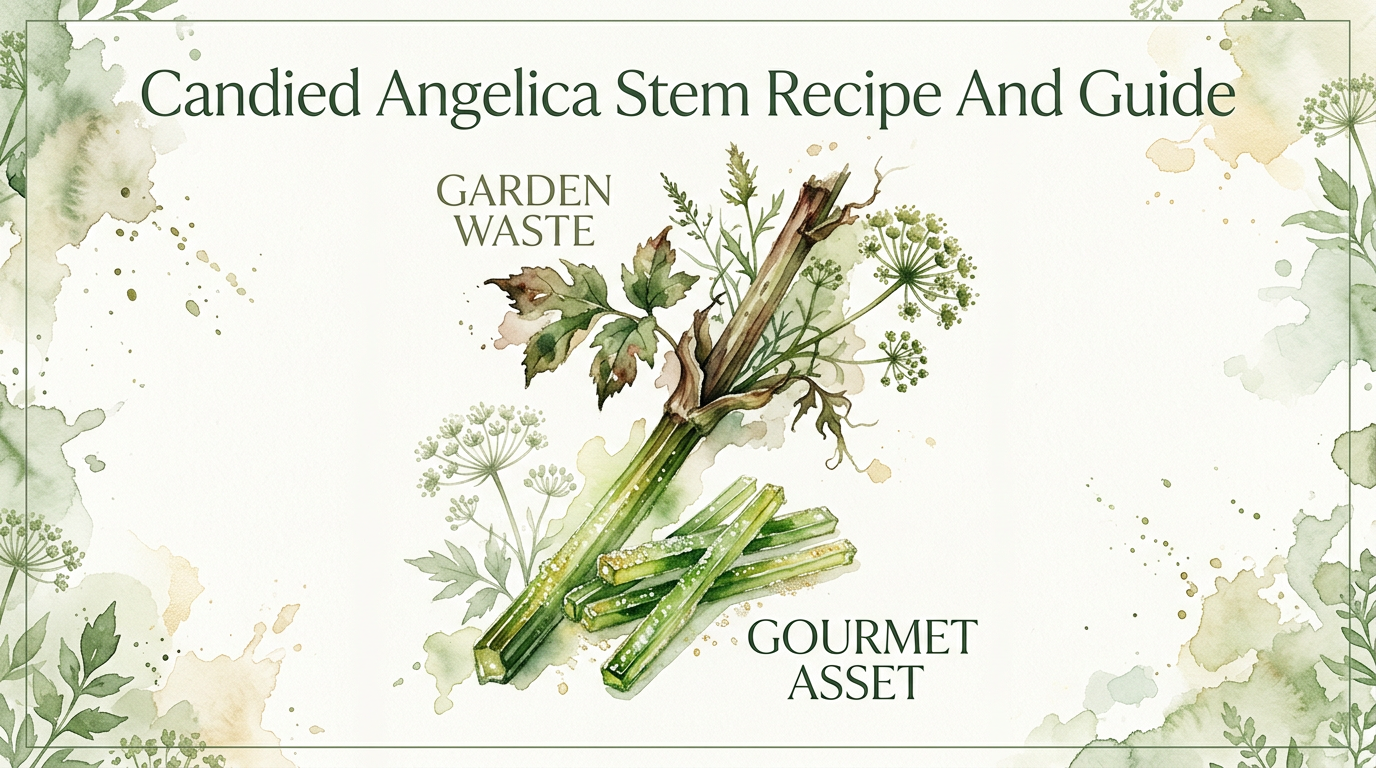
That ‘overgrown’ stalk you were about to throw away is actually a hidden delicacy found in the world’s finest patisseries. Most gardeners see the thick, hollow stems of Angelica as a cleanup chore once the season ends. But these ‘scraps’ are the secret to the most sought-after garnish in French baking. Here is how to turn garden debris into culinary gold.
If you have ever stood in your garden looking at a towering, architectural plant that seems more like a structural beam than an herb, you have likely met Angelica archangelica. It is a giant among the carrot family, often reaching heights of 6 to 8 feet (1.8 to 2.4 meters) with a presence that commands respect. Most of us grow it for the drama it adds to the back of a border, but for centuries, those thick, ribbed stems have been harvested and transformed into something ethereal.
Turning a fibrous, green stalk into a translucent, emerald-colored candy is a process steeped in tradition. It is a slow craft that demands patience, but the result is a flavor that cannot be replicated by anything else in the pantry. It is musk-like, slightly citrusy, and deeply herbal all at once. When you share a jar of home-candied angelica with a neighbor, you are not just giving them a sweet; you are handing over a piece of horticultural history that has nearly been forgotten in the age of pre-packaged goods.
In the sections below, I will walk you through everything from the careful identification of the plant to the multi-day syrup baths required to reach that perfect “glacé” finish. Whether you are a serious baker or just a gardener who hates to see a good resource go to waste, mastering the art of the candied angelica stem is a rewarding journey from the soil to the soul.
The Heritage of the “Herb of the Angels”
The name Angelica is not just a poetic flourish. Legend has it that the Archangel Michael revealed the plant to a monk as a cure for the plague. While modern medicine might disagree with that specific use, the plant’s association with protection and healing has persisted for over a millennium. Historically, it bloomed around the feast day of the Archangel in May, cementing its status as a divine gift to the spring garden.
The true heart of the candying tradition lies in Niort, France. Since the 1700s, the “Angélique de Niort” has been a protected specialty of the region. Nuns in the 18th century perfected the art of preserving the stalks in heavy sugar, creating a product so vibrant that it was once the centerpiece of Royal banquets. Today, finding authentic candied angelica is increasingly difficult, as the labor-intensive process makes it too expensive for most commercial supermarkets. This is why the home gardener has a distinct advantage; we have the one ingredient money can’t buy—time.
Growing your own angelica also ensures you are using the correct variety. While Angelica sylvestris grows wild in many damp meadows, it lacks the deep, musky perfume of the garden variety, Angelica archangelica. By cultivating it yourself, you control the soil quality and the exact moment of harvest, which is the most critical factor in a successful batch of candy.
Growing Angelica for the Kitchen
If you want to produce the best stems for candying, you have to understand how this plant lives. Angelica is a biennial, which means it has a two-year life cycle. In the first year, it produces a lush mound of green leaves. In the second year, it sends up those magnificent, hollow flower stalks, sets seed, and then says its goodbyes. For the purpose of candying, we are looking for the growth in the second spring, just before the flower heads open.
Success starts with the right location. Angelica loves a spot that mimics a cool, damp riverbank. It prefers partial shade, especially in regions with hot summers, and soil that never truly dries out. I always recommend digging in a generous amount of well-rotted compost or leaf mold before planting. This helps the soil hold onto that precious moisture and provides the nitrogen the plant needs to push out those thick, succulent stems.
One peculiarity of angelica is that the seeds need light to germinate. If you are starting from seed, simply press them into the surface of the soil and keep them moist. They lose their viability very quickly, so “fresh is best” is the golden rule here. If you can’t get fresh seed, you might have better luck buying a young plant from a local herb nursery. Once established, it will often self-seed, giving you a perpetual supply of stems for your kitchen adventures.
Candied Angelica Stem Recipe And Guide
Candied angelica is a confectionery product made by replacing the natural water content of the angelica stalk with a concentrated sugar syrup through a process of osmosis. This results in a stem that is translucent, vibrant green, and has a chewy, supple texture. Unlike a simple boiled sweet, candied angelica retains the complex essential oils of the plant, offering a flavor profile that ranges from pine and juniper to sweet celery and citrus.
In the culinary world, these stems are most famously used as a garnish for the classic English trifle or the French Charentaise cake. Because the color is so naturally striking, a small sliver can make a plain sponge look like it came from a high-end patisserie. Beyond decoration, chopped candied angelica is a wonderful addition to fruitcakes, hot cross buns, or even home-churned ice cream. It pairs exceptionally well with rhubarb, as the herb’s natural chemistry helps neutralize the sharp acidity of the fruit while enhancing its sweetness.
The process of candying is not difficult, but it is a “slow food” project. You cannot rush the sugar into the plant cells; if the syrup is too thick too fast, the stems will shrivel and toughen. If it is too thin, they will ferment. Following a traditional multi-day schedule ensures the sugar penetrates the fibers evenly, preserving the internal structure of the stem and creating that sought-after “stained glass” appearance.
Essential Equipment and Ingredients
To begin your candying journey, you will need a few basic kitchen tools and a healthy supply of sugar. This is one of the few recipes where I suggest using plain white granulated sugar. While I love the depth of raw sugars, they can muddy the brilliant green color of the angelica, which is half the charm of the final product.
- Fresh Angelica Stems: Approximately 1 lb (450g) of young, green stalks.
- Granulated White Sugar: You will need at least 2 lbs (900g) for the syrup and extra for dusting.
- Water: For the initial blanching and the syrup.
- Baking Soda (Optional): A half-teaspoon (2.5g) added to the blanching water helps preserve the emerald green color.
- Stainless Steel Pot: Avoid aluminum, as it can react with the plant’s natural acids.
- Cooling Rack: For drying the finished stems.
- Paring Knife or Peeler: For removing the fibrous outer skin.
How the Process Works: Step-by-Step
The secret to a successful candy is the “syrup run.” This involves boiling the stems in a syrup, letting them rest, and then increasing the sugar concentration each subsequent day. This slow transition allows the plant’s cell walls to remain intact while they are flooded with sugar.
Step 1: The Harvest
Timing is everything. You want to harvest the stems in late spring or early summer (typically May or June in the Northern Hemisphere). Look for stalks that are about the thickness of a thumb. They should be bright green and supple. If the plant has already bloomed and the stems have turned purple or feel woody, they will be too stringy to eat. Use a sharp garden knife to cut the side shoots or the main stem, leaving the root in place if you want the plant to try and send up more growth.
Step 2: Preparation and Blanching
Wash the stems thoroughly and remove any leaves. Cut the stalks into manageable lengths, usually 4 to 6 inches (10 to 15 cm). Bring a large pot of water to a boil and add your pinch of baking soda. Plunge the stems into the boiling water and cook for 4 to 8 minutes. You are looking for them to be tender enough to pierce with a fork but not mushy. Immediately move them to an ice bath to stop the cooking and lock in the color.
Step 3: Peeling the Fibers
Once cooled, use a small paring knife or even your fingernail to catch the edge of the skin. Much like celery, the outer layer of angelica is very fibrous. Peel away this skin to reveal the bright, translucent flesh underneath. If the stems were blanched correctly, the skin should slip off with very little resistance. This step is vital; if you leave the skin on, your candy will be tough and “thread-y.”
Step 4: The First Syrup Bath
Prepare a simple syrup using a 1:1 ratio of sugar to water (e.g., 2 cups sugar to 2 cups water). Bring it to a boil, then pour it over your prepared stems in a heat-proof bowl. Ensure they are completely submerged; you may need to weight them down with a small plate. Let this sit for 24 hours at room temperature. The sugar will begin its work, slowly drawing out the moisture from the stems.
DIY PROJECT: Collect rainwater no matter where you live...

This DIY project is the best way to legally collect rainwater NO MATTER where you live. Get chlorine-free water, cut down on your water bills, and have enough for an emergency situation or to water your garden. Read More Here...
Step 5: Increasing the Concentration
On the second day, drain the syrup into a pot, leaving the stems in the bowl. Add another half-cup (100g) of sugar to the liquid and bring it back to a boil. Pour the now-heavier syrup back over the stems and wait another 24 hours. Repeat this process for at least 3 to 5 days. By the final day, the syrup should be quite thick, and the angelica should look like green gemstones.
Step 6: The Final Boil and Drying
On the final day, bring the syrup and the stems to a boil together for 2 to 3 minutes. Drain the stems (save that syrup! It’s incredible in cocktails). Place the stalks on a wire rack to dry. If you want “crystallized” angelica, roll them in extra-fine sugar while they are still sticky. If you want “glacé” angelica, leave them plain. Let them dry in a warm, airy spot for 24 to 48 hours until they are no longer tacky to the touch.
Benefits of Making Your Own
Making your own candied angelica offers practical advantages that go beyond the simple satisfaction of DIY. Most commercial angelica is treated with artificial dyes (like Blue 1 and Yellow 5) to achieve that neon green look. When you make it at home, the color comes from the plant’s own chlorophyll, stabilized by the sugar and a touch of baking soda. The difference in appearance is subtle but far more natural and appetizing.
There is also the matter of freshness. Because essential oils dissipate over time, store-bought angelica can often taste like little more than sugary cardboard. Home-cured stems retain that characteristic “angelica” punch—that unique blend of musk and citrus that makes people ask, “What is that wonderful flavor?” Additionally, you can control the texture, choosing to leave them slightly softer for inclusion in batters or drying them longer for a firmer garnish.
Safety: Knowing Your Friend from a Foe
I cannot stress this enough: accurate identification is a matter of life and death. Angelica belongs to the Apiaceae family, which includes delicious things like carrots and parsley, but also includes some of the most lethally poisonous plants on the planet. Specifically, Poison Hemlock (Conium maculatum) and Water Hemlock (Cicuta spp.) look remarkably similar to angelica.
To avoid a tragic mistake, never harvest wild plants unless you are 100% certain of their identity. If you are growing it in your garden from a reputable seed source, you are generally safe, but it is still good to know the markers. Angelica has thick, smooth stems that may be purplish at the base but do not have the distinct, angry purple splotches of Poison Hemlock. Furthermore, angelica has a pleasant, musky, or “sweet celery” smell when crushed, whereas Poison Hemlock smells foul and “mousy.” If the plant you are looking at has lacy, fern-like leaves and purple spots on the stem, stay far away.
| Feature | Garden Angelica | Poison Hemlock |
|---|---|---|
| Stem | Smooth, ribbed, hollow; pale green to solid purple base. | Smooth, hollow; covered in distinct purple spots/splotches. |
| Leaves | Broad, divided into large leaflets (like celery). | Very finely divided, lacy (like parsley or ferns). |
| Smell | Pleasant, aromatic, musky, sweet. | Unpleasant, musty, mousy, or like wet fur. |
| Flower | Globe-like, rounded umbels; greenish-white. | Flatter, umbrella-shaped umbels; bright white. |
Challenges and Common Mistakes
The most common frustration I hear from neighbors trying this for the first time is that their stems ended up “woody.” This almost always happens because the harvest was too late. Once the plant begins to focus its energy on the flower head, the stems develop tough lignin fibers that no amount of boiling will soften. If you can see the individual flower buds starting to expand, you are at the very end of your harvest window.
Another pitfall is mold during the syrup phase. This usually occurs if the sugar concentration is too low or if the stems are not fully submerged. Sugar acts as a preservative, but only at high densities. If you notice any bubbles or a sour smell during the multi-day soak, the syrup has started to ferment. To prevent this, keep your bowl in a cool place (or even the refrigerator if your kitchen is very warm) and ensure the sugar ratios are followed strictly.
Practical Tips for Best Results
To elevate your candied angelica from good to professional grade, consider these small adjustments. First, try using the “leaf stalks” (petioles) rather than the main central trunk. These are often more tender and have a better surface-to-volume ratio for sugar penetration. They also tend to be a more uniform green throughout.
When it comes to storage, do not just toss them in a bag. Store your finished, dried stems in an airtight glass jar in a cool, dark cupboard. If they are dried properly, they will keep for up to two years. If you find they have become too hard over time, you can briefly steam them for a minute to restore their suppleness before using them in a recipe. Also, remember that the leftover syrup is a goldmine. I use it to glaze fruit tarts or as the sweetener in a gin and tonic; it carries the essence of the garden better than any store-bought simple syrup ever could.
Examples and Scenarios
Let’s look at how a typical week of candying might play out. Imagine you harvest 1 lb (454g) of stems on a Saturday morning. After blanching and peeling, you might have about 12 oz (340g) of clean stalks. You start with a syrup of 2 cups (400g) of sugar and 2 cups (473ml) of water. By Sunday, the syrup will be thinner because the plant’s water has moved out into the liquid. You add another 1/2 cup (100g) of sugar and boil. By Wednesday, you have added a total of about 4 cups of sugar, and the syrup is like heavy honey. On Thursday, you dry them. By Friday evening, you have enough candied angelica to decorate twenty trifles and enough syrup to flavor a dozen summer cocktails.
Consider a scenario where you want to make a traditional British fruitcake. Instead of using those neon-red cherries, you chop your home-candied angelica into small, pea-sized bits. The herbal notes of the angelica cut through the richness of the raisins and currants, providing a “lift” to the heavy spice profile of the cake. It turns a standard dessert into a sophisticated conversation piece.
Final Thoughts
The journey from a “weedy” stalk in the corner of the garden to a shimmering green delicacy is one of the great joys of the culinary garden. It teaches us the value of patience and the beauty found in the most unlikely of places. While the process takes several days, the actual “work” time is only a few minutes each morning, making it a perfect project for a busy gardener who appreciates the finer things in life.
I hope this guide encourages you to give angelica a permanent home in your herb bed. Even if you only candy a small batch once a year, you are helping to keep a beautiful tradition alive. There is something deeply satisfying about looking at a magnificent cake and knowing that the most elegant part of it started as a scrap you were nearly ready to compost. Happy growing, and even happier candying!